Skip to content

Posts tagged ‘chocolate’

Salt of the earth…A sweet and salty tart

I am so excited to collaborate with Saltverk to create recipes using their amazing sea salt. If you don’t know about them I urge you to read about the company and try the salt. Saltverk hand harvests the salt from Westfiords in Iceland using 100% green geothermal energy. The raw material is from the clean and pristine sea water of the Westfiords. Using quality ingredients for me is extremely important and this artisanal salt is just that, high quality, sustainable and environmentally friendly. Its more than just about flaky sea salt, Saltverk produces an array of flavored salts.

Flaky sea salt, birch smoked salt, black lava salt, licorice salt, seaweed salt, arctic thyme. Each salt with a distinct and complex flavor that adds incredible flavor to any dish.

I thought I would start this journey with dessert, as a child I always wanted to have dessert first. I’m certain you have seen recipes for chocolate chip cookies topped with flaky sea salt or have had salted caramel, well that was my inspiration when I created this recipe. Salted Caramel and Chocolate Ganache Tart. For this recipe I used the licorice sea salt, the Persian licorice root is subtle and the resulting flaky sea salt infused with this root is amazing, the caramel, dark chocolate ganache and whipped cream are taken to another level when finished with this salt.

Pastry (Based on recipe by Martha Stewart)

4 oz (1 stick) unsalted butter at room temperature

1/2 c powdered sugar

1 c flour

1/4 tsp salt ( used flaky sea salt)

1 egg yolk

Cream butter and powdered sugar, add the egg yolk and beat just until combined, add the flour and salt mix just until its cohesive, don’t over beat. Press into a disc and refrigerate for one hour. Pre heat oven to 400 degrees, roll out or press dough into tart pan or pastry rings, place in freezer for 30 minutes. Line tart or tartlets with parchment and fill with pie weights or whatever you like to use. Bake for 18-20 minutes you will see the edges just starting to brown, remove pie weights and parchment and continue baking until golden brown, another 10-15 minutes (baking time will vary as all ovens are different).

Caramel (Inspired by recipe from Bon Appetite)

1 1/2 c sugar

1/8 tsp cream of tartar

1/3 c water

6 tbs unsalted butter

1/3 c heavy cream

1 tsp salt (licorice sea salt)

In heavy bottomed non reactive largish (4 qt) saucepan bring the sugar, cream of tartar and water to a boil stirring only until the sugar melts. Reduce heat to medium continue cooking, swirling the pan every few minutes until it turns a deep amber color. Remove from heat, add the butter 1 tbs at a time stirring constantly (It will bubble so be careful) Once butter is all incorporated add the heavy cream and salt. Set aside to cool to room temperature. Once cooled pour into tart shell, not to the top of the shell about halfway and refrigerate while you make the ganache.

Ganache

4 oz dark chocolate (chopped)

4 oz (1/2 cup) heavy cream

Place the chopped chocolate into a mixing bowl. Heat the milk to scalding, pour over the chocolate and let it sit for 5 minutes. Start stirring it from the middle until all the chocolate is melted and you have a creamy smooth mixture. If all the chocolate has not melted place bowl over some hot water in a pot and stir until completely smooth and silky. Remove caramel filled tart(s) from refrigerator and pour enough ganache so that it reaches the top of the shell. Refrigerate until set. Serve with whipped cream and a sprinkling of sea salt. Whip heavy cream to stiff peaks adding powdered sugar to desired sweetness.

The salt really makes this dessert special. If you love salt, if you love artisanal products, if you love products that are sustainable and environmentally friendly I highly recommend finding some Saltverk Sea Salt. More recipes are coming… Love this product and the company.

Happy Easter, A Chocolate Banana Vegan Tart

Happy Holidays to everyone, Easter, Passover or just celebrate that Spring is finally here.  Honestly, it has not really felt like Spring with blustery cold and snow and unfortunately more in the forecast for this week. I see signs of the change of seasons everywhere, flowers popping up, longer daylight, warmer weather trying to take hold.

I often make pie dough and will line a tart pan and freeze, this tart is delicious, no animal products were used in making it but you can easily adapt using cream for the ganache and whipped cream to top it. The ganache was made with dark chocolate, sweetened condensed coconut milk and coconut milk. The whipped topping is made by simply refrigerating a can of coconut milk, the cream will rise to the top and become solid. All you have to do is scoop it out and whip it with sweetener and flavoring.

Chocolate Tart (Vegan)

Pie crust ( use your favorite recipe or commercially prepared)

4 oz dark chocolate (I used vegan chocolate)

1/4 cup sweetened condensed coconut milk

1/4 cup coconut milk (Note: for non vegan or regular ganache use 1/2 cup heavy cream)

1 banana sliced

coconut or regular whipped cream

Toasted coconut (optional)

Place a can of coconut milk in the refrigerator before you begin or even better the night before. The coconut cream will separate from the liquid and you will use that (saving the liquid for another recipe)

Heat oven to 400 degree’s. Place pie dough in 8 or 9 inch tart pan. You are going to blind bake the pie crust, place a sheet of parchment on top and fill the pan with pie weights or beans or whatever you like to use. Bake for approximately 20 minutes, remove parchment and weights and bake for another 15-20 minutes or until golden brown. Remove from oven and let cool. Note: the oven should be quite hot, I baked the first tart shell at 375 and even with pie weights it shrunk down the sides.

Ganache

Heat the coconut milk or heavy cream to scalding. Place the chocolate in a small bowl and pour the hot cream over the chocolate, let sit for 5 minutes and stir until the chocolate is melted and the ganache is smooth and shiny. Pour into the cooled tart shell and refrigerate until set, approximately 1-2 hours or overnight.

To serve

Place sliced banana on top of the chocolate. Scoop the coconut cream from the cold can of coconut milk. Whip with electric mixer adding sugar to taste and flavoring of your choice (vanilla)  or you can add 2 tbs of the sweetened condensed coconut milk that is left from making the ganache. Heat oven to 350 and toast flaked coconut until golden brown, watch it closely it will burn and only takes a few minutes. Spread some of the whipped cream (coconut or other) on top of the banana’s and sprinkle with toasted coconut.

Happy Easter from Percy and Jenna Rose!

Mini Chocolate Sponge Cakes With Buttercream Frosting

This is a simple chocolate sponge cake, the one I have always and will always use because it never fails, NEVER. So easy to make and the cake is tender and soft but still maintains the sponge like quality that, well makes it sponge cake. It’s made on a half sheet pan and is the recipe I used for my Brooklyn Blackout Semifreddo cake that was posted on Food52 and also featured in their cookbook “Ice cream and Friends”. For this little dessert I cut out small ( 3.5 inch) round layers and filled with the super simple French Buttercream that I used in the Dacquoise last year. I layered 3 rounds per mini cake and the sheet cake will give you 4 mini three layer mini cakes and don’t throw out the scraps you can freeze them and make something with them.

Cake

  • 1/4 cup milk
  • 2 tablespoons unsalted butter
  • 8 large eggs at room temperature
  • 2 cups sugar
  • 3/4 cups flour
  • 1/2 cup unsweetened cocoa powder
  • 1 teaspoon baking powder
  • 1 teaspoon salt
  • 1 teaspoon vanilla

Pre heat oven to 350 degrees. Place milk and butter in glass measuring cup and microwave for 45 seconds or until butter is melted. Using stand mixer with wire whisk or electric mixer whip the eggs and sugar on med/high for approximately 8 minutes or until the mixture is pale yellow, tripled in volume and thick, with the machine running slowly add the heated milk and butter. Sift the flour, cocoa, baking powder and salt. Fold into the egg mixture, there should be no lumps. Fold in the vanilla. Grease a 1/2 sheet pan, lay parchment sheet and grease the parchment, and sprinkle with sugar. Pour batter into the pan, spread so that it is evenly distributed and bake for 20-25 minutes. Allow to cool for a couple of minutes in the pan run a knife around the edges to loosen then invert onto wire rack, remove parchment and let cool completely.

Buttercream

Recipe (doubled) food52 – Merrill Stubbs

12 oz soft unsalted butter

4 egg yolks

1 1/3 cup confectioners or powdered sugar

2 tbs vanilla extract

Put all the ingredients in the bowl of the stand mixer fitted with the whisk attachment and beat until thick, silky and spreadable. Thats it, so easy!!
Chocolate Caramel Ganache

1/3 cup heavy cream

2.5 oz dark and milk chocolate chopped

2 tbs caramel sauce (I had some homemade caramel sauce in the refrigerator but you can use whatever is your favorite this is optional).

1-2 tbs clear karo syrup

Bring cream to scalding, add chocolate and caramel sauce and let sit for 5 minutes. Stir until smooth and glossy, stir in the karo syrup. Let cool to room temperature before pouring on cake.


Guest Post- Cherry Chocolate Scones

I was thrilled when Mollie,  The Frugal Hausfrau agreed to do a guest post. I am a big fan, she is a wonderfully talented cook, take a look at her creations on her blog, you will see why I am so in love with her recipes. Down home and elegant, budget conscience, approachable, ok I’ll stop now, thank you Mollie for sharing these incredible scones they look so delicious! Take it away Mollie….

When Suzanne said she might like a guest post or two, I was all over it – and knew exactly what I wanted to make. I just had it in my head that Scones with Dried Cherries & Dark Chocolate might cheer her up a bit. They’d be great with coffee or black tea and such a fun treat for a weekend breakfast.

I started out with one recipe and I don’t know if it was the recipe or me, but it was pretty mediocre. Then I tried another and it was too cakey. A scone is a scone is a scone, and cake? That’s just not a scone. A scone should be good, but have a certain sensibility about it.

I remembered that King Arthur had a scone recipe I have been meaning to try. (They mentioned a scone pan, too, that I ordered and I love it and used it – that’s how long it took me to make these scones!) So on to the King Arthur recipe.

The first time I forgot the baking powder. It was like a Shortbread Scone. A Shrone? There might be some possibilities in that idea, lol!

So finally, the final rendition. And I learned a few things along my journey! I used two chocolates because I ran out of the chocolate I was initially using and it the scones were so much better.

You can stick with one kind of chocolate if you’d like, but I’d highly recommend chopping some good chocolate and combining it with Nestle’s Chocolate Chunks or at least with their dark chocolate chips. I was thinking of striping these scones with a little glaze, but they’re just so good as is!

The two chocolates melted and acted differently and it was like a perfect alchemy with the soft and chewy dried cherries. So at long last, here’s the recipe as I made it. Check with King Arthur for all their suggested variations and many tips. This recipe is excellent and Suzanne, I hope you love these!

King Arthur’s Scones

2 3/4 cups King Arthur Unbleached All-Purpose Flour or Gluten-Free Measure for Measure Flour

1/3 cup sugar

3/4 teaspoon salt

1 tablespoon baking powder

1/2 cup cold butter

1/2 cup roughly chopped dried cherries

1/2 cup Nestle’s chocolate chunks

3 to 4 ounces good dark chocolate, roughly chunked

2 large eggs

2 teaspoons vanilla extract or the flavoring of your choice

1/2 cup to 2/3 cup half and half (see note)

In a large mixing bowl, sift together the flour, sugar, salt, and baking powder.

Work in the butter just until the mixture is unevenly crumbly; it’s OK for some larger chunks of butter to remain unincorporated.

Stir in the dried cherries and chocolate.

In a separate mixing bowl, whisk together the eggs, vanilla and half and half.

Add the liquid ingredients to the dry ingredients and stir until mixture starts to hold together. Dump out and carefully pinch and pull the dough until all is incorporated.

Sprinkle a bit of flour atop a baking sheet.

Divide dough in half and place each half on the baking sheet. Form each into a five to six-inch circle about 3/4’s of an inch high. If using a scone pan, see note, below.

Brush each circle with milk, and sprinkle with coarse white sparkling sugar or cinnamon sugar, if desired.

Using a knife or bench knife that you’ve run under cold water, slice each circle into 6 wedges.

Carefully pull the wedges away from the center to separate them just a bit; there should be about 1/2″ space between them, at their outer edges.

For best texture and highest rise, place the pan of scones in the freezer for 30 minutes, uncovered. Chilling the scones relaxes the gluten in the flour, which makes the scones more tender and allows them to rise higher. It also chills the fat, which will make the scones a bit flakier. While the scones are chilling, preheat the oven to 425°F.

Bake the scones for 15 to 20 minutes, or until they’re golden brown. When you pull one away from the others, it should look baked all the way through; the edge shouldn’t look wet or unbaked.

Remove the scones from the oven, and cool briefly on the pan. Serve warm. They’re delicious as is, but add butter and/or jam, if you like.

When the scones are completely cool, wrap them in plastic and store at room temperature for up to several days. To reheat room-temperature scones, place on a baking sheet, tent lightly with foil, and warm in a preheated 350°F oven for about 10 minutes.

Notes:

Since the scones I baked were baked in January, when the humidity is low and flour is dry, these scones used the full amount of liquid.

If using a scone pan, the full amount of dough will fit into the pan. I found 1/2 cup scoop worked well to distribute the dough in the eight slots. There’s no need to freeze the dough. For these particular scones, I did not brush with butter or sprinkle with sugar.

Paleo Gluten Free Frosted Cake Brownies

I really want to expand my horizons, I have always been a butter and sugar kind of gal and use it when I bake just about everything. On July 4th I went to a BBQ at a friends house and one of the guests practices a paleo lifestyle and has really done amazingly well. While we all enjoyed the cheesecake for dessert I watched her sit there with nothing and felt kind of bad. On Instagram I noticed a post for paleo brownies with a peanut butter frosting that looked amazing and I decided to give them a try. If you follow strict paleo, the brownies in the recipe are not 100% paleo as they have a peanut butter frosting and peanuts are not permitted. I chose to follow in that same line of thinking and the frosting I made is also not 100% paleo but it’s close. It really is delicious, I paleo-ized  (don’t think thats a word) Merrill Stubbs buttercream recipe on food52, the same one I used for the dacquoise that I made a few months ago. Since the recipe calls for powdered sugar (not paleo) and coconut palm sugar is allowed, I thought I   would make my own powdered sugar using the coconut palm sugar and a little coconut flour. It worked well, if I had a vitamix it probably would have been a little better but my Ninja did a pretty good job. There are a few pieces of the coconut sugar that didn’t break down but IMHO that gives it character. The coconut sugar gives the buttercream a caramel flavor.

The brownies which are really more like a cake are so easy to make, you put all the ingredients in a blender, process until smooth and pour into a prepared pan. Got to love that! NOTE: Be careful not to over bake, I think I did and they got a little dry. Whenever I make a recipe for the first time I follow it to the letter but if I make these again I will make a few changes. I am not going to embrace a paleo lifestyle although in theory it sounds good and I know people that have lost an incredible amount of weight and feel great but I find it too restrictive, but rather choose to try to eat healthfully with portion control and limit sugar. I also could not eat as much meat as you are supposed to eat on paleo, not my thing.

  1. Add chocolate chips or chunks or shaved chocolate (if going paleo find paleo friendly chocolate)
  2. The recipe said to use a 7 inch square pan, I have never seen a 7 inch pan and used my 8 inch pan which made them a little thinner than the ones pictured in the original recipe. It would be even better to use a 6 inch square if you can find one.
  3. Might increase the coconut oil a bit adding an additional tablespoon or 2.

Paleo/GF Brownies

Recipe from paleo gluten free eats

1 cup coconut sugar

1/2 cup coconut flour

1/2 cup unsweetened cocoa powder

1/3 cup melted coconut oil

1/4 cup coconut milk (full fat is best)

6 large eggs

1 tsp baking soda

1/4 tsp salt

Heat oven to 350 degree’s.

Line 8 inch square pan with parchment paper so there is an overhand on 2 sides. Grease the sides and bottom with a little coconut oil.

Add all the ingredients to your blender and process until smooth, you may need to scrape the sides once or twice. Scrape into prepared pan and bake for 20-25 minutes (test after 20 minutes). Cake tester should come out fairly clean (a few crumbs are fine). Better to be a little under done than over done, it continues to bake a little after removed from the oven.

Powdered coconut sugar

1 cup coconut sugar

1 tbs coconut flour.

Place in high powered blender like vitamix and process until it’s powdery. It took about 10 minutes. If you have a vitamix use the dry container for this if not it’s ok, I used my to go cup on my ninja and it worked great. Place in a covered container. You might want to double the recipe if making the frosting because you need 1 1/2 cups.

Frosting

1 egg yolk from farm fresh egg or pasteurized egg

1 1/2 cup powdered coconut sugar

4 1/2 oz earth balance vegan butter or you could use coconut butter or even  pure cocoa butter (earth balance is not paleo because it contains soy)

1 tsp vanilla extract

Place everything in a bowl and beat with your electric mixer until smooth and creamy.

Frost the brownies when cooled and cut into pieces after frosting. Refrigerate until ready to use. NOTE: the egg can be eliminated but it gives a silky smooth texture that I love. The egg is not cooked or heated so make sure you use eggs from a trusted source, fresh or pasteurized.


Chocolate Marbled Banana Bread

This banana bread recipe has been featured on this site many times, as banana bread and also using other fruits like apples and figs. It is IMHO the best banana bread recipe I have found. While perusing recipes I saw a gorgeous chocolate marble banana bread and although I have added chocolate chips never a chocolate swirl. I used my go to recipe and copied how the chocolate marble swirl was made. The bread is delicious, simple and I like to make 3 mini loaves and freeze them, it freezes beautifully.

It’s moist and chocolaty with lots of banana flavor. The spelt adds some texture and a delicious nuttiness that you only get from spelt.

Chocolate Marbled Banana Bread

Makes one 9 inch or 3 mini loaves

Adapted from a recipe by Martha Stewart

1 stick 4 oz softened butter

1 cup sugar

2 large eggs at room temperature

1 cup flour

1/2 cup spelt flour

1 tsp baking soda

1 tsp salt

1 heaping cup mashed very ripe banana (2 1/2 large or 3 medium bananas)

1/2 cup sour cream or creme fraiche

1 tsp vanilla

3 oz dark chocolate melted

2 tsp unsweetened cocoa powder

Heat oven to 350 degree’s. Prepare your baking tins by greasing generously either with cooking spray, butter or shortening. Place flours, baking soda and salt in bowl and whisk to combine.

In the bowl of a stand mixer add the butter and sugar. Cream until light and fluffy scraping the sides occasionally. Add the eggs one at a time beating well after each addition. Add the flour mixture and beat on medium high speed just until combined. Now add the banana, sour cream and vanilla and mix to combine.

Remove one cup of the batter to a small bowl. Melt the chocolate and add the cocoa powder, stir. Add to the 1 cup of batter and fold in.

Spoon some of the regular batter into the baking pan if using a 9 inch loaf pan add half the batter, now half of the chocolate batter in two spoonful. Add the rest of the plain batter and spoon the rest of the chocolate batter on top. Swirl gently with a knife or skewer being careful not to over swirl, a few times back and forth will be enough.

Bake the 9 inch loaf approximately 50-55 minutes and the 3 mini loaves approximately 25-30 minutes. A cake tester or toothpick should come out clean when inserted in the center. The loaves will be browned and feel firm.


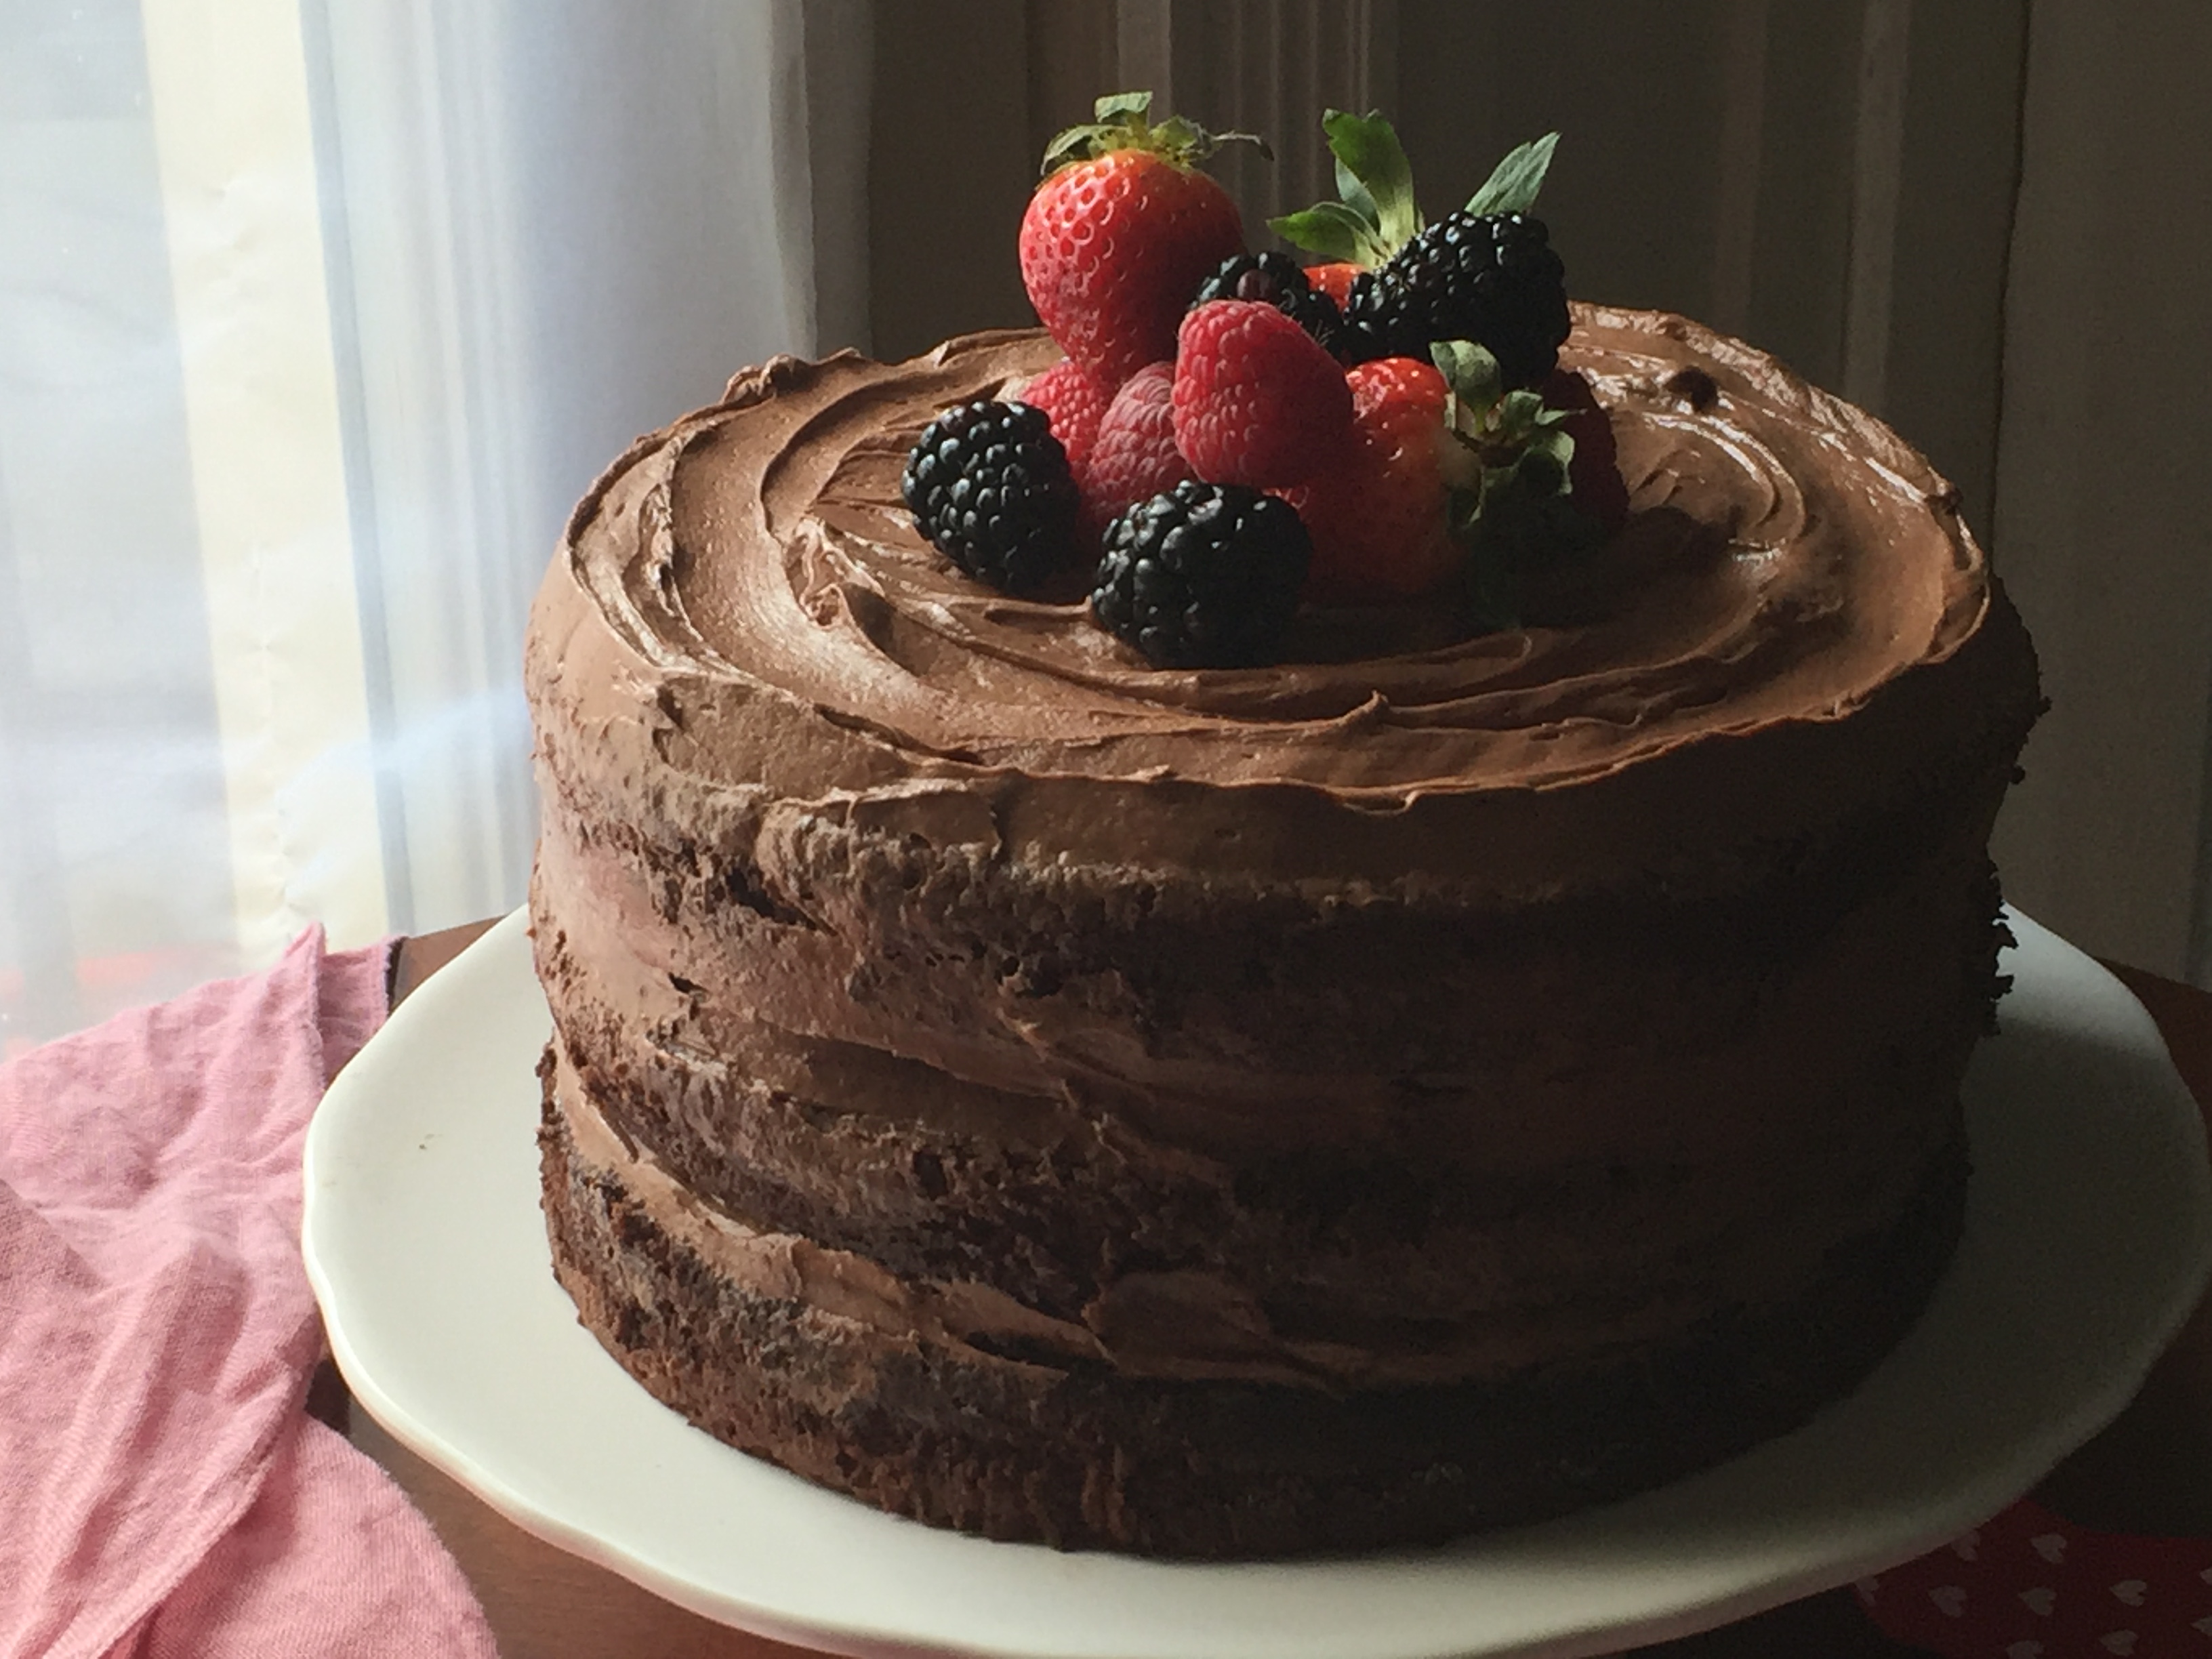
Happy Valentines Day-Chocolate Layer Cake With Whipped Chocolate Caramel Ganache Frosting

img_9500

I don’t really celebrate Valentine’s Day but one thing I love to do is make a special dessert, usually containing chocolate. The cake is chocolate, my favorite go to recipe from Hershey and the frosting is one that I developed and entered in a contest at Food52, I was lucky enough to win the contest with this simple and very delicious frosting, there is no added sugar so it’s not cloyingly sweet and is it’s very light. Three layers of cake piled high with chocolate caramel whipped ganache is a great way to celebrate this day that celebrates love. Speaking of love, February 13th is Percy’s gotcha day, I will forever be grateful to Emily for letting me adopt Percy and although he cannot have chocolate cake I will make him a special dinner, his outfit a vest, white shirt and red bow time was made by an uber talented designer I met on Instagram see her work @thestylishbisou, she is amazing.  I made a 8 inch 3 layer cake and the recipe for the ganache made just enough to fill and frost the top, you can easily double the recipe for more frosting to cover the entire cake.

I am bringing this special Valentines cake with me to Fiesta Friday #158 and the co hosts this week are Ai @ Ai Made It For You and Petra @ Food Eat Love Check out all the gorgeous food and join us all at the party.

img_9400

Hershey’s Best Chocolate Cake

makes 24 cupcakes, two 9 inch layers or three 8 inch layers

1 3/4 cup all purpose flour

3/4 cup unsweetened natural cocoa powder

2 cups sugar

1 tsp salt

1 1/2 tsp baking soda

1 1/2 tsp baking powder

2 tsp espresso powder (optional)

1/2 cup vegetable oil

1 cup whole milk at room temperature

2 large eggs at room temperature lightly beaten

1 tsp vanilla extract

1 cup boiling water

Heat oven to 350 degree’s. Line muffin pan with liners or butter and flour cake pans.

Whisk dry ingredients together in a large mixing bowl. In 4 cup measuring cup add the wet ingredients and whisk together. Add to the dry ingredients and mix with electric mixer for 2 minutes. In the meantime put water on to boil and add the 1 cup boiling water to the batter and mix with electric mixer for 1 minute or until combined.

The batter will be thin, thats ok it’s supposed to be that way. Pour into prepared pans and for cupcakes bake 20-25 minutes. Layer cakes 30-40 minutes depending on size of the pan. Cake is done when tester inserted in middle comes out clean.

img_9367

Whipped Chocolate Caramel Ganache

Chocolate Caramel Sauce:
1 cup sugar
6 tablespoons salted butter cut into tablepoon-size pieces
1/2 cup heavy cream
2 ounces dark chocolate (I used bittersweet)
1 teaspoon vanilla extract
Put the heavy cream in a glass measuring cup and microwave on high for 45 seconds, add chocolate and microwave another 30 seconds Stir until its smooth, add the vanilla extract and stir to combine, add the butter to the warm chocolate cream and set aside .
In large saucepan add the sugar, turn heat to med/high and let sit until it starts to liquefy. Swirl the pot and gently move  with a heat proof spatula.  Cook until it turns amber in color.
Remove from heat and add the chocolate cream. Stir until its incorporated. Be careful when adding the cream and butter the hot liquid sugar will bubble and could burn you. Store in a container at room temperature until ready to use. If you make this ahead of time, simply place the bottle or jar in hot water to warm the caramel so it’s pourable. Note: I changed this slightly, instead of adding the butter and then the choolate cream. I added the butter to the warm chocolate cream and added it all at once after removing the caramel from the heat.
Ganache :
4 ounces dark chocolate broken into small pieces
4 ounces milk chocolate broken into small pieces
1 cup plus 2 tablespoons heavy cream
1 tablespoon liquor (I like cointreau or kahlua) or vanilla extract
1/2 cup chocolate caramel sauce
Heat cream to scalding (not boiling). Pour over the pieces of chocolate that are in a mixing bowl. Let sit 5 minutes then stir until there are no pieces of chocolate and it’s smooth and shiny, then add the chocolate caramel sauce and stir to combine.
Place bowl in an ice bath or in the refrigerator until cooled but not COLD  — it will stiffen fairly quickly if it gets too cold. Remove from the ice bath and beat with a mixer or whisk until the ganache is fluffy and spreadable. Frost the cake immediately. Best served at room temperature.

img_9589

Percy

Percy

Chocolate, Orange And Hazelnut Biscotti

img_7898

I am working on gift boxes, I have sent off several but still have a lot to go, it’s a labor of love and quite a lot of work, the planning, shopping, baking is labor intensive but packaging and sending takes time as well, carefully packaging is so important as you don’t want your baked goods to arrive in pieces. Putting together a box or basket to give as a gift takes planning and careful thought. You want to send things that travel well, items that can withstand a few days in transit without going stale and you must carefully pack so that when the carrier jostles it around it will stay intact. I always send 2-3 day priority mail and tell them it’s “perishable” asking them to stamp that all over the box. So far I have been lucky and everything I have sent arrives in good shape. Knock on wood!!

A work in progress

A work in progress this is going to New Mexico to the winning bidder in a charity auction for a sick pup

Every year I make biscotti, being Italian I grew up on these delightful cookies, they are best when dipped in coffee, milk or Vin Santo or sweet dessert wine. This recipe is from Marisa’s Italian Kitchen, I changed the ingredients just slightly, Marisa’s biscotti have anise seed or extract which I would have loved and thought I had but did not so I left out the anise, and added chopped hazelnuts, other than that I followed the recipe exactly. This recipe caught my months ago and I saved it knowing I would be making biscotti for the holidays, I was looking for a biscotti that is not to hard, light and tender and looking at her recipe I thought that would be what I was looking for, and that is exactly how they turned out. They are delicious, I think adding the almond flour gives them a light as air, crunchy and delicate texture. They are wonderful and thank you Marisa for a great recipe.

Chocolate, Orange And Hazelnut Biscotti

 adapted from Marisa’s Italian Kitchen

1 3/4 cup flour

1/3 cup almond flour

2 tsp baking powder

1/4 tsp salt

3/4 cup chocolate chips

3/4 cup chopped toasted hazelnuts

2 eggs

3/4 cup sugar

1 tbs orange zest

2 tsp vanilla extract

1/3 cup melted butter

1 egg white beaten with fork (to brush on the logs)

Heat oven to 350 degree’s and line a baking sheet with parchment

slightly uneven logs ready for the oven

slightly uneven logs ready for the oven

In large bowl add flours, baking powder and salt and whisk to combine, add the chocolate chips and hazelnuts and stir so that the chocolate and nuts are covered with flour. In a small bowl beat the egg, sugar, orange zest, vanilla and butter. Add to the dry ingredients and using a wooden spoon stir until it’s a cohesive dough (the dough will be a little sticky, don’t add more flour thats the way it should be) Lightly flour a work surface and turn the dough onto it. Divide into 4 equal portions and form each into a log that is between 8-10 inches long. Transfer the logs to the baking sheet, brush with egg white and bake for 20 minutes turning pan halfway through. After 20 minutes remove from the oven and sit the baking sheet on a cooling rack for 10 minutes. Place a log on a cutting board and slice diagonally into about 3/4 inch slices with a sharp serrated knife and place back on baking sheet standing upright for more even baking.

standing upright for even baking

standing upright for even baking

Place back in the oven for 15 minutes. Let cool about 10 minutes on the pan and then remove to cooling rack. NOTE: Timing is important. I baked them for exactly the time outlined in the recipe and I think to achieve these results you have to. I am not one to stick to an exact baking time, I tend to wing it, but with a few recipes I make I have to and this is one of them. 

img_7865


Chocolate Madeleines

IMG_1352

I’ve posted this recipe before, it’s so good it’s worth posting again. The recipe comes from Gale Gand. I love her and have been watching her show, buying her cookbooks and following her recipes for years. The only thing I haven’t done is go to her restaurant in Chicago, Tru, it’s on my bucket list and one day I will.

These madelienes are very simple and always turn out great. I saw her once making these on Martha Stewarts show and she was agast that Gale would add baking powder to madeleines. Gale explained that because of the cocoa being heavy you need a little extra lift and it makes sense. Gale also lightly browns the butter and sieves out the solids for this recipe, it makes a difference trust me.

I made these for several reasons, they are simple and delicious, I just got this oh so pretty madeliene pan at Williams Sonoma and I am bringing these little treats with me Fiesta Friday #109. I had so much fun co hosting last week and this week our lovely co hosts are Josette @ thebrookcook and Lily @ little sweet baker.

Pretty shell pattern

Pretty shell pattern

IMG_1395

Chocolate Madeleines

A recipe by Gale Gand – Makes 2 dozen

1/2 cup, plus 4 tablespoons unsalted butter softened, for buttering madeleine molds
3 large eggs
1/2 cup granulated sugar
2 tablespoons packed dark-brown sugar
1 cup cake flour (not self-rising)
1/4 cup cocoa powder, preferably Dutch-processed
1 1/2 teaspoons baking powder
1/8 teaspoon salt
1 tsp vanilla extract

Preheat oven to 325 degrees. Brush madeleine pans well with 4 tablespoons softened butter; refrigerate 5 minutes.
In a small heavy-bottomed saucepan, melt remaining 1/2 cup butter over medium heat. Continue to cook until butter turns golden brown, being careful not to let the butter burn. Remove from heat and strain through a fine mesh sieve into a small bowl; set aside.
In the bowl of an electric mixer fitted with the whisk attachment, whip eggs with granulated and brown sugars until light and thickened, 3 to 5 minutes. Add flour, cocoa powder, baking powder, and salt, and stir on low speed until combined. Add vanilla and reserved browned butter; mix just until blended.
Insert a 1/2-inch plain tip into a pastry bag and fill with batter. Pipe mounds of batter into prepared pans until each mold is full, mounding batter in the center of the molds but not filling to the edge. Alternatively, you can use a teaspoon to fill the molds with batter (which is what I did). Bake until madeleines are firm and a little mound is puffed up in the middle, 10 to 12 minutes. Madeleines are best eaten the same day they are baked.

Light and elegant

Light and elegant

fiesta-friday-badge-button-i-was-featured1

Chocolate Cake

IMG_6137

This is a recipe from Bon Appetit for Chocolate Cake. What sets this cake apart is the method of preparation. When I read the directions I really wanted to give it a try, I have a simple chocolate cake recipe that I have been using for years and it’s fantastic, it’s a very old recipe from Hershey’s and it’s right on their can of unsweetened cocoa. I love it and have never deviated or tried another recipe, it’s that good.

The method of preparation is the brainchild of the great Rose Levy Beranbaum, she is amazing and I have several of her cookbooks but missed this and it took Claire Saffitz from Bon Appetit to bring it to life. I will let her explain why this method is so genius.

Contrary to the traditional method of creaming the butter and sugar before adding eggs and wet and dry ingredients, reverse creaming does pretty much the opposite. The dry ingredients and sugar are mixed with the fat (oil and butter) plus some of the wet ingredients (eggs + buttermilk + melted chocolate + coffee). The fat coats the dry ingredients and inhibits gluten formation, which would normally result in a tough cake, while the addition of some moisture simultaneously develops just enough gluten to give the cake structure. It’s hard to overmix with this method, giving you a tender crumb. Because there’s less air in the batter due to no creaming, the layers bake evenly and stack up without the need to level or trim. It’s the perfect method for building a layer cake.

.

Batter is thick and creamy

Batter is thick and creamy

Cake

Bon Appetit by Claire Saffitz adapted from a recipe by Rose Levy Beranbaum

  • ½ cup (1 stick) unsalted butter, room temperature, plus more for pan
  • 2 cups all-purpose flour, plus more for pan
  • 6 ounces bittersweet chocolate, chopped
  • 1 cup brewed coffee
  • ⅔ cup unsweetened cocoa powder (not Dutch process)
  • 3 large eggs, room temperature
  • 1 cup buttermilk, room temperature
  • 2 teaspoons vanilla extract
  • 1¾ teaspoons kosher salt
  • 1½ teaspoons baking powder
  • 1½ teaspoons baking soda
  • 2½ cups (packed) light brown sugar
  • ¼ cup vegetable oil
  • Preheat oven to 350˚. Butter two 9″-diameter cake pans and line bottoms with parchment paper rounds. Butter parchment and dust with flour, tapping out excess.
  • Heat chocolate, coffee, and ⅔ cup cocoa powder in a medium heatproof bowl set over a medium saucepan of barely simmering water (water should not touch bottom of bowl), stirring until chocolate melts and mixture is smooth. Let cool, then whisk eggs, buttermilk, and vanilla into chocolate mixture.
  • Using an electric mixer on low speed, mix salt, baking powder, baking soda, and 2 cups flour in a large bowl just to combine. Add brown sugar, oil, ½ cup butter, and ½ cup reserved chocolate mixture and beat on medium speed until flour is evenly distributed and mixture is smooth, about 2 minutes. Add remaining chocolate mixture in 2 additions, scraping down sides and bottom of bowl as needed and beating until smooth after each addition. Scrape batter into prepared pan and smooth top.
  • Bake cake until top is firm to the touch and a tester inserted into the center comes out clean, 30–40 minutes. Transfer cake pan to a wire rack and let cake cool in pan 10 minutes before turning out onto a wire rack. Let cool completely.

cake sunk in the middle

cake sunk in the middle

nice rise

nice rise

Tomorrow I will frost and taste the cake but have to to say so far I am not in love with it, it took longer to bake than the directions, now that could be my wonky oven that I had repaired to tide me over until I get my new stove. So that could have been a factor but the cake feels drier than my go to Hershey’s cake, I tend to like layer and cupcakes that use oil rather than butter, I find the crumb is perfect, they are light and moist. This cake feels more like a brownie that is a bit overdone. I also like that the Hershey’s recipe is one bowl, super fast and easy. This was not difficult but had steps that I normally don’t have to do. It is possible I did something wrong or it was my oven so I cannot say with certainty that there is a flaw in the recipe.

The proof will be in the tasting so stay tuned because tomorrow I will frost and try the cake.

Full disclosure: I got distracted and forgot to add the vanilla.