Skip to content

Posts from the ‘Breakfast or Brunch’ Category

Roasted honeynut squash apple soup, lox and bagels and compound butter

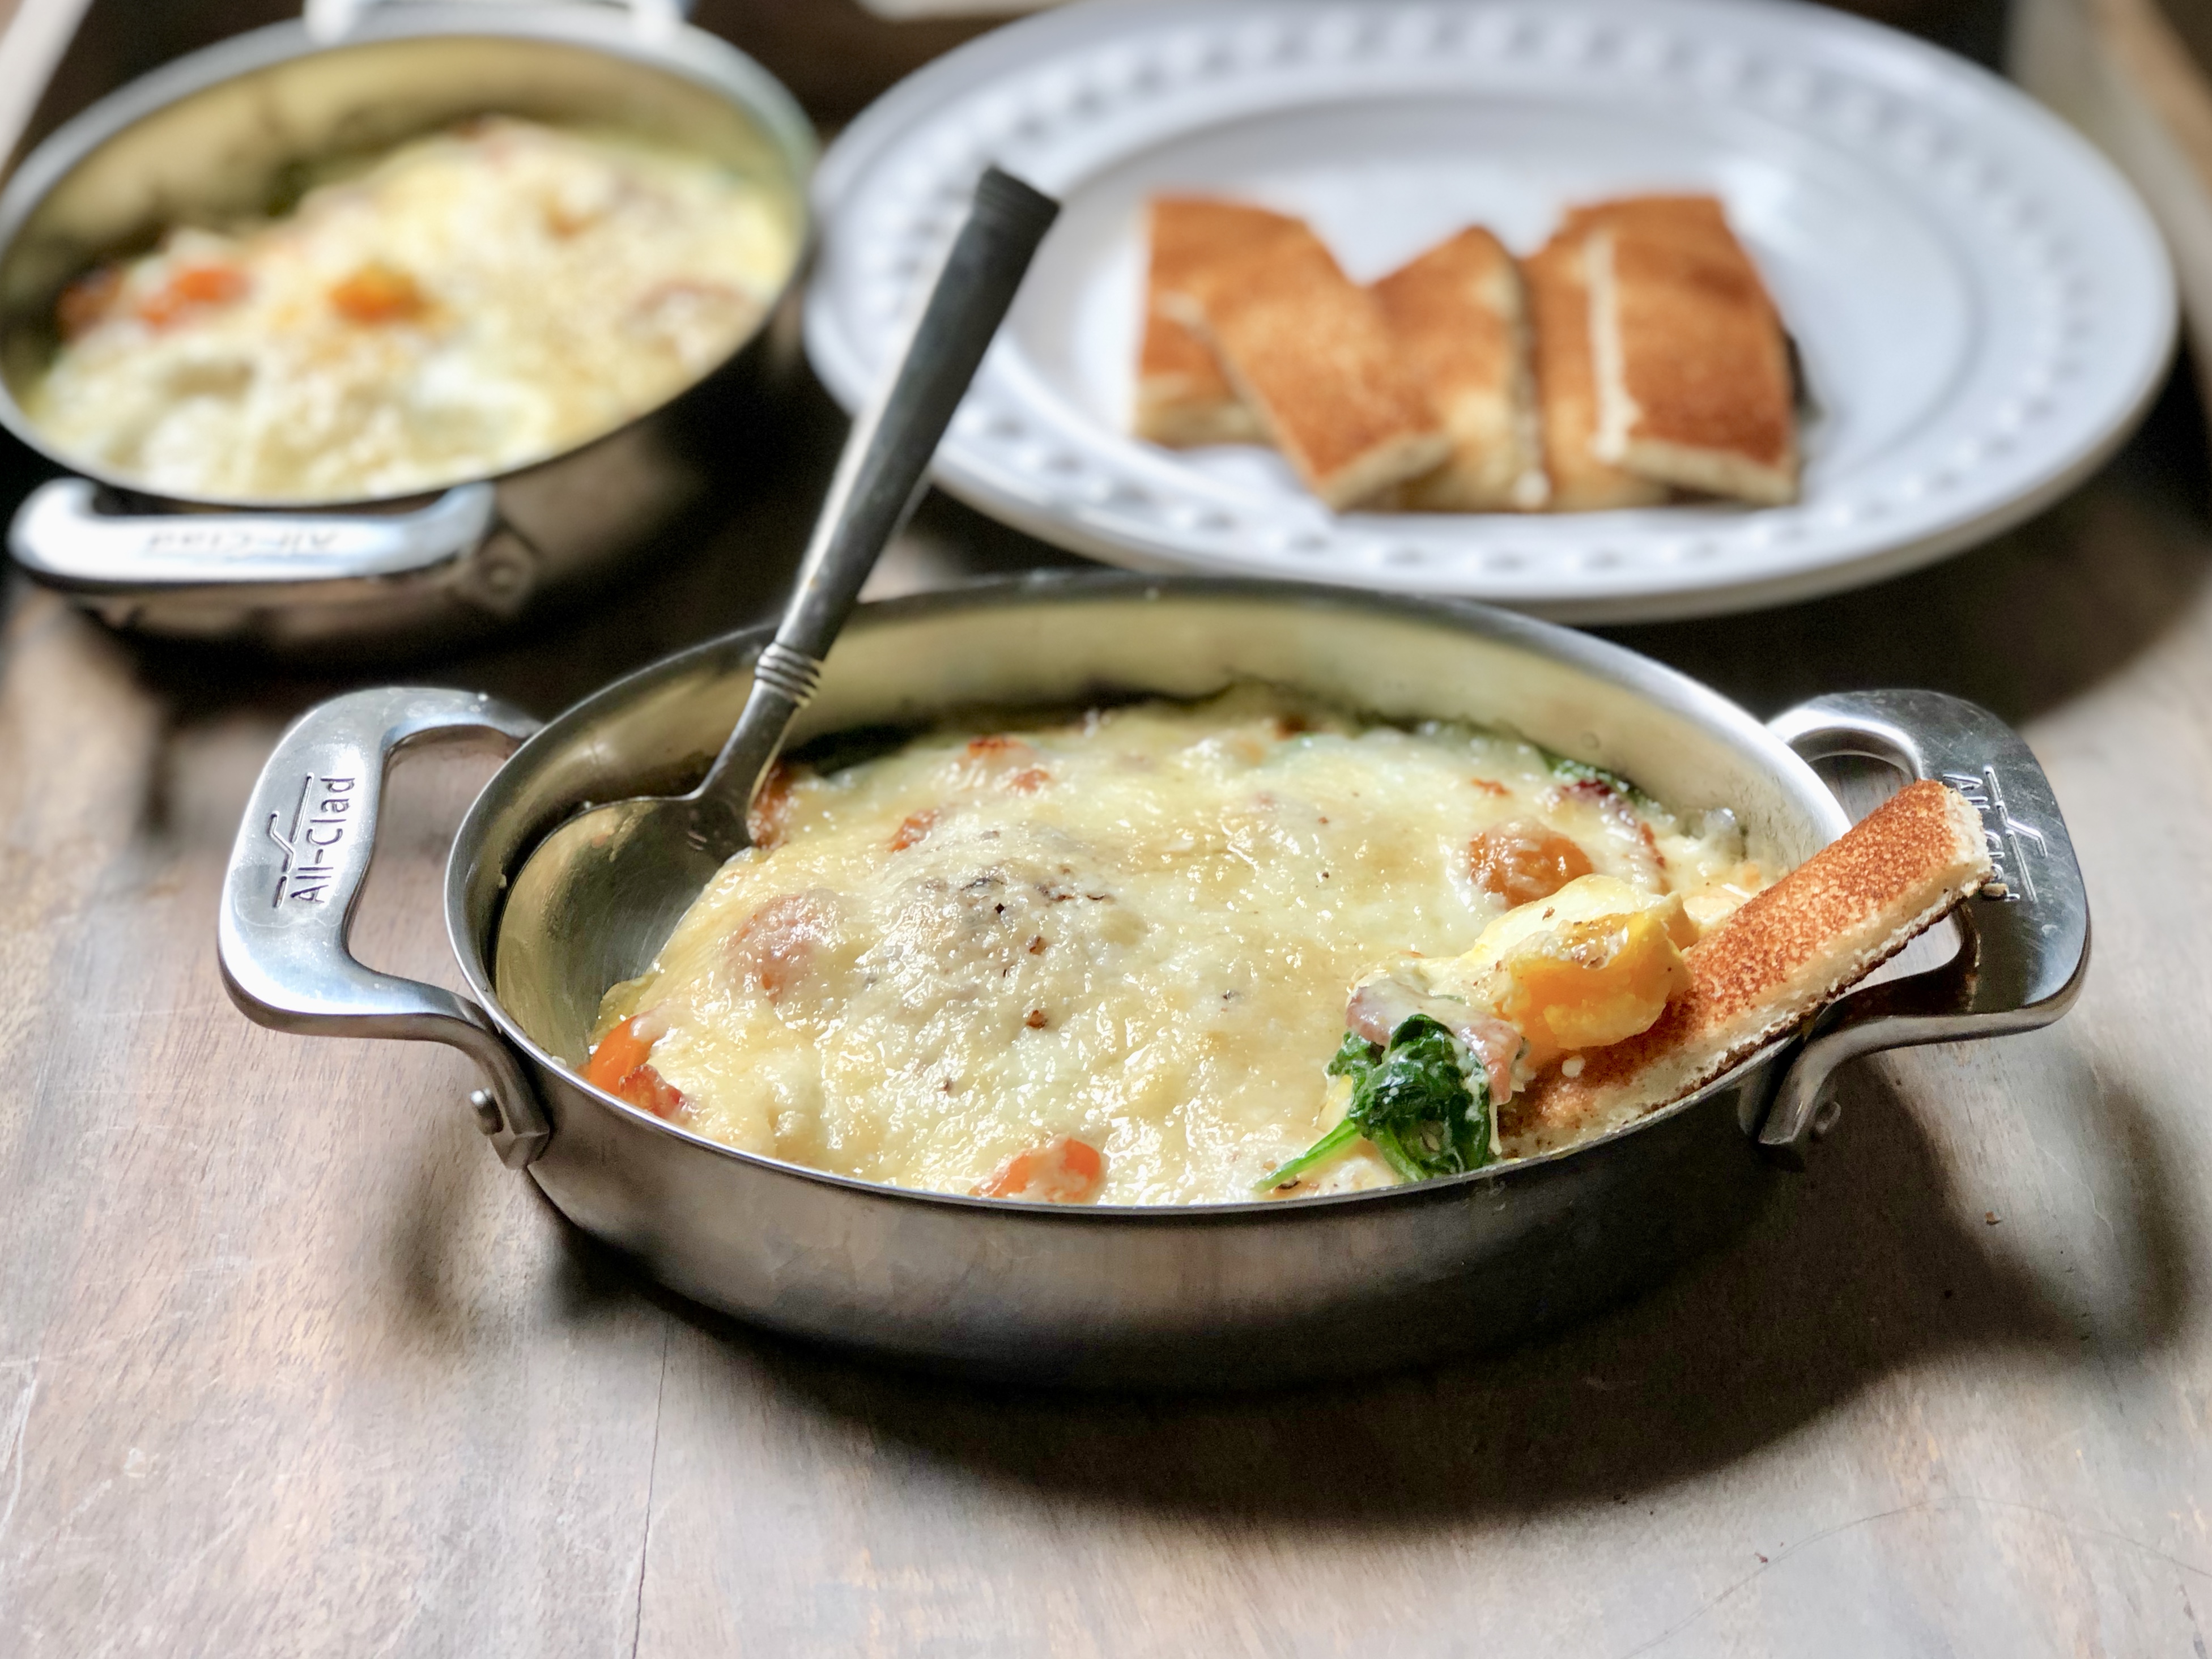
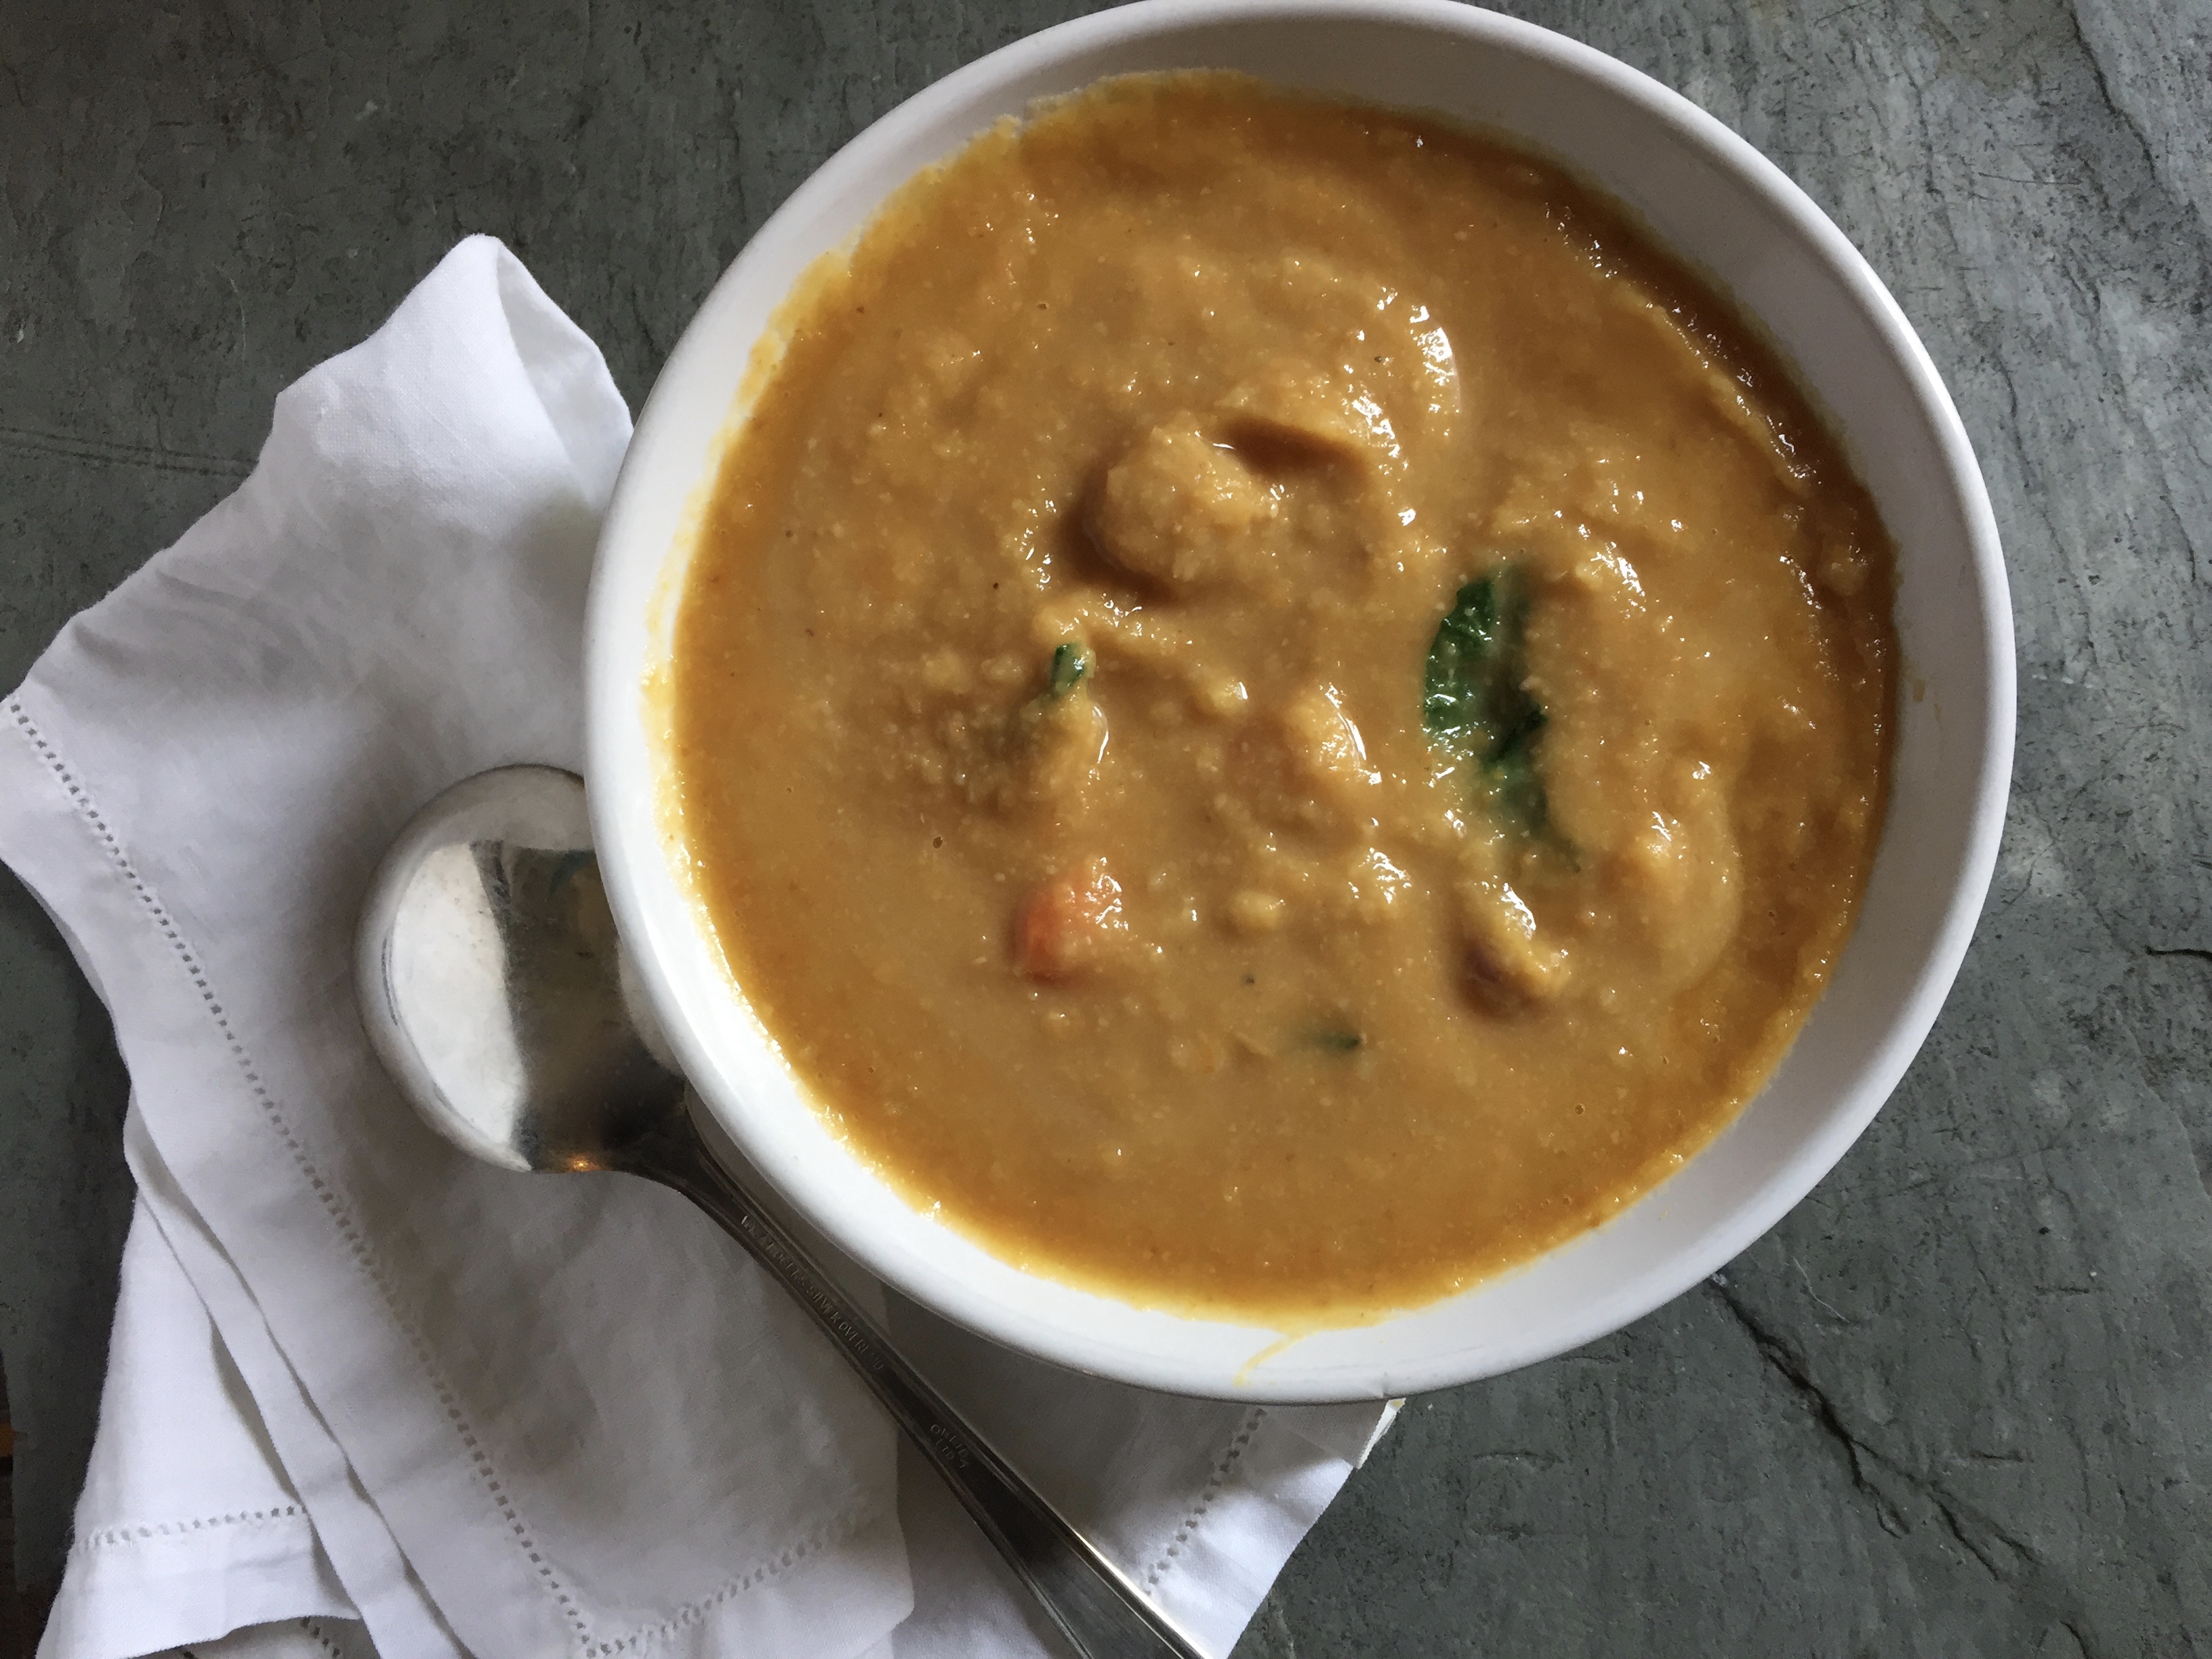
I have been having so much fun using Saltverk’s sea salt. Pictured is a creamy and delicious Fall soup using honeynut squash and apples. Honeynut squash is like butternut but smaller, sweeter and the color is more vivid. Its delicious and the soup is wonderful, it comes together easily and quickly and requires only a little time standing over the stove, your oven does most of the work. The soup is pureed and finished with a dollop of sour cream and some black lava sea salt, perfect for Halloween.

Roasted Honeynut squash and apples

Roasted Honeynut Squash Apple Soup

3 Honeynut squash peeled, seeds removed and cut into pieces

2-3 apples (depending on size) skin on, cored and quartered

1/2 yellow onion peeled and quartered

1 tsp Saltverk Arctic thyme sea salt or 1 tsp sea salt and either 2 fresh thyme sprigs or a sprinkling of dried thyme

2 cups broth or water (chicken or vegetable both work)

1/4 c heavy cream (for vegan option coconut milk works well)

1 tbs butter

1-2 tbs sour cream to garnish

salt and pepper to taste

sprinkle black lava salt on top for dramatic effect and delicious flavor as well!

Pre heat oven to 375 degrees. Place squash, apples and onions on parchment lined sheet pan, drizzle with olive oil and season with the thyme salt (or whatever salt you want to use) and pepper. Roast stirring occasionally until the vegetables and fruit just start to caramelize (approximately 30 minutes). Remove from oven and set aside to cool. Puree in blender or food processor until smooth (if you need to add a little water or broth if too thick its fine. Transfer to pot and add the broth or water, butter and cream. Heat to desired serving temperature. Add a dollop of sour cream and finishing salt and enjoy.

The Birch Smoked Sea Salt was wonderful on a bagel with herbed cream cheese (Fresh dill and chives), smoked salmon, French breakfast radish, pickled red onion and the birch smoked sea salt sprinkled on top along with more dill and chives. The smoked salt and smoked salmon with the herby cream cheese and vegetables was delicious and the salt a perfect compliment.

Compound Butter

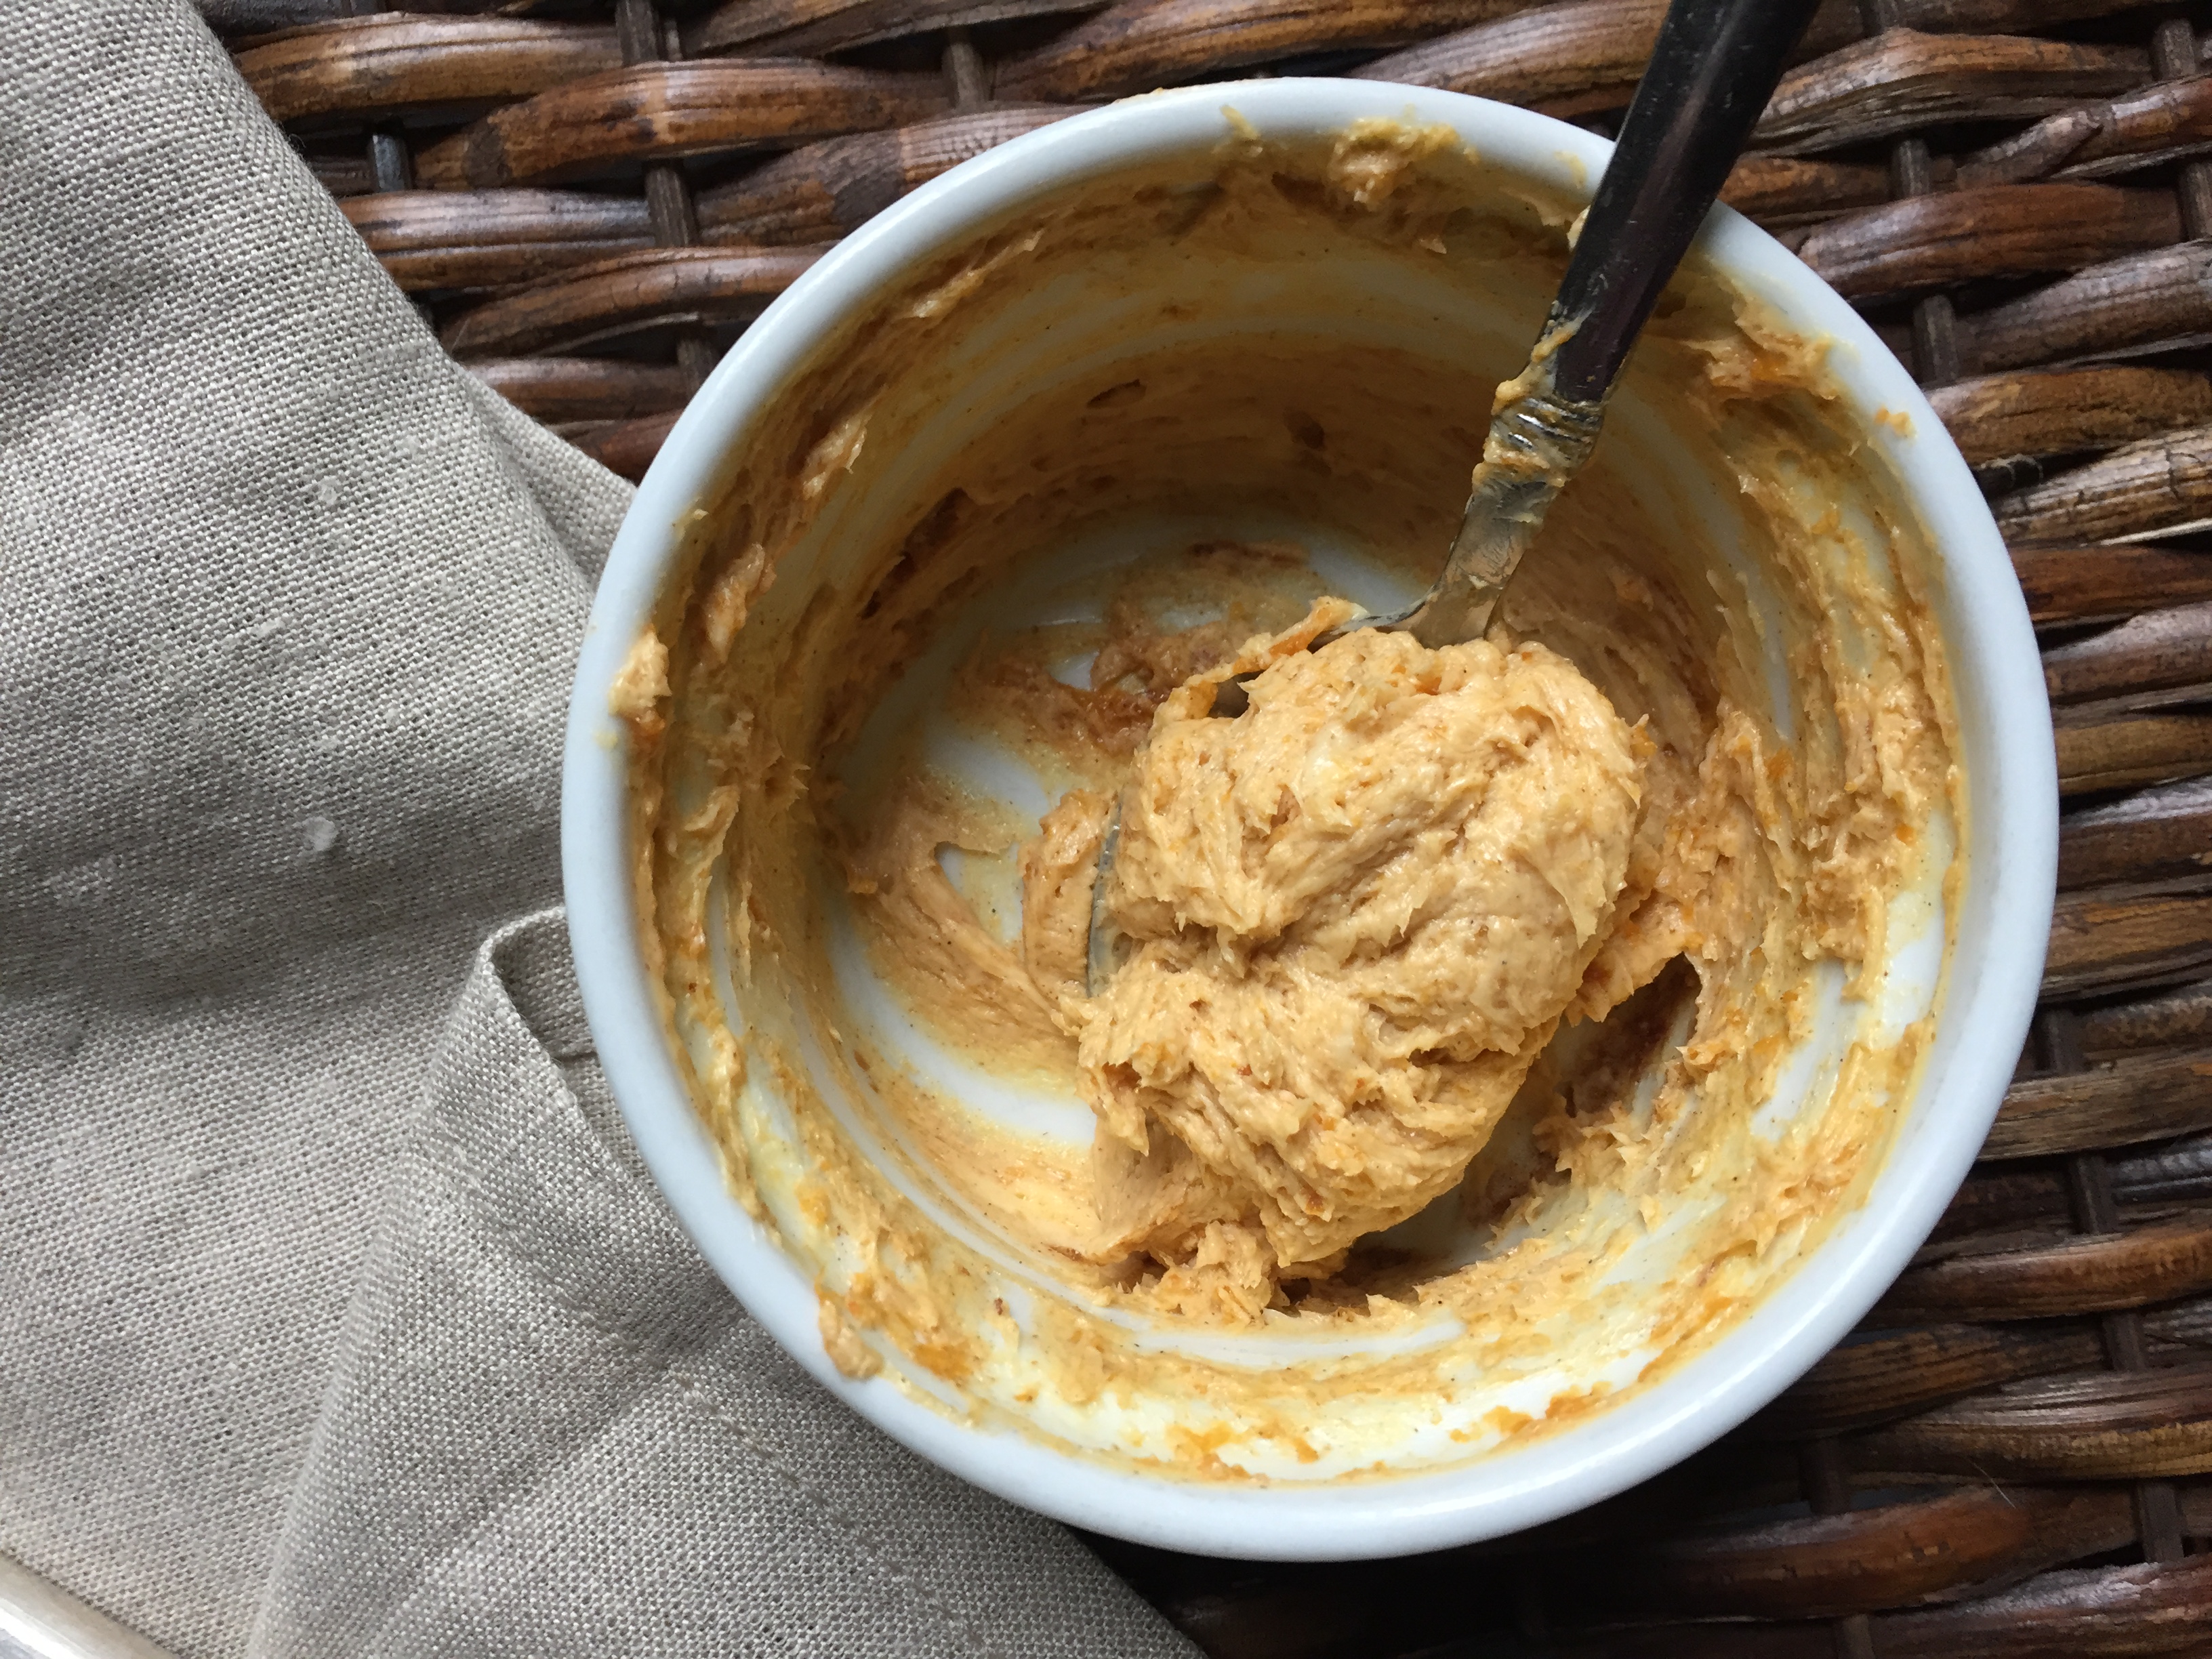
Years ago I created a recipe for Thanksgiving Turkey using a flavorful compound butter that is inserted under the skin and rubbed on the skin as well. I am reprising this recipe using the Arctic Thyme Sea Salt, its absolutely delicious with floral and herbal notes.

Compound Butter

8 oz unsalted butter softened

1-2 garlic cloves (depending on size and personal taste)

zest of 1 lemon

3 sprigs thyme (leaves removed)

3 fresh sage leaves, chopped

2 tsp Arctic Thyme sea salt (or any flaky sea salt) divided

Smash the garlic cloves with 1/2 tsp of the salt either in mortar and pestle or using a chefs knife on a cutting board (you want the garlic to be a paste). Mix the soft butter with garlic paste, lemon zest, thyme leaves, sage and remaining 1 1/2 tsp salt. Mix to combine, roll into a log, wrap in plastic wrap and parchment paper and store in refrigerator until ready to use. It’s delicious on turkey or chicken or on roasted vegetables. I roasted Brussels sprouts, potatoes, onions and carrots.

Creamy Baked Eggs

I am so sorry that my posts are few and far between. I feel like I am fighting my way back from a sort of dark abyss. I appreciate so much that you have stuck with me despite my lack of posts (totally inactive). It had been a long time since I had entered a contest at Food52 and missed it and the community. The most recent contest is “Your Best Creamy Breakfast”. Well, breakfast is my favorite meal of the day and of course anything creamy is definitely something I can get behind. Thinking about what to make brought me to my childhood, on special occasions my Mom made baked eggs or shirred eggs. This is my updated version of my Moms recipe. I was lucky enough to be picked as a finalist and would appreciate so much if you would cast a vote for me, click here and it will take you to the voting page on Food52. Thank you again for being so wonderful!

Creamy Baked Eggs

Recipe by sdebrango

Serves 2-4 depending on appetite

Béchamel

2 tbs butter

2 tbs flour

1 1/2 cup warmed whole milk

salt and pepper to taste

The rest

4 large eggs

5 oz baby spinach cleaned

4-6 slices bacon cut into bite size pieces

10 cherry tomatoes cut in half

1/2 cup grated gruyere cheese

Handful toasted breadcrumbs to coat pan or pans

Make béchamel or white sauce. Add butter to small heavy bottom saucepan, melt on medium low heat, add flour and whisk cooking for about 1-2 minutes. Slowly add the warmed milk whisking constantly and cook until it thickens. Season with salt and black pepper to taste. Remove from heat and set aside

Heat a saute or fry pan on medium high flame and add the bacon bits, saute until lightly browned. Remove the bacon leaving the rendered fat in the pan. Add the spinach and saute until wilted. Remove and set aside. Place the tomatoes in the to pan and cook until they start to blister and soften, set aside. Preheat oven to 425 degree’s. NOTE: if bacon doesn’t produce enough rendered fat add a little olive oil.

Assembly:

Butter pans,( I used 2 individual oval pans), ramekins or cocottes. Sprinkle bottom with toasted breadcrumbs. Divide the spinach between the pans, add the bacon bits and tomatoes. Spoon 3 heaping tbs of the béchamel on top. Create a well and gently nestle the eggs in the well. Spoon more béchamel around the eggs. Place your pans on a baking sheet and bake for 10 minutes, the eggs will not be completely set, that’s ok you are going to finish in the broiler. Remove from oven and adjust to broil setting. Cover top with grated cheese and place in broiler close to flame for about 1 minute or until cheese is melted and lightly browned.  Note: You can assemble this the night before and bake in the morning.

Serve with toast!


Guest Post- Cherry Chocolate Scones

I was thrilled when Mollie,  The Frugal Hausfrau agreed to do a guest post. I am a big fan, she is a wonderfully talented cook, take a look at her creations on her blog, you will see why I am so in love with her recipes. Down home and elegant, budget conscience, approachable, ok I’ll stop now, thank you Mollie for sharing these incredible scones they look so delicious! Take it away Mollie….

When Suzanne said she might like a guest post or two, I was all over it – and knew exactly what I wanted to make. I just had it in my head that Scones with Dried Cherries & Dark Chocolate might cheer her up a bit. They’d be great with coffee or black tea and such a fun treat for a weekend breakfast.

I started out with one recipe and I don’t know if it was the recipe or me, but it was pretty mediocre. Then I tried another and it was too cakey. A scone is a scone is a scone, and cake? That’s just not a scone. A scone should be good, but have a certain sensibility about it.

I remembered that King Arthur had a scone recipe I have been meaning to try. (They mentioned a scone pan, too, that I ordered and I love it and used it – that’s how long it took me to make these scones!) So on to the King Arthur recipe.

The first time I forgot the baking powder. It was like a Shortbread Scone. A Shrone? There might be some possibilities in that idea, lol!

So finally, the final rendition. And I learned a few things along my journey! I used two chocolates because I ran out of the chocolate I was initially using and it the scones were so much better.

You can stick with one kind of chocolate if you’d like, but I’d highly recommend chopping some good chocolate and combining it with Nestle’s Chocolate Chunks or at least with their dark chocolate chips. I was thinking of striping these scones with a little glaze, but they’re just so good as is!

The two chocolates melted and acted differently and it was like a perfect alchemy with the soft and chewy dried cherries. So at long last, here’s the recipe as I made it. Check with King Arthur for all their suggested variations and many tips. This recipe is excellent and Suzanne, I hope you love these!

King Arthur’s Scones

2 3/4 cups King Arthur Unbleached All-Purpose Flour or Gluten-Free Measure for Measure Flour

1/3 cup sugar

3/4 teaspoon salt

1 tablespoon baking powder

1/2 cup cold butter

1/2 cup roughly chopped dried cherries

1/2 cup Nestle’s chocolate chunks

3 to 4 ounces good dark chocolate, roughly chunked

2 large eggs

2 teaspoons vanilla extract or the flavoring of your choice

1/2 cup to 2/3 cup half and half (see note)

In a large mixing bowl, sift together the flour, sugar, salt, and baking powder.

Work in the butter just until the mixture is unevenly crumbly; it’s OK for some larger chunks of butter to remain unincorporated.

Stir in the dried cherries and chocolate.

In a separate mixing bowl, whisk together the eggs, vanilla and half and half.

Add the liquid ingredients to the dry ingredients and stir until mixture starts to hold together. Dump out and carefully pinch and pull the dough until all is incorporated.

Sprinkle a bit of flour atop a baking sheet.

Divide dough in half and place each half on the baking sheet. Form each into a five to six-inch circle about 3/4’s of an inch high. If using a scone pan, see note, below.

Brush each circle with milk, and sprinkle with coarse white sparkling sugar or cinnamon sugar, if desired.

Using a knife or bench knife that you’ve run under cold water, slice each circle into 6 wedges.

Carefully pull the wedges away from the center to separate them just a bit; there should be about 1/2″ space between them, at their outer edges.

For best texture and highest rise, place the pan of scones in the freezer for 30 minutes, uncovered. Chilling the scones relaxes the gluten in the flour, which makes the scones more tender and allows them to rise higher. It also chills the fat, which will make the scones a bit flakier. While the scones are chilling, preheat the oven to 425°F.

Bake the scones for 15 to 20 minutes, or until they’re golden brown. When you pull one away from the others, it should look baked all the way through; the edge shouldn’t look wet or unbaked.

Remove the scones from the oven, and cool briefly on the pan. Serve warm. They’re delicious as is, but add butter and/or jam, if you like.

When the scones are completely cool, wrap them in plastic and store at room temperature for up to several days. To reheat room-temperature scones, place on a baking sheet, tent lightly with foil, and warm in a preheated 350°F oven for about 10 minutes.

Notes:

Since the scones I baked were baked in January, when the humidity is low and flour is dry, these scones used the full amount of liquid.

If using a scone pan, the full amount of dough will fit into the pan. I found 1/2 cup scoop worked well to distribute the dough in the eight slots. There’s no need to freeze the dough. For these particular scones, I did not brush with butter or sprinkle with sugar.

Cookies, Fruitcake and More Cookies

I am going to try to keep this short and sweet. I have been baking and packing gift boxes for the last week. My meals are take out or a quick sandwich. Have to say my new oven is amazing. It literally cuts baking time in half having an oven that actually works like it’s supposed to. My first attempt at convection baking wasn’t the best, not a disaster but not great, I read that it automatically converts the temperature and I didn’t realize you have to change the setting on the stove to convert the temp. Second round was perfect.

Got 3 gift boxes mailed, no small feat as I had to wait almost 2 hours in line at the post office. It’s been pretty busy around here, I volunteered as a foster for a rescue organization and they had an urgent need to foster a little chiweenie (chihuahua dachshund mix). He is about 7-8 yrs old and is named Gosha. He will stay with me until he finds a forever home much to the chagrin of Mr. Percy, he is not pleased and is moping around the house, won’t eat unless I hand feed him and is generally perturbed.

Christmas cards have been pouring in, for Percy, LOL! I have gotten 2 with over 30 cards for Percy from our friends on social media.

I found a great recipe for Chocolate thumbprint cookies, better than the recipe I have been using for the last few years. It’s from Martha Stewart and have to say it’s terrific. The cookies are soft and moist and I love adding the striped Hershey’s kiss in the center while the cookies are still warm.

chocolate thumbprint cookies

I’ve also made fruitcakes, chocolate chip cookies, rugelach and biscotti. This week I’m making Stollen, more cookies and more.

rugelach, chocolate, orange hazelnut

fruitcake

Chocolate Thumbprint Cookies

Recipe from Martha Stewart

Makes 90 small cookies

2 cups all purpose flour

1 cup plus 1 tbs dutch cocoa, unsweetened

2 tsp course salt

8 ounces (2 sticks) unsalted butter softened

1 1/3 cup sugar (plus more for rolling the cookies in)

2 large egg yolks

2 tbs heavy cream

2 tsp vanilla extract

Heat oven to 350 degree’s. Sift flour, cocoa powder and salt into a small bowl and set aside. Cream butter and sugar until fluffy. Reduce speed to medium and add egg yolks, cream and vanilla, beat until combined scraping sides when needed. Beat in flour mixture just until combined.

Scoop out approximately 2 tsp and roll into a ball, roll in sugar and place on parchment lined baking sheet. Use your thumb or the end of a wooden spoon to make an indent in each cookie. Bake for 5 minutes rotating the pan and then bake another 5 minutes (10 minutes total baking time).
Remove from oven and place a Hershey’s kiss in the center, let cool completely before packaging or storing.

Apple Cider Doughnuts

Making the pumpkin spice doughnuts was fun and they turned out really well so I decided to try a recipe I found for apple cider doughnuts. One of the first stands visible at the farmers market, always front and center is also one of my favorites, apples, apple cider and doughnuts and it’s a favorite of mine and IMHO it epitomizes Fall. The recipe is from Bon Appetit and sounded really wonderful. The cake doughnuts contain homemade apple butter and apple cider syrup, at my last trip to the farmers market I bought a jar of apple butter which eliminated one step but I did make the cider syrup, it’s a bit of a slow process but fills your house with the most wonderful aroma of apples and cinnamon.  I love apples so much I decided to devote the next several blog posts to recipes using apples. This is the first in the apple installment and it’s a great way to kick off all things apples.

This is a really really good recipe, the doughnuts are the perfect texture and crumb, love how they get a bit craggy when frying, gives them character. The flavor is out of this world delicious. Highly recommend you give this a try if you want to make doughnuts. They are the perfect dunking donut if you know what I mean, it always makes me laugh thinking of the Seinfeld episode where they were all wondering if Joe DiMaggio dunks when they were in Dinky Donut, so funny.

I am bringing these bad boys to Fiesta Friday #195 this week, you must check out all the Halloween goodies, amazing. The co  hosts this week are  Monika @ Everyday Healthy Recipes and Sandhya @ Indfused

That was 3 cups of cider

Apple Cider Syrup

3 cups apple cider

2-3 cinnamon sticks

Boil on medium high heat in large wide pot (makes the process quicker). The cider will reduce to a thick syrup and the yield will be about 1/3 cup. It takes approximately 30 minutes. Make sure you watch it because it can burn and removing the burnt cider is a challenge, (burned my first batch).

Doughnuts

1/2 cup apple butter

1/3 cup apple cider syrup

1/2 cup buttermilk

2 tsp vanilla extract

1 tbs + 2 tsp baking powder

1 tsp kosher salt

1/4 tsp baking soda

1/4 tsp nutmeg

1 tbs + 1 tsp cinnamon divided

3 1/2 cup all purpose flour

6 tbs unsalted butter softened and at room temperature

1/4 cup packed light brown sugar

2 large eggs

1 1/4 cup granulated sugar (divided)

Vegetable oil for frying

Whisk together the apple butter, apple cider syrup, buttermilk, vanilla and set aside. Whisk flour, baking powder, baking soda, salt, nutmeg and 1 tsp cinnamon. Set aside. Using an electric mixer on medium high speed cream the butter, brown sugar, 1/4 cup granulated sugar until light and fluffy (takes about 4 minutes) Add the eggs one at a time beating between each addition. Reduce mixer to low and add the dry ingredients in 2 additions, alternating with the cider mixture. Make sure you start with the dry, add half the cider mixture, then the other half of dry ingredients and ending with cider mixture. The dough will be soft and sticky.

Line a baking sheet with parchment paper. Spread about 1/3 cup of flour on the sheet. Put the dough on the parchment and sprinkle with a little flour. With your hands gently pat the dough spreading it on the lined sheet pan, you want the dough to be about 1/2 inch thick. Cover with plastic wrap and refrigerate for 3 hours or longer.

When dough is sufficiently chilled, start heating your oil, pour about 3 inches of oil in a pot and heat to 350 degree’s using a deep fry thermometer. While oil is heating cut out your doughnuts using a 3 inch round biscuit cutter and to make the hole in the center a 1 or 1/2 inch. Place cut doughnuts on a floured piece of parchment and drop them carefully in the hot oil. Fry 2 or 3 at a time letting them get nicely browned on both sides. After the doughnuts are done fry the holes.

Mix 1 cup sugar and 1 tbs cinnamon in a bowl and roll the warm doughnuts in the sugar mixture and place on cooling rack.

love to dunk


All About Pumpkin, Soup And Doughnuts

Recently I ordered 2 cans of pumpkin from my online grocer, I simply added to my cart without looking at the size of the cans, thinking it is the usual small cans of pumpkin puree. What arrived were the big cans, a whole lotta pumpkin and once opened it has to be used. I don’t really like freezing it because it becomes watery. I made 3 mini loaves of pumpkin spice bread, some chickpea pumpkin soup and pumpkin spice donuts and there is still enough leftover for a few pumpkin spice latte’s.

The pumpkin loaves I can practically make with my eyes closed, I use my recipe for banana bread and adapt to pumpkin adding spices.  The soup was my own creation and turned out quite well and is super easy to make. Now Doughnuts are another thing entirely. I have only made doughnuts once I think,  they were less than stellar so I abandoned  making those delicious little fried cakes and opted to buy them (the best doughnuts EVER are in my neighborhood).  We had a brief (2 days) of cool weather, back to warmer temps for the rest of the week but the soup on a cool day was just perfect. I used what I had in the pantry and refrigerator, threw everything in my oval roaster and slow cooked for about 6 hours. I didn’t pre soak the chick peas, just threw them in with some vegetable broth, carrot, onion, celery and everything cooked up beautifully. At the end I pureed some of the chickpeas, added pumpkin, Sri Lankan curry powder and some creme fraiche. So easy really, and no recipe required. You can add whatever you like or have on hand. I think that next I will try making yeast doughnuts now that I have cake doughnuts down.

curried pumpkin chickpea soup

Curried Pumpkin Chickpea Soup

2 cups dried chick peas

1 onion quartered

2 stalks celery

1 large or 2 small carrot

8 cups vegetable broth (you can also use water or chicken broth)

1 cup pumpkin puree

1 tsp curry powder (I used Sri Lankan)

Optional 1/2 cup creme fraiche

salt and pepper to taste

Heat oven to 325 degree’s. Put everything in the pot, put it in the oven and let it cook slow and long. I cooked it for 6 hours. When done, scoop out about 2/3 of the chick peas and a little of the broth along with the celery and onion. Puree in the blender until smooth, add the pumpkin, curry powder and optional creme fraiche. Add back to the pot, cut the carrots into bite size pieces and cook on medium heat for about 15 minutes. Adjust seasoning and if you like at the end add some spinach. I had some that needed to be used and it was nice in the soup.

Pumpkin Spice Doughnuts

Makes 12 doughnuts and holes

Recipe from Good Housekeeping

2 tbs softened butter

1/2 cup sugar

2 tsp baking powder

1/2 tsp salt

1 tsp cinnamon

1/4 tsp baking soda

dash of ground nutmeg or about 1/8 tsp

1/2 cup pumpkin puree

1/3 cup buttermilk

1 egg

1 egg yolk

1/2 tsp vanilla

2 cups all purpose flour

vegetable oil for frying

Cream butter until fluffy, it’s only 2 tbs so it won’t be that fluffy. Add the sugar, baking powder, salt, cinnamon and nutmeg. Beat until combined scraping sides of the bowl occasionally. Beat in the pumpkin, buttermilk, egg and egg yolk and vanilla until combined. Using a wooden spoon stir in flour until well combined. Cover bowl and chill for at least 3 hours or over night.

Heat the oil to 365 degrees. On work surface dusted with flour roll out the dough to about 1/2 inch thick. Using doughnut cutter or biscuit cutter cut the doughnuts and place on parchment lined baking sheet. When oil is at the right temperature drop 2 or 3 doughnuts at a time and turn once browned making sure they are evenly brown and cooked through. It takes about 3 – 4 minutest per doughnut. When done place on rack lined with paper bag or paper towels. Prepare some sugar and cinnamon and roll each doughnut while still warm in the sugar mixture. Let cool and enjoy!


Pumpkin Pecan Spiced Waffles And Pumpkin Spice Compound Butter

It’s pumpkin season, this is my absolute favorite time of year and I want to celebrate by focusing on some recipes using pumpkin. Now, I am not the adventurous type that buys a whole pumpkin and goes through the arm breaking task of cutting and cleaning, Libby’s pumpkin puree is just fine by me.

These waffles are light, soft and delicious. I saw the recipe on Martha Stewarts site and adapted it substituting part of the all purpose flour for toasted pecan flour. The gentle warm spicing and pumpkin flavor of these waffles is like having Fall on a fork.  It literally takes only minutes to put these waffles together and it makes a hearty and delicious meal. I like to think that with the nut flour and pumpkin it’s health food. The compound butter is also nice because in reality you are using less butter since you have added pumpkin pureé. Win win!

pumpkins lined up at the local markets

Pumpkin Pecan Spiced Waffles

Adapted from a recipe by Martha Stewart

1 1/2 cup all purpose flour

1/2 cup +2 tbs toasted pecan flour

1 tsp baking powder

1/2 tsp baking soda

1/4 tsp nutmeg

1/2 tsp powdered ginger

1 1/4 tsp cinnamon

1 tsp kosher salt

scant 1/4 cup sugar

1 3/4 cup whole milk

1/2 cup pumpkin pureé

3 eggs

1 stick (1/2 cup melted butter

Pre heat your waffle maker. To toast the pecans heat oven to 350 place 1 cup pecans on baking sheet and toast in the oven for approximately 15 minutes or just until you can smell the nuts. Let cool and then grind in the food processor or vitamin, it will resemble course flour. Line a baking sheet with parchment.

Pecan flour

In medium bowl whisk together the dry ingredients (flour, sugar, spices, salt, baking soda and powder. In large bowl whisk together the milk, egg, pumpkin, eggs and melted butter add the flour mixture and stir until combined. Let sit for 5 minutes and follow manufacturers directions for your waffle maker. Keep them warm in the oven after you make each batch. They freeze beautifully also, I usually put in a zip lock bag with each waffle separated by parchment.

pumpkin spice butter

Pumpkin Compound Butter

1 stick (1/2 cup) softened butter

1/4 cup pumpkin pureé

2 tsp brown sugar

Pumpkin pie spice blend (You can use the same spices in the waffles)

Mix it all together until thoroughly blended. Serve on top of waffles

Some Jam, Scones And Sour Cherry Hand Pies

When I saw the baskets of sour cherries and gooseberries at the farmers market I had to buy them. Both are delicious but really not great eaten fresh/raw. They are very sour on their own and I thought they would be best made into jam or preserves and a small jar of sour cherry pie filling. They are very tedious to prep, the sour cherries are small and soft and juicy and hard to pit, (please don’t eat cherry pits you can actually get sick when eaten in large enough quantities, saw this article on food52) and the gooseberries need to have the ends pinched off, both ends. Luckily I did not buy a huge amount of the fruit so although tedious it didn’t take me all day to prep them. I have been working on recipes for Teagan’s wonderful Thistledown episodes, I absolutely love this story and am inspired by the magickal world of faeries.

Refrigerator jam is a wonderful thing, no muss no fuss, no canning or preserving, it’s stored in the refrigerator rather than sealed properly and stored in the pantry. I still use sterilized jars and it does seal somewhat but not enough to make me comfortable storing unrefrigerated. It really lasts a long time in the fridge and if you haven’t ever made your own jam or preserves you must give it a go, it really is delicious.

I had 3 pints of sour cherries and 2 pint of gooseberries which was enough to make 2 16 ounce jars and 8 ounces of cherry pie filling. The scones are my favorite recipe from my friend on Food52 Liz Larkin aka @sconeladylarkin on Instagram. The recipe for scones IMHO is the best scone recipe ever, they are tender and light and delicious.

The hand pies were an after thought. There was leftover galette dough after making the tomato tart, and the small jar of cherry pie filling. Cherry pie has always been one of my favorites especially warm with a scoop of vanilla ice cream

Royal Wedding Scones

Recipe by Liz Larkin on Food52

2 1/2 cups all purpose flour

3/4 tsp salt

1/4 cup sugar

1 tbs baking powder

6 tbs cold unsalted butter

1 large egg

1 cup heavy cream

1 tsp vanilla extract

3/4 cup frozen blueberries

Pulse the flour, salt, sugar and baking powder a couple of times in the food processor, add the butter and pulse about 10 times until the butter is broken up in the flour mixture don’t worry if there are some larger pieces butter it doesn’t have to be uniform crumbs. Dump the mixture into a large bowl and add the frozen blueberries. Mix the egg, cream and vanilla together and add to the flour mixture. Mix with a fork until just combined, be careful not to over mix.

The dough will be a bit shaggy, place on floured work surface and press gently into a circle that is about 1/2 inch thick. Cut in half, in half again and then each quarter into two wedges you will have 8 scones. Place on parchment lined baking sheet and freeze until completely frozen about 1 hour. You can then bake them or store in freezer bags until ready to use, I like to wrap each frozen scone individually in either plastic wrap or parchment.  Before baking brush the scones with some heavy cream and sprinkle some sugar on them. Bake in a 420 degree oven until golden brown, when touched with finger they will feel solid. Don’t over bake, because they are frozen it can take a little longer than usual approximately 20-25 minutes.

Sour Cherry Jam and Gooseberry jam

Makes 2 16 oz jars

2 pint sour cherries pitted, in separate pot 2 pint gooseberries trimmed

1 1/2 cup sugar each

pinch of salt

Cook on medium high heat until thickened. Test to see if its ready by spooning some of the jam on a very cold spoon, if it thickens it’s ready because it was not a lot of jam it only took a little less than 30 minutes to cook. Pour into sterilized jar, let cool to room temperature and refrigerate. Note: The longer you cook the thicker your jam will be, I like mine on the loose side so for my taste about 30 minutes was perfect.

Sour cherry pie filling

Makes 8 ounces

1 pint sour cherries pitted

2/3 cup sugar

4 tsp corn starch

pinch of salt

pinch of cinnamon (optional)

place everything in a medium non reactive pot and cook on medium high heat until thickened. Pour into clean or sterilized jar and refrigerate after it’s cooled to room temperature.

To make the hand pies use your favorite recipe for pie dough or pre made dough works great as well, using a biscuit or something round cut out circles, you will need 2 for each pie. Spoon a little filling in the middle, brush some egg was on the edge of the circle place the other round on top, seal, cut a vent in the top, brush with egg wash and sprinkle with sugar and bake in 375 degree oven for about 20-25 minutes.

Farmers Market Haul, A Guest Post, Zucchini Fritters And A Big Salad

The farmers market in my neighborhood is absolutely brimming with a fabulous variety of beautiful fruits and vegetables. I love going there and am always inspired by what I see and feel and smell and taste. The wheels are turning and I am so excited to announce that I will be doing another guest post with Teagan, her latest story is amazing and magickal. She brilliantly involves her readers in the stories, remember the Three Ingredients series?

What you see in the photo are pink gooseberries, sour cherries and plums. This guest post has been cooking for a while and I specifically shopped with that in mind. The fruit is so fresh and delicious and I am really looking forward to sharing the recipes with you, but that has to wait.

In the meantime I am going to share a recipe that I saw on Instagram, Zucchini Fritters with Feta and Dill. The recipe comes from Chef Michael Symon, some of you may have seen him on “The Chew”, Food Network or maybe you have eaten in one of his restaurants, well he is a wonderful chef and these fritters are so easy to make and really delicious.


They were delicious for breakfast with a 5 minute egg and salad. A light and satisfying meal.

My tomatoes

I am happy that my tomatoes are growing and it looks like they may just be turning from green to red soon. But in the meantime it’s great that the Farmers market has some beautiful tomatoes and the bounty this summer is phenomenal. I went again this morning and as usual my eyes are bigger than my stomach and I bought a lot, every year I plant basil and almost every year it dies, this year was no different. I was lucky to find a huge bunch of fresh basil and I plan on making some pesto with it.

Perfect summer dinner, fresh salad, simple vinaigrette and Rosé

Percy

I will leave you with a photo of Percy, he recently had dental surgery, 6 teeth pulled and he lost 3 or 4 while they were cleaning his teeth. It was a rough day post surgery and the day after, he was pretty sick. Percy can’t tolerate the heat and boy has it been hot out, my poor boy is miserable so we limit our time outside and I walk him very early in the morning between 5:30-6AM when it’s a little cooler out.


Chocolate Marbled Banana Bread

This banana bread recipe has been featured on this site many times, as banana bread and also using other fruits like apples and figs. It is IMHO the best banana bread recipe I have found. While perusing recipes I saw a gorgeous chocolate marble banana bread and although I have added chocolate chips never a chocolate swirl. I used my go to recipe and copied how the chocolate marble swirl was made. The bread is delicious, simple and I like to make 3 mini loaves and freeze them, it freezes beautifully.

It’s moist and chocolaty with lots of banana flavor. The spelt adds some texture and a delicious nuttiness that you only get from spelt.

Chocolate Marbled Banana Bread

Makes one 9 inch or 3 mini loaves

Adapted from a recipe by Martha Stewart

1 stick 4 oz softened butter

1 cup sugar

2 large eggs at room temperature

1 cup flour

1/2 cup spelt flour

1 tsp baking soda

1 tsp salt

1 heaping cup mashed very ripe banana (2 1/2 large or 3 medium bananas)

1/2 cup sour cream or creme fraiche

1 tsp vanilla

3 oz dark chocolate melted

2 tsp unsweetened cocoa powder

Heat oven to 350 degree’s. Prepare your baking tins by greasing generously either with cooking spray, butter or shortening. Place flours, baking soda and salt in bowl and whisk to combine.

In the bowl of a stand mixer add the butter and sugar. Cream until light and fluffy scraping the sides occasionally. Add the eggs one at a time beating well after each addition. Add the flour mixture and beat on medium high speed just until combined. Now add the banana, sour cream and vanilla and mix to combine.

Remove one cup of the batter to a small bowl. Melt the chocolate and add the cocoa powder, stir. Add to the 1 cup of batter and fold in.

Spoon some of the regular batter into the baking pan if using a 9 inch loaf pan add half the batter, now half of the chocolate batter in two spoonful. Add the rest of the plain batter and spoon the rest of the chocolate batter on top. Swirl gently with a knife or skewer being careful not to over swirl, a few times back and forth will be enough.

Bake the 9 inch loaf approximately 50-55 minutes and the 3 mini loaves approximately 25-30 minutes. A cake tester or toothpick should come out clean when inserted in the center. The loaves will be browned and feel firm.