Skip to content

Archive for

The Basics – Mayonnaise

Mayonnaise

Mayonnaise

We should all have some basic recipes in our repertoire. Whenever I need a classic base recipe I turn to the master, at least in my opinion, Julia Child. I have several of her cookbooks but the one I turn to most often is Julia’s Kitchen Wisdom. I know I’ve mentioned this book before and it’s always worth mentioning again. It’s small but packed full of Julia’s master recipes from stock to bechemel, how to cook fish, shellfish, chicken and beef and vegetables, pastry dough and creme to a classic genoise. Over the next few weeks I will be featuring a base recipe along with a recipe that includes or uses it. There will be guest posts from some wonderful and extremely talented bloggers. I think this will be fun!

I love homemade mayonnaise, truth be told I don’t always or often make it. When I need mayo for a very special dish I will, but for every day use, Hellman’s is fine by me.  That said, everyone (who likes mayonnaise) should know how to make it from scratch. It’s really simple, all you need is egg, oil, vinegar or lemon juice, dijon mustard, salt and pepper and a blender, food processor or strong arm and a whisk. I really love customizing with different flavors, meyer lemon and herb are my favorites. You have probably heard of aioli, it’s the same principal but contains garlic and olive oil. When making mayonnaise you usually use a neutral oil like canola or grapeseed or plain vegetable oil. I always use a neutral oil with a tbs of good olive oil, just that little bit gives character to the mayonnaise

Mayonnaise

From Julia’s Kitchen Wisdom

Yields about 1 1/2 –  2 cups

1 whole egg and 2 egg yolks at room temperature

1 tbs lemon juice or white wine vinegar

1 tsp dijon mustard

1/2 tsp salt (I like to use sea salt)

several grinds of white pepper (I use whatever pepper I have on hand)

1 1/2 – 2 cups oil (neutral flavor) Optional + 1 tbs good olive oil

Add the whole egg and yolks to the blender or food processor and blend for 30-45 seconds until it’s thick and light yellow in color. With blender or processor running and through the feeder tube or hole add the lemon juice or vinegar, mustard, salt and pepper. Now slowly drizzle in the oil with the blender/processor running, after you have slowly added approximately 1/2 cup you can start adding the oil faster until you have added all of it.  Taste and adjust the seasoning, you can add more lemon or vinegar, salt and pepper to suit your taste. Store in the refrigerator for up to 2 weeks.

Hints:

1. It’s important for everything to be the same temperature

2. Don’t over beat or mix, when I make it I beat or mix the eggs, add the vinegar,mustard salt and pepper and if your oil is not ready to start drizzling I stop the blender. It is possible to over mix, it will liquify rather than emulsify.

3. The recipe calls for 2 cups oil, I never use that much, a cup and a half at the most. I find I don’t really need that much oil.

4. If for some reason your mayonnaise doesn’t come together, don’t despair and throw it out, that has happened to me numerous times. Pour the mixture into a measuring cup, clean out your blender or processor add 2 more egg yolks and a splash of vinegar or lemon juice and start over. Instead of adding oil slowly drizzle in the failed mayo. It will thicken up.

One of my favorite ways to enjoy homemade mayo is on a lobster roll, I didn’t have any lobster so I made my second favorite a Bacon, Lettuce and Tomato sandwich. No recipe needed, you will need the bread of your choice, good bacon, tomato, lettuce and mayonnaise. Sometimes I like to add a few slices of avocado.

BLT

BLT

Biscuits, Finger Update And A Different Look

Biscuits

Biscuits

I  haven’t really cooked anything for a while now, my finger injury has sort of taken my life and turned it upside down. I was hoping that by now, a month since the injury I would be well on my way to normalcy but unfortunately thats not the case. I decided to try making biscuts this morning with one and a half hands, wouldn’t recommend it. The biscuits came out ok, it’s a good recipe but it was hard. Biscuits have long been my nemesis and still to this day I haven’t found what I consider the perfect biscuit.  Growing up my Mom made everything from scratch, at least almost everything, biscuits came from a can in the refrigerator section of the supermarket and I really liked them. Maybe thats why I have unattainable expectations from my homemade biscuits. I like them more like bread than a quick bread texture. These biscuits are a recipe from Julia Child, it’s very good, not perfect but very good.

My favorite biscuit recipe is from Food52, Cheese Biscuits. They are wonderful but I couldn’t grate cheese otherwise I would have made these. Totally Yummy!! If you do make them, reduce the salt, just a hint!!

Baking Powder Biscuits

Makes 1 dozen

Pre heat oven to 425 degrees

1 1/2 cup all purpose flour

1/2 cup cake flour

1 2/3 tbs baking powder

3/4 tsp salt

1 tbs sugar

3/4 cup vegetable shortening (I like spectrum organic) Note: You can also use butter or a mixtire of butter and shortening – I use both

1 cup whole milk

Measure dry ingredients into large mixing bowl, whisk together. Cut in the shortening/butter until the mixture resembles crumbs. Gently fold in the milk just to wet. DON”T KNEAD OR OVERMIX. Turn out onto work surface and gently pat into a 1/2 inch thick circle. Use biscuit cutter or glass and place on ungreased baking sheet or baking pan. Brush the tops with cream or melted butter and bake 15-20 minutes or until golden brown.

Now for my finger, well it has not healing well, I went to the doctor the other day and I need to start physical therapy going several times a week for 8 weeks, we are hoping that will help the joint to re align, it’s still out of whack. I am keeping it splinted in place, the cartilage and ligaments were badly damaged and cannot hold my finger in place. It’s painful and for me very discouraging. I need my finger back, it’s 100% unusable at this point. Here is a photo of the most recent x-ray.

My poor finger

My poor finger

I am also changing the theme for my blog, what do you think of the new look?

Oats for Breakfast- Two Quick And Easy Recipes That I love!!

Oatmeal Pancakes

Oatmeal Pancakes

When I first started my blog I tried every month or so to feature another blogger and one of their recipes, I really enjoyed doing that and it was a great way to introduce those who read my blog to someone they may not know. I don’t really know why I stopped doing that and I am going to start again. So to start out 2014 here is my first entry, I’m sure many of you know both and if you don’t you really should visit their blogs.

One of the blogs I love and follow is  Shashi the “Runninsrilankan“, she is a super fit Mom writing about fitness and food,   her recipes are delicious, healthful and easy to prepare from ingredients most of us have in our pantries. I saw her most recent post, Oatmeal Pancakes, read the ingredients and directions and thought WOW, these are easy to make, healthful and who doesn’t love pancakes for breakfast (or lunch or dinner). I had an appointment yesterday so whipped up a batch before I left and had a wonderful breakfast that really stuck with me. Honestly, I like these better than pancakes made from wheat flour. Now I did make one minor change to her recipe, instead of almond milk I used whole cows milk, next time I will use the almond milk. I’m telling you this is such an easy and delicious recipe, it has been placed in my regular breakfast rotation. Now Shashi said the recipe is for 1 serving but I made 4 pancakes which for me is 2 servings. Yesterday I had for breakfast and dinner, in the morning I had it with blueberries and in the evening with a nice knob of butter and grade B maple syrup. Yes, I had them twice in one day, they are that good. You can find the recipe by clicking here. Note: I found that letting the batter sit for an hour or so makes for a thicker fluffier pancake.

Overnight oats

Overnight oats

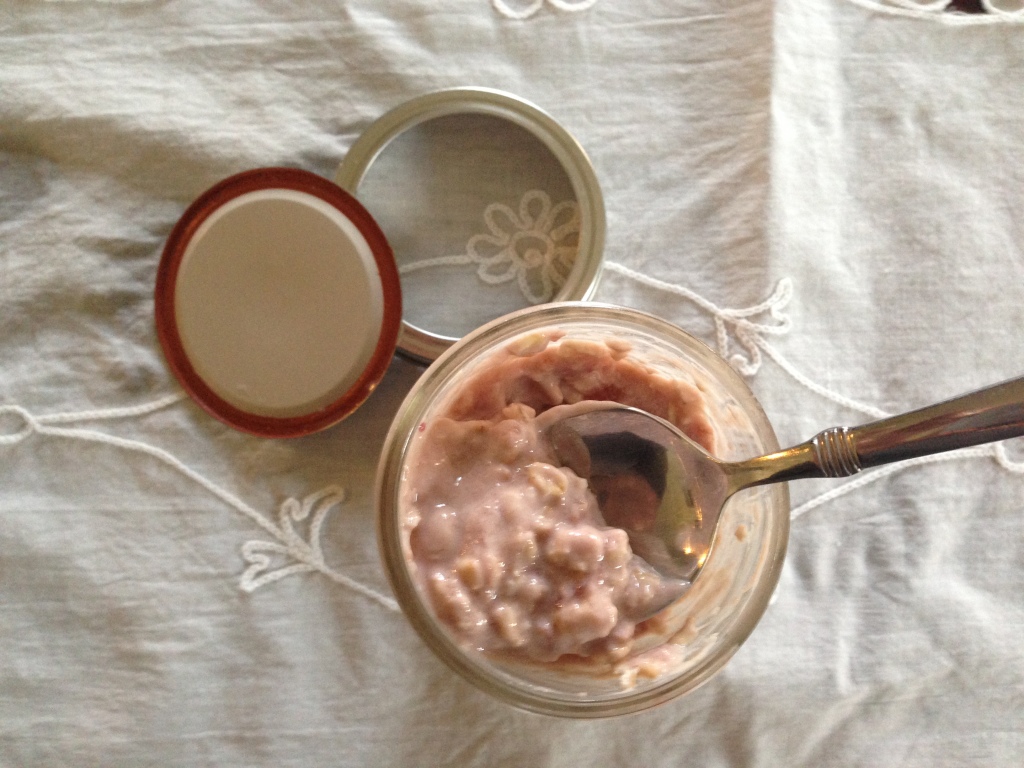
The second recipe is from Tamara at Pretty Bitches Can Cook Too, I was instantly drawn to this because first of all it’s healthful, second there is no cooking and third you make it the night before and let it sit in the refrigerator all night and in the morning grab and eat. It’s also really delicious and you can tailor to your taste. I made two of them one strawberry and one blackberry. Tamara makes with greek yogurt and coconut milk, I used plain kefir and instead of the agave I used a couple of tsp’s of honey in each, I also added some almonds that I whizzed in the food processor. This is such a satisfying meal that is no fuss at all. You may remember Tamara from a few months ago, I did a guest post on her blog and she sponsored a give away of her fabulous salsa. Visit her site here to find the recipe. You have to give this a try, its fantastic.

3rd Grader Erases All Doubt About Organic Produce

I love Cooking Up the Cure and follow every single post, always so informative and interesting. This is amazing, please watch the video included in the post. The little girl is great and if you had any doubts about buying organic as opposed to the other non organic vegetables this will make the decision for you.
Enjoy!!

Second Anniversary Or Is It Blogoversary!

A pug in the kitchen via pinterest

A pug in the kitchen via pinterest

I can’t believe I’ve been blogging for two years now. I started the blog on January 12th and it took me two days to get the courage to write my first post and click publish.  My very first post was on January 14, 2012. Seems like yesterday and eon’s ago at the same time. I have really enjoyed the ride. It was like jumping into cold water or venturing into the unknown, I wondered if anyone would read my blog.  I was a little scared, fearing that if anyone did visit they would think it silly or uninteresting. Despite my fears I jumped in and was so relieved to find the most wonderful community of fellow bloggers, people I have so much in common with and consider my friends even though we have never met in person. I am thankful for the welcoming and kind comments. This blog has helped me in many ways, I feel like I am a better cook, writer and photographer and it has given my cooking a dual purpose, more than just nourishing myself and my family, I am cooking for a much larger crowd, the wonderful people who follow my blog and for that reason I am more careful and deliberate in the kitchen. So thank you everyone for being there for and with me on this journey. It has been fun and I hope to continue doing this as long as I can. During this two years I have received and given awards, participated in contests, participated in bake/cooking groups, had multiple potlucks at my house, been a part of charity food events, whew, this really has been a lot of fun and I want to thank you again because without your encouragement I would not still be doing this.

Here are some of my favorite photo’s and recipes a pictorial history of a pug in the kitchen:

.Mixed Citrus Curd

Mixed Citrus Curd

Mixed Citrus Curd my first post

Tender Yellow Cake

The Best Yellow Cake Ever!

Tender Yellow Cake Photo by Food52

Angel Food Cupcakes With Chocolate Orange Buttercream

Angel Food Cupcake With Chocolate Orange buttercream

Angel Food Cupcake With Chocolate Orange buttercream

Beef Kebob on Flat Bread

Beef Kabobs on Flat Bread

Beef Kabobs on Flat Bread

Triple Chocolate Cake

Triple Chocolate cake

Triple Chocolate cake

Shrimp Scampi

Shrimp Scampi

Shrimp Scampi

Pizza Margherita

A thing of beauty

A thing of beauty

Moms Meatballs

Meatballs

Meatballs

White Cake with blackberry whipped cream frosting

White Cake With Blackberry Whipped Cream frosting

White Cake With Blackberry Whipped Cream frosting

Mango cream tart

Mango Cream Tart

Mango Cream Tart

Chocolate Shortcake With Cognac Infused Apricots

Chocolate Shortcake With Apricots

Chocolate Shortcake With Apricots

Fig and goat cheese tart

Mosto Cotto Fig And Goat Cheese Tart

Mosto Cotto Fig And Goat Cheese Tart

Brooklyn Blackout Semifreddo Cake

Brooklyn Blackout Semifreddo Cake

Brooklyn Blackout Semifreddo Cake

Flank Steak on Texas toast with chimichurri

Photo by James Ransom for Food52

Photo by James Ransom for Food52

Blackberry and nectarine galette

Galette

Galette

Vanilla ice cream

Vanilla Ice Cream

Vanilla Ice Cream

Farmers Market Finds

Kale Anyone?

Kale Anyone? Ft. Greene Farmers Market

Figs

Lovely figs before roasting

Lovely figs before roasting

Roasted Tomato and goat cheese tarts

Rectangular tart roasted tomato and goat cheese

Rectangular tart roasted tomato and goat cheese

Empanadas guest post

Spicy and flaky empanadas

Spicy and flaky empanadas

Whipped Chocolate Caramel Ganache

Photo by James Ransom for Food52

Photo by James Ransom for Food52

Eggnog

Eggnog

Eggnog

Izzy And Nando

Izzy And Nando

Pasta e Fagiole

Pasta Fagioli

Pasta Fagioli

I posted this in February 2012,  I did a week long tribute to my Italian heritage. This is my Mom’s recipe for Pasta Fagioli, she really made this her own and was known for this dish. It took years for me to pry the recipe from her, like so many cooks she never wrote anything down including amounts so it was hit or miss and it took me several years to get it right but my latest version was the closest I have ever gotten to my Mom’s fabulous recipe.

Ingredients and Directions:

1 1/4  cup great northern beans
1 clove garlic smashed
salt pork (about the size of a deck of cards)
8 cups water
Bring beans, garlic. pork and water to a boil, reduce heat and simmer covered for approximately 2 hours until beans are tender. I did not soak the beans overnight but if you do reduce cooking time by at least half.
1 28 oz can whole italian plum tomatoes (Blended until smooth)
1 can (28 oz) water – just fill the tomato can with water
1 clove garlic minced
1 shallot minced
salt and pepper to taste
4-5 fresh basil leaves
In dutch oven or large saucepan heat some olive oil, add garlic and shallot cook until they are soft and cooked through, add tomatoes, 3 basil leaves and water and cook for 30 minutes on medium heat.
When beans are done add to the tomato sauce (add beans and water they cooked in). Simmer on low for 20 minutes, the sauce will be thin, that is the way its supposed to be,adjust seasoning. Remove salt pork and add the cooked pasta, add 2 or 3 torn basil leaves and simmer for about 5 minutes and serve with grated parmigiano or romano cheese. NOTE: You can judge how much pasta to add I like about 2-3 cups of cooked pasta, it expands in the soup and you want to retain most of the broth.
Pasta:
2 1/2 cups AP flour
4 large eggs
1 tbs water
2 tsp olive oil
On work surface dump flour and make a well in the middle, add the eggs, water and olive oil and beat with a fork, working in a circle incorporate the flour until you have a cohesive dough, add more flour if your dough is too sticky. Knead until dough is smooth, wrap in plastic wrap and let rest for 30 minutes.
Or by food processor (which I did)  place flour in bowl then add the eggs, oil and water and pulse until it comes together into a ball. Turn onto lightly floured work surface and knead until smooth cover with plastic wrap and let rest for 30 minutes.
If rolling by hand roll dough with rolling pin as thin as you can, the dough should be almost translucent. Fold and cut into thin strips like linguine. If using a pasta machine follow manufacturers directions. NOTE: You will only need half of the pasta for this, wrap the other half of the dough well and freeze for later use).
Bring a large pot of water to a rolling boil, when water is boiling add salt (the water should be salty like sea water) Add the pasta stirring to make sure each piece is separated and cook for 2 minutes. Drain and add to the bean and tomato sauce.

Dough Resting

Rolling paper thin ready to become linguine

The Pugs

Veggies for the Pugs

Veggies for the Pugs

Izzy and Nando, the pugs, are senior dogs with health problems. Both are diabetic, Izzy less than a year from diagnosis and Nando is 5 years living with Diabetes. He is blind and in frail health now, he is 13 years old and Izzy is 12 going to be 13 in April. Since I am not really cooking I thought I would give you a little peek into my life with the pugs. Izzy came from a breeder and Nando is a rescue pug, he was abandoned in Long Island and I adopted him from Pug Rescue.

Izzy and Nando have never had commercially prepared dog food I have cooked for them from the moment they came into my life. Their diet has changed as they have aged and their health issues surfaced. I probably would have given them a raw diet if I had known about it when they were younger but I did my best giving them healthful food, about 80/20 percent mostly protein with bone meal and supplements.  Their diet now consists of skinless boneless chicken breast or lean beef, raw vegetables ground in the food processor, non fat plain yogurt, barley, bone meal and their supplements. Because of the diabetes I have to be very careful how I prepare the food, no fat at all the chicken is steamed and I dry roast the beef.  I use only organic vegetables and the meat, well, when it’s on sale I get organic grass fed or pastured but it’s so expensive I try to get the best I can, antibiotic and hormone free.  Both Izzy and Nando are insulin dependent, I have to give them injections twice a day every day at the same time all the time, schedules are very important when you have diabetes. I have to have a chart for each to keep track of which supplements each gets on a daily basis, keeps my mind sharp!

Supplements

Supplements

I take them upstate New York to a fantastic integrative vet at Smith Ridge Veterinary Clinic, Dr. Seo saved Nando’s life and put me on the right path to keep him as healthy as possible given his medical problems. I also have a great vet here in the city that we see since Dr. Seo is about 2 hours away.

Stressed at the Vets

Stressed at the Vets

They have a good life in the city, the pugs are not really energetic outdoorsy dogs even when they were young and healthy, they always enjoyed laying around in the house or hanging in the backyard. In the summer I would put a kiddie pool there so they could keep cool.

Hangin in the yard

Hangin in the yard

When they were younger they were even in a movie, they were transported by limo to Central Park. They enjoyed the star treatment.

On the set in Central Park

On the set in Central Park

The food

The food

Izzy, Nando and their BFF Daisey!

Izzy, Nando and their BFF Daisey!

Ricotta Polenta With Tomato Mushroom Sauce/Ragu

Creamy Polenta with Tomato and Mushrooms

Creamy Polenta with Tomato and Mushrooms

I posted this back in January 2012, it’s really delicious and worth posting again, I am not really doing any cooking because of my injury so I thought it would be fun to go back into the recesses of my blog and re post some of my recipes. This is a wonderful, filling vegetarian dish, you can of course add meat to the sauce but I love it with just vegetables. Tailor to however you like it, adding lots of fresh herbs, different types of mushrooms, I think eggplant would be wonderful. You don’t really have to follow a recipe for this.

Serves 4-6 depending on serving size

4 cups whey or water

1 cup polenta (corn meal) I used stone ground

pinch of salt

1/2 cup ricotta (well drained)

2 tbs butter

black pepper (2 or 3 turns of the pepper mill)

In saucepan add the whey or water and pinch of salt, bring to a rolling boil. Whisk in the polenta, don’t dump it all in add slowly while you are whisking it thickens very quickly. Lower heat to low and continue whisking until its done. It takes approximately 3-5 minutes. Remove from heat add the butter and stir, now add the ricotta. Stir until its all incorporated. Cover pan and set aside while you make the sauce.

8 oz cremini mushrooms sliced or whatever type of mushroom you like

2 cups chopped fresh tomatoes or 1 28 oz can whole or chopped tomatoes

splash of white wine

2 clove garlic peeled and minced

1 whole shallot peeled and chopped

handful italian parsley chopped

olive oil for pan

salt and pepper to taste

Put some olive oil in a saute pan and heat on medium high. Add the shallots and cook until they become soft and translucent. Add the garlic and continue to cook until they start to caramelize. Now add the mushrooms  and cook until the mushrooms lightly browned, add the tomato and wine and cook on med/high until sauce thickens approximately 30 minutes uncovered, I like to cook this in a large skillet. Season with salt and pepper and remove from heat. Add the chopped parsley.