Skip to content

Posts from the ‘Cookies’ Category

Happy Valentines Day-The Elusive Macaron And Percy’s Gotcha Day

Making a perfect macaron has eluded me for years. My first attempt was a big fail as was my second attempt. The first time I tried the French method where you add a warm sugar syrup to the egg whites with the mixer running is not a good idea for me, I have sugar strings flying everywhere and the macaron didn’t develop feet and were flat and pretty bad. The second time I used a recipe I found on Martha Stewart, there were steps and ingredients missing and I think amounts were off so another fail. Not being one to give up I found a Martha Stewart video with a recipe and I had a feeling this one would work. I followed the instructions to the letter, now there was one very important step (letting the macaron sit for about an hour before baking so they develop a skin) this was omitted, but having done research I knew to add that and by jove they turned out. They are not perfectly sized, some are a bit misshapen it will take some time to really master the piping of the batter but not bad!

Macaron are tricky, and following directions and measuring/weighing is really important. This recipe is very specific, I didn’t deviate at all. These delicious and delicate French cookies have been on my bucket list for a while, after my first fail I became discouraged and decided not to even try it again for a while. I am going to give you step by step instructions and if you follow you too can make macaron.

February 13 was also a very special day, it was the 2 year anniversary of when Percy came to live with me, his gotcha day. He is doing very well and is my best friend and the most amazing dog. Happy gotcha day Mr. P!!  You can view Martha’s recipe and video by clicking here.

French Macaron

Recipe by Martha Stewart

Makes 1 dozen

2 large egg whites at room temperature

1/4 cup granulated sugar

pinch of salt

71 grams finely ground almond flour (NOTE: you can use blanched slivered almonds and make your own flour) approximately 2/3 cup

117 grams powdered sugar – approximately 1 cup

gel food color if desired (start with one drop and add more depending on how deep you want the color)

Place almond flour (if using sliced almonds process first to a fine powder and then add the powdered sugar)  and confectioners sugar in food processor and process until mixed thoroughly and the almond flour is finely ground. Pour through a sieve and if you have more than a tablespoon of the mixture left in the sieve, place that in the processor and give it a good whiz and pour through the sieve again. Set aside. It is very important to remove any larger pieces of almond, it should be very very fine.

Heat oven to 350,  make sure rack is in the bottom third of the oven. Line a baking sheet with parchment. Pour the egg whites, granulated sugar and salt in stand mixer fitted with whisk attachment. Beat on 4 (setting) for 2 minutes, turn up the speed to 6 and beat another 2 minutes, change speed to 8 and beat another 2 minutes. At this time add the food coloring and mix to combine. Remove bowl from the mixer and add all of the flour sugar mixture at once. Using a spatula fold from bottom swiping up 37 times, the batter will loosen. It’s important to do this 37 times according to Martha who got it from an expert.

Folded 37 times and ready to pipe

Fit a pastry bag with a 3/8 inch round tip (Ateco #804) place inside a tall glass (believe me this is important since the opening of the tip is quite large the batter will leak out. Pour the batter into the bag (tip down) and secure.  Carefully pipe a small amount (about 3/4 inch) on the parchment spacing each about 2 inches apart. Tap the pan twice lifting a couple of inches and dropping onto the counter. Leave the macaron to sit for an hour even a little longer is fine. It’s important for them to develop a skin, you can actually see the change the top will become dull and look quite different once the skin develops it traps moisture in while baking making them puff and develop feet.

Bake in the 350 degree oven for 13 minutes. Remove from the oven and let sit on the sheet pan until cooled. Carefully remove the rounds, they are delicate so work gingerly. Turn over every other one as you will pipe some filling on the bottom and sandwich the other on top. The macaron should have developed feet see photo below.

the curly edge is called feet

I had some of the French buttercream and a little ganache leftover from the other cake and thought it would make a nice filling. I put the buttercream into the mixer added 1 ounce melted dark chocolate and 2 tbs of the ganache and whipped it. After you pipe a dollop of the filling onto the cookie place the other cookie on top and VERY gently press down so that the filling reaches the edge of the cookie.

You can fill with ganache, jam or buttercream. Nutella would also be delicious. You can add flavoring or different colors to the macaron shells, to make chocolate all you have to do is remove 1/4 cup of the almond flour and replace with unsweetened cocoa powder. I plan on experimenting with different flavors and colors.

Percy with his monogrammed bandana Happy Gotcha day Buddy!!

Cookies, Fruitcake and More Cookies

I am going to try to keep this short and sweet. I have been baking and packing gift boxes for the last week. My meals are take out or a quick sandwich. Have to say my new oven is amazing. It literally cuts baking time in half having an oven that actually works like it’s supposed to. My first attempt at convection baking wasn’t the best, not a disaster but not great, I read that it automatically converts the temperature and I didn’t realize you have to change the setting on the stove to convert the temp. Second round was perfect.

Got 3 gift boxes mailed, no small feat as I had to wait almost 2 hours in line at the post office. It’s been pretty busy around here, I volunteered as a foster for a rescue organization and they had an urgent need to foster a little chiweenie (chihuahua dachshund mix). He is about 7-8 yrs old and is named Gosha. He will stay with me until he finds a forever home much to the chagrin of Mr. Percy, he is not pleased and is moping around the house, won’t eat unless I hand feed him and is generally perturbed.

Christmas cards have been pouring in, for Percy, LOL! I have gotten 2 with over 30 cards for Percy from our friends on social media.

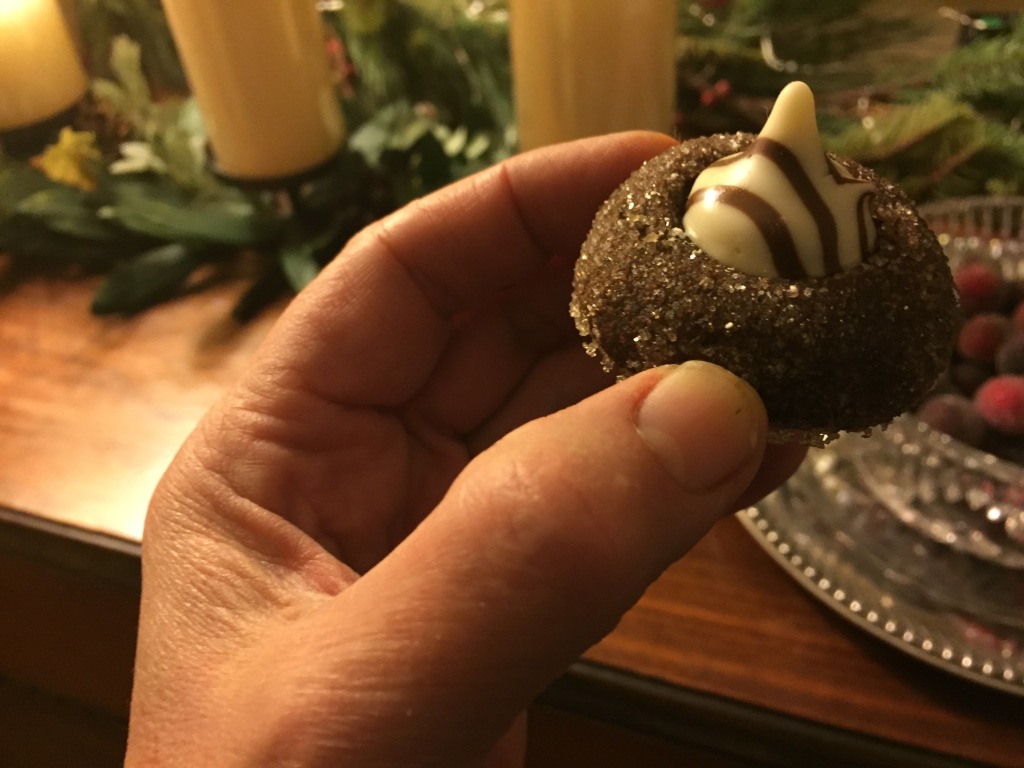
I found a great recipe for Chocolate thumbprint cookies, better than the recipe I have been using for the last few years. It’s from Martha Stewart and have to say it’s terrific. The cookies are soft and moist and I love adding the striped Hershey’s kiss in the center while the cookies are still warm.

chocolate thumbprint cookies

I’ve also made fruitcakes, chocolate chip cookies, rugelach and biscotti. This week I’m making Stollen, more cookies and more.

rugelach, chocolate, orange hazelnut

fruitcake

Chocolate Thumbprint Cookies

Recipe from Martha Stewart

Makes 90 small cookies

2 cups all purpose flour

1 cup plus 1 tbs dutch cocoa, unsweetened

2 tsp course salt

8 ounces (2 sticks) unsalted butter softened

1 1/3 cup sugar (plus more for rolling the cookies in)

2 large egg yolks

2 tbs heavy cream

2 tsp vanilla extract

Heat oven to 350 degree’s. Sift flour, cocoa powder and salt into a small bowl and set aside. Cream butter and sugar until fluffy. Reduce speed to medium and add egg yolks, cream and vanilla, beat until combined scraping sides when needed. Beat in flour mixture just until combined.
Scoop out approximately 2 tsp and roll into a ball, roll in sugar and place on parchment lined baking sheet. Use your thumb or the end of a wooden spoon to make an indent in each cookie. Bake for 5 minutes rotating the pan and then bake another 5 minutes (10 minutes total baking time).
Remove from oven and place a Hershey’s kiss in the center, let cool completely before packaging or storing.

More Holiday Cookies- Crinkle Cookies And Chocolate Thumbprints

img_8140

Baking for the Holidays is work but fun at the same time. Both of these recipes were included in my boxes last year and this year as well. The recipe for the Crinkle cookies is from Fida at Sweet and Savory Pursuits. The chocolate thumbprint cookies came from my archive of recipes and I don’t know who penned the original. They are really good and I like putting a white chocolate striped Hershey’s kiss right in the middle.

img_8124

Holiday Chocolate Crinkle Cookies

Fida- Sweet and savory pursuits

Makes 36-44 depending on size

Ingredients

  • 2 cups all-purpose flour
  • 2 tsps. instant espresso powder optional
  • 2 tsps. baking powder
  • 1/2 tsp. baking soda
  • ½ tsp salt
  • 1 cup unsweetened cocoa powder
  • 1 ½ cups packed light brown sugar
  • 1/2 cup vegetable oil
  • 4 large eggs
  • 1 tsp. pure vanilla extract
  • ½ cup granulated sugar
  • ½ cup confectioners’ sugar

Instructions

  1. In a medium bowl combine the all purpose-flour, espresso powder (if using), baking powder, baking soda and salt. Stir with a whisk and set aside.
  2. In the bowl of your mixer, add the cocoa powder, brown sugar and vegetable oil, blend until well combined.
  3. Add the eggs, one at a time, mixing after each addition.
  4. Add the vanilla extract and blend.
  5. Slowly add the dry ingredients to the chocolate mixture and mix until well blended, being careful not to to overmix the batter.

  6. Cover the bowl with cling film and refrigerate for 4 hours or more. If pressed for time, place covered bowl in the freezer and freeze for approximately an hour and a half. Note: I like leaving the dough overnight in the refrigerator, and refrigerate or put in the freezer between batches. It is a sticky dough and needs to be cold when handling.
  7. When ready to roll the cookies, place a rack in the center of your oven and preheat oven to 350ºF.

  8. Line two baking sheets with parchment paper.
  9. Using a cookie scoop or a tablespoon, scoop a ball of dough out, roll it in your hands and then roll the ball into the granulated sugar before rolling it a second time in powdered sugar.

  10. Place balls of cookie dough about two inches apart on the baking sheet and repeat process until the sheet is full.

  11. Bake in the oven for approximately 10 to 12 minutes. The cookies will look uncooked between the cracks but that is ok, they will set as they cool on the baking sheet. Please see note for explanation on determining time needed for baking cookies.

Recipe Notes

1. If dough sticks to your hands when rolling, just powder your hands with the icing sugar, the dough shouldn’t stick anymore.
2. If dough is still too sticky then you should return it to the freezer or fridge for additional chilling time.
3. At 10 minutes you should have cookies that are still very fudgy inside. If you prefer them more done, leave them in the oven for an extra minute. I found that the cookies I left in for 12 minutes kept a perfectly domed shaped. Those at 10 min sunk in just slightly in the middle. Note: I baked for exactly 11 minutes and they kept the dome shape and were soft and totally delicious.
I recommend baking a few on a tray to see how you like them and what the perfect time is for you before baking the entire batch of cookies.

Itty bitty thumbprint cookies

Itty bitty thumbprint cookies

Chocolate Thumbprints

Makes 36-48 cookies

Ingredients

  • 2 cups all purpose flour
  • 2/3 cup unsweetened cocoa powder
  • 1 cup butter room temperature (soft)
  • 1 cup sugar
  • 1/4 tsp salt
  • 1 egg
  • 1 1/2 tsp vanilla extract
  • 1/4-1/2 cup sugar in bowl to roll cookies in.

In a medium bowl, whisk together flour, cocoa powder, and salt. In a large bowl, using an electric mixer, beat 1 cup each butter and sugar on medium-high until light and fluffy, 3 minutes. Add egg and vanilla; beat to combine. With mixer on low, gradually add flour mixture and beat to combine.  If you do not use all of the cookie dough refrigerate but bring to room temperature before baking. Pre heat oven to 350 degree’s. Use a small scoop (so they are uniform in size) and roll in your hands into a ball, place dough in the bowl of sugar and make sure its completely covered, place on parchment or silpat lined baking sheet. Using your thumb make an indent on top of each ball. You can fit 1 dozen on a baking sheet, cookies should be at least an inch apart. Bake for 8-10 minutes no longer please, it really depends on your oven, when you remove them they will be soft,my first batch I kept in almost 10 minutes the second batch 8 minutes, I like them better when left in for 8 minutes. Remove from oven, let sit for 5 minutes on baking sheet and then place a kiss in the center of each cookies. Place on cooling rack. The kiss will soften but should retain it’s shape.

Another gift box ready to mail

Another gift box ready to mail

Chocolate, Orange And Hazelnut Biscotti

img_7898

I am working on gift boxes, I have sent off several but still have a lot to go, it’s a labor of love and quite a lot of work, the planning, shopping, baking is labor intensive but packaging and sending takes time as well, carefully packaging is so important as you don’t want your baked goods to arrive in pieces. Putting together a box or basket to give as a gift takes planning and careful thought. You want to send things that travel well, items that can withstand a few days in transit without going stale and you must carefully pack so that when the carrier jostles it around it will stay intact. I always send 2-3 day priority mail and tell them it’s “perishable” asking them to stamp that all over the box. So far I have been lucky and everything I have sent arrives in good shape. Knock on wood!!

A work in progress

A work in progress this is going to New Mexico to the winning bidder in a charity auction for a sick pup

Every year I make biscotti, being Italian I grew up on these delightful cookies, they are best when dipped in coffee, milk or Vin Santo or sweet dessert wine. This recipe is from Marisa’s Italian Kitchen, I changed the ingredients just slightly, Marisa’s biscotti have anise seed or extract which I would have loved and thought I had but did not so I left out the anise, and added chopped hazelnuts, other than that I followed the recipe exactly. This recipe caught my months ago and I saved it knowing I would be making biscotti for the holidays, I was looking for a biscotti that is not to hard, light and tender and looking at her recipe I thought that would be what I was looking for, and that is exactly how they turned out. They are delicious, I think adding the almond flour gives them a light as air, crunchy and delicate texture. They are wonderful and thank you Marisa for a great recipe.

Chocolate, Orange And Hazelnut Biscotti

 adapted from Marisa’s Italian Kitchen

1 3/4 cup flour

1/3 cup almond flour

2 tsp baking powder

1/4 tsp salt

3/4 cup chocolate chips

3/4 cup chopped toasted hazelnuts

2 eggs

3/4 cup sugar

1 tbs orange zest

2 tsp vanilla extract

1/3 cup melted butter

1 egg white beaten with fork (to brush on the logs)

Heat oven to 350 degree’s and line a baking sheet with parchment

slightly uneven logs ready for the oven

slightly uneven logs ready for the oven

In large bowl add flours, baking powder and salt and whisk to combine, add the chocolate chips and hazelnuts and stir so that the chocolate and nuts are covered with flour. In a small bowl beat the egg, sugar, orange zest, vanilla and butter. Add to the dry ingredients and using a wooden spoon stir until it’s a cohesive dough (the dough will be a little sticky, don’t add more flour thats the way it should be) Lightly flour a work surface and turn the dough onto it. Divide into 4 equal portions and form each into a log that is between 8-10 inches long. Transfer the logs to the baking sheet, brush with egg white and bake for 20 minutes turning pan halfway through. After 20 minutes remove from the oven and sit the baking sheet on a cooling rack for 10 minutes. Place a log on a cutting board and slice diagonally into about 3/4 inch slices with a sharp serrated knife and place back on baking sheet standing upright for more even baking.

standing upright for even baking

standing upright for even baking

Place back in the oven for 15 minutes. Let cool about 10 minutes on the pan and then remove to cooling rack. NOTE: Timing is important. I baked them for exactly the time outlined in the recipe and I think to achieve these results you have to. I am not one to stick to an exact baking time, I tend to wing it, but with a few recipes I make I have to and this is one of them. 

img_7865


Pumpkin Molasses Dog Cookies

img_7800

Counting down the weeks before Christmas and this year I am making lots of gift boxes, for charity auction winners, family, friends and clients. I go through a huge amount of ingredients, flour, butter, sugar, dried fruit, chocolate etc… I don’t really care to calculate how much goes into this because I’m afraid I would scare myself.

When making gift boxes or baskets I will always include dog treats if the recipient is a pet parent. I posted a recipe for dog biscuits with peanut butter and fruit,  but for the holidays I wanted to do something with more holiday flavors and pumpkin, molasses and a dash of warm spice just screams holidays, at least to me. Why shouldn’t our fur babies have something a little different, special and holidayish.  After doing a little research I determined that molasses in small amounts is not bad for our canine companions and we all know that pumpkin is very very good for them, I didn’t go grain free  for these cookies, but used whole wheat pastry flour which given as a treat and not in large amounts is fine. I found a recipe online for pumpkin molasses dog treats and proceeded to put my own spin on it.

Pumpkin Molasses Dog Cookies

1 cup pumpkin puree

1/4 cup molasses

1/4 cup coconut oil

6 tbs water (more if needed a tbs at a time)

1 large egg

5 cups whole wheat flour or comination of whole grain flours

1/2 tsp baking soda (optional)

4 tsp dried milk

1/4 tsp powdered ginger

1/2 tsp cinnamon

Optional- sprinkle a little coconut palm sugar mixed with cinnamon and ginger on top before baking.

img_7790

Heat oven to 350 degree’s. In small bowl mix together the wet ingredients, pumpkin, molasses, egg, oil and water. In large mixing bowl whisk together the flour, dry, baking soda and spices. Add the wet ingredients and combine until it is a cohesive dough, if you need to add more water do so in small amounts 1 tbs at a time until you reach the desired consistency.

Roll out to about 1/4 inch thick and cut into desired shapes. Bake for approximately 15-20 minutes until lightly browned. Let cool on rack.

Percy ate it but liked the bite of ginger molasses cookies for humans better

Percy ate it but liked the bite of ginger molasses cookies for humans better


Black and White Cookies For Fiesta Friday #127

IMG_3126

Black and White Cookies are an iconic treat made famous in New York City. There are multitudes of articles and opinions of who makes the best. Russ and Daughters, Zabar’s, Glasers, the opinions are as numerous as the number of black and whites in NYC. In doing some research I saw that one theory of origin is that it was was first made in Utica, NY and called “the half moon” (my hometown) at Hemstroughts Bakery (my families favorite bakery). You can see reference to the black and white on one of my favorite Seinfeld episodes and it is thought to be “the New York snack”.  History aside, these are some seriously delicious cookies, or really they are small cakes. The cookie part is like a sponge cake, soft and voluptuous and the glaze is sweet and the perfect topping for this substantial cookie.

I thought I would try my hand at making the “black and white” and studied some recipes and my favorite was one from Epicurious. It seemed very easy to make and the cookies looked wonderful. The recipe makes eight large cookies, now they say to put about 1/4 cup batter 2 inches apart on a large sheet pan, maybe mine was not large enough because some of my cookies ran together. I don’t really care that they are not perfectly round, as long as they taste good. Let me tell you, this is a really good recipe, the cookies are delicious. The cookie came out exactly as it should, flat on the bottom and domed on the top, it has a tender crumb and is very cake like. The glaze is wonderful as well. This recipe is a keeper.

I made these cookies with 2 things in mind, first of all my young cousin who lives in NYC just had surgery and I am going to see her tomorrow, her favorite thing is the black and white so I am bringing some to her. Next I am lucky enough to be co hosting Fiesta Friday #127 this week with the lovely and uber talented Jess @Cooking Is My Sport. You are all invited to the party!!

IMG_3136

Black And White Cookies

Recipe on Epicurious

1 1/4 cup AP flour

1 tsp baking soda

1/2 tsp salt

1/3 cup butter softened to room temperature

1/2 cup sugar

1 egg

1/3 cup buttermilk (I didn’t have buttermilk so I thinned some creme fraiche, worked great)

1/2 tsp vanilla

Preheat oven to 350 degree’s. Whisk together or sift the flour, baking soda and salt.  In your stand mixer with the paddle attachment cream the butter and sugar for about 3 minutes until light and fluffy. Add the egg and beat to combine well. Mix the vanilla with the buttermilk. Add the flour mixture alternately with the buttermilk ending with the flour mixture. The batter is quite thick and I used a heaping 1 1/2 tbs scoop for each cookie. Line your cookie sheet with parchment and spray lightly with cooking spray. (In retrospect I would not bake all 8 cookies at the same time because some of them ran together slightly) place the scoops about 2 inches apart and bake for about 15 minutes (I took them out at 13 minutes). Place cookies on cooling rack and make the glaze.

Vanilla and Chocolate Glaze

1 1/4 cup confectioners sugar

1 tbs clear corn syrup

2 tsp lemon juice

1-2 tbs water

1/4 cup unsweetened cocoa powder.

1/4 tsp vanilla

Mix the sugar, corn syrup, lemon juice and vanilla together. Add water as needed until it’s spreading consistency, it will be thick. The recipe said to divide into two bowls, I didn’t do that. When the coolies were cool I spread the white part with a small offset spatula, when that was done I added to the remaining glaze the chocolate, 1/2 tsp corn syrup and another tbs of water and spread that on the other half of the cookie (it saved me from getting another bowl dirty). Make sure the glaze is set before storing them.

Really good

Really good, quality control, cooks perogative taste testing.

fiesta-friday-badge-button-i-was-featured1


Chocolate Chip Cookies, Not Re-Inventing The Wheel And A Garden


IMG_0910Chocolate chip cookies are iconic, delicious and probably the most made cookie in the US. There are probably as many recipes as there are cookies made, well maybe not but close. I have a couple of recipes that I like to use and they always produce a great cookie. The other day I got an email from King Arthur flour, The Bakers Catalog disecting, demystifying and decoding the chocolate chip cookie.

It is actually a great article with suggestions for different types of cookies from chewy and soft to crisp and crunchy. I decided that I would make her favorite chocolate chip cookie recipe and see what all the hype is about. I was a little put off that it contains some shortening, mind you I have nothing against vegetable shortening but really like my cookies made using only butter for the most part. This uses butter and shortening. The method is also very different,creaming the butter straight from the fridge (love not having to bring to room temp) with shortening, vinegar, baking soda, sugars and vanilla.

The cookies are really fantastic crispy edges with a soft middle. You know that the butter is there but using some shortening gives the cookies a wonderful texture. All in all a really good recipe that I will add to my favorites and will be making again.

Chocolate Chip Cookies

Recipe by PJ Hamel for King Arthur Flour

2/3 cup light brown sugar packed

2/3 cup granulated sugar

1/2 cup, 1 stick, 8 tbs or 4 oz butter straight from the refrigerator

1/2 cup vegetable shortening

3/4 tsp salt or 1/2 tsp if you used salted butter

2 tsp vanilla extract

1 tsp baking soda

1 tsp apple cider or white vinegar

1 large egg

2 cups all purpose flour

2 cups chocolate chunks or chips (I mixed milk and dark chocolate)

In stand mixer fitted with paddle attachment mix the butter, sugars, shortening, salt, vanilla. baking soda, and vinegar until light and fluffy. Add the egg and contine mixing until combined.  Add the flour and mix gently only until the flour is incorporated into the wet ingredients. Remove bowl from stand and mix in chocolate by hand. Refrigerate dough for 1 hour before baking. Pre heat oven to 375 degree’s while dough chills and line baking sheet with parchment or silpat.

Scoop onto baking sheet using a 1 1/4 inch scoop placing each ball about 2 inches apart. Bake for 11-12 minutes edges will be golden brown.

IMG_0872

In closing I wanted to share photo’s of the garden which right now is in full bloom. The flowers are just beautiful and I have hundreds of beautiful fragrant roses, peonies and the annuals that I bought. I am also very excited that my tomato plants are doing well and already have those yellow blossoms.

IMG_0941 IMG_0950 IMG_0952 IMG_0961

Chocolate Madeleines

IMG_1352

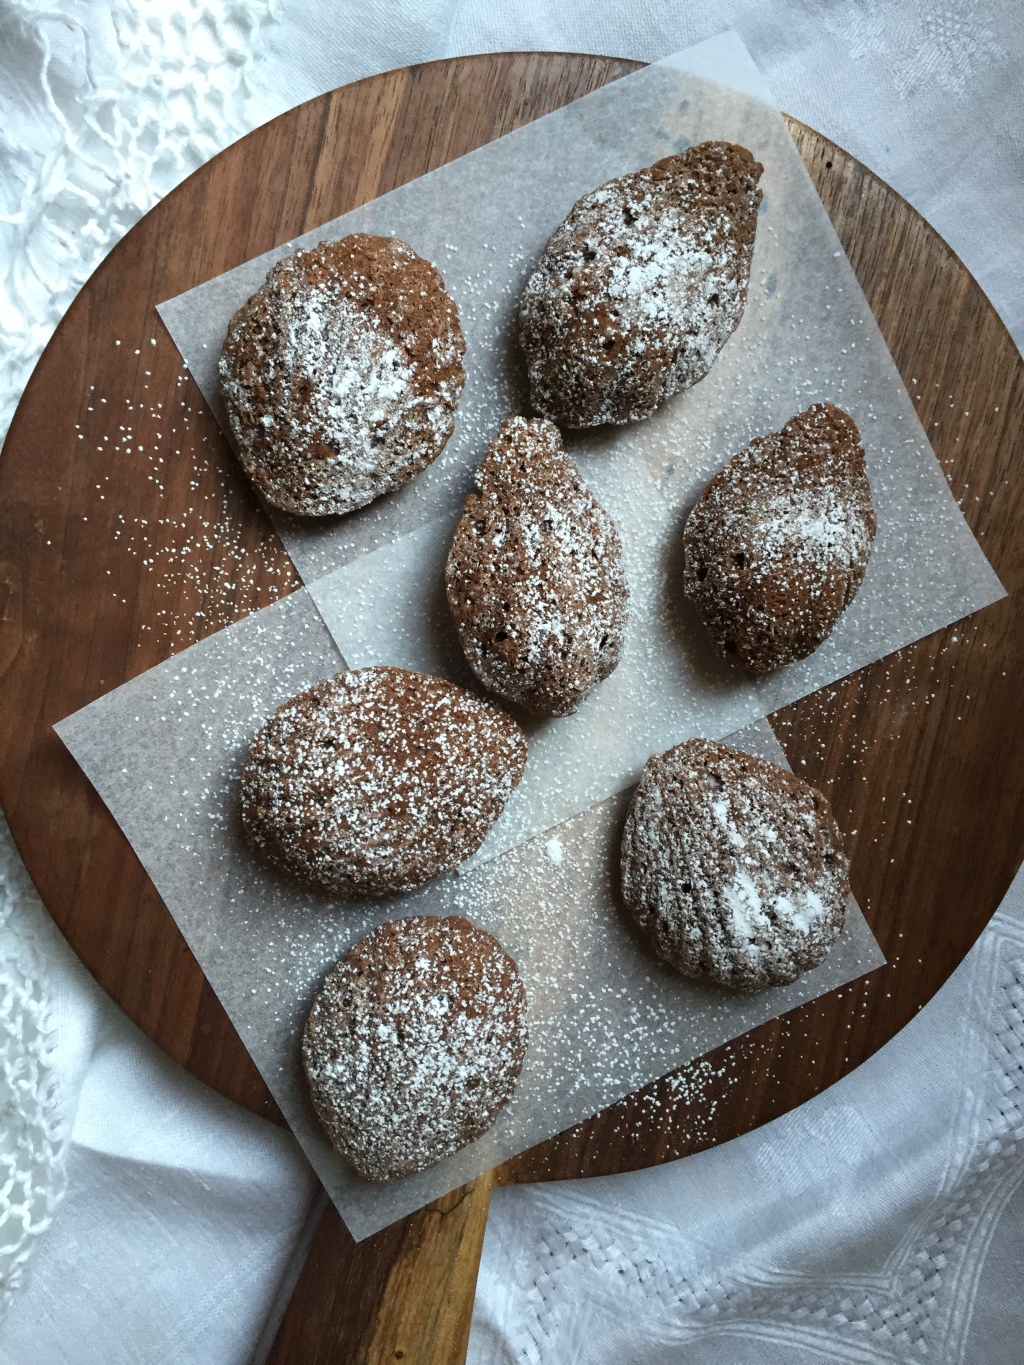
I’ve posted this recipe before, it’s so good it’s worth posting again. The recipe comes from Gale Gand. I love her and have been watching her show, buying her cookbooks and following her recipes for years. The only thing I haven’t done is go to her restaurant in Chicago, Tru, it’s on my bucket list and one day I will.

These madelienes are very simple and always turn out great. I saw her once making these on Martha Stewarts show and she was agast that Gale would add baking powder to madeleines. Gale explained that because of the cocoa being heavy you need a little extra lift and it makes sense. Gale also lightly browns the butter and sieves out the solids for this recipe, it makes a difference trust me.

I made these for several reasons, they are simple and delicious, I just got this oh so pretty madeliene pan at Williams Sonoma and I am bringing these little treats with me Fiesta Friday #109. I had so much fun co hosting last week and this week our lovely co hosts are Josette @ thebrookcook and Lily @ little sweet baker.

Pretty shell pattern

Pretty shell pattern

IMG_1395

Chocolate Madeleines

A recipe by Gale Gand – Makes 2 dozen

1/2 cup, plus 4 tablespoons unsalted butter softened, for buttering madeleine molds
3 large eggs
1/2 cup granulated sugar
2 tablespoons packed dark-brown sugar
1 cup cake flour (not self-rising)
1/4 cup cocoa powder, preferably Dutch-processed
1 1/2 teaspoons baking powder
1/8 teaspoon salt
1 tsp vanilla extract

Preheat oven to 325 degrees. Brush madeleine pans well with 4 tablespoons softened butter; refrigerate 5 minutes.
In a small heavy-bottomed saucepan, melt remaining 1/2 cup butter over medium heat. Continue to cook until butter turns golden brown, being careful not to let the butter burn. Remove from heat and strain through a fine mesh sieve into a small bowl; set aside.
In the bowl of an electric mixer fitted with the whisk attachment, whip eggs with granulated and brown sugars until light and thickened, 3 to 5 minutes. Add flour, cocoa powder, baking powder, and salt, and stir on low speed until combined. Add vanilla and reserved browned butter; mix just until blended.
Insert a 1/2-inch plain tip into a pastry bag and fill with batter. Pipe mounds of batter into prepared pans until each mold is full, mounding batter in the center of the molds but not filling to the edge. Alternatively, you can use a teaspoon to fill the molds with batter (which is what I did). Bake until madeleines are firm and a little mound is puffed up in the middle, 10 to 12 minutes. Madeleines are best eaten the same day they are baked.

Light and elegant

Light and elegant

fiesta-friday-badge-button-i-was-featured1

Happy New Year, Some Favorites And 2015 in review

Taken from Pinterest

Taken from Pinterest

I wish each and everyone of you an amazing, healthy, happy, joyous and prosperous 2016. I want to thank you all for being such great friends, for leaving such uplifting and kind comments and for being my source of inspiration. Below is the report compiled by the WordPress helper monkey’s. I don’t really keep track of the stats, but do appreciate the work that WordPress puts into these reports, thank you to the good people at WordPress!! Both 2014 and 2015 were hard years for me, harder than I can even express. The start of a new year brings with it hope and we also reflect on the past year, the good and the bad, the sad and the happy, triumphs and failures. Life can sometimes be like a rollercoaster ride.

Going into my 4th year of blogging in January is quite momentous for me. I can’t believe I am still doing this,  have made such great friends and learned so much. Hope you all have a wonderful time on New Years Eve and joyously welcome 2016, peace, love and joy to all. Below are some photo’s I compliled with some of my favorite dishes both sweet and savory.

Savory favorites

Savory favorites

Baked, desserts and the epic biscuit!

Baked, desserts and the epic biscuit!


The WordPress.com stats helper monkeys prepared a 2015 annual report for this blog.

Here’s an excerpt:

The concert hall at the Sydney Opera House holds 2,700 people. This blog was viewed about 37,000 times in 2015. If it were a concert at Sydney Opera House, it would take about 14 sold-out performances for that many people to see it.

Click here to see the complete report.

Crinkle Cookies, Decorating And More Stuff

I have no idea where time is going, it’s already the end of the week, Christmas is a week from today. I haven’t really done anything except make a few gift baskets, I still have so much to do, I am way behind schedule.  Honestly, this year is very hard, I am trying, but my heart is not in it. I did sign up for Secret Santa/Wino on a wine blog I follow, The Drunken Cycalist and got a lovely gift.  Jeff organzes this every year and this time I decided to participate. It was fun and I get to try some great wine. Thank you to Allison who sent me this wonderful gift. I have not opened the wine yet, waiting to make the right meal to pair with. That prickly pear jelly is so good, must find it.

Secret Santa gift

Secret Santa gift, wine, sausage, candy, jelly

I have been baking, I made some gift baskets, have a few more to make, had our block association Holiday party and baked for that also. Last year I made fruit cakes and loved the recipe so I made them again this year, I really soaked them with the reserved cognac syrup. So delicious.

fruit cakes

fruit cakes

Made some thumbprints, again same recipe as last year. They are delicious.

Chocolate thumbprint

Chocolate thumbprint

IMG_8512

I am adding some cookies to my holiday repertoire I mentioned the biscotti in a previous post along with Pecan Chewiess and Vanilice. I also decided to make chocolate crinkle cookies. I think they look so beautiful and I love anything chocolate. They turned out so good, it’s another recipe from Fida at Sweet and Savory Pursuits. The cookies are as light as a feather and so delicious, I have linked to the site so you can try the recipe, It’s wonderful. I also made my cardamom, orange and chocolate ribbon cookies.

Packing the cookies

Packing the cookies

Last but not least I started to decorate, I dragged multiple boxes of decorations upstairs and started unpacking and one of the first things I came across were Izzy and Nando’s Holiday Stockings. It made me so sad,  I hung them on the mantle like I do every year. My sweet little dogs will always be with me in spirit.

decorated mantle

decorated mantle.

I hope you all have a great weekend and get all of your holiday shopping, baking and decorating done.  Are you the very definition of organization and efficiency? Have you done all of your shopping and decorating or do you make a mad rush to finish it all just in the knick of time?