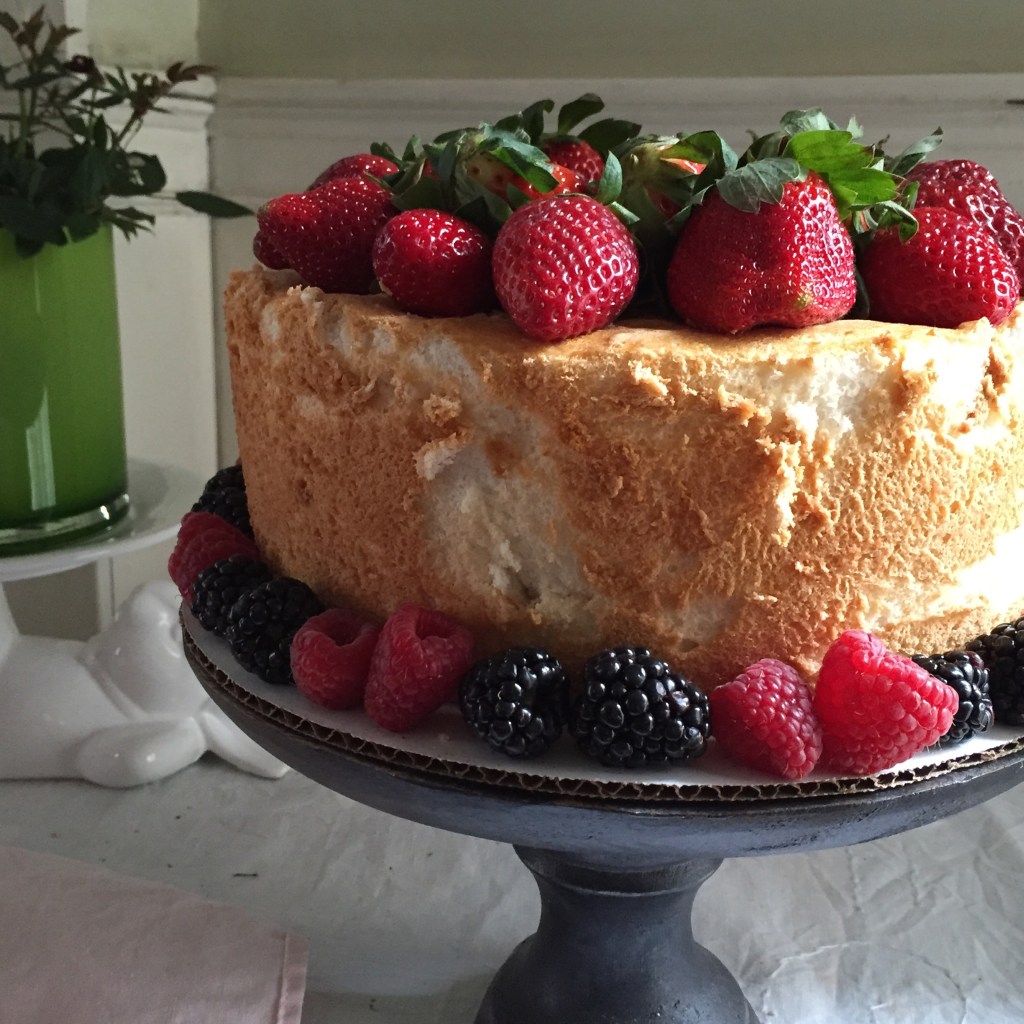
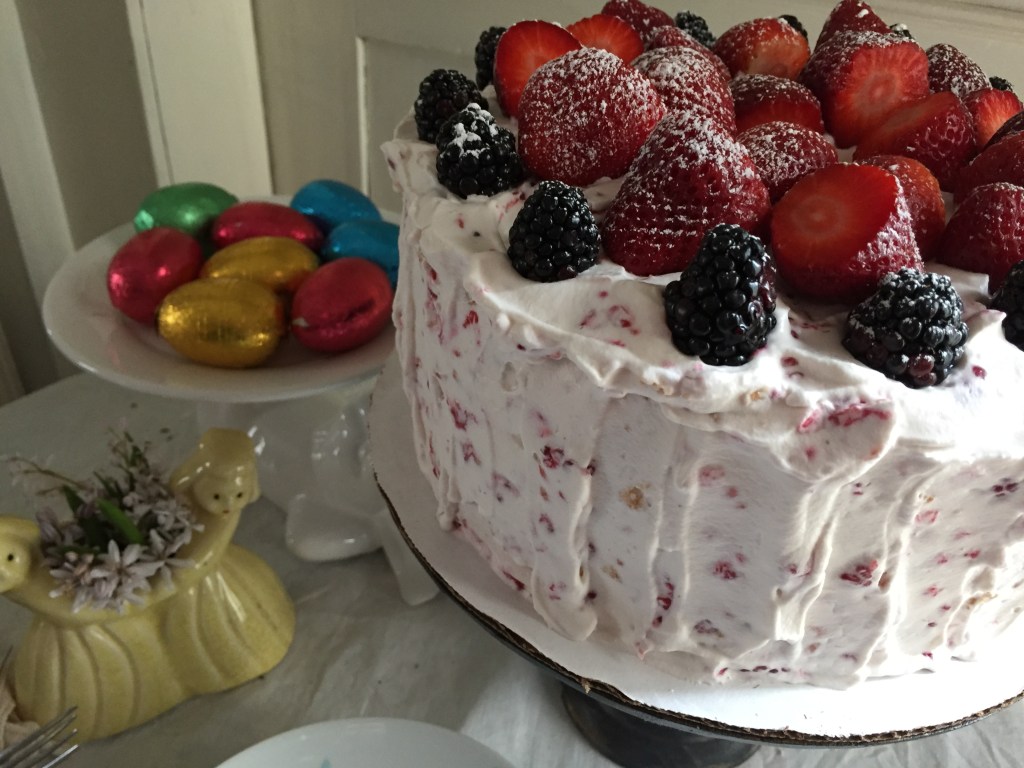
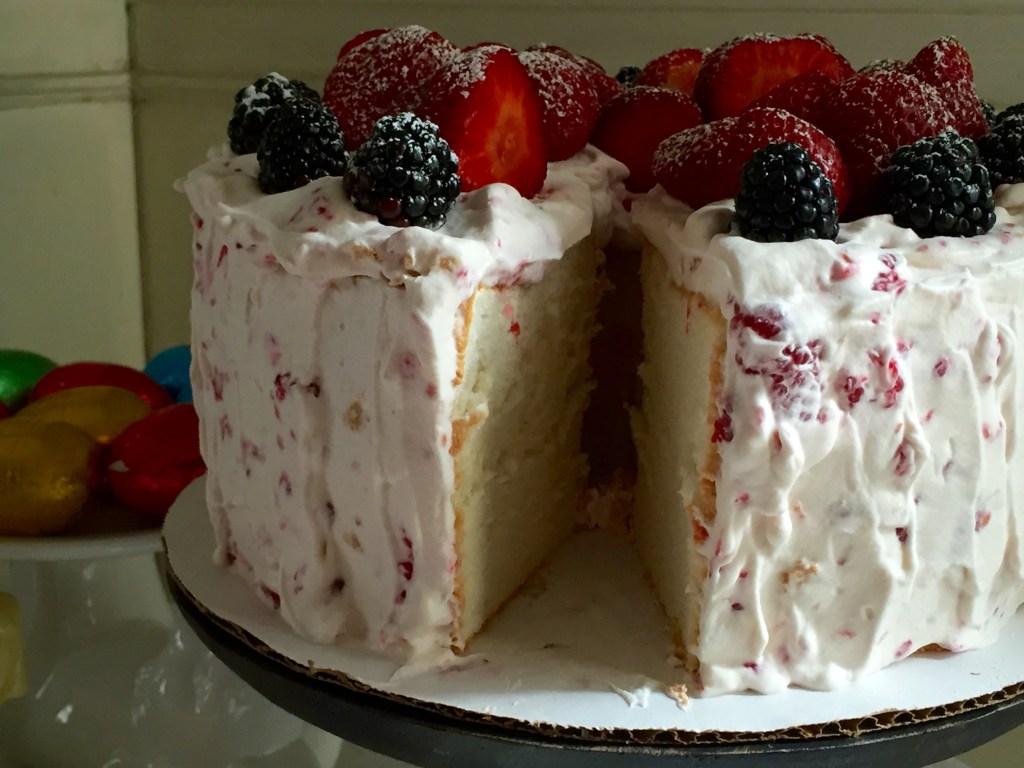
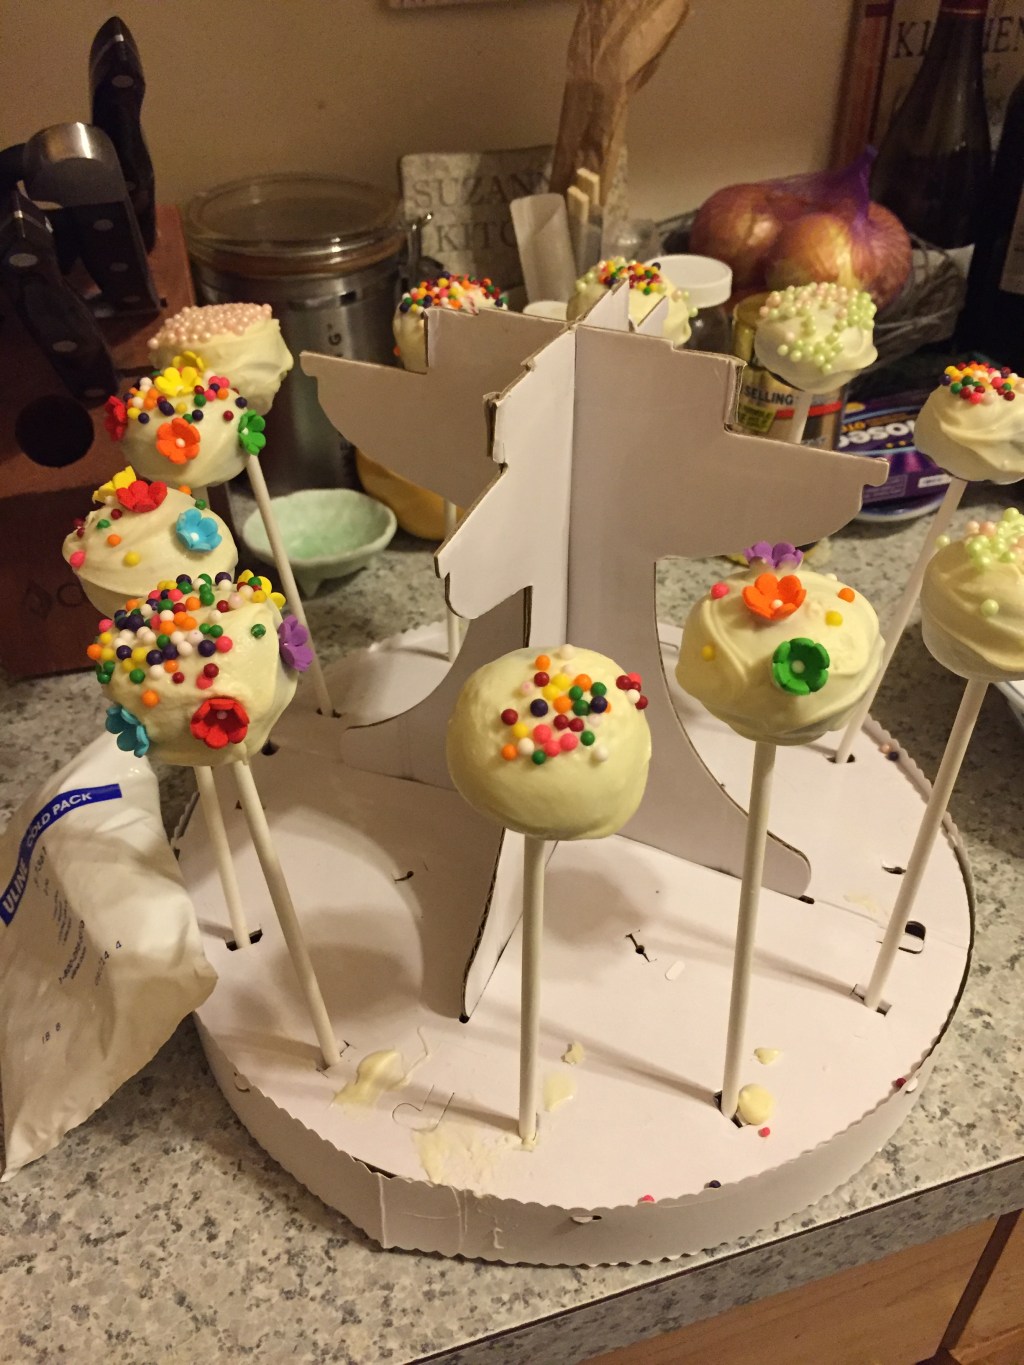
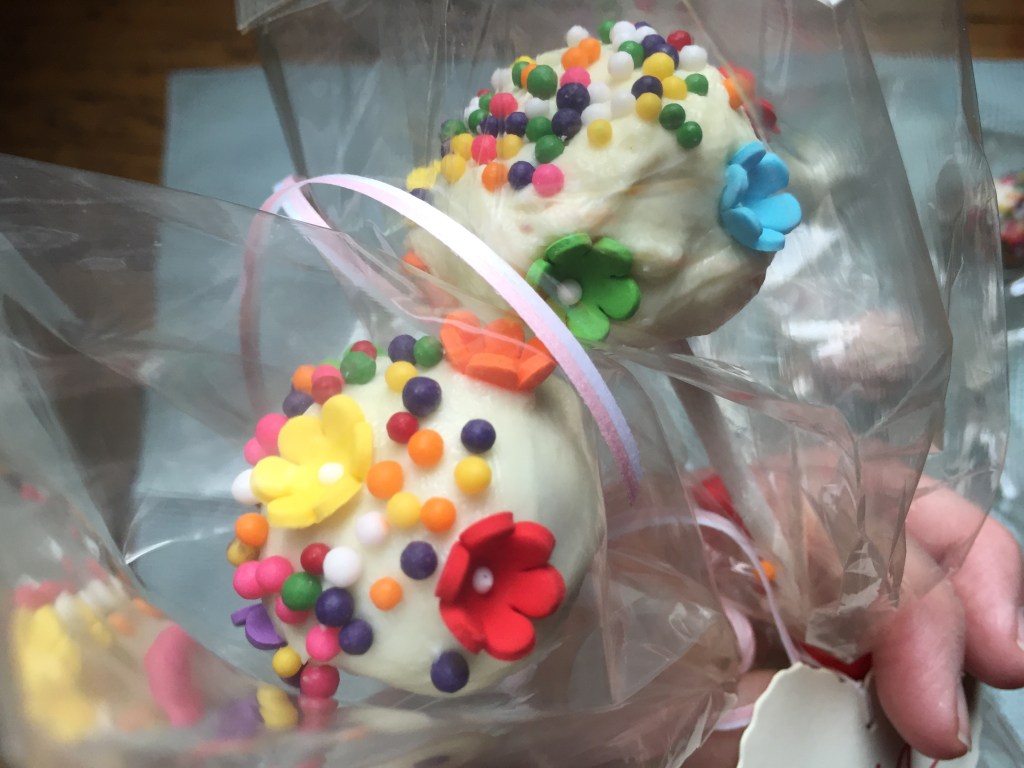
Skip to content

Archive for

Happy Easter Cake

IMG_2331

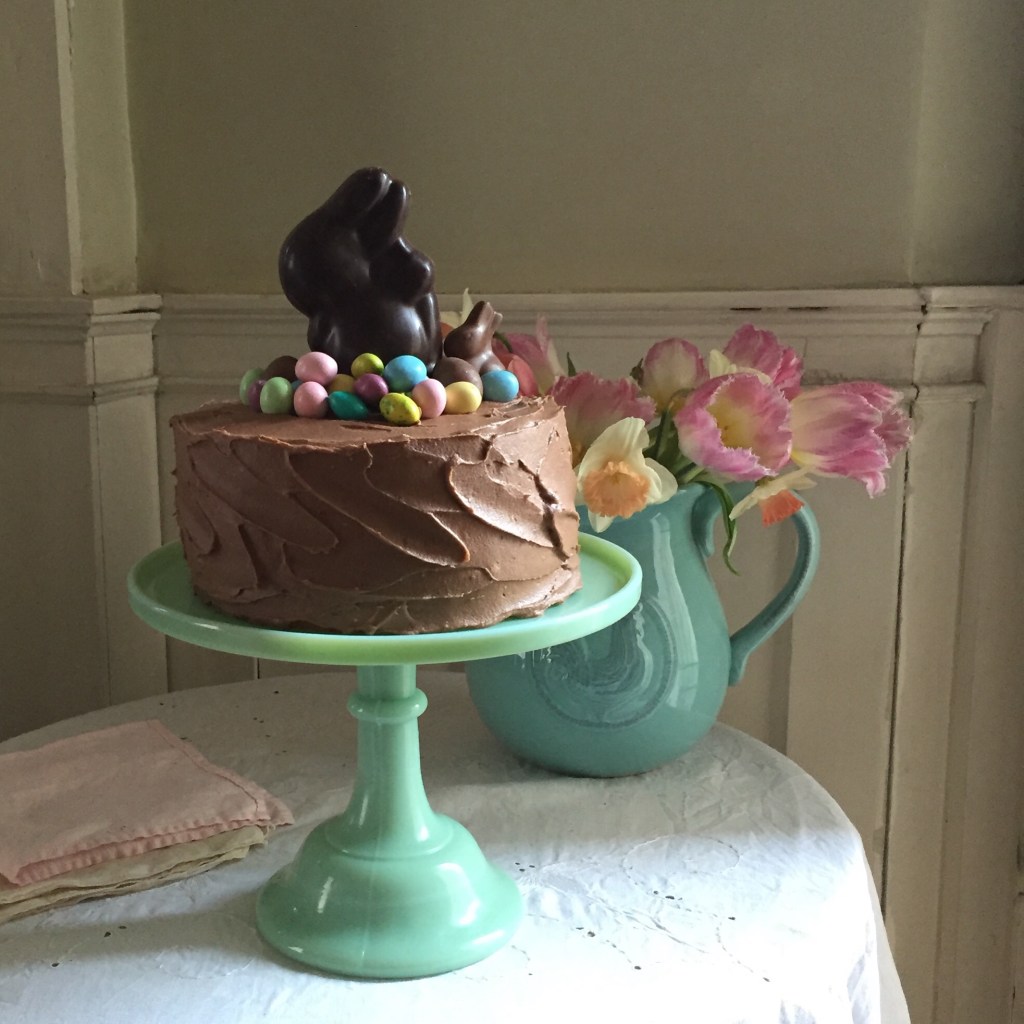
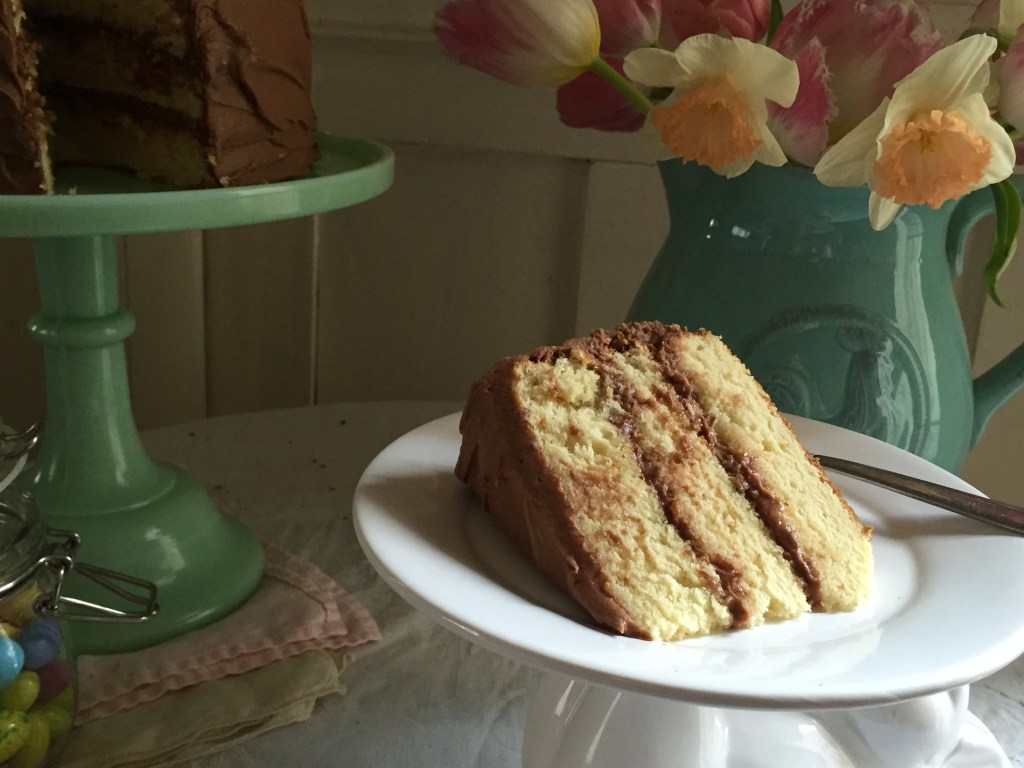
This is one of my favorite cakes ever. Nothing fancy, yellow cake with chocolate frosting. I don’t know what it is about the combination but I love it. Yellow cake with chocolate frosting and chocolate cake with white frosting are both divine. This cake recipe is one my Mother developed for me when I was just a little girl. I have made a couple of very minor changes but really it is exactly as my Mom wrote it. I remember this cake in several variations growing up, my favorite and most requested was Boston Cream Pie.  The cake does not contain butter but vegetable oil and the eggs are separated and the whites beat until billowy and folded into the batter. The resululting cake is moist and flavorful and very very light. Because I was not using a fruit filling for this cake I gave it a little bit of soaking syrup before frosting, I made a tangerine simple syrup and dabbed it on each layer.

The frosting is a variation of a recipe for Chocolate Cream Cheese Frosting by Chef Amy@Come Cook With Me a I hope everyone is having a great day, spending time with friends and family a very Happy Easter to all from Percy and me!!

Tender Yellow Cake

Makes two 9 inch layers or 24 cupcakes

3 large eggs separated and at room temperature
1 1/2 cup sugar divided
2 1/4 cups cake flour
3 teaspoons baking powder
1 teaspoon salt
1/3 cup + 1 tbs vegetable oil (I use canola)
1 cup whole milk (1 or 2% work also)
1 1/2 teaspoon pure vanilla extract
Pre-heat oven to 350 degrees

Line your pans with a parchment round, butter the bottom of the pan, lay the parchment then butter again on bottom and sides and then flour the pans.

Beat egg whites until frothy then add 1/2 cup of the sugar (reserving the rest) a tablespoon at a time until egg whites are stiff and glossy

Sift flour, remaining 1 cup sugar, baking powder and salt into large mixing bowl or bowl of a stand mixer. If using a stand mixer use the paddle attachment.I actually prefer to use my hand held mixer for this recipe. Add the oil, the milk, the egg yolk and the vanilla. Beat for 2 minutes on medium speed, mixture will be quite thick. Fold in the beaten egg whites.

Pour the batter into the prepared pans dividing evenly, bake for 30-35 minutes. Cake will be golden brown. Be careful not to overbake start checking the cake at 30 minutes. Cake tester will come out clean.

Note: I made 3 8 inch layers baking time is approximately 25 minutes.

Let cool in pans for 10 minutes then turn out onto cooling rack remove parchment and cool completely before frosting.

IMG_2330

Chocolate Buttercream

8 oz cream cheese softened at room temperature

8 oz mascarpone softened to room temperature

8 oz unsalted butter softened to room temperature

6 oz dark chocolate melted

3 tbs unsweetened cocoa powder

3 -3 1/2 cup confectioners sugar

2 tsp vanilla extract

Cream butter, mascarpone and cream cheese until light and fluffy, add the confectioners sugar a cup at a time beating betweeen each addition. Add the melted chocolate and cocoa powder and vanilla and whip until completely incorporated. Frost the cake immediately.

Happy Easter from Percy and me!

Happy Easter from Percy and me!

Hot Cross Buns And New Food52 App

IMG_2158

This recipe comes from The Bakers Catalogue/King Arthur Flour. I am working my way to Easter and Hot Cross Buns are an Easter tradition for many. I have never made them before, I’ve bought and eaten them and love them but never tried making them myself. This recipe sounds easy enough, I love the boozy fruit in the buns and am a sucker for that sweet cross on the top of the bun.

They turned out just beautiful, soft and pillowy, they smell amazing and have a very good rise. They are really delicious and made only a few minor changes mainly with the dried fruit and the soaking liquid and they turned out so good that I will do it again just as I made them.

On a completely unrelated topic, Food52 launched a new app for ipad and iPhone that I am having so much fun with, it’s all about cooking without a recipe or #notrecipes. Half of what I make does not involve a recipe except for baking. It’s a fun app, you interact with other cooks and there are great food52 contests as well. Try it out, it’s very cool, a real source of inspiration and it’s free.

Hot Cross Buns

Recipe from King Arthur Flour

Makes 12-14 buns

Buns 

  • 1/4 cup apple juice or rum(I used Poire William)
  • 1/2 cup mixed dried fruit(apricots, golden raisins, cherries,cranberries,pears)
  • 1/2 cup raisins or dried currants(didn’t use currants used golden raisins)
  • 1 1/4 cups milk, room temperature (Used 2% but recommend whole milk)
  • 3 large eggs, 1 separated
  • 6 tablespoons butter, room temperature
  • 2 teaspoons instant yeast
  • 1/4 cup light brown sugar, firmly packed
  • 1 teaspoon ground cinnamon
  • 1/4 teaspoon ground cloves or allspice (I used allspice)
  • 1/4 teaspoon ground nutmeg
  • 1 3/4 teaspoons salt
  • 1 tablespoon baking powder
  • 4 1/2 cups King Arthur Unbleached All-Purpose Flour

Topping

  • 1 large egg white, reserved from above
  • 1 tablespoon milk

Icing

  • 1 cup + 2 tablespoons confectioners’ sugar
  • 1/2 teaspoon vanilla extract
  • pinch of salt
  • 4 teaspoons milk, or enough to make a thick, pipeable icing (It was very thick but was better thick than too thin)

Directions

  1. Lightly grease a 10″ square pan or 9″ x 13″ pan. (I used a sheet pan lined with parchment)
  2. Mix the rum or apple juice with the dried fruit and raisins, cover with plastic wrap, and microwave briefly, just till the fruit and liquid are very warm, and the plastic starts to “shrink wrap” itself over the top of the bowl. Set aside to cool to room temperature. Note: If you worry about using plastic wrap in your microwave, simply cover the bowl with a glass lid. I don’t microwave plastic at all, heated in a saucepan, poured into a bowl, covered and sat aside.
  3. When the fruit is cool, mix together all of the dough ingredients except the fruit, and knead, using an electric mixer or bread machine, till the dough is soft and elastic. Mix in the fruit and any liquid not absorbed.
  4. Let the dough rise for 1 hour, covered. It should become puffy, though may not double in bulk.
  5. Divide the dough into billiard ball-sized pieces, about 3 3/4 ounces each. A heaped muffin scoop (about 1/3 cup) makes about the right portion. You’ll make 12 to 14 buns. Use your greased hands to round them into balls. Arrange them in the prepared pan.
  6. Cover the pan, and let the buns rise for 1 hour, or until they’ve puffed up and are touching one another. While the dough is rising, preheat the oven to 375°F. Now this is not included in the recipe but I saw several that all do this, with a knife or razor blade slice a cross on top of each bun, not a deep cut really just the surface only.
  7. Whisk together the reserved egg white and milk, and brush it over the buns.
  8. Bake the buns for 20 minutes, until they’re golden brown. Remove from the oven, and transfer to a rack to cool.
make sure they cool completely before adding the cross

make sure they cool completely before adding the cross

  1. Mix together the icing ingredients, and when the buns are completely cool, pipe it in a cross shape atop each bun.
These hot cross buns are delicious.

These hot cross buns are delicious.

Happy First Day Of Spring An Angel Food Cake To Celebrate

Angel Food Cake

Angel Food Cake

It’s the first day of Spring and guess what, in NYC we are waiting for a snow storm, kind of dismal so to cheer myself up I made an Angel Food Cake, which is one of my all time favorites, I love how light it is, that it’s fat free and so moist. I usually serve it simply with berries and whipped cream or if I make cupcakes I will sometimes frost with a chocolate swiss meringue buttercream. This cake is perfect for spring and summer when berries are in season and plentiful. It’s a little early for berries at the farmers market but the berries I got in the supermarket weren’t bad. I have been making this cake recipe for years, It’s from James McNair’s “Cakes”. I love his cookbook the angel food and chiffon cakes are the best and always consistently good. I made a raspberry whipped cream frosting and decorated with fresh berries.

I am bringing this cake to Fiesta Friday #111 this week. A super light cake with loads of assorted berries and gently sweetened whipped cream makes a lovely dessert. This week Angies wonderful co hosts are Naina @ Spice in the City and Julianna @ Foodie On Board.

IMG_1890


Angel Food Cake

Recipe by James McNair from his book “Cakes”

1 cup cake flour

1 1/2 cup granulated sugar divided

1/4 tsp salt

2 cups egg whites at room temperature (approximately 16 large eggs)

2 tsp cream of tartar

zest of 1 lemon

1 tsp vanilla extract

Pre heat oven to 325 degrees. No need to prep your pan all you need is a 10 inch tube pan with removable bottom and feet (so you can invert while cake cools). Sift flour, salt, and 3/4 cup sugar and set aside. In stand mixer with whisk attachment start whipping the egg whites, when they are frothy add the cream of tartar increase speed to medium high and whip until the egg whites are billowy and form soft peaks. Add the remaining 3/4 cup sugar a little at a time (about a tbs) whip until the egg whites form stiff peaks being careful not to overwhip. It takes about 5-6 minutes, now add the lemon zest and vanilla. Remove the bowl from the mixer and gently fold in the dry ingredients with either a spatula or balloon whisk in 3 increments making sure that all the dry ingredients are incorporated. Spoon into tube pan, smooth the top and bake for approximately 50 minutes. Cake will be golden brown and springy when touched.

Invert cake pan so it is standing on the feet, if your tube pan does not have feet you can invert onto a wine bottle. Let cool completely approximately 1 1/2 -2 hours. To remove cake run flexible offset spatula around the edge of the pan and around the tube. Gently remove the cake by pushing the tube part. When the cake is out of the pan you can free it from the tub by running  a spatula or butter knife along the bottom of the tube, the cake will come off and you can place on serving dish.

Frosted Cake

Frosted Cake

Raspberry Whipped Cream Frosting

2 cups heavy cream very cold and divided

1/2 cup powdered sugar

2 tsp corn starch

1 tsp vanilla

1/2 pint fresh raspberries mashed.

Place 1/2 cup of the heavy cream in a small saucepan, add the cornstarch and powdered sugar and whisk so there are no lumps. On medium heat stirring constantly stir or whisk the cream mixture until it thickens, it is like pudding, spoon into a bowl and let cool to room temperature stirring occasionally.

While the stabilizer is cooling place whisk attachment and bowl of mixer in the freezer to get cold. When it’s sufficiently cold add the cold cream, stabilizer, and the vanilla. Whip until thick and spreading consistency. Gently fold in the raspberries and frost the cake immediately.

IMG_1980 IMG_2004


fiesta-friday-badge-button-i-was-featured1


A Pi Day Surprise

7F6F57E3-E6A9-402E-9451-3E17F2B5851A

Yesterday was Pi Day, to celebrate Pi we cooks and food lovers take just a little liberty and make it all about Pie. Now I just love pies, fruit pies, cream pies, tarts, galettes, savory tarts and pies. They are all good. I love making pastry crust, I always have frozen pie dough in the freezer in case I need it.

I was busy, lots going on with work. I didn’t check my spam folder as I normally do every day until later in the afternoon and when I did I saw an email from Kate at Food52, she wondered if I would be home today between 1-5PM, they wanted to deliver a surprise. Honestly, I was flabbergasted and intrigued. I love surprises and rarely get one. At 5PM on the dot one of the Food 52 staff hand delivered this pie in this amazing pie box (which I have been meaning to order and now I need to get another one or 2), how cool is that? It made me feel really really good, they thanked me for being a long time member, it made me feel so special. Thank you Food52 for making my day!! Oh and I can’t forget to mention the pie was a salted honey pie, with an amazing flaky buttery crust. SO DELICIOUS!! I ate way too much pie!!

Pi Day Surprise

Pi Day Surprise

I also want to update everyone on sweet Percy, he is doing really really good. He was a little under the weather yesterday, I think it was the rain and cool temps but today he is doing great. He is very happy in Brooklyn and has adjusted to his new life, made lots of doggie friends and is getting to know his neighborhood.

Rolling in the grass

Rolling in the grass

Handsome boy

Handsome boy

Horrible Evil Cake Pops For Fiesta Friday #110


cake pops

cake pops

I seriously doubt I will ever recover from the trauma of making cake pops. When I got a request to make cake pops for a childs birthday bash at school I thought gee, how hard could that be? She wanted oreo cake pops and honestly I was excited to make them thinking this will be a breeze, no baking, crush the cookies, dip them in white chocolate sprinkle with decorations and call it a day. I ambitiously said I would do 2 per child which would be 64 pops. I totally underestimated how challenging it would be to make these things. I bought these adorable Wilton cardboard cake pop stands, lots of decorations, tall sticks and was ready to make those pops. I read recipes online and watched video’s showing just how simple it is to make. Simple to make, yes, executing a successful cake pop was a challenge.

Cake pop stand assembly required

Cake pop stand assembly required and it didn’t work

I am bringing these cake pops with me to Fiesta Friday#110. This weeks co hosts are  Jhuls @ The Not So Creative Cook and Apsara @ Eating Well Diary

Back to the cake pops, I bought way too many oreo’s which will promptly be given away, the recipe calls for 1 package of oreo’s and 1/2 cup softened cream cheese to bind it. You crush or process the oreo’s so that they are like flour (I left some bigger crumbs for interest) add the cream cheese and it will become a cohesive dough. Scoop out some roll with your hands into a round and refrigerate. While they are in the refrigerator melt a little white chocolate to dip your stick in before inserting into the cake pop. Everything was going well at this point. I actually made 72 cake pops. The problem arose when I was finishing them. I melted some white chocolate over simmering water, got the cake pops out of the refrigerator. I noticed some cracks in some of them and smoothed them. The very first one I dipped in the thick warm chocolate fell off the stick and broke in half, hmmmmm…. I didn’t let that discourage me did it again. same thing.

The carnage

The carnage

To make a long story short (er) it was pretty bad, I managed to get 32 cake pops with many disasters that went straight into the circular file. I was not able to use the cardboard stands because they would not fit together properly and the sticks were too tall anyway I used the bottom of it to stand the pops so the coating could dry. You have to be careful not to let it get too hard because the decorations won’t stick or do it too soon because the weight of the decorations causes the coating to run. I did manage to get some cute ones placed them in cellophane bags and off they go.

drying on the stand

drying on the stand

cute

cute

If I ever do cake pops again I will not use oreo’s I think it would have worked much better with crumbled cake mixed with buttercream like Starbucks cake pops. It will be a long time before I attempt this again if ever. I will probably stick to cupcakes and cookies.

fiesta-friday-badge-button-i-was-featured1


Guest Post- Falafel By Elaine From Foodbod

Beautiful Elaine and her sweet Bob

I love this photo of beautiful Elaine and her sweet Bob

I feel so very lucky to know so many lovely and talented people. When I think about some of the exceptional cooks/bloggers that have agreed to do guest posts here I am honored and so very happy to present them to all of you that stop by for a read. This blogger/cook and amazingly talented woman is one of my favorite people, she can make a die hard vegetable hater a veggie lover. Elaine’s gorgeous blog Foodbod is one that I have followed for a few years now, I love her recipes like this Middle Eastern Aubergine or her wonderful sourdough bread.  She inspires with her creativty, amazes with her talent and I like to call her the vegetable whisperer, she can coax incredible flavor from the most humble of vegetables by adding a little of this and that and when she pulls that tray out of the oven you know the master has done her magic I know most of you know her and if you don’t please visit her blog and read about Elaine and how her mission to eat healthful and delicious food came about, you will love it as much as I do, I guarantee it. Take it away Elaine…..

What can I say about the lovely Suzanne that hasn’t already been said by her previous guest posters?? Nothing really, they’ve said it all so beautifully, I’ll just be repeating things..but hey, who cares?!

Suzanne is such a constant, supportive and complimentary food blogger; she always has time to visit and comment on people’s posts, and is always positive and interested in what people have cooked, asking questions, giving suggestions and being a lovely friend. And Suzanne is such a gifted cook that I always feel honoured when she likes my food, so I was happily surprised, and honoured, when she asked me if I would like to put together a guest post for her…I hope she likes it, and that her readers do too 🙂

The fact that we share a love of dogs only makes me like her more xx

I wanted to push myself and create something new for Suzanne so I bring you:

the joy of a homemade falafel mix..

img_1534

Falafels are a middle eastern ‘pattie’, typically made with dried soaked chickpeas and they tend to be deep fried; they are very much middle eastern street food. I love falafels and, in particular, I love the flavours in the mix of ingredients and like applying it to other dishes. On this occasion I decided to experiment with fava beans, which are dried broad beans, in place of dried chickpeas – whichever you choose, do not use the cooked or canned versions; the success of falafels comes from using dried & soaked pulses, that all adds to their crunch. I have also oven baked my falafels which I think works well, but that’s not all, read on…

The mix:

Ingredients

250g dried split fava beans, placed in a large bowl of water and soaked overnight

1 medium red onion, peeled and roughly chopped

2-3 garlic cloves, peeled

1 bunch flat leaf parsley

1 tsp ground coriander

1 tsp ground cumin

1/4 cayenne pepper (optional)

Juice of 1 lemon

Salt to taste

Flour of your choice as needed

Method

Wash and drain the fava beans

Put everything EXCEPT the flour in a blender and chop to a chunky crumb

At this point I stored the mixture in a wrapped bowl in the fridge and let the flavours develop, then started to make things with it over the next few days. You could use it immediately depending on your plans.

My first use of the mixture creates a lovely brunch, lunch or dinner..a falafel crunch with spinach and eggs..

img_1464

Put about a quarter of the falafel mixture in a pan with melted coconut oil, over a medium heat. As you cook it, turn it all over every so often, and it becomes lovely and crunchy and browned.

Once cooked, add a handful of baby spinach leaves, and once that is cooked without becoming mushy, make some spaces in the mix and cook eggs into the mix.

A sprinkle of grated cheese finishes it all off perfectly.. I ate mine directly from the pan – saves on washing up!!

img_1461

For a other idea, how about a falafel quinoa goodness bowl?

First, spoon about a quarter of the falafel mixture again into a pan with olive oil over a medium heat.

img_1467

Start to cook it through then add several spoons of cooked quinoa.

img_1469

Cook the mixture until the fava beans are cooked and the mixture starts to crisp slightly.

This creates a lovely dish of tasty goodness on its own, perfect for me for lunch with some homemade dips.. …

img_1473 img_1476 img_1478

or you could use it as a side dish or in place of something like rice. Or again add some eggs to the dish, or your choice of meat or fish.

And finally..the actual falafels..

img_1537

These falafels are oven baked; I’ve never deep fried my falafels so I can’t tell you how well it does or doesn’t work, but I can tell you that they are very good when baked..

A quarter of the mixture formed 6 falafels

Add 1-2 tablespoons of flour (I used spelt flour but any all purpose plain flour will do) and bring the mixture together with your hands, it will create a ‘dough’

I use a falafel press to create my patties but you could easily split the mixture into 6 and create balls then flatten them to discs

Brush olive oil on both sides and place on parchment paper on baking tray

Bake at 200C for 10 minutes then turn them all over and bake for another 10 minutes

img_1547

They come out lovely and crunchy 🙂

I enjoyed mine wrapped in lettuce leaves with tahini sauce and homous.

img_1544-1

In the Middle East falafels would typically be served in flat bread wraps with salad and tahini sauce so the lettuce formed my ‘bread’.

I hope you like my falafels and other ideas for the mix. I think it could also be utilised as a ‘crumble’ topping over a lovely dish, or as a crumb on a piece of fish or meat. The possibilities are endless!

Thank you again to Suzanne for inviting me to appear on her lovely blog, I hope you all enjoyed a bit of my world 🙂

Chocolate Madeleines

IMG_1352

I’ve posted this recipe before, it’s so good it’s worth posting again. The recipe comes from Gale Gand. I love her and have been watching her show, buying her cookbooks and following her recipes for years. The only thing I haven’t done is go to her restaurant in Chicago, Tru, it’s on my bucket list and one day I will.

These madelienes are very simple and always turn out great. I saw her once making these on Martha Stewarts show and she was agast that Gale would add baking powder to madeleines. Gale explained that because of the cocoa being heavy you need a little extra lift and it makes sense. Gale also lightly browns the butter and sieves out the solids for this recipe, it makes a difference trust me.

I made these for several reasons, they are simple and delicious, I just got this oh so pretty madeliene pan at Williams Sonoma and I am bringing these little treats with me Fiesta Friday #109. I had so much fun co hosting last week and this week our lovely co hosts are Josette @ thebrookcook and Lily @ little sweet baker.

Pretty shell pattern

Pretty shell pattern

IMG_1395

Chocolate Madeleines

A recipe by Gale Gand – Makes 2 dozen

1/2 cup, plus 4 tablespoons unsalted butter softened, for buttering madeleine molds
3 large eggs
1/2 cup granulated sugar
2 tablespoons packed dark-brown sugar
1 cup cake flour (not self-rising)
1/4 cup cocoa powder, preferably Dutch-processed
1 1/2 teaspoons baking powder
1/8 teaspoon salt
1 tsp vanilla extract

Preheat oven to 325 degrees. Brush madeleine pans well with 4 tablespoons softened butter; refrigerate 5 minutes.
In a small heavy-bottomed saucepan, melt remaining 1/2 cup butter over medium heat. Continue to cook until butter turns golden brown, being careful not to let the butter burn. Remove from heat and strain through a fine mesh sieve into a small bowl; set aside.
In the bowl of an electric mixer fitted with the whisk attachment, whip eggs with granulated and brown sugars until light and thickened, 3 to 5 minutes. Add flour, cocoa powder, baking powder, and salt, and stir on low speed until combined. Add vanilla and reserved browned butter; mix just until blended.
Insert a 1/2-inch plain tip into a pastry bag and fill with batter. Pipe mounds of batter into prepared pans until each mold is full, mounding batter in the center of the molds but not filling to the edge. Alternatively, you can use a teaspoon to fill the molds with batter (which is what I did). Bake until madeleines are firm and a little mound is puffed up in the middle, 10 to 12 minutes. Madeleines are best eaten the same day they are baked.

Light and elegant

Light and elegant

fiesta-friday-badge-button-i-was-featured1