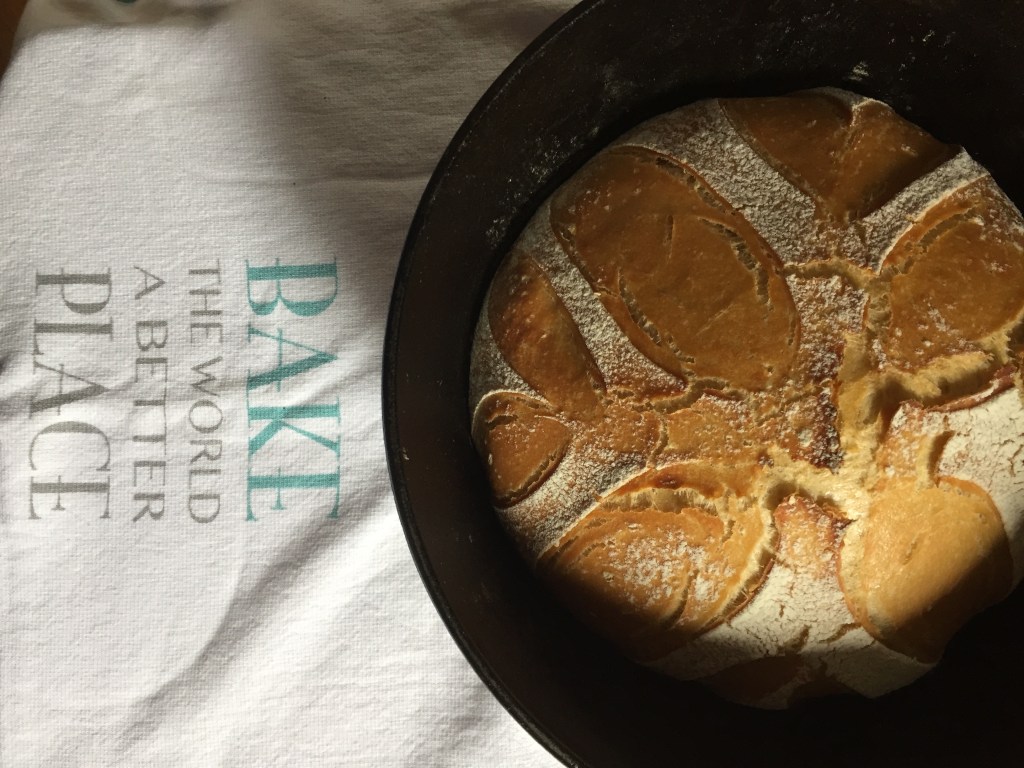
Skip to content

Posts tagged ‘bread’

Easy No Knead Bread

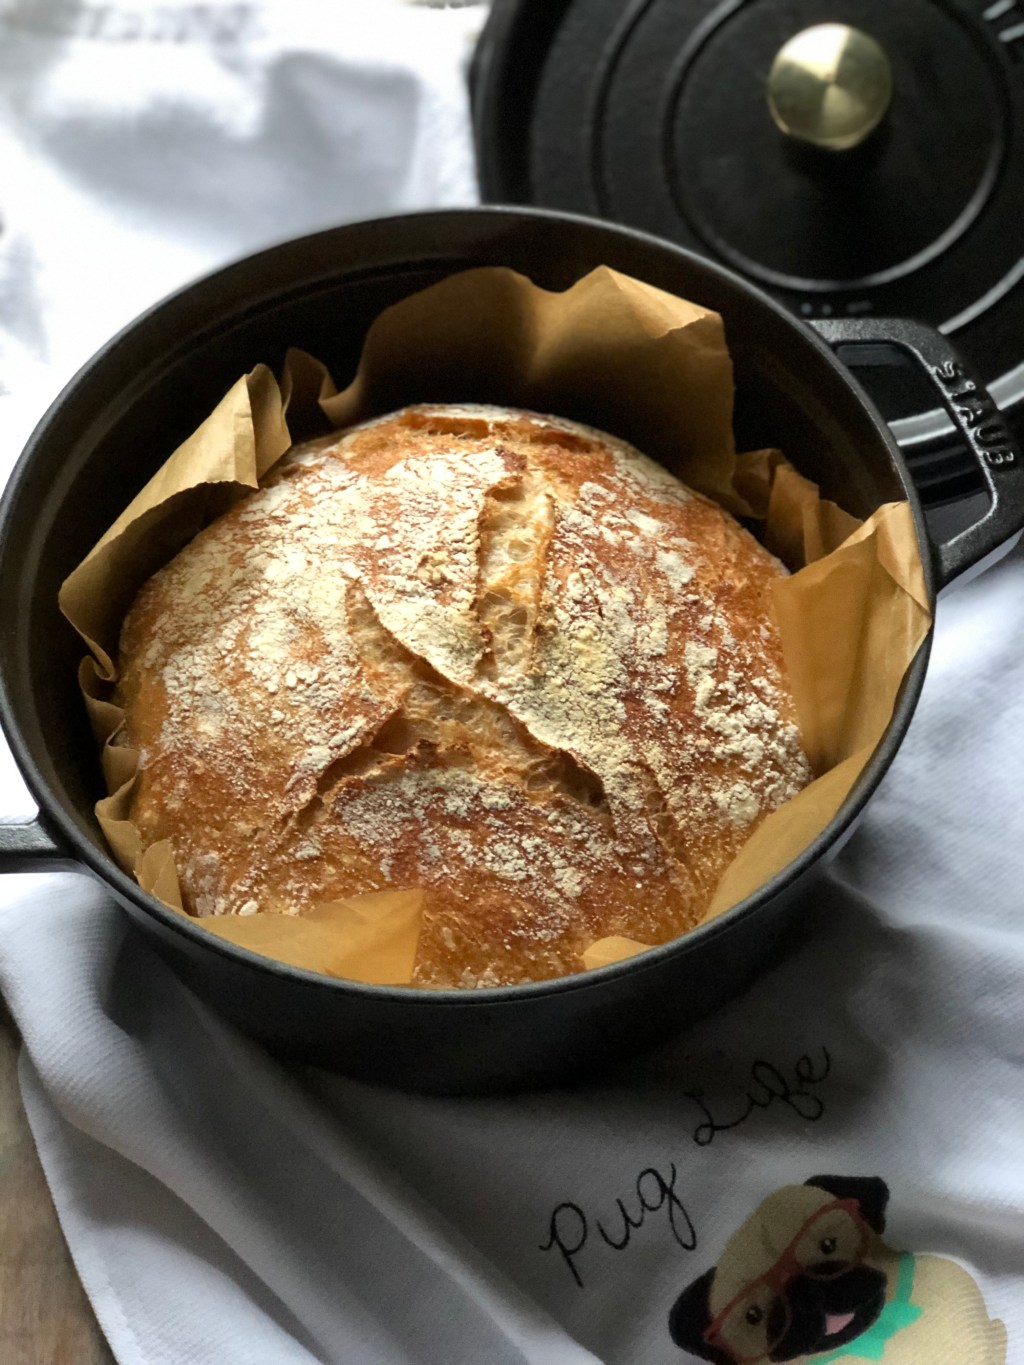
I first saw this recipe on Christinas Cucina, it looked amazing and she had me at no knead. Christina said that this recipe is from Jim Lahey who owns Sullivan Street Bakery in NYC. I love their bread, its nothing short of amazing. I bought his cookbook and tried one of the recipes and was less than successful (Milk Bread) but his recipe for no knead bread is absolutely fool proof. Christina tweaked the recipe so that she could produce a larger loaf, I chose to follow Mr. Lahey’s recipe which created a slightly smaller loaf. My most recent purchase from the Food52 shop is a Staub Cocotte, a beautiful dutch oven, I chose the 4 quart size (got an excellent deal it was on sale) it was just the right size for this recipe and the bread is outstanding.  I thought baking this bread would be an excellent way to christen my new pot.

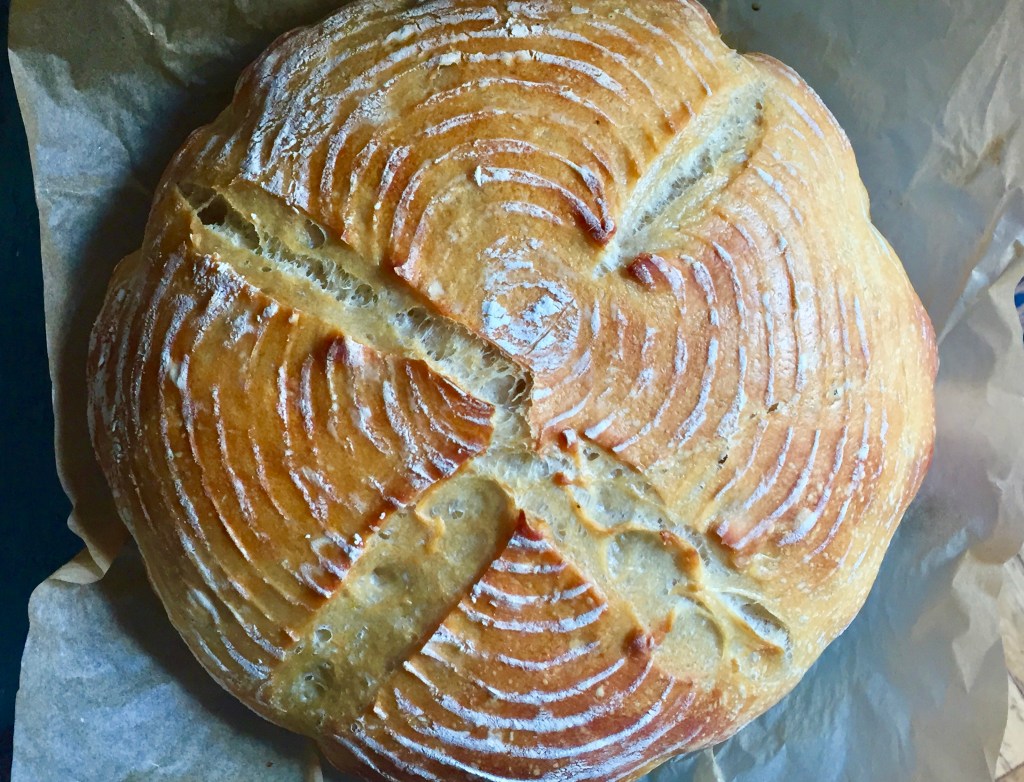
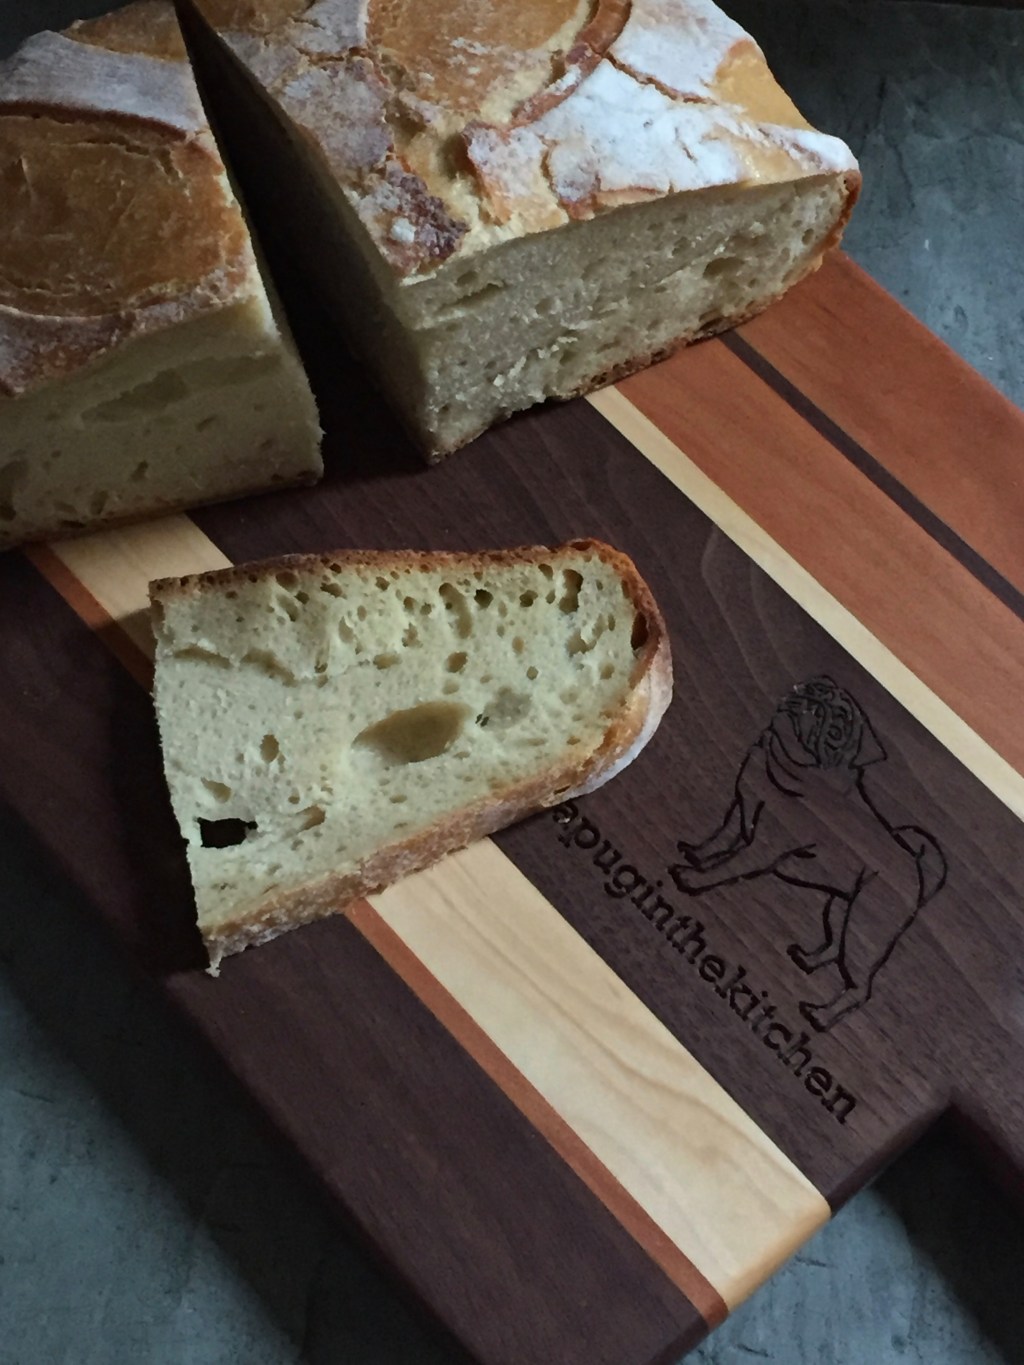
There are only 4 ingredients, you don’t knead or have to use a stand mixer or bread machine. This bread is brilliant in its simplicity and I absolutely love it. Mr. Lahey uses white all purpose flour, I chose to add some spelt as well, Christina mixed in some whole wheat flour. The basic directions are dump ingredients in a bowl, stir with your hands or a spoon, cover and let sit for 12-18 hours (overnight) dump dough onto floured tea towel, cover and let rise 2 hours, transfer to your covered pot and bake on high heat. Simple, easy and delicious. This recipe is a keeper and would be a great bread for the novice bread baker.

I am bringing this bread to Fiesta Friday #257, I am a co host with Kat@Kats 9 lives

No Knead Bread

Recipe by Jim Lahey

3 cups flour (I used 2 cups all purpose flour and 1 cup spelt flour)

1/4 tsp instant yeast

1 1/4 tsp salt

1 1/2 cup warm water

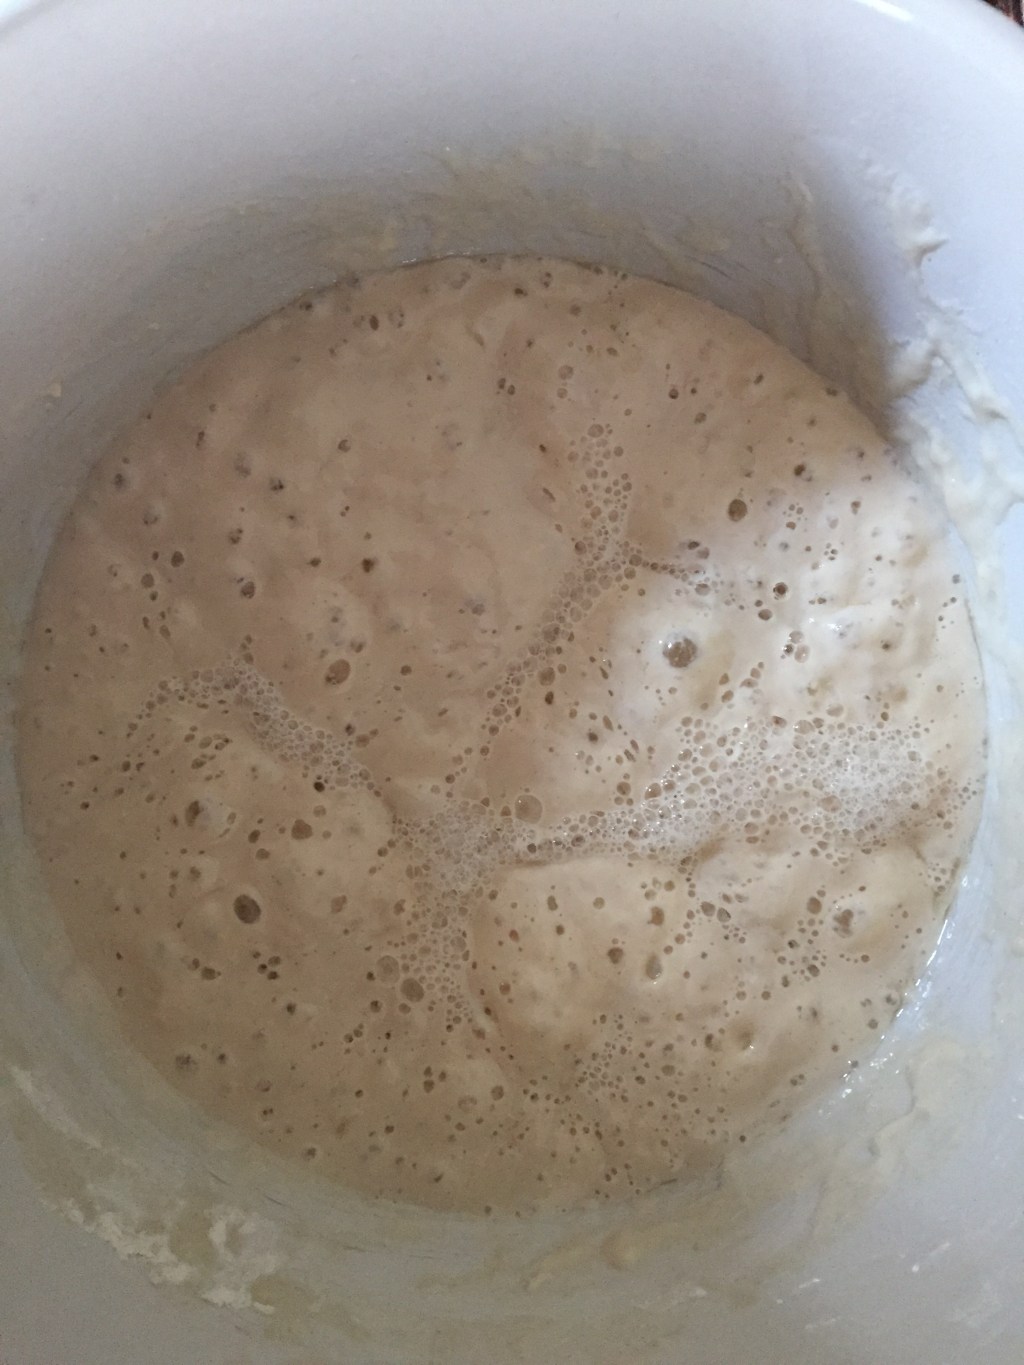
Place all ingredients in mixing bowl, mix with your hands a spoon or a dough whisk, cover with plastic wrap and a tea towel and let sit overnight 12-18 hours. It will double in bulk and have some bubbles. The dough is quite wet. Using your hand or a spatula (watch Christines video) bring the dough into the middle, lifting and pulling all the way around the bowl. Now you can use a tea towel or even a banneton for the 2 hour prove. If using a tea towel, generously flour the towel (I used flour and semolina flour) dump the dough on the towel, sprinkle the top with flour, bran or semolina,  cover and let sit for 2 hours.

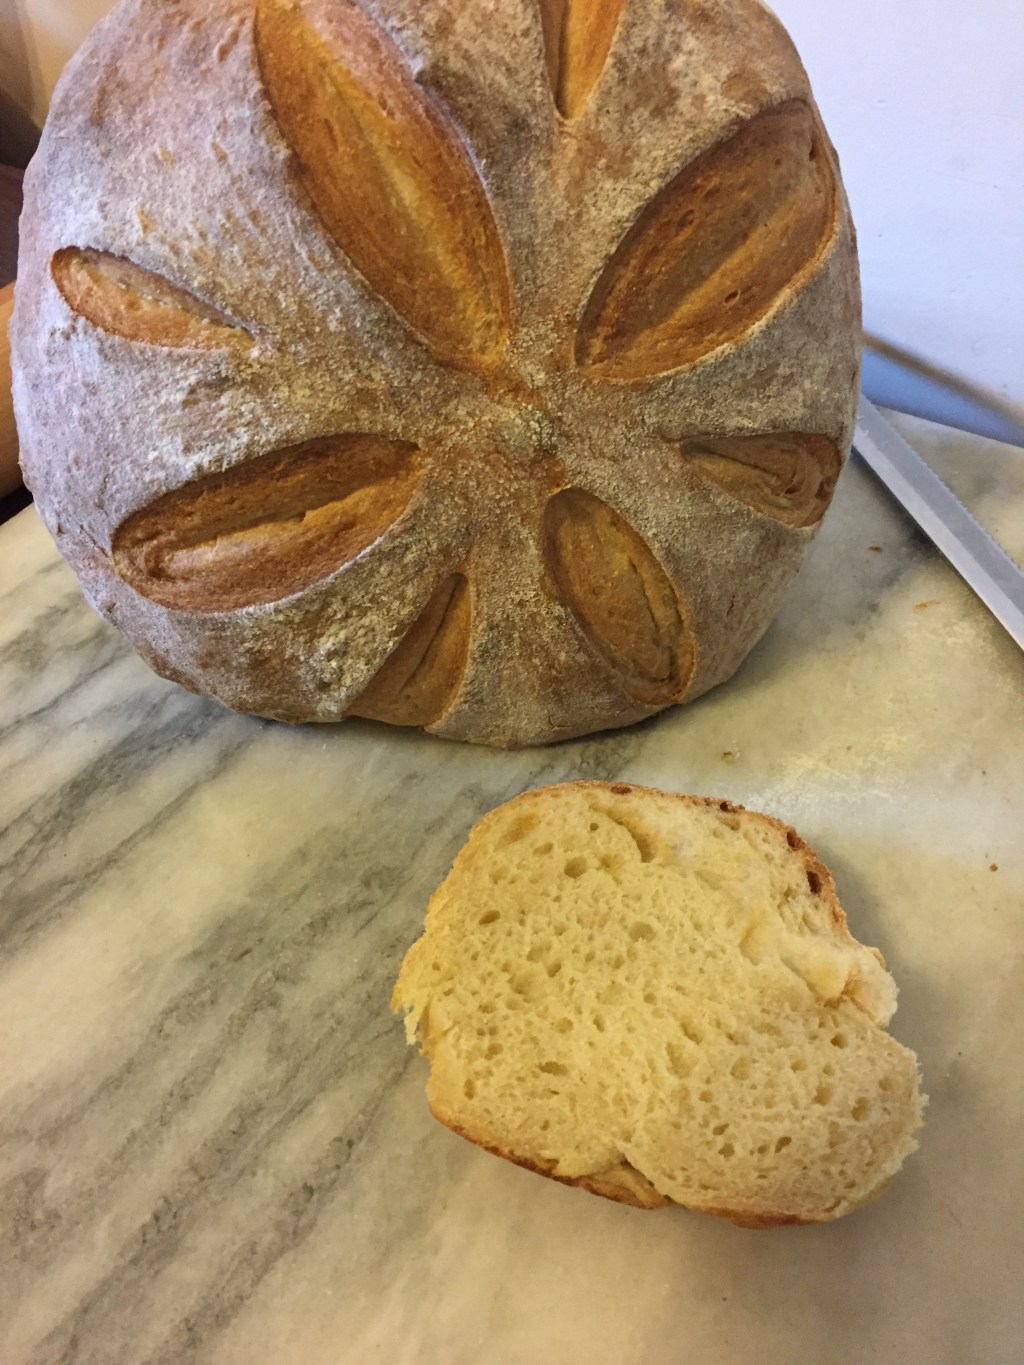
Pre heat your oven about 30 minutes before the dough is ready to bake. If using conventional oven heat to 500+ as high as it goes and if using a convection oven 495 degrees. Transfer the dough to the pot, cover and bake for 30 minutes, decrease temperature to 465 degree’s, remove the lid and continue baking another 10-15 minutes or until it is browned.

Wild Yeast, Fruit Water Yeast Bread


I follow Elaine@foodbod’  both her blog and other social media outlets like Instagram, lately she has been cultivating her own wild yeast and making the most amazing bread, I have been so intrigued and inspired to try her recipe. You make wild yeast simply by putting fruit, in water and let it sit until it ferments it only takes a week sometimes less.  My first attempt I used raisins which for some reason didn’t work so I tried apple and that worked perfectly.

The bread did not have a tremendous rise, it was modest. When making the semolina bread I did add a very small amount 1/4 tsp of instant yeast, I did that because I felt the semolina is pretty heavy and it might need a little bit of a boost, I’m sure it would be fine without it, so that is optional of course. Elaine’s bread is beautiful and the crust is amazing, I’ve made this a number of times and my crust just doesn’t have the same look as hers, it’s still good mind you, but her crust is crusty looking for lack of a better word and meant in a really good way! I have asked her about this and she thinks it could be the difference in flour or some other factor, she is in England and I must say has this down pat. Check Elaine out both on her blog and Instagram.

The first loaf turned out beautifully and you can find the recipe on her blog by clicking on the link in the first paragraph, I was so pleased at the rise and the flavor was delicious.

fruit water bread

The second loaf I made was from date water, I saw Elaine’s beautiful loaves on Instagram and wanted to give that a go. I deviated a bit on the bread recipe using semolina and adapting a recipe I found on King Arthur Flour site. The biga/preferment or poolish is Elaine’s recipe.

Dates after a week see the bubbles

Date water semolina bread

adapted from a recipe by Elaine at Food Bod and King Arthur Flour

Biga or Poolish

10 oz fermented date water (150 grams)

1 1/2 cup bread flour (150 grams) (add more if the dough is too wet, by the spoonful) It should be soft but not runny. Use equal parts flour and water pretty much.

Mix together and let sit overnight covered in plastic wrap and a tea towel. In the morning it should be bubbly.

Bubbly biga

The Bread

1 1/2 cup flour

1 1/2 cup + 1/4 cup semolina flour

1/4 tsp instant yeast

1 scant tbs salt

1 cup cool water

Put all the ingredients in the bowl of a stand mixer fitted with the dough hook. Mix on low speed for about 5 minutes, it will become a cohesive dough. Turn the mixer off, cover with plastic and let sit for 30 minutes. Turn the mixer back on medium speed and knead for another 5 minutes. Remove dough to a clean lightly oiled bowl, cover with plastic wrap and a tea towel and put in the refrigerator overnight.

The following morning take it out of the refrigerator and let it come to room temperature. Shape into desired shape (I made a boule), place on parchment lined baking sheet.nCover with oiled plastic wrap loosely and a tea towel and let rise for approximately one hour. When you press your finger in the dough it should leave an indent.

Heat oven to 475 degree’s. Slash the dough with a razor, knife or lame, dust with some flour and place in the oven, throw a few ice cubes at the bottom of the oven. Immediately reduce the temperature to 425 degree’s and bake for approximately 35-40 minutes. Bread when tapped will sound hollow and it will be a golden brown. You can also place a parchment round in a dutch oven and bake covered in the pot. You will need to bake a little longer using this method. Elaine gives instructions in her recipe.

King Arthur’s recipe offers a great idea for keeping the bread, place cut side down on counter or cutting board, don’t cover it with anything. The crust will stay pretty crisp and the inside of the bread stays soft. It works.

Stand the bread on a counter cut side down the bread stays soft the crust fairly crisp. This loaf was made with a little more yeast than the one below. You can see the difference.

I did experiment with the semolina bread the first loaf I added a half tsp of instant yeast, the second loaf 1/4 tsp. There is a marked difference in the texture of the bread and I think both are good.

Bread Poha

IMG_8184


This is the recipe for Bread Poha that I saw on Sonal’s site Simply Vegetarian777  and  fell in love with. Bread, spices, pea’s, simple comfort food and a delicious Indian dish. I saw the photo’s and immediately saved the recipe and then sweet Sonal sent me the  spice packet so I have everything I need to put this dish together quickly. I decided to serve it with a 5 minute egg, a little runny, that golden yolk flowing on that delicious bread, well my friends it doesn’t get much better than this. Make this dish, you will be glad you did, really  you have to try it, the recipe is linked above!

Step by step instructions and spice mix

Step by step instructions and spice mix

Bread Poha literally takes minutes to make and is the very definition of Indian comfort food it can be used as a side dish, snack or main dish. I did a little research and saw many variations one showed the Poha with paneer (that looked delicious) among other things. Sonal masterfully mixes the spices,  she sent me a packet that contained everything you need to properly spice the dish, It could not have been easier and I feel totally spoiled.

The Poha was breakfast with a medium soft egg (5 minute egg), I had some leftover cubed brioche that I had used in my Thanksgiving dressing the bread was oven dried and held up nicely during the cooking process but you can use any stale bread torn into bite size pieces.  Thank you Sonal for sending me the spices you are so sweet and it opened up a new breakfast avenue for me, I think I could eat this every day!

IMG_8175

I have had several people ask about the egg, how to do it. It is in between soft and hard boiled. I call it a medium soft egg. It is boiled for exactly 5 minutes. The egg has to be warmed first, not straight from the refrigerator, a room temperature egg is perfect. Bring lightly salted water to a rolling boil, gently lower the egg into the water and time it, at 5 minutes remove the egg and place in a pot or bowl of cold water. Let sit for 1 minute in the cold water then gently peel. The yolk will still be runny but the white of the egg will be firmly set. It works every time and yields a perfectly cooked medium soft egg.

IMG_8204


Secret Santa Gift Swap And A Loaf Of Bread

Gift Swap

Gift Swap

I have been an active cook on Food52 for almost 2 years now, it’s a wonderful community of kind and giving cooks/chefs some very accomplished home cooks and other culinary professionals. I have made some good friends and count myself very lucky to know them.

Last year one of the community members (Noelle/Enbe) offered to organize a Secret Santa gift swap for members for the Food52 community, it was a huge success and Noelle organized it again this year. I registered and sent a very nice package to South Carolina and the day after I sent my package I received a beautiful package from California. I was thrilled to find out that my Secret Santa was Helen (Antonia James on food52), She put together a thoughtful and beautiful basket, home canned blueberry jam and blueberries in syrup, assorted homemade (delicious) cookies, Levain that Helen started and a brotform proofing bowl. I was thrilled and a little scared, well I was scared because I have never baked bread using a levain nor have I fed or cared for levain before. I thought, geez I kill every single houseplant that comes into my house, not on purpose of course, will I kill this too?  Helen so carefully cultivated and shipped it  to me and I really wanted it to work.  Luckily, she was kind enough to give me instructions on the care and feeding of levain, I followed her directions and was delighted that my levain thrived and grew.

Levain is fed and starting to bubble

Levain is fed and starting to bubble

Yesterday I made the bread dough, following William Alexanders recipe for baguettes, it fermented overnight in the fridge and I am going to bake it today.

Bread dough after fermeting overnight look at those bubbles

Bread dough after fermeting overnight look at those bubbles

I baked a baguette and a boule and they turned out pretty well, I need to work on the shaping of the loaves but all in all I think my first try at baking bread with levain was a success. I am so grateful to Helen for sending it to me, I have learned a lot!! I also used the brotform mold to proof the boule ,love the circular lines on the loaf. Below is William Alexanders recipe for baguettes. Please visit his wonderful website and buy his book he is genius. I have to say the bread is exceptional, a thin crisp crust and soft interior, it’s a little work caring and feeding levain but the results are well worth it.

Boule and baguette

Boule and baguette

Ingredients

375 g all-purpose flour (13.23 oz)
250 g levain (8.8oz)
215 g water (7.58oz)
¼ teas. instant yeast
10 g salt

  1. Prepare the dough

  2. Feed levain at least 2 hours or the night before beginning.
  3. Mix all ingredients and allow dough to rest, covered (“autolyse”) for about 25 min.
  4. Knead by hand for about 7 minutes until dough is silky and elastic.
  5. Cover with oil-misted plastic wrap. If doing an overnight fermentation, place immediately in refrigerator. For same-day baking, ferment at room temperature for 2 hours, then ferment in refrigerator an additional 4 hours.
  6. Remove from refrigerator and wait for dough to reach temperature (2 to 3 hours).

    Form loaves and proof

  7. Place an old cast-iron skillet on the bottom shelf of your oven and a pizza stone near the middle rack.
  8. Preheat oven to 500°F.
  9. On a floured countertop, divide dough into 4 equal parts of about 212 grams each (don’t go crazy trying to make them all exactly the same), shape into balls, and allow to rest, covered for 15 minutes. (I sometimes omit this step if in a hurry, but it does help to relax the dough for the next step.)
  10. Press each ball into approximately a 3- by 5-inch rectangle, and form baguettes as shown in the accompanying video. You should have nice little blisters or bubbles of gas in the dough – leave them!
  11. Proof in a floured couche (a heavy linen canvas) or, lacking that, between folds of parchment paper, for 45-60 minutes.

    Score and bake

  12. With four baguettes to place into your oven, it’s sometimes easier to use a wide baking sheet rather than your peel. Sprinkle the sheet liberally with corn meal or rice flour (or cover with a sheet of parchment paper), transfer the baguettes to it (I use a narrow piece of quarter-inch plywood as a flipping board, but you can use transfer them by hand as well).
  13. Using a fresh single-edged razor or a lame, make several overlapping diagonal slashes on each baguette.
  14. Transfer the baguettes to the stone with a clean jerk back of the baking sheet. Quickly add a cup of water to the skillet and turn oven down to 480°F.
  15. Bake for 20-25 minutes until crust is a rich brown and center registers 210°F or a rap on the bottom of the loaf produces a hollow percussion sound.
  16. Cool on rack.

Baked Egg Casserole

I usually make this on the stovetop but adapted it to bake in the oven primarily because I entered this recipe in a Whole Foods Baked Breakfast contest. I actually like it better baked in the oven so from now on that’s exactly how I am going to make this. I must confess I try to have a healthy smoothie or shake for breakfast every morning but every now and then and I want something filling and warm and well, with runny eggs, cheese and bread.  This certainly satisfies me in every way and its quick and easy to make to boot. It consists of a baguette cut into cubes, cherry tomatoes roasted in the oven, eggs and a quick and easy no fuss cheese sauce.

  • 1 small baguette cut into cubes
  • 10-12 cherry tomatoes cut in half
  • 1 cup grated cheddar cheese
  • 4 tablespoons heavy cream
  • olive oil to drizzle
  • salt and pepper to taste
  • 4 large eggs (preferably organic and pastured)

Preheat oven to 450 Tear off 2 sheets of foil and lay on baking sheet, on one sheet place bread cubes and drizzle with olive oil, on the other sheet place tomatoes drizzle with olive oil and season with salt and pepper. Place in the oven and bake for 6-8 minutes until bread is lightly browned and tomatoes are soft. Remove from oven. Mix the grated cheese and heavy cream together. Keep oven at 450 degrees. Butter a gratin pan and scatter the bread cubes in the pan so that they cover the bottom. Add the tomatoes next and distribute evenly with the bread, now carefully break the eggs on top nestling them into the bread and tomato, season the eggs with a little salt and pepper, now spoon the cheese and cream on top of the eggs making sure its evenly distributed. Place on baking sheet and bake for 8-10 minute until the egg whites are somewhat set, now turn on broiler and broil for 1- 2 minutes until the cheese is lightly browned, Note: Watch carefully oven temps vary and it make take a little less or more time depending on your oven and the size of the baking pan, I used individual gratin pans and it took 8 minutes to bake and a bit over 1 minute under the broiler.

The Mission – Lets Bake

The mission should I choose to accept it (ok, its corny but I just saw the new Mission Impossible flick)  is to bake an Italian Boule or loaf, the call to arms or I guess whisks came from “The solitary Cook” and we all are to bake a loaf or boule of her fabulously delicious Italian bread. Truth be told since she posted this recipe I have already made 8 loaves (see an earlier post on my site) and no one has to twist my arm to make more, its just that good.  Visit The Solitary Cook at  her wordpress website: thesolitarycook.wordpress.com and Lets Bake!!

Preferment on it’s way to the fridge to rest overnight

I took the preferment out of the fridge this morning, let it come to room temp and made the dough. It came together so nicely, I just love this recipe. Just took the finished loaf out of the oven. Tomorrow, with the rest of the dough I will make two boule. Here is a link to the recipe:

RUSTIC ITALIAN BREAD

Finished loaf of Rustic Italian Bread