Skip to content

Posts from the ‘Quick Breads’ Category

Guest Post- Cherry Chocolate Scones

I was thrilled when Mollie,  The Frugal Hausfrau agreed to do a guest post. I am a big fan, she is a wonderfully talented cook, take a look at her creations on her blog, you will see why I am so in love with her recipes. Down home and elegant, budget conscience, approachable, ok I’ll stop now, thank you Mollie for sharing these incredible scones they look so delicious! Take it away Mollie….

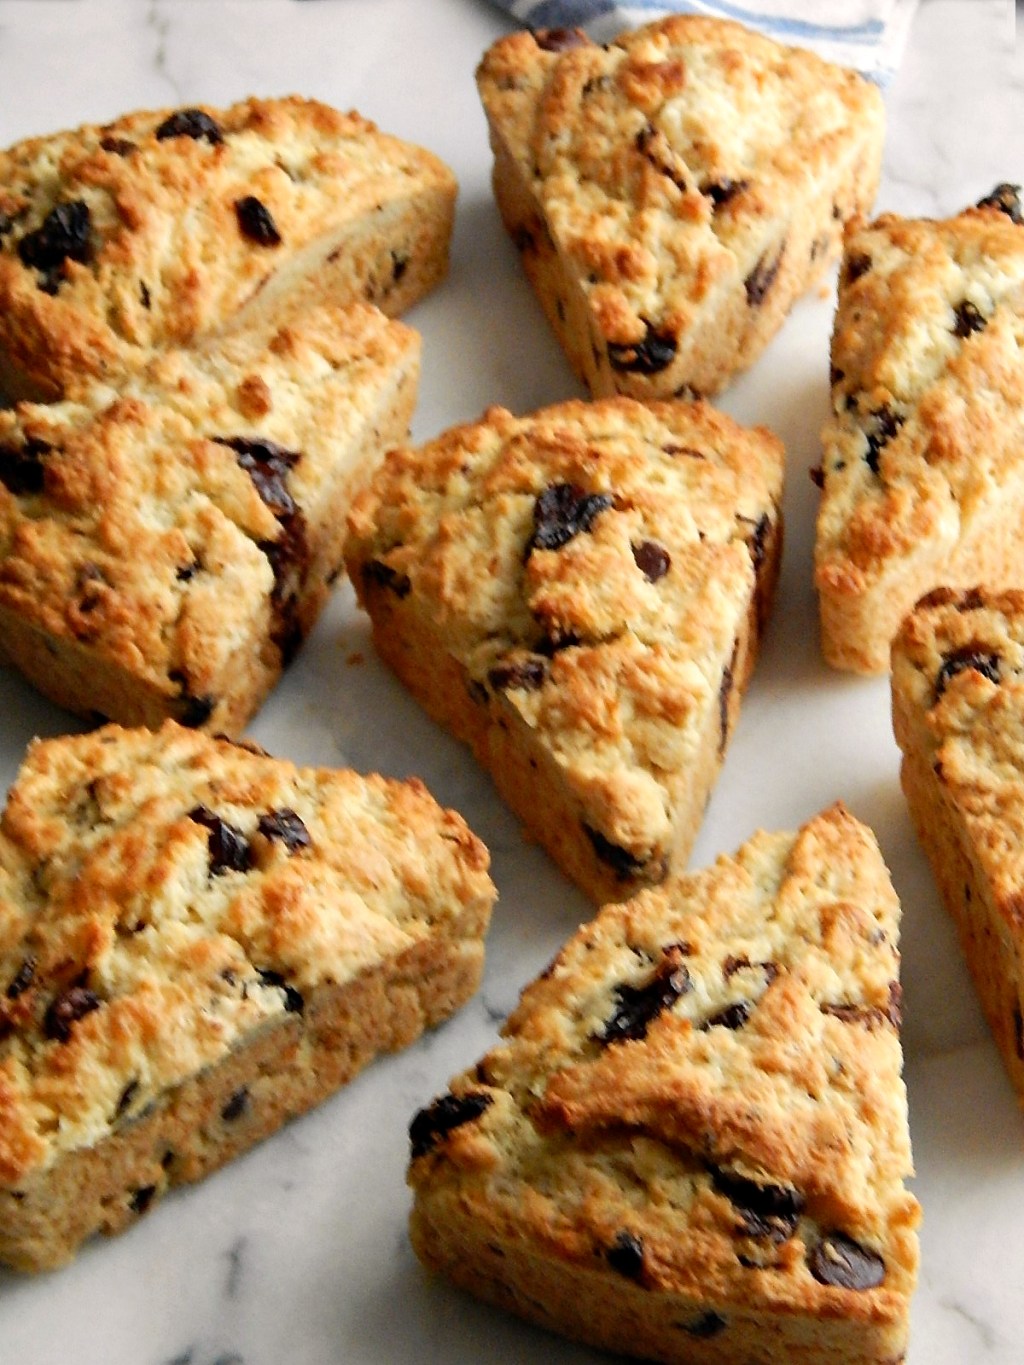
When Suzanne said she might like a guest post or two, I was all over it – and knew exactly what I wanted to make. I just had it in my head that Scones with Dried Cherries & Dark Chocolate might cheer her up a bit. They’d be great with coffee or black tea and such a fun treat for a weekend breakfast.

I started out with one recipe and I don’t know if it was the recipe or me, but it was pretty mediocre. Then I tried another and it was too cakey. A scone is a scone is a scone, and cake? That’s just not a scone. A scone should be good, but have a certain sensibility about it.

I remembered that King Arthur had a scone recipe I have been meaning to try. (They mentioned a scone pan, too, that I ordered and I love it and used it – that’s how long it took me to make these scones!) So on to the King Arthur recipe.

The first time I forgot the baking powder. It was like a Shortbread Scone. A Shrone? There might be some possibilities in that idea, lol!

So finally, the final rendition. And I learned a few things along my journey! I used two chocolates because I ran out of the chocolate I was initially using and it the scones were so much better.

You can stick with one kind of chocolate if you’d like, but I’d highly recommend chopping some good chocolate and combining it with Nestle’s Chocolate Chunks or at least with their dark chocolate chips. I was thinking of striping these scones with a little glaze, but they’re just so good as is!

The two chocolates melted and acted differently and it was like a perfect alchemy with the soft and chewy dried cherries. So at long last, here’s the recipe as I made it. Check with King Arthur for all their suggested variations and many tips. This recipe is excellent and Suzanne, I hope you love these!

King Arthur’s Scones

2 3/4 cups King Arthur Unbleached All-Purpose Flour or Gluten-Free Measure for Measure Flour

1/3 cup sugar

3/4 teaspoon salt

1 tablespoon baking powder

1/2 cup cold butter

1/2 cup roughly chopped dried cherries

1/2 cup Nestle’s chocolate chunks

3 to 4 ounces good dark chocolate, roughly chunked

2 large eggs

2 teaspoons vanilla extract or the flavoring of your choice

1/2 cup to 2/3 cup half and half (see note)

In a large mixing bowl, sift together the flour, sugar, salt, and baking powder.

Work in the butter just until the mixture is unevenly crumbly; it’s OK for some larger chunks of butter to remain unincorporated.

Stir in the dried cherries and chocolate.

In a separate mixing bowl, whisk together the eggs, vanilla and half and half.

Add the liquid ingredients to the dry ingredients and stir until mixture starts to hold together. Dump out and carefully pinch and pull the dough until all is incorporated.

Sprinkle a bit of flour atop a baking sheet.

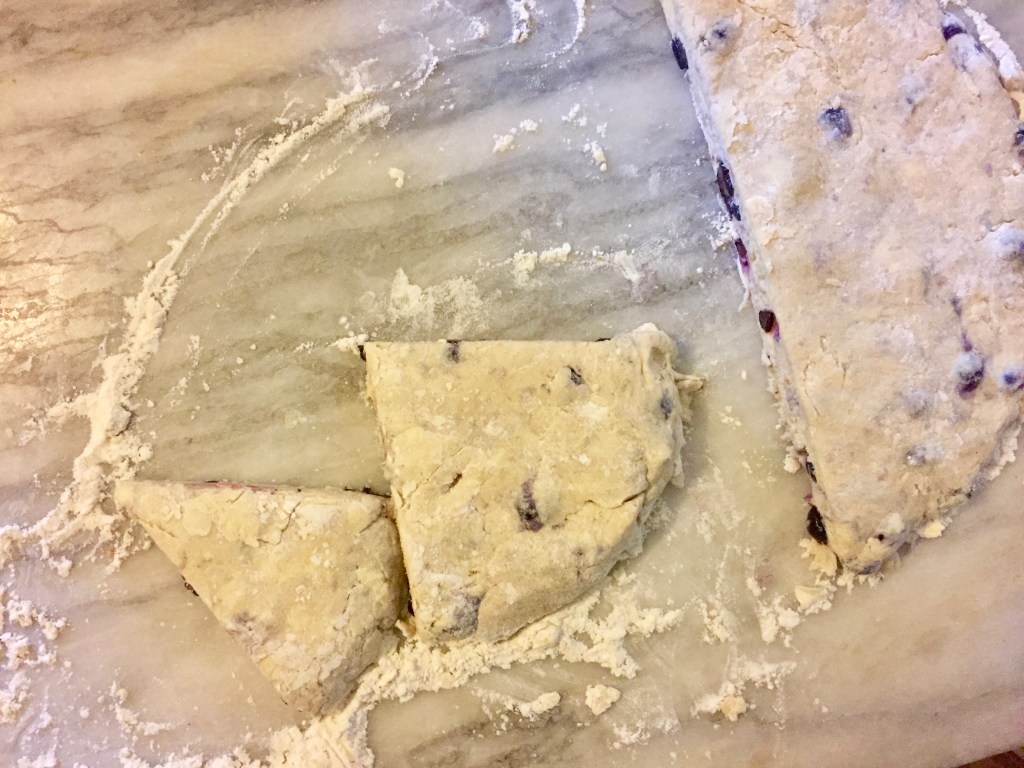
Divide dough in half and place each half on the baking sheet. Form each into a five to six-inch circle about 3/4’s of an inch high. If using a scone pan, see note, below.

Brush each circle with milk, and sprinkle with coarse white sparkling sugar or cinnamon sugar, if desired.

Using a knife or bench knife that you’ve run under cold water, slice each circle into 6 wedges.

Carefully pull the wedges away from the center to separate them just a bit; there should be about 1/2″ space between them, at their outer edges.

For best texture and highest rise, place the pan of scones in the freezer for 30 minutes, uncovered. Chilling the scones relaxes the gluten in the flour, which makes the scones more tender and allows them to rise higher. It also chills the fat, which will make the scones a bit flakier. While the scones are chilling, preheat the oven to 425°F.

Bake the scones for 15 to 20 minutes, or until they’re golden brown. When you pull one away from the others, it should look baked all the way through; the edge shouldn’t look wet or unbaked.

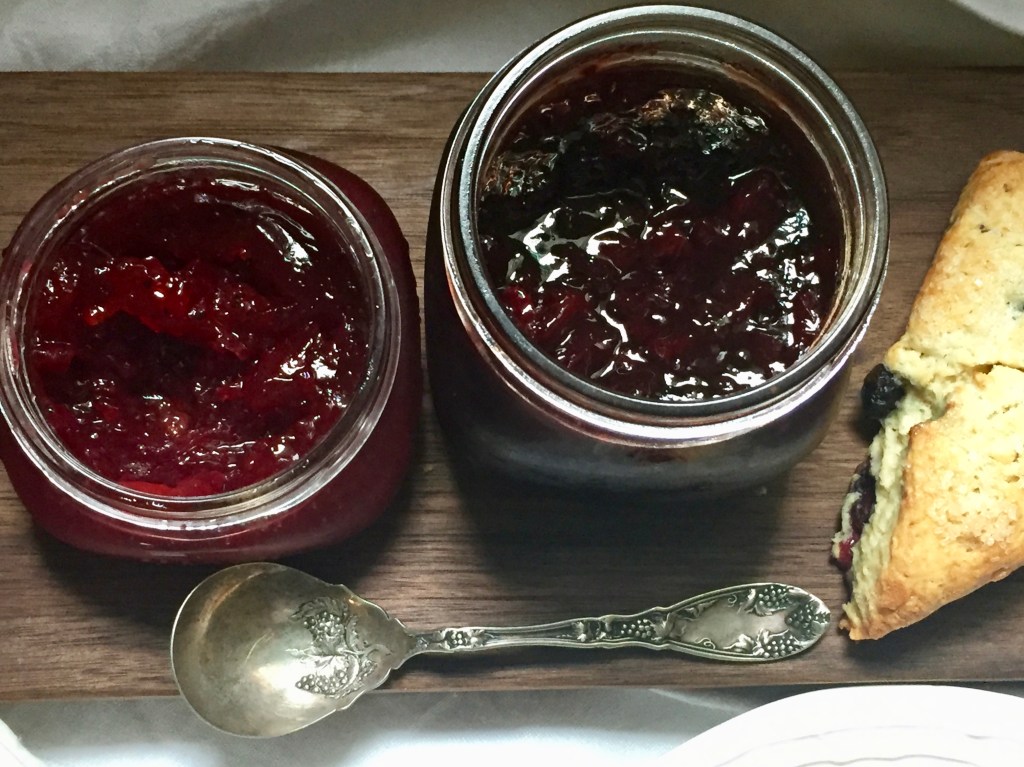
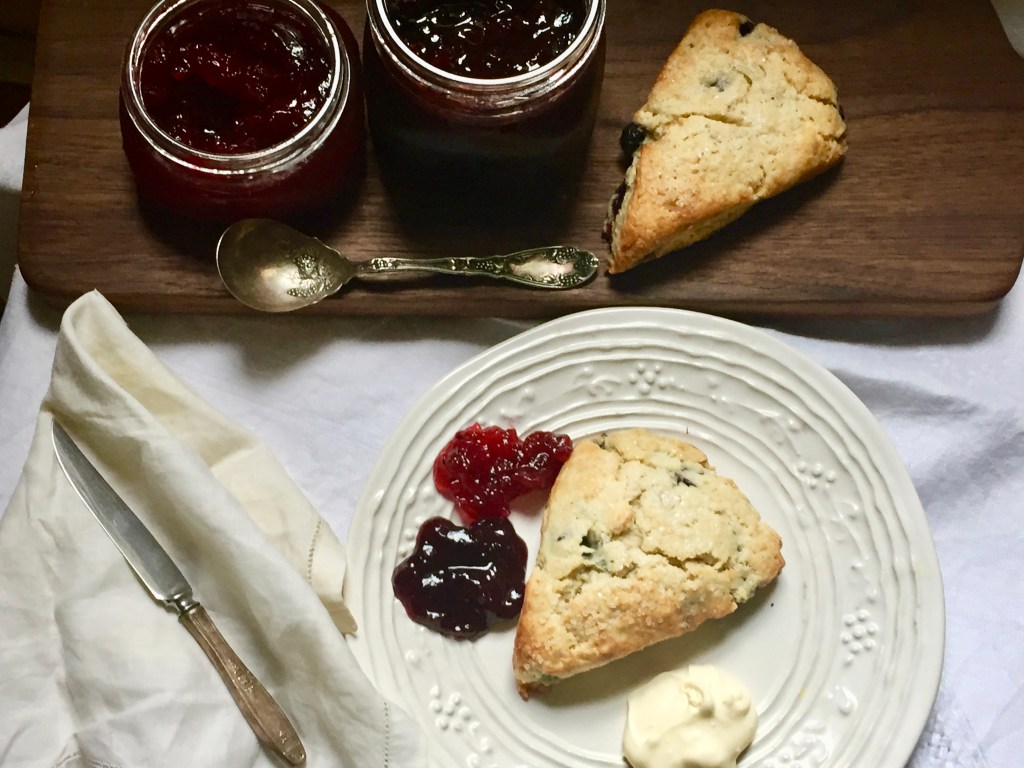
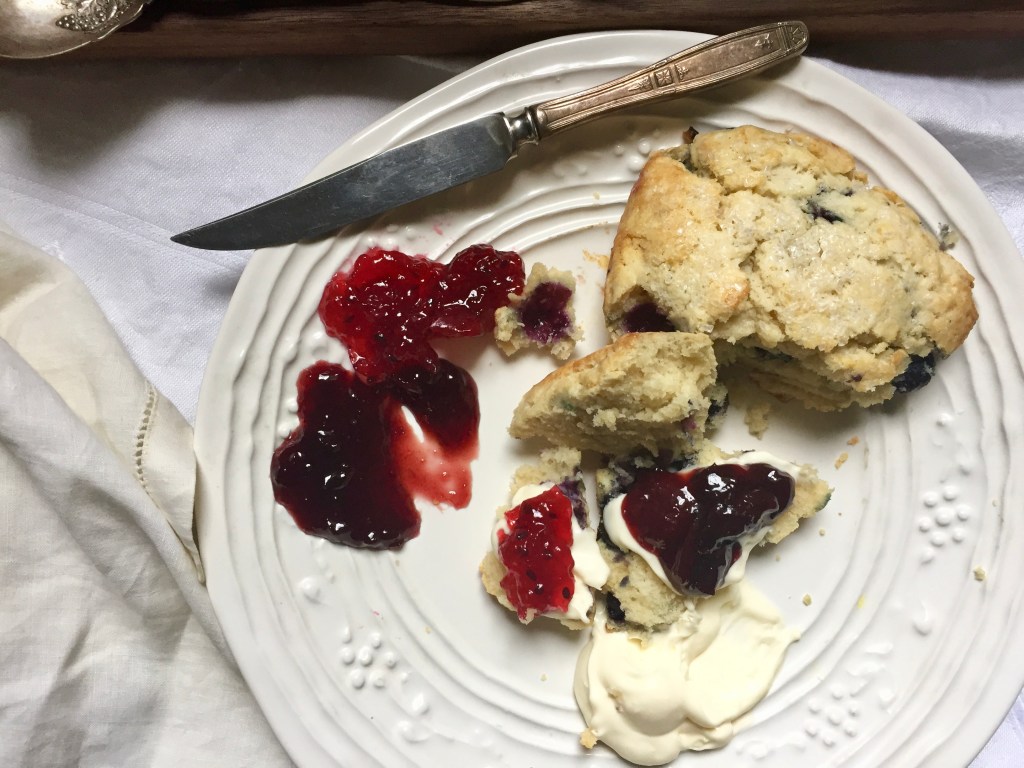
Remove the scones from the oven, and cool briefly on the pan. Serve warm. They’re delicious as is, but add butter and/or jam, if you like.

When the scones are completely cool, wrap them in plastic and store at room temperature for up to several days. To reheat room-temperature scones, place on a baking sheet, tent lightly with foil, and warm in a preheated 350°F oven for about 10 minutes.

Notes:

Since the scones I baked were baked in January, when the humidity is low and flour is dry, these scones used the full amount of liquid.

If using a scone pan, the full amount of dough will fit into the pan. I found 1/2 cup scoop worked well to distribute the dough in the eight slots. There’s no need to freeze the dough. For these particular scones, I did not brush with butter or sprinkle with sugar.

Cookies, Fruitcake and More Cookies

I am going to try to keep this short and sweet. I have been baking and packing gift boxes for the last week. My meals are take out or a quick sandwich. Have to say my new oven is amazing. It literally cuts baking time in half having an oven that actually works like it’s supposed to. My first attempt at convection baking wasn’t the best, not a disaster but not great, I read that it automatically converts the temperature and I didn’t realize you have to change the setting on the stove to convert the temp. Second round was perfect.

Got 3 gift boxes mailed, no small feat as I had to wait almost 2 hours in line at the post office. It’s been pretty busy around here, I volunteered as a foster for a rescue organization and they had an urgent need to foster a little chiweenie (chihuahua dachshund mix). He is about 7-8 yrs old and is named Gosha. He will stay with me until he finds a forever home much to the chagrin of Mr. Percy, he is not pleased and is moping around the house, won’t eat unless I hand feed him and is generally perturbed.

Christmas cards have been pouring in, for Percy, LOL! I have gotten 2 with over 30 cards for Percy from our friends on social media.

I found a great recipe for Chocolate thumbprint cookies, better than the recipe I have been using for the last few years. It’s from Martha Stewart and have to say it’s terrific. The cookies are soft and moist and I love adding the striped Hershey’s kiss in the center while the cookies are still warm.

chocolate thumbprint cookies

I’ve also made fruitcakes, chocolate chip cookies, rugelach and biscotti. This week I’m making Stollen, more cookies and more.

rugelach, chocolate, orange hazelnut

fruitcake

Chocolate Thumbprint Cookies

Recipe from Martha Stewart

Makes 90 small cookies

2 cups all purpose flour

1 cup plus 1 tbs dutch cocoa, unsweetened

2 tsp course salt

8 ounces (2 sticks) unsalted butter softened

1 1/3 cup sugar (plus more for rolling the cookies in)

2 large egg yolks

2 tbs heavy cream

2 tsp vanilla extract

Heat oven to 350 degree’s. Sift flour, cocoa powder and salt into a small bowl and set aside. Cream butter and sugar until fluffy. Reduce speed to medium and add egg yolks, cream and vanilla, beat until combined scraping sides when needed. Beat in flour mixture just until combined.

Scoop out approximately 2 tsp and roll into a ball, roll in sugar and place on parchment lined baking sheet. Use your thumb or the end of a wooden spoon to make an indent in each cookie. Bake for 5 minutes rotating the pan and then bake another 5 minutes (10 minutes total baking time).
Remove from oven and place a Hershey’s kiss in the center, let cool completely before packaging or storing.

Apple Cider Doughnuts

Making the pumpkin spice doughnuts was fun and they turned out really well so I decided to try a recipe I found for apple cider doughnuts. One of the first stands visible at the farmers market, always front and center is also one of my favorites, apples, apple cider and doughnuts and it’s a favorite of mine and IMHO it epitomizes Fall. The recipe is from Bon Appetit and sounded really wonderful. The cake doughnuts contain homemade apple butter and apple cider syrup, at my last trip to the farmers market I bought a jar of apple butter which eliminated one step but I did make the cider syrup, it’s a bit of a slow process but fills your house with the most wonderful aroma of apples and cinnamon.  I love apples so much I decided to devote the next several blog posts to recipes using apples. This is the first in the apple installment and it’s a great way to kick off all things apples.

This is a really really good recipe, the doughnuts are the perfect texture and crumb, love how they get a bit craggy when frying, gives them character. The flavor is out of this world delicious. Highly recommend you give this a try if you want to make doughnuts. They are the perfect dunking donut if you know what I mean, it always makes me laugh thinking of the Seinfeld episode where they were all wondering if Joe DiMaggio dunks when they were in Dinky Donut, so funny.

I am bringing these bad boys to Fiesta Friday #195 this week, you must check out all the Halloween goodies, amazing. The co  hosts this week are  Monika @ Everyday Healthy Recipes and Sandhya @ Indfused

That was 3 cups of cider

Apple Cider Syrup

3 cups apple cider

2-3 cinnamon sticks

Boil on medium high heat in large wide pot (makes the process quicker). The cider will reduce to a thick syrup and the yield will be about 1/3 cup. It takes approximately 30 minutes. Make sure you watch it because it can burn and removing the burnt cider is a challenge, (burned my first batch).

Doughnuts

1/2 cup apple butter

1/3 cup apple cider syrup

1/2 cup buttermilk

2 tsp vanilla extract

1 tbs + 2 tsp baking powder

1 tsp kosher salt

1/4 tsp baking soda

1/4 tsp nutmeg

1 tbs + 1 tsp cinnamon divided

3 1/2 cup all purpose flour

6 tbs unsalted butter softened and at room temperature

1/4 cup packed light brown sugar

2 large eggs

1 1/4 cup granulated sugar (divided)

Vegetable oil for frying

Whisk together the apple butter, apple cider syrup, buttermilk, vanilla and set aside. Whisk flour, baking powder, baking soda, salt, nutmeg and 1 tsp cinnamon. Set aside. Using an electric mixer on medium high speed cream the butter, brown sugar, 1/4 cup granulated sugar until light and fluffy (takes about 4 minutes) Add the eggs one at a time beating between each addition. Reduce mixer to low and add the dry ingredients in 2 additions, alternating with the cider mixture. Make sure you start with the dry, add half the cider mixture, then the other half of dry ingredients and ending with cider mixture. The dough will be soft and sticky.

Line a baking sheet with parchment paper. Spread about 1/3 cup of flour on the sheet. Put the dough on the parchment and sprinkle with a little flour. With your hands gently pat the dough spreading it on the lined sheet pan, you want the dough to be about 1/2 inch thick. Cover with plastic wrap and refrigerate for 3 hours or longer.

When dough is sufficiently chilled, start heating your oil, pour about 3 inches of oil in a pot and heat to 350 degree’s using a deep fry thermometer. While oil is heating cut out your doughnuts using a 3 inch round biscuit cutter and to make the hole in the center a 1 or 1/2 inch. Place cut doughnuts on a floured piece of parchment and drop them carefully in the hot oil. Fry 2 or 3 at a time letting them get nicely browned on both sides. After the doughnuts are done fry the holes.

Mix 1 cup sugar and 1 tbs cinnamon in a bowl and roll the warm doughnuts in the sugar mixture and place on cooling rack.

love to dunk


All About Pumpkin, Soup And Doughnuts

Recently I ordered 2 cans of pumpkin from my online grocer, I simply added to my cart without looking at the size of the cans, thinking it is the usual small cans of pumpkin puree. What arrived were the big cans, a whole lotta pumpkin and once opened it has to be used. I don’t really like freezing it because it becomes watery. I made 3 mini loaves of pumpkin spice bread, some chickpea pumpkin soup and pumpkin spice donuts and there is still enough leftover for a few pumpkin spice latte’s.

The pumpkin loaves I can practically make with my eyes closed, I use my recipe for banana bread and adapt to pumpkin adding spices.  The soup was my own creation and turned out quite well and is super easy to make. Now Doughnuts are another thing entirely. I have only made doughnuts once I think,  they were less than stellar so I abandoned  making those delicious little fried cakes and opted to buy them (the best doughnuts EVER are in my neighborhood).  We had a brief (2 days) of cool weather, back to warmer temps for the rest of the week but the soup on a cool day was just perfect. I used what I had in the pantry and refrigerator, threw everything in my oval roaster and slow cooked for about 6 hours. I didn’t pre soak the chick peas, just threw them in with some vegetable broth, carrot, onion, celery and everything cooked up beautifully. At the end I pureed some of the chickpeas, added pumpkin, Sri Lankan curry powder and some creme fraiche. So easy really, and no recipe required. You can add whatever you like or have on hand. I think that next I will try making yeast doughnuts now that I have cake doughnuts down.

curried pumpkin chickpea soup

Curried Pumpkin Chickpea Soup

2 cups dried chick peas

1 onion quartered

2 stalks celery

1 large or 2 small carrot

8 cups vegetable broth (you can also use water or chicken broth)

1 cup pumpkin puree

1 tsp curry powder (I used Sri Lankan)

Optional 1/2 cup creme fraiche

salt and pepper to taste

Heat oven to 325 degree’s. Put everything in the pot, put it in the oven and let it cook slow and long. I cooked it for 6 hours. When done, scoop out about 2/3 of the chick peas and a little of the broth along with the celery and onion. Puree in the blender until smooth, add the pumpkin, curry powder and optional creme fraiche. Add back to the pot, cut the carrots into bite size pieces and cook on medium heat for about 15 minutes. Adjust seasoning and if you like at the end add some spinach. I had some that needed to be used and it was nice in the soup.

Pumpkin Spice Doughnuts

Makes 12 doughnuts and holes

Recipe from Good Housekeeping

2 tbs softened butter

1/2 cup sugar

2 tsp baking powder

1/2 tsp salt

1 tsp cinnamon

1/4 tsp baking soda

dash of ground nutmeg or about 1/8 tsp

1/2 cup pumpkin puree

1/3 cup buttermilk

1 egg

1 egg yolk

1/2 tsp vanilla

2 cups all purpose flour

vegetable oil for frying

Cream butter until fluffy, it’s only 2 tbs so it won’t be that fluffy. Add the sugar, baking powder, salt, cinnamon and nutmeg. Beat until combined scraping sides of the bowl occasionally. Beat in the pumpkin, buttermilk, egg and egg yolk and vanilla until combined. Using a wooden spoon stir in flour until well combined. Cover bowl and chill for at least 3 hours or over night.

Heat the oil to 365 degrees. On work surface dusted with flour roll out the dough to about 1/2 inch thick. Using doughnut cutter or biscuit cutter cut the doughnuts and place on parchment lined baking sheet. When oil is at the right temperature drop 2 or 3 doughnuts at a time and turn once browned making sure they are evenly brown and cooked through. It takes about 3 – 4 minutest per doughnut. When done place on rack lined with paper bag or paper towels. Prepare some sugar and cinnamon and roll each doughnut while still warm in the sugar mixture. Let cool and enjoy!


Some Jam, Scones And Sour Cherry Hand Pies

When I saw the baskets of sour cherries and gooseberries at the farmers market I had to buy them. Both are delicious but really not great eaten fresh/raw. They are very sour on their own and I thought they would be best made into jam or preserves and a small jar of sour cherry pie filling. They are very tedious to prep, the sour cherries are small and soft and juicy and hard to pit, (please don’t eat cherry pits you can actually get sick when eaten in large enough quantities, saw this article on food52) and the gooseberries need to have the ends pinched off, both ends. Luckily I did not buy a huge amount of the fruit so although tedious it didn’t take me all day to prep them. I have been working on recipes for Teagan’s wonderful Thistledown episodes, I absolutely love this story and am inspired by the magickal world of faeries.

Refrigerator jam is a wonderful thing, no muss no fuss, no canning or preserving, it’s stored in the refrigerator rather than sealed properly and stored in the pantry. I still use sterilized jars and it does seal somewhat but not enough to make me comfortable storing unrefrigerated. It really lasts a long time in the fridge and if you haven’t ever made your own jam or preserves you must give it a go, it really is delicious.

I had 3 pints of sour cherries and 2 pint of gooseberries which was enough to make 2 16 ounce jars and 8 ounces of cherry pie filling. The scones are my favorite recipe from my friend on Food52 Liz Larkin aka @sconeladylarkin on Instagram. The recipe for scones IMHO is the best scone recipe ever, they are tender and light and delicious.

The hand pies were an after thought. There was leftover galette dough after making the tomato tart, and the small jar of cherry pie filling. Cherry pie has always been one of my favorites especially warm with a scoop of vanilla ice cream

Royal Wedding Scones

Recipe by Liz Larkin on Food52

2 1/2 cups all purpose flour

3/4 tsp salt

1/4 cup sugar

1 tbs baking powder

6 tbs cold unsalted butter

1 large egg

1 cup heavy cream

1 tsp vanilla extract

3/4 cup frozen blueberries

Pulse the flour, salt, sugar and baking powder a couple of times in the food processor, add the butter and pulse about 10 times until the butter is broken up in the flour mixture don’t worry if there are some larger pieces butter it doesn’t have to be uniform crumbs. Dump the mixture into a large bowl and add the frozen blueberries. Mix the egg, cream and vanilla together and add to the flour mixture. Mix with a fork until just combined, be careful not to over mix.

The dough will be a bit shaggy, place on floured work surface and press gently into a circle that is about 1/2 inch thick. Cut in half, in half again and then each quarter into two wedges you will have 8 scones. Place on parchment lined baking sheet and freeze until completely frozen about 1 hour. You can then bake them or store in freezer bags until ready to use, I like to wrap each frozen scone individually in either plastic wrap or parchment.  Before baking brush the scones with some heavy cream and sprinkle some sugar on them. Bake in a 420 degree oven until golden brown, when touched with finger they will feel solid. Don’t over bake, because they are frozen it can take a little longer than usual approximately 20-25 minutes.

Sour Cherry Jam and Gooseberry jam

Makes 2 16 oz jars

2 pint sour cherries pitted, in separate pot 2 pint gooseberries trimmed

1 1/2 cup sugar each

pinch of salt

Cook on medium high heat until thickened. Test to see if its ready by spooning some of the jam on a very cold spoon, if it thickens it’s ready because it was not a lot of jam it only took a little less than 30 minutes to cook. Pour into sterilized jar, let cool to room temperature and refrigerate. Note: The longer you cook the thicker your jam will be, I like mine on the loose side so for my taste about 30 minutes was perfect.

Sour cherry pie filling

Makes 8 ounces

1 pint sour cherries pitted

2/3 cup sugar

4 tsp corn starch

pinch of salt

pinch of cinnamon (optional)

place everything in a medium non reactive pot and cook on medium high heat until thickened. Pour into clean or sterilized jar and refrigerate after it’s cooled to room temperature.

To make the hand pies use your favorite recipe for pie dough or pre made dough works great as well, using a biscuit or something round cut out circles, you will need 2 for each pie. Spoon a little filling in the middle, brush some egg was on the edge of the circle place the other round on top, seal, cut a vent in the top, brush with egg wash and sprinkle with sugar and bake in 375 degree oven for about 20-25 minutes.

Chocolate Marbled Banana Bread

This banana bread recipe has been featured on this site many times, as banana bread and also using other fruits like apples and figs. It is IMHO the best banana bread recipe I have found. While perusing recipes I saw a gorgeous chocolate marble banana bread and although I have added chocolate chips never a chocolate swirl. I used my go to recipe and copied how the chocolate marble swirl was made. The bread is delicious, simple and I like to make 3 mini loaves and freeze them, it freezes beautifully.

It’s moist and chocolaty with lots of banana flavor. The spelt adds some texture and a delicious nuttiness that you only get from spelt.

Chocolate Marbled Banana Bread

Makes one 9 inch or 3 mini loaves

Adapted from a recipe by Martha Stewart

1 stick 4 oz softened butter

1 cup sugar

2 large eggs at room temperature

1 cup flour

1/2 cup spelt flour

1 tsp baking soda

1 tsp salt

1 heaping cup mashed very ripe banana (2 1/2 large or 3 medium bananas)

1/2 cup sour cream or creme fraiche

1 tsp vanilla

3 oz dark chocolate melted

2 tsp unsweetened cocoa powder

Heat oven to 350 degree’s. Prepare your baking tins by greasing generously either with cooking spray, butter or shortening. Place flours, baking soda and salt in bowl and whisk to combine.

In the bowl of a stand mixer add the butter and sugar. Cream until light and fluffy scraping the sides occasionally. Add the eggs one at a time beating well after each addition. Add the flour mixture and beat on medium high speed just until combined. Now add the banana, sour cream and vanilla and mix to combine.

Remove one cup of the batter to a small bowl. Melt the chocolate and add the cocoa powder, stir. Add to the 1 cup of batter and fold in.

Spoon some of the regular batter into the baking pan if using a 9 inch loaf pan add half the batter, now half of the chocolate batter in two spoonful. Add the rest of the plain batter and spoon the rest of the chocolate batter on top. Swirl gently with a knife or skewer being careful not to over swirl, a few times back and forth will be enough.

Bake the 9 inch loaf approximately 50-55 minutes and the 3 mini loaves approximately 25-30 minutes. A cake tester or toothpick should come out clean when inserted in the center. The loaves will be browned and feel firm.


Pancakes

I added blueberries

A basic pancake recipe should be in everyone’s repertoire and for many years I have used the pancake recipe in a vintage Betty Crocker cookbook, it’s good but I am constantly searching for a recipe that is even better. The pancakes should be tender and fluffy and light. I’ve tried separating the eggs and beating the whites, folding them into the batter and that works well but let me be honest, in the morning I don’t really feel like the extra work. I saw this recipe on Food52 by The Kitchn and the pancakes looked great I was intrigued by the directions, you do separate the egg, but add the white to the batter unbeaten. It didn’t really seem like that would produce a pancake that met my expectations but I had to give it a try.

I’ve mentioned before that I am an Air Bnb host and I had guests from England, they chose pancakes from the menu for breakfast and I thought this was the perfect opportunity to try this recipe.  The batter took only a few minutes to put together, it calls for full fat buttermilk which is kind of difficult to find. The buttermilk most readily available is reduced fat and the smallest size available is a 32 oz carton, the unused milk is frozen in an ice cube tray and stored in a freezer bag. I always have a jar of homemade creme fraiche in the refrigerator, so to make full fat buttermilk I add creme fraiche. The recipe calls for 2 cups of buttermilk and to make it full fat I used 1 3/4 cups buttermilk and 1/4 cup creme fraiche. You can also make buttermilk by adding lemon juice or vinegar to whole milk.

This is now the only recipe I will use for pancakes. I have removed the bookmark from my Betty Crocker cookbook, these pancakes are wonderfully light, fluffy, tender and tasty. I cut the recipe in half, I didn’t want that many pancakes and accidentally added the whole tsp of baking soda and baking powder (pre-coffee and very early) instead of cutting the amount in half and the results were great so I will continue to double the leavening agents when I make this recipe.

Buttermilk Pancakes

Food52 Genius Recipes – The Kitchn

Makes 18-20

2 1/2 cups flour (Editor’s note: in testing, we used 300 grams unbleached all-purpose flour)

2 tablespoons sugar

1 1/2 teaspoon fine salt

1 teaspoon baking powder

1 teaspoon baking soda

2 large eggs, separated

2 cups buttermilk (for extra, extra fluffy pancakes, seek out thick, whole milk buttermilk)

1/2 cup whole milk

10 tablespoons unsalted butter, melted and cooled

1 tsp vanilla (Not in the recipe but I added and it does make a difference)

Canola or unrefined peanut oil for frying


Heat the oven to 225° F and prepare a large baking sheet by setting a cooling rack inside. Place both in the oven.

Whisk the flour, sugar, salt, baking powder, and baking soda together in a large bowl. In a separate smaller bowl, whisk the egg yolks, buttermilk, milk, and vanilla. Add the melted, cooled butter and whisk until well combined.

Pour the yolk and milk mixture into the flour mixture and stir with a wooden spoon until barely combined. Add the egg whites and stir just until a thick batter is formed. Set aside for 5 minutes. Note: I added extra milk as the batter was too thick, I only added enough to thin a bit approximately 1/4 cup added a tbs at a time.

Heat a large skillet over medium-high heat. When hot, film with 1/2 teaspoon of neutral oil such as canola or peanut oil. After about 30 seconds, when the oil shimmers but is not smoking, lower the heat to medium-low and use a soup spoon to drop in heaping spoonfuls of pancake batter.

The batter will spread into a pancake about 3 inches wide. Cook for about 2 1/2 minutes. (If the pancake scorches or the oil smokes, lower the heat.) When the bubbles that form on the edges of the pancakes look dry and airy, use a thin spatula to gently lift one side and peek underneath. If the pancake is golden brown, flip and cook on the other side for 2 to 2 1/2 minutes, or until the bottom of the pancake is golden brown.

Remove from the skillet to the baking sheet in the oven. Wipe any stray crumbs or scraps out of the skillet with a paper towel, add a little more oil, and continue to cook the remaining batter.

I added blueberries after I had spooned onto the griddle.

pancakes and fried egg

A Guest Post- Ten Times Tea

chestnut-prune-vanilla-guest-post

A few months back I was thrilled when Laurie whose gorgeous blog Ten Times Tea agreed to do a guest post. Her timing is impeccable because this loaf just screams holidays. She is uber talented with such creativity,  I love her photographs and her no nonsense writing style. Thank you so much Laurie for doing this post for me and wish you and yours a very Happy Holiday. I love the way Laurie experiments and even though she may not admit it I think her results are outstanding, she loves to use whole grains  giving her baked goods a healthy twist. Can’t wait to try this, thank you for your kind words and take it away Laurie…..

Suzanne’s experience, attention to flavour, and warm style comes through in everything she makes and blogs about. And, unlike some food bloggers that I tend to admire from afar, Suzanne’s blog demands a pause, taking time to comment and marvel and laugh and sometimes even commiserate.
I was so happy to be to have the opportunity to put together a guest post. Though I was also a bit conflicted: what makes us quite different is that Suzanne’s recipes simply ooze with experience and certainty, exactly what my recipes typically lack. My blog is all about the baking (unfortunately or otherwise), and frankly, leans more towards a “log” of what disasters and otherwise I’ve been baking, rather than a reliable source of recipes. But despite this, Suzanne has been so supportive of my experiments and even the most dismal failures.

sam_4823
I wasn’t sure I would be able to make anything worthy of a guest post…but then, enter this cake. This cake is fabulous. I’m still in awe. It’s based on the brown butter and vanilla weekend cake in one of Dorie Greenspan’s books, Baking Chez Moi. Would you expect anything else from Dorie?

The cake is unabashedly rich, the crumb possessing a buttery sheen, and is incredibly fragrant due to an incredible quantity of vanilla extract and browned butter. I’ve made merely superficial changes, but I highly advocate them. The prunes and chestnuts, which are two of my favourite things, are homely and warm, while still somehow glamorous in my vague imagination of 20th century whiskey glasses and pâté and feather boas. (Ah, this imagination sometimes.) They simply fit perfectly into the backdrop of a dense and vanilla-heady cake, such that even a friend who does not at all subscribe to my obsession with prunes admitted that really, they did seem to work quite well.

I also made a couple more characteristic changes, reducing the sugar and using part whole spelt flour. I wanted to use these changes to transition into writing about some general themes in baking and my approach. As Suzanne recently wrote about, lately she’s switched her eating focus. It made me think a bit about this whole baking thing—what choices I make, what I minimize and maximize, and why. But after writing it, I looked back and felt so pretentious, with these meanderings on sugar and whole grains.

The thing is, I find there are many valid perspectives when it comes to baking. And thus many valid styles of baking, which result in many, many delicious baked goods. I enjoy them all. There is nothing superior about any approach over others. Some days call for Smarties-dotted blondies just as much as other days call for raw vegan coconut oil and date squares. So I hope everything here can be taken with several grains of salt—it’s one vague approach to baking. I guess I like it so I seem to advocate for my view, but it doesn’t mean I always stick to it.

sam_4815
Sugar

Sugar is something I do not try to eliminate, but I find I can typically reduce the sugar content of baked goods with little consequence. This isn’t to validate desserts or bolster excuses for eating more (well, at least I try not to do that…). But I do occasionally bake for some diabetics, and in general, if I can reduce the sugar, I think I may as well.

In fact, I do think that most desserts don’t require too much sweetness for it to still taste like dessert. I’m a bit of a cake-person as opposed to a candy-person (a very important dichotomy), where I like more moderate sweetness padded with plenty of substance and textures and other flavours. Better yet, baking can quite often fit into that ambiguous breakfast/tea sort of category as well, which entails the same richness and decadence with noticeably less sweetness. Another trick is to use sweet-associated flavours like warm spices, or plenty of fresh fruit.

I find it’s worthwhile to experiment! A 25-50% reduction in the sugar is a good place to start, at least in cases where the sugar is not a structural necessity (I’ve tried to push it unsuccessfully with meringues and buttercreams). However, in the end you may just find that sugar reductions compromise golden crusts or perfect textures. It always depends on what you’re looking for, and reductions may not be worth it.

sam_4840 sam_4846
Whole grains

Recently I made a cake that used only white flour, and I was surprised—it tasted bland all of a sudden. I suppose it’s because in recent years, whole wheat and spelt flour have become my go-to, some somehow now taste rather “neutral.”

I refrain from using this idea of whole grains as a gateway to a certified healthy label. It’s a bit of a false rhetoric because 1) we are still talking dessert and 2) I don’t push the envelope very far. The whole grains are primarily for flavour, and I like to prioritize structure as well. (On this note, I admire the ingenuity, innovation and persistence of gluten-free bakers!) Thus, something may be only a quarter whole spelt flour, but it will taste nutty and warm and complement spices or dried fruit. Whole wheat flour is very suitable for crumbles and oatmeal cookies. I find buttery and salted whole wheat pastry perfect for tarts, and while scones have been a perpetual struggle for me, I recently made some fluffy scones with half whole wheat pastry flour.

As far as pastry-type experimentation goes (bread is a bit iffier), I think whole wheat flour can be successfully subbed for 50-100%. Spelt flour, I would normally not go above 50% due to the lower gluten content. Buckwheat and rye I usually try at 25-20% due to their low gluten content and stronger flavours. In the end, though, it does depend on what you’re making. Sometimes white flour is the best.

sam_4855

This cake is a rich and buttery and sugary glory, and in no way do my changes make it at all healthy…but I like the cake even more for the changes I did make. It is only moderately sweet, with spelt flour to complement the prunes and pick up on the warm notes of the roasted chestnuts and browned butter.

So happy baking! With the approaching holidays, I’m sure there will be plenty of baking going on.

img_8388

prune and chestnut vanilla loaf cake
Based on Dorie Greenspan’s brown butter and vanilla bean weekend cake in Baking Chez Moi. Instead of part vanilla bean and part vanilla extract, you can use either: 1 whole vanilla bean or 4 tsp vanilla extract as detailed by the original recipe. I would also consider increasing the quantity of prunes and chestnuts to 150 g each.
1 stick butter
100 g whole spelt flour
138 g all-purpose flour
scant 1/2 tsp kosher salt
1 1/2 tsp baking powder
175 g granulated sugar
3-cm length of vanilla bean
4 eggs
2 tsp vanilla extract
1/3 c (80 mL) heavy cream
1 capful dark rum
100 g dried prunes
100 g roasted and peeled chestnuts, whole and broken into rough pieces
Preheat the oven to 350F. Butter a loaf pan and line with a sling of parchment paper.
Brown the butter in a small saucepan, cooking until deep golden and nutty, and then set aside.
Whisk together the flours, baking powder and salt.
Place the sugar in a large bowl. Split the vanilla bean and scrape the seeds out into the sugar and rub in. Add the split vanilla bean and rub in the sugar as well to remove any excess seeds (this can then be placed in the sugar bowl for vanilla sugar and the like). Add the eggs and whisk until thoroughly combined. Follow with vanilla extract, the heavy cream and rum, whisking until combined.
Add the dry ingredients in two additions, folding in with a rubber spatula. Next, fold in the butter in three additions. Lastly, mix in the chestnuts and prunes. Scrape into the prepared pan and bake for 60 minutes or until an inserted skewer is removed clean.
Let cool on a wire rack.


Spiced Pumpkin Pecan Loaf Part II And Stollen

img_8194

This is a different loaf than the one I made before, although I liked that loaf it was quite heavy and more bread like than I wanted. I try different recipes and although they turn out good there is something about it that just doesn’t sit right with me,  I almost always end up going back to my old stand by’s, the tried and true always good recipes that I use over over. The banana bread recipe is one of those, I substitute other fruits like apples and pears for the banana and in this case I used pumpkin. The change I made was adding spice, cinnamon, ginger and allspice along with pecans. These loaves are sweeter than the other but I am ok with that, they have the lighter texture and moist crumb that I wanted. I like the other recipe but my favorite way to serve is making mini muffins dipped in melted butter and rolled in a spice sugar mixture. For a loaf I like this recipe though, they are very light, moist and delicious.

Stollen dough ready for an overnight chilly rise

Stollen dough ready for an overnight chilly rise

I made my fruitcakes and have quite a bit of leftover boozy fruit and it’s been years since I’ve made Stollen, a German slightly sweet and absolutely delicious holiday bread. I had saved a recipe on Food52 years ago by Chef June and decided this year I would try it. The recipe is vintage and the directions are a bit vague so I decided to wing it. If it turns out I will post the recipe, well even if it doesn’t I might. The dough is super easy to put together, no kneading at least the directions don’t call for it so we will see. The butter is broken into the flour like a pie crust, I did it in the food processor then you add the rest of the ingredients and let it rise overnight in the refrigerator.  I have a feeling it’s going to be wonderful, rich and buttery and eggy. Fingers crossed. More to come…..

Spiced Pumpkin Pecan Loaf

makes 1 9×5 loaf or 3 mini loaves

1 cup flour

1/2 cup spelt flour

1 tsp baking soda

1 1/2 tsp cinnamon

1 tsp ginger

1/2 tsp allspice

1 tsp salt

1 cup sugar

4 oz or 1 stick butter room temperature

2 large eggs at room temperature

1/2 cup sour cream or creme fraiche

1 cup pumpkin puree

1 tsp vanilla extract

approximately 1/2 cup chopped pecans

demerara sugar mixed with cinnamon, allspice and ginger to sprinkle on top of loaf

Heat oven to 35o and butter or oil your loaf pan or pans. Put flours, baking soda, salt and spices in small bowl and whisk together.

Cream butter and sugar until light and fluffy. Add the eggs one at a time beating between each addition. Add the dry ingredients and mix just until combined. Add the pumpkin, sour cream and vanilla and mix until combined. Fold in the pecans and spoon into prepared pan or pans, smooth out the top, sprinkle with chopped pecans and sprinkle with sugar spice mixture and bake for approximately 40-45 minutes until golden brown and tester comes out clean when inserted into the middle of the loaf.

Let cool in pans for 10 minutes and then using a small flexible offset spatula or butter knife loosen the edges running it around the loaf. Turn out onto cooling rack and let cool completely before wrapping. This loaf freezes well, wrap in plastic and place in ziplock bag before freezing.


Ginger Molasses Pumpkin Bread

img_7951

I found this recipe on Food52 and it looked so good and got great reviews that I decided to make it and include it in my gift boxes this year. Trying new recipes is great especially if the results are good, this loaf did not disappoint, the combination of spices and pumpkin and molasses is delicious and even better it’s not overly sweet. If you do want a sweeter loaf you can tightly pack the brown sugar. The loaf is hearty, rustic, moist and makes a great addition to my gift boxes.

The recipe made two mini loaves that rose high above the pan and with the batter that was left I made some mini muffins that I rolled in melted butter and then in spiced sugar and I think next time I make this I will just make mini muffins, they are really good!!

This loaf and mini muffins are heading to the party, Fiesta Friday #149 and our co-hosts this week are Judi @ cookingwithauntjuju and Sandhya @ Indfused

Ginger Molasses Pumpkin Bread

Makes 1 9×5 loaf or 2 mini loaves plus 6 mini muffins

2 1/2 cup all purpose flour

1/2 tsp baking soda

1 tsp baking powder

1 tsp salt

2 tsp cinnamon

1 tsp ginger

1/2 tsp nutmeg

1 egg

1 cup pumpkin puree

1/2 cup dark brown sugar (lightly packed) Tightly pack for a slightly sweeter loaf

2 tbs melted butter

1/4 cup vegetable oil

1/2 cup buttermilk (full fat)

1/4 cup molasses

1 tbs chopped (minced) fresh ginger

1 tsp vanilla

1 tbs turbinado sugar (to sprinkle on top of loaf)

1 tsp cinnamon (to sprinkle on top of loaf)

Pre heat oven to 350 degree’s

butter or use spray like PAM a 9×5 or 2 mini loaf pan (s)

In large mixing bowl whisk together flour, baking soda and powder, salt, cinnamon, ginger and nutmeg. In another bowl whisk together egg, pumpkin,molasses, brown sugar, butter, oil, buttermilk until well combined. Add the fresh ginger and vanilla extract and stir to combine. Pour the wet ingredients into the dry and stir just until combined careful not to overmix. Pour into prepared loaf pan or pans and mix the turbinado sugar and cinnamon and sprinkle on top. Bake 40 minutes for a 9×5 pan and 20-25 minute for mini loaves. Toothpick or tester should come out clean when inserted into center of loaf. Cool in pan for 10 minutes then turn out onto rack and allow to cool completely before cutting. NOTE: I went a step further and after removing from the oven I brushed the top of the loaf with melted butter and sprinkled a combination of sugar, ginger and cinnamon on top.

img_8010