Skip to content

Archive for

Citrus Semolina Olive Oil Cake

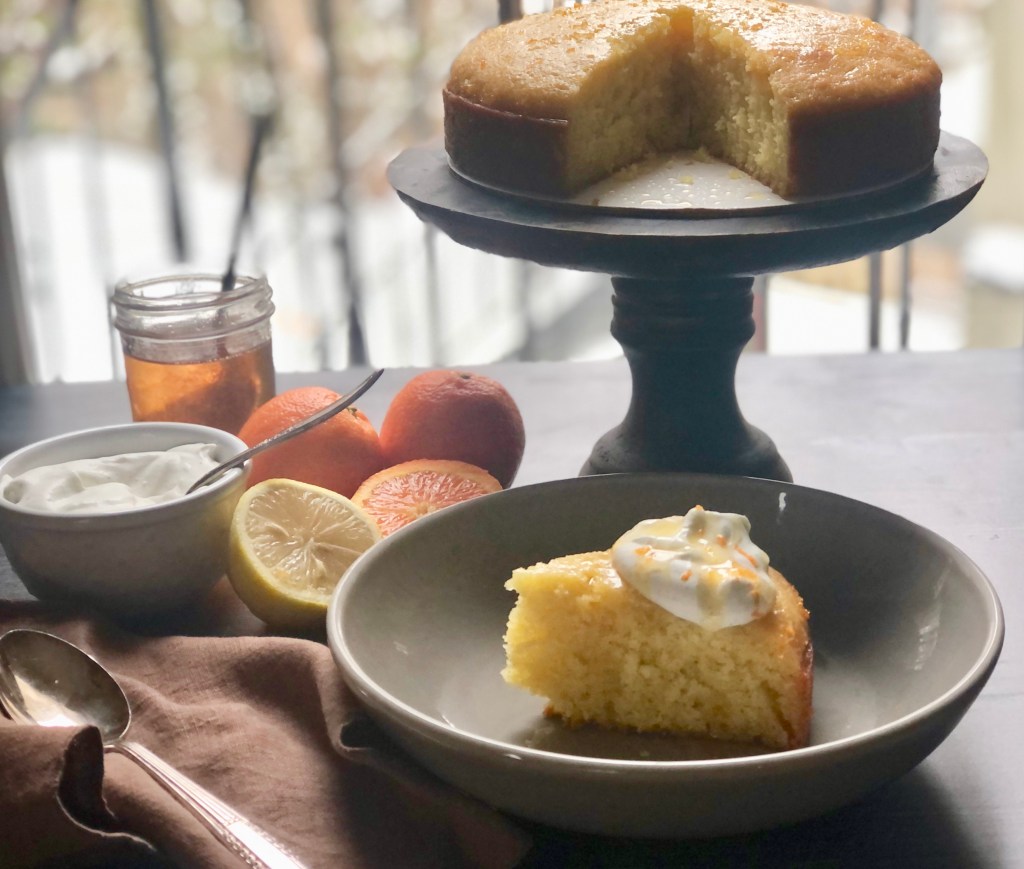
I went to brunch with a friend and she said I had to taste a piece of this lovely citrusy rustic cake.  One bite and I knew I had to try to recreate it. I thought it might be a semolina olive oil cake infused with citrus (It was an Italian Restaurant, Saraghina in Bed Stuy Brooklyn). I researched some recipes and came up with this recipe that I adapted from Epicurious.  They made it in a 9″ springform pan ( I thought I had one but didn’t) so I decided to use a loaf pan. Their recipe also had candied orange slices on top which I decided not to do but instead rely on the juice and zest of the citrus to provide the citrus flavor. The cake is very moist and sweet, while the cake is hot you poke small holes with a thin skewer all over the cake and pour the warm syrup all over it, let it soak in and then pour some more. I am including the recipe with the original proportion of sugar in the cake but next time I make it I am going to reduce the sugar by half because the syrup really sweetens the cake. The pan is oiled with olive oil and the cake develops a lovely almost crisp exterior on the bottom and sides of the cake.

Citrus Semolina Olive Oil Cake

Makes 1 9 inch loaf or round cake

Syrup:

2 cup granulated sugar

1 1/2 cup water

1/4 cup orange or tangerine juice ( freshly squeezed)

1/4 cup freshly squeezed lemon juice

Zest of small orange or tangerine and zest of a lemon

Place all ingredients in saucepan, bring to a boil on high heat, reduce to medium high and boil for 8-10 minutes until sugar is completely dissolved.

Cake:

1/2 cup olive oil, plus more for pan

1/2 cup sugar divided (1/4 c will go in batter and 1/4 c in egg whites)

1 cup all purpose flour

1/2 cup semolina flour (cornmeal can be subbed if you don’t have semolina)

1 1/2 tsp baking powder

1/4 tsp baking soda

3 large eggs separated

2/3 cup plain yogurt

1/2 tsp kosher salt

zest of 1 lemon

1 tsp vanilla extract

Preheat oven to 350 degrees. Brush baking pan with olive oil, I recommend brushing pan with olive oil and line the bottom with parchment paper brush the parchment with oil as well. Whisk dry ingredients and set aside. Beat egg whites until frothy and add the 1/4 c sugar a tbs at a time until soft peaks form. Using electric mixer beat olive oil and 1/4 c sugar, add the egg yolks one at a time beating well with each addition. Add yogurt, zest, vanilla beat only until combined and add the dry ingredients beating just until combined. Fold in the egg whites and pour into prepared pan, smooth the top and bake 45-50 minutes until golden brown and toothpick inserted in center comes out clean, Remove from oven and while cake is still hot poke holes using toothpick or skewer all over the cake. Slowly drizzle 1/4 cup of the syrup on the cake and when it is absorbed another 1/4 cup of syrup is drizzled over the cake. Let it cool in the pan, to remove run knife or offset spatula around the edges to release and invert onto serving pan. I cut some parchment that fit into the bottom of the pan, that helped with the release.

Super Sweet Bloggers Award

Super Sweet Award

Super Sweet Award

I love this award, maybe because I have a real sweet tooth. Thank you to Francesca for giving me this sweet award. If you haven’t visited Francesca’s amazing blog Flora’s Table, you must, it is a collaboration between Francesca, her husband Stefano (wine expert) and Nicole (baker). You will not only find amazing recipes and photography but information about wine from Stefano. It’s a veritable wealth of information all in one blog. Thank you so much Francesca for the lovely award, I truly appreciate it.

The rules of the award are:

1 Visit and thank the blogger who nominated you.
2 Acknowledge that blogger on your blog and link back.
3 Answer the “Super Sweet” questions.
4 Nominate a “Baker’s Dozen” (12) blogs for the award, add a link to their blogs in your post, and notify them on their blogs.
5 Copy and paste the award on your blog somewhere.

The Super Sweet Questions are:

1. Cookies or Cake? Cake

2. Chocolate or Vanilla? Chocolate

3. What is your favorite sweet treat? This is a hard question depends on my mood, love Snickers

4. When do you crave sweet things the most?  In the afternoon and evening

5. If you had a sweet nickname, what would it be? I’ve never had a nickname???.

Drum Roll please!!! I am nominating for this super sweet award:

Shut Up And Cook (The Attainable Gourmet)

 Global Grazers

Food Babbles

Home and Food Co. UK

Christina’s Cucina

Our Growing Paynes

A Taste Of Wintergreen

Inspire And Indulge

Pale Yellow

Lapadia’s Kitchen

Fig And Quince

Petit 4 Chocolatier 

Chef Mimi Blog

Super Sized Chocolate Chip Cookies

Super Size Chocolate Chip Cookies

Super Sized Chocolate Chip Cookies

I made these amazing cookies and I have to share it with you, they are REALLY good. There are no eggs, no processed sugar, no butter or vegetable oil in them, virtuous, definitely, but oh so scrumptious. I follow Brandi’s blog The Healthy Flavor  and am amazed at the fabulous recipes she comes up with. They are healthful, vegan and really really good!

The fat in these cookies comes from roasted pecan butter, it’s super simple to whip up, and is in my opinion is what makes them so wonderful. The list of ingredients is minimal, whole wheat pastry flour,cornstarch, maple syrup as the sweetener, chocolate, baking soda and powder, sea salt and vanilla. Thats it, simple, healthful and they come together in a flash. Full disclosure, I didn’t have whole wheat pastry flour so I used whole wheat flour with 2 tbs of AP flour, I also decided to use some of the chocolate in my pantry that really needed to be used so I combined, dark chocolate, dark chocolate with peanut butter and milk chocolate.  To make this vegan don’t do as I did just use vegan dark chocolate. Enjoy these cookies with a nice cold glass of milk (I had almond milk) and they are especially good slightly warm. Visit Brandi’s blog and try her recipes, you will love them as much as I do. Thank you so much for creating such a wonderful recipe and allowing me to post it on my blog.

Recipe courtesy of Brandi, The Healthy Flavor:

Ingredients:

1 cup roasted pecan butter. Pecan butter is creamier and oilier than other nut butters, so I wouldn’t recommend subbing anything. I made them with peanut butter and the taste was good, but they were more dry and didn’t hold together as well)

1/2 cup whole wheat pastry flour

2 tablespoons cornstarch

1/4 cup plus 2 tablespoons pure maple syrup

1 teaspoon vanilla extract

1/2 teaspoon baking powder

1/2 teaspoon baking soda

1/4 teaspoon fine sea salt (depending on how much you added when you make the pecan butter, this may need to be adjusted)

1/2-3/4 cup vegan dark chocolate chips plus extra to stick on the top if desired

Tip: The key to getting these as chunky and thick is to follow the exact steps. You must chill the dough first and also only divide the dough into 12 cookies. If you make more than that, they won’t be as fluffy.

Directions:

After making the roasted pecan butter, make sure to measure 1 cup in case you made more than that in the food processor. Add it to a bowl with the syrup and vanilla. Stir until well combined. In a small bowl, sift together the flour, cornstarch, baking powder, baking soda and salt and whisk very well. Make sure there are no lumps. Stir the chocolate chips into the flour mixture. Now add the flour into the wet ingredients a small amount at a time, stirring until just combined. Put the bowl into the fridge for 20 minutes to chill only.

Pre-heat the oven to 375 degrees and line a sheet pan with parchment paper. Depending on how creamy you pulsed your pecan butter, your batter may be a bit crumbly. If so, just press the dough together roughly with your hands by large spoonfuls. Divide the dough into 12-14 cookies only, if you want them thick and fluffy. I added a few extra chocolate chips on top of the cookies too. :) Do NOT flatten or spread out the dough, leave it piled high. They should bake high and fluffy as in the pictures. I made 3 batches and they all turned out fabulously fluffy. Bake for 11 to 12 minutes or until just starting to turn golden brown around the edges. Mine was perfect just after 11 minutes. Do not over bake!

Cool 10 minutes and transfer to cool completely on a cooling rack before handling…if you can contain yourself! :)After they have cooled, place them on a papertowel to drain any extra pecan butter.

Molasses Ginger Whoopie Pies With Ginger/Tangerine Buttercream

Whoopie Pies

Whoopie Pies

This is an unofficial Bake Together with Abby Dodge, it came about after an email to Abby from the great Greg Patent author of many wonderful cookbooks including one of my favorites Baking In America you should also visit his blog The Baking Wizard (aptly named) for some great baking tips and wonderful recipes. Greg was excited about Abby’s Bake Together concept and had made his variation of her delicious Whoopie Pie recipe in her newly released cookbook Mini Treats And Handheld Sweets. she let us all know that if we wanted to we could do the same and make a variation of the recipe.

Whoopie!

Molasses Ginger Whoopie Pies With Ginger Tangerine Cream Cheese Butter Cream
Makes 24 filled whoopie pies

For the whoopies
2 cups (9 ounces) unbleached all-purpose flour
2 teaspoons baking powder
1/2 teaspoon baking soda
1/2 teaspoon table salt
1 tsp ginger
1 tsp cinnamon
1/2 tsp allspice
6 tablespoons (3 ounces) unsalted butter, softened
1/2 cup granulated sugar +1/2 cup dark brown sugar
2 large eggs, at room temperature
1 teaspoon pure vanilla extract (Abby used 1 1/2 tsp vanilla extract or paste)
1/2 cup buttermilk, at room temperature minus 1 tbs
1 tbs molasses
Make the whoopies

1. Position an oven rack in the center of the oven and heat the oven to 350°F. Line three cookie sheets with parchment or nonstick baking liners.

2. Whisk the flour, baking powder, baking soda, spices and salt in a medium bowl until well blended and no lumps remain. Put the butter and sugars in a large bowl. Beat with an electric mixer fitted with the paddle attachment on medium speed until well blended and smooth, about 3 minutes. Add the eggs, one at a time, beating until just blended between additions. Add the vanilla with the last egg. Stop to scrape down the bowl and the beater as needed. Add half of the flour mixture and mix on low speed until just blended. Stir molasses into buttermilk and add the buttermilk and mix until just blended. Add the remaining flour mixture and mix on low speed until just blended.

3. Using a 1-tablespoon mini scoop, shape the dough into balls and arrange about 1 1/2 inches apart on the prepared cookie sheets. Bake, one sheet at a time, until a pick inserted in the center of one whoopie comes out clean, 9 to 11 minutes. Move the sheet to a cooling rack, let the whoopies sit for 10 minutes, and then transfer them to a rack to cool completely.

Make the filling

4 oz cream cheese at room temperature
4 oz softened unsalted butter
3-4 cups confectioners sugar
1/2 tsp powdered ginger
Zest from 1 tangerine  (I used satsuma tangerines)
 
Cream the cream cheese and butter, add confectioners sugar a cup at a time, add the ginger and tangerine zest beating until smooth and spreadable.
 

Assemble the whoopie pies

Turn half of the cooled whoopies over so they are flat side up. Spoon a slightly rounded 1 tablespoon of the filling onto the center of each whoopie. Top with the remaining whoopies, flat side down. Press gently on each cookie to spread the filling almost to the edge.  Roll the edges of the whoopie pies in colored sprinkles, if desired. Whoopies can be served immediately, chilled for 30 minutes or refrigerated up to 2 days. They are best when served slightly chilled.

I Can’t stop,More Awards

When I worked on my post last night I clamored to list blogs that I love and visit all the time, I want to mention a few more blogs that are beautiful and full of great recipes. So in the interest of making this brief here are a few more blogs that I love and are deserved of awards. There are so many great blogs I couldn’t stop with the ones mentioned in the previous post. You have to visit these also, they are amazing. How can I just pick a few when there are so many that are so wonderful.  You can pay it forward if you like but no obligation I just wanted to add you because I admire and love your blogs. I think it’s important for everyone who visits here to get to know you also.

Daisey And The Fox

Fleur de sel

Cambio de humor

Floras table

Maria Dernikos

A Taste Of Wintergreen

Vegan Flavorista

Real Italian dish

Christina’s Cucina

Chef Mimi blog

Sisterhood or brotherhood

Sisterhood or brotherhood

So Grateful- An Award Giving And Receiving

Wonderful award

Wonderful award

I want to thank Veena whose wonderful blog Vina’sdeliciousrecipes is always a source of inspiration, and for awarding me the Sisterhood the the World Bloggers Award. We are all linked by our passion for cooking and creating and being able to visit each others sites links us with those halfway around the world. Thank you Veena, I truly appreciate this, please visit her blog you will find amazing and delicious recipes and cultural information.

Here are the 10 questions.

  1. What is your favorite color? green and pink
  2. Your favorite animal? dog
  3. Your favorite non-alcoholic drinks? hot cocoa
  4. Facebook or Twitter? twitter
  5. Your favorite pattern? paisley
  6. Do you prefer getting or giving presents?  Giving
  7. Your favorite number?  5
  8. Your favorite day of the week? friday
  9. Your favorite flower? peony
  10. What is your passion? cooking, my dogs,my family,my work

Bloggers I would like to nominate:

The Healthyflavor

The Healthy Epicurean

Lilly Sue’s Bites and Brews

Yummy Chunklet

Go Bake Yourself

The Kat & the Falling Leaves

Food Thoughts to Share

Pale Yellow

Two Dogs In The Kitchen

Yorkes Girl

Petit4chocolatier

I admire and visit all of these blogs all the time, each one is full of great recipes, is informative and beautiful. If you choose to pay it forward , link to this post please. Just letting you know I love your blogs and admire your work.

DIY Almond Milk

Almond Milk

Almond Milk

I know this is probably nothing new to many of you but for me if was a revelation, making your own almond milk is easy and yields (IMHO) a product so superior to the commercially prepared milk, I honestly was blown away. It’s my new obsession and I use it everyday in shakes or on cereal or as a snack. I researched several websites to see how it is done and tried a few different methods, I made a few changes to the recipes I saw online. You need raw almonds, bottled or filtered water, a sweetener is optional, as is flavoring and salt (preferably sea salt). I decided that I like it with just a touch of sweetener and vanilla. I probably use a little less water to make it than other recipes because I like it rich and creamy. It is delicious, nutritious and a real treat. I always used soy milk in my morning shakes but not anymore. This morning I had a banana, date shake made with the almond milk and it was heavenly. I used the leftover pulp to make some granola this weekend and it was great I have to try to think of ways to use it right now it is sitting in my freezer in ziplock bags. If any of you have any ideas on what to make with the pulp please let me know. You will need raw almonds of course, filtered or bottled water, cheesecloth or a nut milk bag and thats it. There is no real formula you can add or subtract from the amounts in this recipe. This is how I like to make it.

Preparation:

3 cups raw almonds

6 cups filtered water

Place almonds and water in a lidded container and refrigerate for 24-48 hours.

Making the Milk:

drained almonds

5 cups water

sweetener (Optional)

Flavoring (Optional)

pinch of sea salt

Drain the almonds in a strainer, add to vitamix or food processor, add 5 cups bottled or filtered water, sweetener (I used 1 1/2 tsp organic cane sugar) optional flavoring (I added a tsp of vanilla), and sea salt, blend or process, If using a vitamix 2 minutes will do and if using a food processor 3-4 minutes.

Have doubled cheese cloth or nut milk bag ready over a large bowl, pour into cloth or bag and squeeze, until it is dry. Pour into container and refrigerate until ready to use.

NOTE: My first batch I used cheese cloth doubled, it worked pretty well but I found it was not completely strained, it’s not necessarily a bad thing to have a few errant pieces of nuts in your milk. The second batch I used a clean cotton tea towel and it worked like a charm, no nut pieces and it was large enough that I was able to really squeeze it and get every drop of milk. I am going to invest in a nut milk bag very soon.

One Year Ago Today

Today is the anniversary of the first post on my blog, it’s hard to believe it has already been a year since I started this blog. I have learned so much during this time and like to think that I have improved a bit both in content and photo’s but it is still a work in progress. The best part of this little adventure really is the wonderful people I have met, virtually for the most part but I feel like I know so many of you personally. I have come to know and follow so many blogs and I strive to achieve what so many of you have already managed to do. This was my first blog post, a recipe I created for a citrus contest on Food52.

Mixed Citrus Curd

Mixed Citrus Curd

Makes 2 cups

1 each orange, tangerine,clementine, lemon (I used a navel orange and honey tangerine)

2 1/2 tbs zest from the fruits

1/2 cup juice (mixed from each fruit)

6 extra large egg yolks

4 oz unsalted butter cut into pieces (1 stick)

1 1/2 cup sugar

pinch of salt

1 tsp orange zest (added after its cooked)

Instructions:

Zest the fruit and set aside 2 1/2 tbs, juice the fruit, mix together and set aside 1/2 cup. In saucepan add the egg yolks, sugar and a pinch of salt. Beat with hand held mixer until creamy and light. Whisk in the juice and zest and add the butter, cook over medium/ low heat stirring constantly with a wooden spoon. Place thermometer in pan, keep stirring. Its done when temperature reads 175, remove from heat. If you don’t have a thermometer cook until thick and it coats the back of your spoon, with your finger make a stripe and if it stays intact its done.

Pour through a sieve into a bowl, add the tsp of orange zest, stir to combine and cover with plastic that sits directly on top of the curd, allow to come to room temperature then refrigerate overnight.

Brown Butter Spiced Ale

IMG_0342

The latest Food52 contest was all about beer, I love a challenge and wanted to create a drink using beer that could comfortably be consumed when it’s cold outside. I primarily think of beer as a summer drink. A hot buttered rum came to mind so I set about switching the ingredients so as to use beer instead of rum and water. I thought that an ale would be nice and added browned butter, brown sugar, some spices and a splash of brandy and the result is really quite delicious. It’s a great way to enjoy beer if you live in a cold climate. The bitterness of the ale is offset by the sugar and spice and the browned butter adds a richness reminiscent of a hot buttered rum. I was so pleased that the recipe was chosen to be tested as a community pick and was thrilled to see that it was chosen to be showcased and photographed by the editors at food52. Kukla, one of our outstanding community members tested the recipe and wrote a lovely review. Here is the recipe, I hope you enjoy if you decide to give it a try.

Serves 2

  • 12 ounces ale of your choice
  • 2 tablespoons unsalted butter, browned
  • 3 tablespoons dark brown sugar
  • 1/4 teaspoon ginger
  • 1/4 teaspoon cinnamon
  • 1/4 teaspoon nutmeg
  • splashes brandy (about 1 tablespoon) per glass
  • 1 Cinnamon stick for garnish
  1. Add butter to small saucepan and melt on medium heat. Cook until butter becomes a light brown and has a slightly nutty smell (approximately 3 minutes). Reduce heat to low and add brown sugar and spices — cook until brown sugar is dissolved and the mixture is paste-like. Scrape into small bowl or ramekin and cover with foil to keep warm.
  2. Add the ale to the same saucepan and heat on medium until hot. Spoon two tablespoonds of the spiced butter mixture in serving glass, pour hot ale into glass and add a splash of brandy (about 1 or 2 tablespoons) and stir. Garnish with cinnamon stick.
Photo by James Ransom for Food52

Photo by James Ransom for Food52

Banana Cupcakes With Cream Cheese Frosting And Salted Caramel

Banana Cupcake

Banana Cupcake

I have a bunch of over ripe banana’s that need to be used ASAP, I have made loaf after loaf of banana bread and wanted something a little different so I decided to make cupcakes, banana cake is wonderful and something I haven’t made in a very long time. I saw this recipe for the cupcakes and caramel sauce on Martha Stewarts website and it sounded delicious. The homemade caramel sauce with banana cake and cream cheese icing sounds perfect.

I have to confess, I have never made caramel, real caramel before. For some reason I was intimidated by it, maybe it was the bubbling that occurs when you add the cream, or the fear of failure, who knows but I avoided making it until today. I have to admit this caramel sauce is wonderful, delicious and so easy to make, I didn’t even use my candy thermometer I simply went by the color of the caramel and it turned out perfectly. You can make the caramel sauce the day before the cupcakes so it is cooled sufficiently and thick enough to pipe onto the cupcakes. NOTE: I halved the recipe for caramel sauce.

Caramel

Caramel

Caramel Sauce:

Makes 10 oz of sauce

1 cup granulated sugar

6 tbs unsalted butter cut into tbs size pieces

1/2 cup heavy cream

sea salt (I used Maldon flakes)

In medium size heavy bottom sauce pan add the sugar, turn the heat to medium/high and let the sugar start to melt, when you see that it’s melting start whisking the sugar, it will clump it’s ok keep whisking until it’s completely melted. Let it cook until it turns a deep amber color swirling the pot every now and then. Once it’s a deep amber color add the butter and whisk until sugar is incorporated. Remove from heat and add the heavy cream, whisk until combined and add a pinch or two of the sea salt. Let cool for 20 minutes and then pour into container, it will be thin but it thickens up beautifully.

Cupcakes:

Makes 24 regular size cupcakes or 12 jumbo

  • 3 cups sifted cake flour (not self-rising)
  • 1 1/2 teaspoons baking soda
  • 3/4 teaspoon baking powder
  • 3/4 teaspoon salt
  • 1 teaspoon ground cinnamon (optional)
  • 6 ounces (1 1/2 sticks) unsalted butter, softened
  • 1 1/2 cups packed light-brown sugar
  • 3 large eggs at room temperature
  • 4 very ripe large bananas, mashed (about 2 cups)
  • 3/4 cup buttermilk
  • 1/2 teaspoon pure vanilla extract
  • 1 cup chopped pecans (optional)

Heat oven to 350 degrees. Place liners in cupcake tins.

Whisk dry ingredients in a large bowl. Cream butter and sugar with a mixer until light and fluffy. Add eggs, 1 at a time, beating after each addition.

Reduce speed to low. Mix wet ingredients (bananas, buttermilk and vanilla) in a bowl. Add dry ingredients to butter mixture in 3 additions, alternating with wet ingredients and ending with dry. Scrape sides of bowl. Divide batter among muffin cups, filling each full.

Bake cupcakes until testers inserted into centers come out clean, about 20 minutes for jumbo cupcakes increase cooking time to 25-30 minutes. Let cool in tins on wire racks

Cream Cheese Frosting:

8 oz cream cheese softened

8 oz unsalted butter softened

4-6 cups confectioners sugar

2 tsp pure vanilla extract

Cream butter and cream cheese in stand mixer using paddle attachment, add the confectioners sugar a cup at a time beating until smooth and spreadable consistency, add the vanilla and mix until combined. Frost cupcakes immediately.

Pipe icing onto cupcakes and drizzle with caramel sauce. Enjoy!

IMG_0471