Mille Crêpe Cake
Look at this cake that Mimi made!!! Fantastic and what a great challenge. I am in awe, it turned out so well.
Apr 29

Look at this cake that Mimi made!!! Fantastic and what a great challenge. I am in awe, it turned out so well.
Apr 23

A quick NOT recipe in between my Dacquoise challenge. It is simple and delicious, filling and there is no meat involved. I used canned chickpeas (drained) because it’s all about keeping it simple. This takes about 20 minutes in the oven and you are ready to eat. I recommend mixing the chickpeas with everything a few hours ahead and let them marinate, overnight would work as well, they will be even more tasty. I used what I had on hand to make this and it turned out great. Served simply with some greek yogurt mixed with fresh diced cucumber and dried mint makes a nourishing and super tasty meal.
Roasted Chickpeas
serves 2-3
1 15 oz can of chickpeas rinsed and drained
approximately 10 cherry or baby heirloom tomatoes washed and cut in half
1 shallot peeled and diced
pine nuts a handful or about a scant 1/2 cup
olive oil
approximately 1-2 tbs harissa
dried mint (didn’t measure)
fresh parsley chopped (if I had to guess about 1/4 cup)
1 clove garlic minced or a couple of shakes of garlic powder
salt and pepper

Put everything in a bowl, mix it so it’s combined. Cover and refrigerate for about 2 hours or overnight. Pre heat oven to 375 and line a small sheet pan with parchment. Pour the chickpea mixture on the parchment and roast in the oven for about 20 minutes or until the tomatoes are soft and chickpeas are lightly browned.
Serve with greek yogurt mixed with chopped cucumber and dried mint.
Apr 21

Photo from Saveur found online at Saveur.com Mocha Dacquoise
Once a upon a time I was very active in recipe contests, they challenged me, inspired me and forced me to think outside the box. Food52 still has contests, not as often as before but they are still there and Whole Foods ended their contests a few years ago. Give me an ingredient and challenge me to come up with an original or semi original recipe using it and it excited me. Those days are but a memory now as I haven’t really participated in a while. Blogging is a challenge and I am afraid I have fallen short of my own expectations, don’t want to be too hard on myself but if we feel like we are failing it’s up to us to do something about it. When I post a recipe I want it to be something different, even if it’s a twist on a classic there should be a new and different technique or some ingredient that is not normally used when making it. Having a repertoire of classic recipes is something every cook should have in their archives, something you make all the time, it always comes out good, you can make it blind folded so to say, without looking at the recipe. I have recipes that I use all the time, tried and true, always good but thats not challenging. One thing that I think would help to keep this blog fresh is to try to make something I’ve never made before, a recipe that will challenge my skills and hopefully will yield a good result. I have a bucket list of things I have always wanted to make, croissant, puff pastry are two things on my list, another is a Dacquoise. I first read about this cake in Julia Child’s cookbook Baking With Julia, it kind of scared me, a lot of parts, some complicated instructions but the finished product is ethereal and delicious. Dacquoise is a cake made with almond and/or hazelnut meringue layers with different fillings, think of a macaron, it’s very similar in technique. The cake is light and if made well, a work of art. I tried making macaron and failed miserably and haven’t tried again, it is still on my list of things I must make.
In a few weeks it will be my birthday and this will be my birthday cake (God willing). I plan on taking a day off work and devoting the entire day to baking. It will be a challenge.They caution you to make the cake in advance of serving, as much as a week but at least 12 hours, the longer you let it sit in the refrigerator the easier it will be to get a clean cut. I found a recipe from Saveur for a Mocha Dacquoise. It looks beautiful and sounds delicious. The traditional almond meringue layers with a coffee buttercream and chantilly filling. I am very excited to try this recipe and scratch it off of my bucket list.

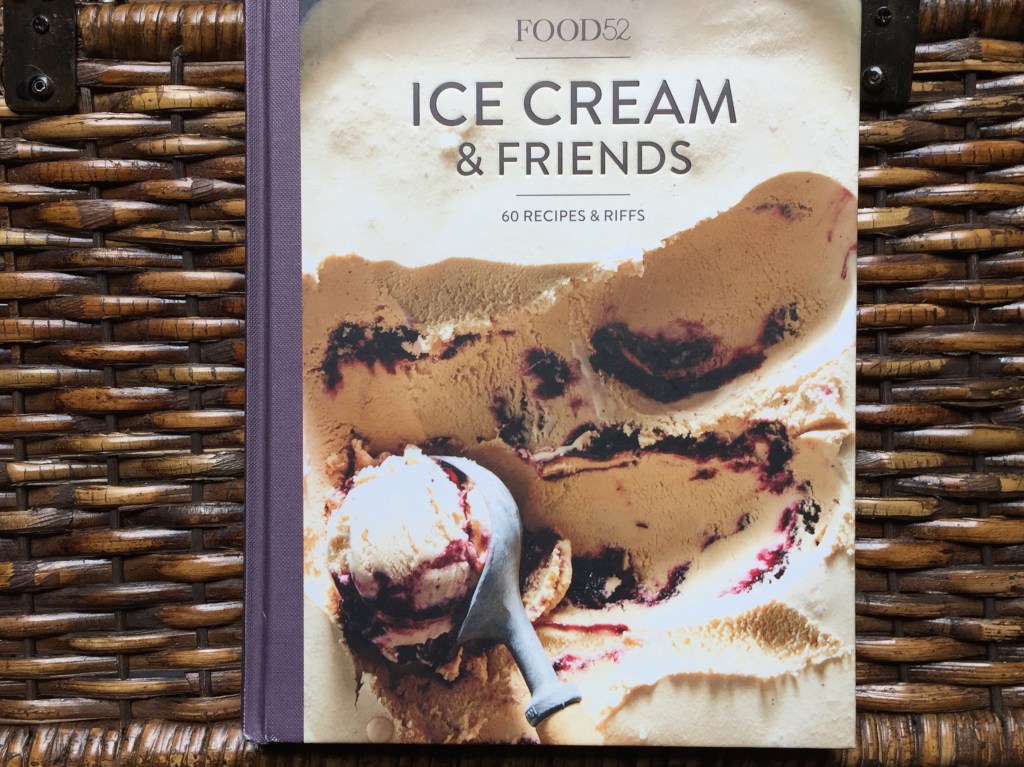
Now for the giveaway! I want to offer one lucky reader a copy of the Food 52 cookbook Ice Cream and Friends. All you will have to do is leave a comment and you will be entered. The winner will be chosen randomly using random.org. But wait, I am feeling generous so there will be a second winner who will get the other Food52 cookbook Mighty Salads. I am sorry that I cannot send the books outside of the continental US, it is open to residents of the US only. The contest will end on May 2nd and I will post my Dacquoise even if it is a fail along with the announcement of the winners. In an effort spice things up here, there is more in the works, giveaways and challenging recipes.
I also want to challenge you all to make something outside of your comfort zone, something you have always wanted to make but were hesitant to try. If you do make something comment here with a link to your blog and I will pick one or two recipes and re blog them. We all need to challenge ourselves and if cooking is your passion push yourself to make something new, exciting and different!
Apr 18

Friends came over for Easter dinner and I wanted to serve a special main dish that screamed Spring, what comes to mind is lamb and to accompany the lamb a variety of vegetables. I bought a boneless lamb shoulder roast weighing 3.65 pounds trimmed and tied. I really don’t cook or eat that much meat especially roasts and did a search online for some ways to prepare.A meal that was simple, no fuss and tasty was key. Jamie Olivers roast lamb shoulder sounded great, flavored with rosemary, salt, pepper and garlic and roasted until so tender it falls apart. The rosemary in my garden is still around, can’t believe it lasted outside all winter and I had just enough for this recipe. Mr. Oliver cranks up the heat in the oven as high as it goes, lays rosemary and unpeeled garlic cloves at the bottom of a baking tray or roasting pan, rubs the meat with salt and pepper, gives it a good dose of olive oil, puts more rosemary and garlic on top of the meat, covers and roasts. Once you put the pan in the oven you immediately lower the oven temp to 325 and leave it for about 3 1/2-4 hours. In the end you have a lovely tender and fragrant lamb roast. After roasting you make a gravy from the pan drippings. The meat was so tender I couldn’t slice it, it fell apart as I touched it that’s why it looks so sloppy. It really was so good and so easy to prepare, no fuss at all.
The vegetables I used are peas, carrots and asparagus. The carrots and asparagus were roasted in the oven and the peas steamed and smothered in butter. I also had some small yukon gold potatoes that I boiled then drained, put in a buttered oval casserole and oven roasted at 400 degree’s covered with foil until the potatoes just began to brown, approximately 45 minutes.
There were leftovers which I made into a shepherds pie, just mix leftover gravy with the meat and vegetables, mash some potatoes, spread on top and bake at 400 degree’s until the mash crust is browned and filling is bubbly.

Jamie Olivers Roasted Lamb Shoulder
One boneless lamb shoulder roast (Mine was 3.65 lbs)
1/2 bulb garlic peel on and gently smashed
2 red onions peeled and quartered
6-8 sprigs fresh rosemary
olive oil
salt and pepper
You will need a roasting pan with a lid or if you don’t have you can cover this with tin foil. Heat the oven as high as it goes which in my case was 550 degree’s. Drizzle a little olive oil in the bottom of your pan and lay several sprigs of rosemary and half of the garlic which you smashed peel and all. Rub some olive oil on the lamb and season with salt and pepper. Lay on the rosemary and garlic. Put another sprig or two of rosemary on top along with the rest of the garlic. Surround the meat with the onion quarters and put the lid on or cover tightly with foil. Place in the oven and immediately lower the temperature to 325 degree’s. Roast for 3 1/2 to 4 hours.
Remove from the oven and pick out the rosemary (discard), onion and garlic. Pour through a sieve, pressing the onion and garlic and pour into a pan where you will reduce by about 1/3. Make a slurry using 1 tbs of flour and add to the reduced pan juices along with some wine, broth or water, just a little. Whisk until it thickens. Serve along side the roast.

My favorite part of the meal is the spring vegetables, I wasn’t lucky enough to find them at the farmers market, there are still a few weeks left before they appear according to the farmers. I was able to get some incredibly fresh vegetables at the store and some frozen peas. No recipe required for the vegetables, the carrots and asparagus are oven roasted with salt and pepper and olive oil, the peas are steamed and then I put them all together on a platter with some good salted butter.

Leftovers made into shepherds pie
Apr 16

First of all I can’t believe how quickly time is whizzing by, already Easter and before you know it we will be enjoying summer with the warm weather and great produce. If it were up to me I would skip the warm weather and just go for the produce. For Easter I decided to have very good friends over for dinner and wanted to make a special meal. Since I love dessert I am going to post the recipe for the dessert before I post dinner, backwards maybe but I’ve always been someone who loves dessert especially when it involves ice cream. A few months back I saw a recipe on Johnny’s blog Kitsch n Flavors for profiteroles. I could have sworn I saved it to Evernote but could not find it, Johnny’s blog is now private and I couldn’t access the recipe so I used one from Saveur which I have to say turned out great. Choux pastry may sound and look imposing but it couldn’t be easier really. It takes literally minutes to prepare, bakes in no time at all and the resulting pastry is light as air and so delicious.
I have also been meaning to make Amanda Hesser’s recipe for Olive Oil Gelato, I tasted it for the first time when I enjoyed Pasta Night at the Food 52 headquarters in Manhattan. I was smitten, totally fell in love. Imagine a light and airy pastry shell filled with olive oil gelato and smothered in a deep rich dark chocolate sauce. Well, it sounded great to me so I set out to make this for my Easter dinner party. The olive oil gelato makes enough for 1 the way I like ice cream, really just a tiny amount and I planned to serve 2 profiterole per person and there was not enough, I ran to the store and found a bourbon butter pecan gelato so my guests will get one of each. If you plan on trying the olive oil gelato and need enough for more than 1 or 2 people you will have to double or even triple the recipe.

Happy Easter, Passover to everyone and I hope you all had a wonderful day!!

Olive Oil Gelato
Recipe by Amanada Hesser/Food52
3/4 cup whole milk
1/4 +2 tbs water
3/4 cup sugar
4 egg yolks
good pinch of salt
4 tbs really good olive oil
Put the milk, water, sugar and salt in a medium size sauce pan and cook until you see bubbles forming on the outer edge. While the milk and sugar are heating whisk the egg yolks until foamy. When milk is ready add in a slow steady stream to the egg yolks whisking constantly. Return to the pot and cook on low stirring constantly until the custard thickens and if using an instant read thermometer it should be 175-180. Place pot in ice bath and stir the custard until it cools. Transfer to a container with a lid and let sit overnight in the refrigerator. The custard will thicken, it takes a while but don’t give up. Remember to stir constantly and don’t let the egg scramble.

When you are ready to make the gelato whisk in the olive oil, it will be smooth and silky. Pour into your ice cream maker and follow manufacturers instructions. Spoon into a freezer container and place in the freezer for at least 4 hours or until scoopable.
I am going to make a recommendation, I plan on making this again because it really is good but I will make a couple of changes. I will increase the milk to 1 cup and the water to 1/2 cup leaving everything else the same, the olive oil doesn’t freeze and makes the gelato very soft, adding additional liquid IMHO will help it to be more scoopable and stay frozen a little longer. The gelato melts very quickly, trying to get a photo with it in the profiterole was challenging and I think that adding more milk and water will help.

Choux Pastry
Recipe from Saveur
1/2 cup whole milk
1/2 cup water
8 tbs butter cut into cubes
1 cup flour
pinch of salt
4 eggs at room temperature
Heat oven to 425 degrees. Put the water, milk, butter and salt into a medium size pot and cook on high heat until it comes to a boil. Add the flour and quickly stir to combine, keep cooking until it is cohesive and somewhat dry. Scrap into a mixing bowl and with hand held mixer add the eggs one a time beating until thoroughly combined. Line a sheet pan with parchment and using a small scoop 1 1/4 tbs size, scoop the choux batter onto the baking pan each one approximately an inch apart. Place into the oven and immediately decrease the oven temperature to 375 degree’s. Bake until golden brown for 20-25 minutes, remove from the oven and with a skewer poke one hole in each pastry, place back in the oven with the door ajar for 3 minutes. Let cool on the pan. You can use them right away or they can be stored up to 3 days in an airtight container, they also freeze beautifully.
Fudge Sauce
6 oz dark chocolate
1/2 cup heavy cream
1 tbs corn syrup (optional)
1/2 tsp espresso powder (optional)
1 tbs coffee liquor like kahlua (optional)
Heat milk to scalding, add the chocolate let sit for 5 minutes, stir until melted add the corn syrup, espresso powder and liquor, stir and enjoy! Best served slightly warm.
I have to mention the eggs you see here, found them in the supermarket they are certified humane from a small farm in New Hampshire. There is a video of the farm on you tube and this farm is truely humane, sustainable and the eggs are gorgeous. I used to watch Martha Stewart’s show all the time and wanted her gorgeous blue/green eggs and when I saw them in the store I couldn’t believe it. Seek out this brand it is carried in quite a few stores including Whole Foods. You can tell they are from happy chickens the yolks are almost orange and the flavor is incredible. Buying humane is very important to me and I look for the Certified Humane label on the dairy that I buy. I was in no way asked to write about Carols Eggs, I did this on my own to pass on information about a great product to you all!


Apr 12
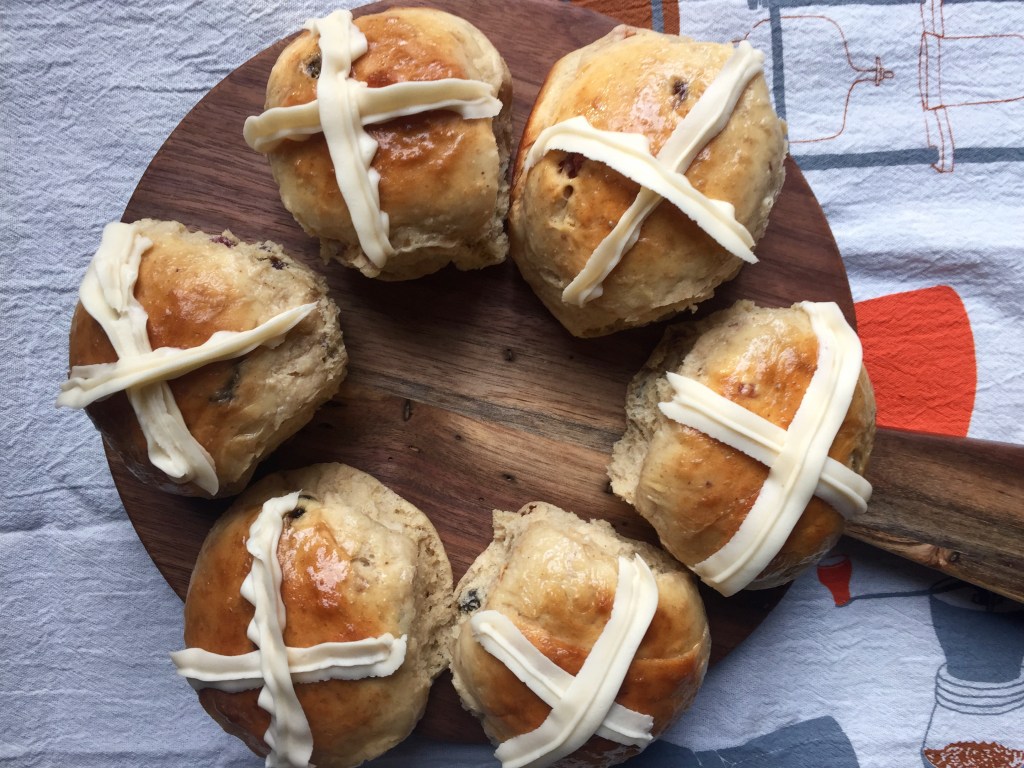
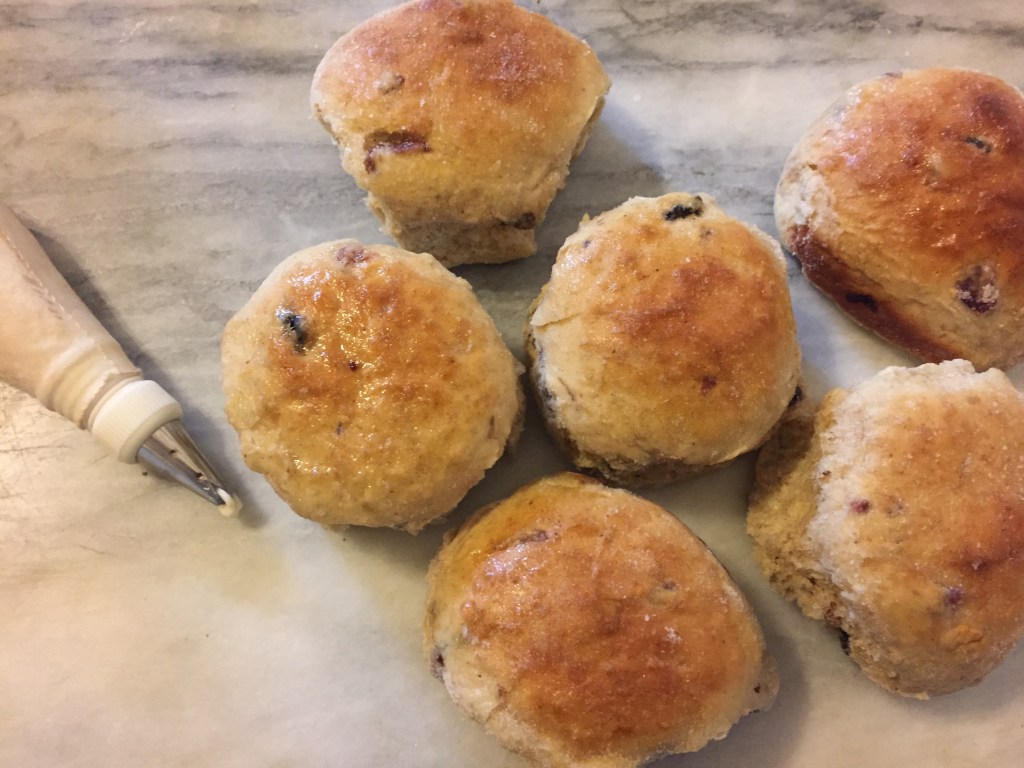
Last year I made hot cross buns, I liked them so much that they have become an Easter tradition. The recipe I made last year was really good, but I’m always on the hunt for one that could be better. I use King Arthur Flour and love their recipes. My go to dinner rolls are from their site and they are the best, last years hot cross buns were also a King Arthur recipe. In reading over this recipe I noticed that there is very little rising time involved, 45 minutes for the first rise and 20-30 minutes for the second rise, thats it. I chose to make them on a warm day to make the rise that much easier. The dough comes together quickly, it’s a very wet dough and now I know why they say to use a scoop and plop them in muffin tins, it does give the option of making them free form in a round pan (I chose that option). If you make them be warned the dough is hard to handle, it’s very sticky and soft. I first oiled my hands to try to form the balls and then changed to flour and let me tell you my hands were a sticky mess. I can deal with that but it makes forming the dough balls difficult. The recipe makes 18, I made them larger and it yielded 14. They also are not exactly round, sort of mishapen but they are very soft and fluffy.
Both recipe’s are similar in technique, I like the use of potato flour in these rolls, potato always yields a very soft moist roll, the flavor is good, however I liked the look of the other rolls I made more. Maybe I will play around with this recipe and see if I can’t get them to look better because they sure are delicious. So pillowy soft, a wonderful recipe and after tasting them I forgot about the sticky messy dough.
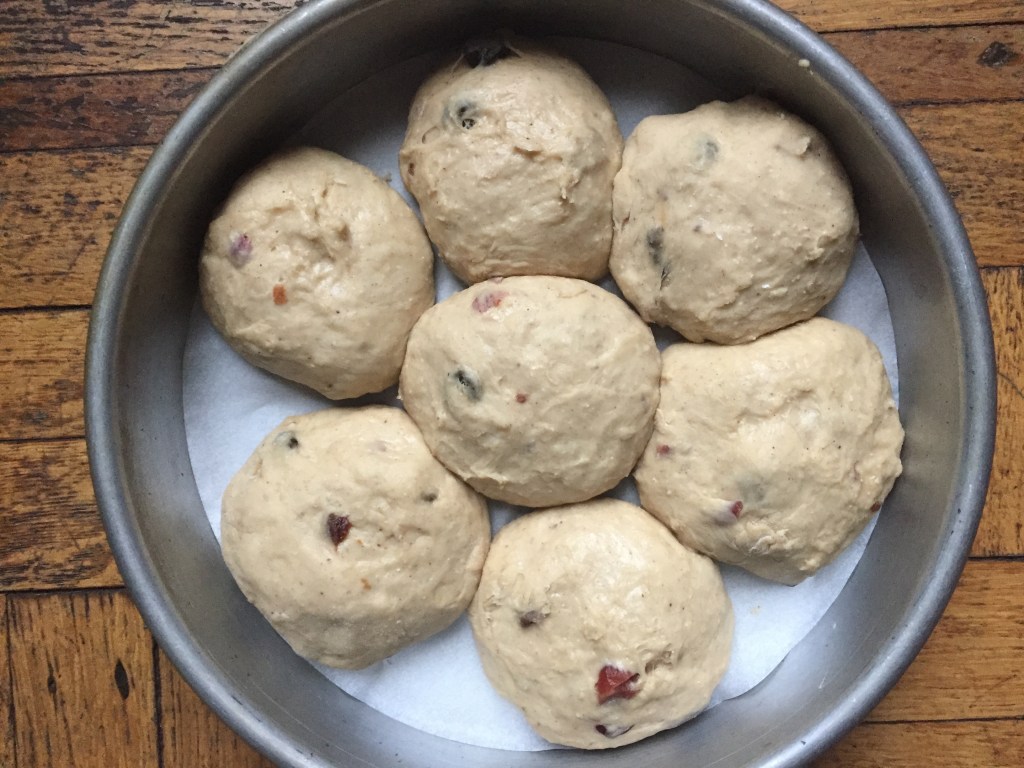
Ready to rise
Hot Cross Buns
Recipe from King Arthur Flour site
1 cup raisins, golden raisins or dried fruit (I used mixed dried fruit soaked in rum)
2 tbs rum or water
3 3/4 cup all purpose flour (Because the dough was so wet I added 3 tbs of flour to make it cohesive)
2 1/2 tsp baking powder
1 1/4 tsp salt
1/4 cup potato flour or potato flakes
1/3 cup sugar
2 1/2 tsp instant yeast
1/2 tsp cinnamon
1/2 tsp nutmeg (next time I will use 1/4 tsp nutmeg and 3/4 tsp cinnamon)
1/4 tsp allspice
2 large eggs
4 tbs melted butter
1 3/4 cup lukewarm water
Glaze (Optional but recommended)
1/3 cup sugar
4 tsp water
1 tbs vanilla extract
Icing for cross
1 1/4 cup confectioners sugar
2 tbs soft butter
1/2 tsp vanilla extract
1 tbs cream or milk
Apr 9
Things have been crazy busy on my end and I have totally neglected the blog. I have ideas and things I want to do but simply have not had time to cook or bake except for charity auctions and you’ve seen all of that before, redundant posts are not something I like posting. I am planning another collaboration with Teagan which is always fun, I hope you all like those, I certainly do. Another giveaway is also in the works, and will be coming soon you may be able to guess what it is.
The food I have been making is pretty boring and not really blog worthy, there is nothing different or unique about it. I got back on track after Holiday food splurges with my change of diet and on the plus side have lost some weight which was important for me. I do a low carb low sugar meal plan with lots of vegetables and some protein. Work has been busy, that’s a good thing since I’m an Independant contractor and my livlihood is dependant on how much business I bring in.
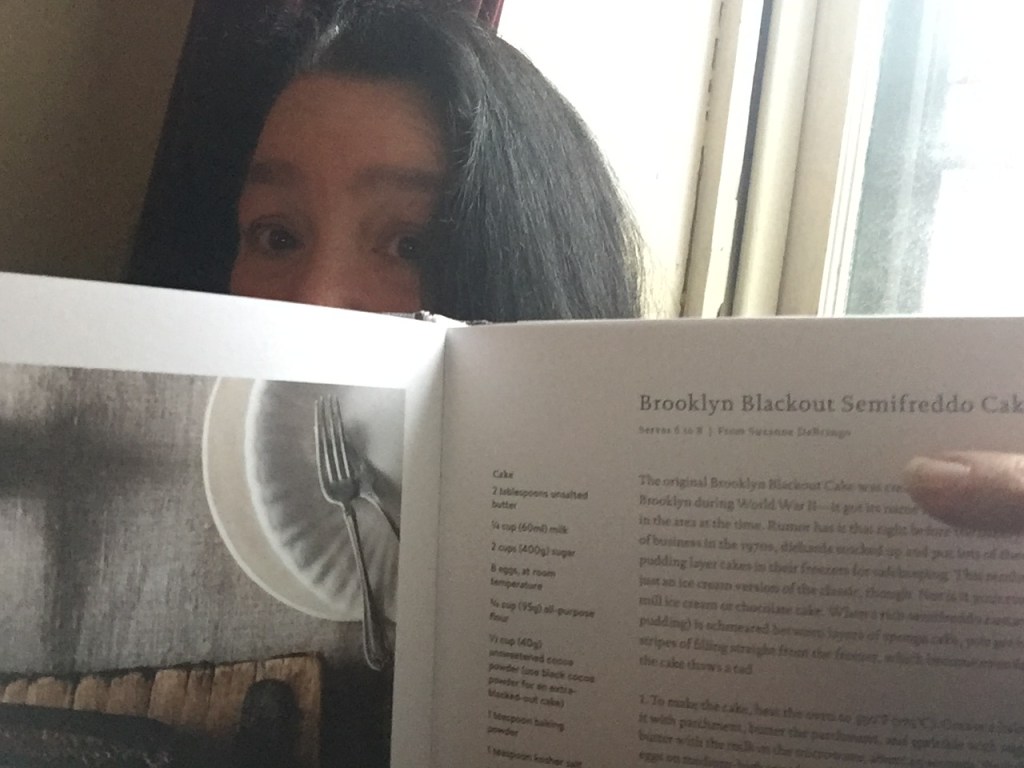
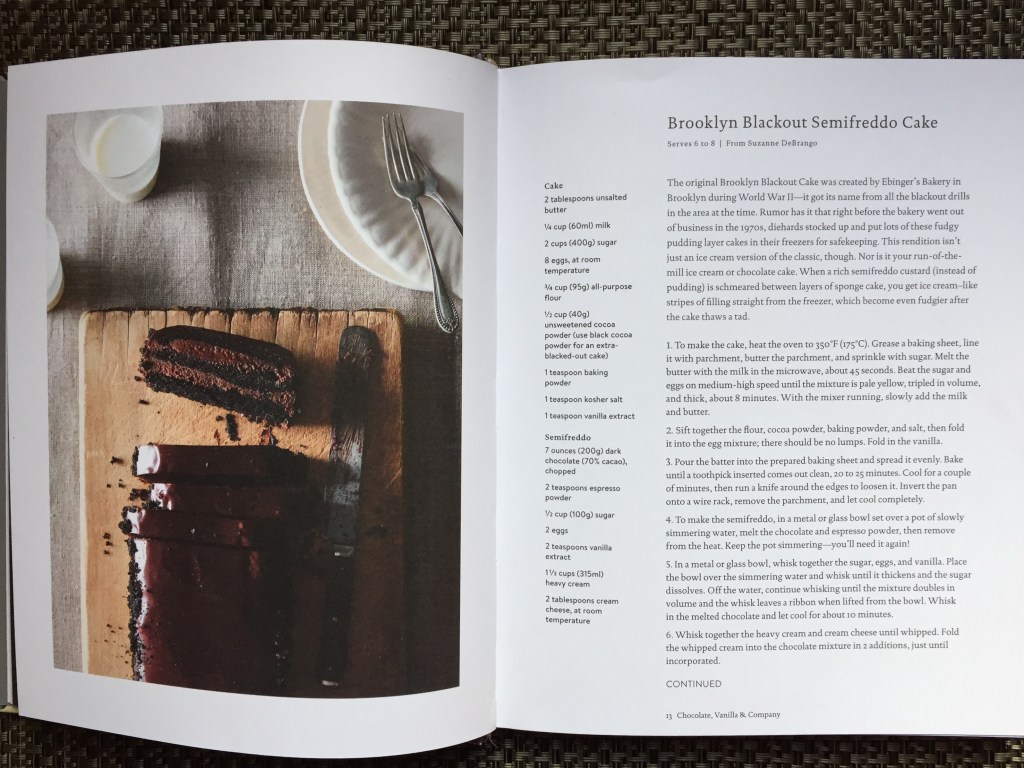
So in the interest of keeping my blog alive I decided to reach into the recesses of my collection of recipes and post something from the past. If I were asked what my favorite recipe is it would be hard to pinpoint but this one is right up there at the top. I posted this recipe on Food52 years ago and last year found out that they are including it in their new cook book Ice Cream and Friends. I received my copy about a week ago and I have to say it’s a gorgeous book with amazing recipes from the Food52 Community and the founders Amanda and Merrill. The recipe they included is Brooklyn Blackout Semifreddo Cake. I dreamed this one up for a contest, the theme was frozen desserts. This was my homage to the famous cake conceived at Ebingers Bakery right here in Brooklyn NY, sadly Ebingers went bankrupt in 1972 and the building is now condo’s but the cake lives on at bakeries and recipes can be found all over the internet. A Brooklyn Blackout Cake is chocolate x100 deeply rich chocolate cake, chocolate pudding filling used also to frost it and cake crumbs pressed onto the sides.
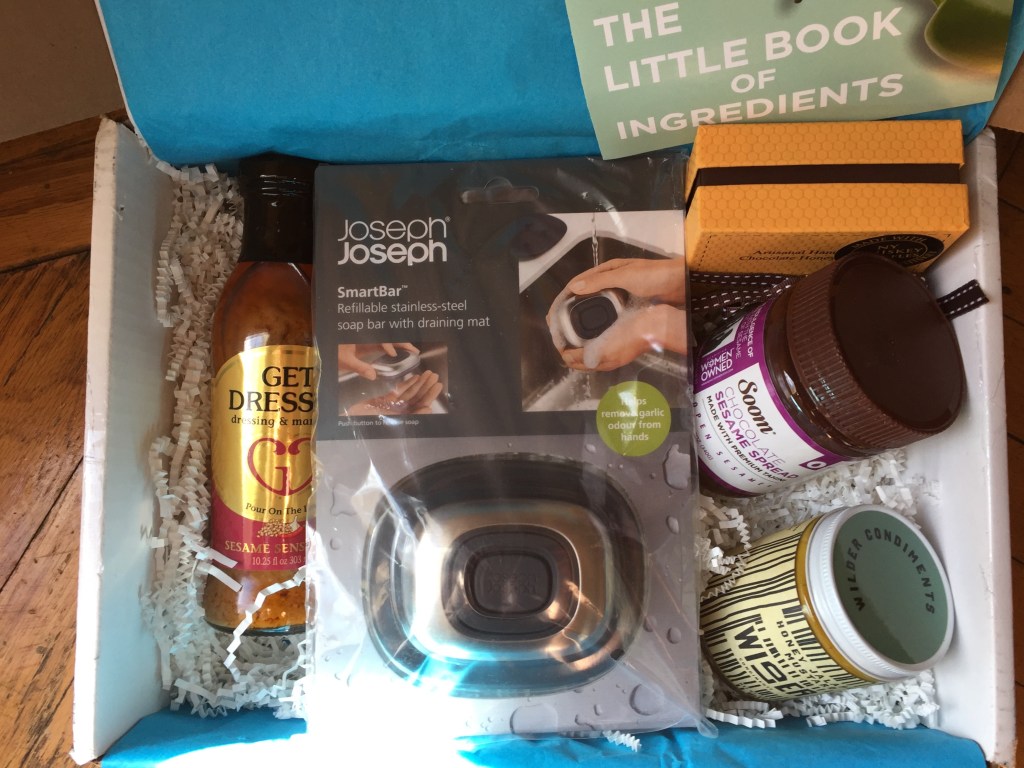
Last week I also received a Spring box from Mary Frances, you all know Mary right. Her blog Love The Secret Ingredient has some amazing recipes and she also has a thriving business Mary’s Secret Ingredient, a seasonal box of goodies is mailed to you and part of the proceeds are used to feed hungry children, Mary has heart along with some great recipes and a creative business sense. I will use some of the products to create a recipe soon but here is a peek at the box.
Mary’s Secret Ingredient Spring Box
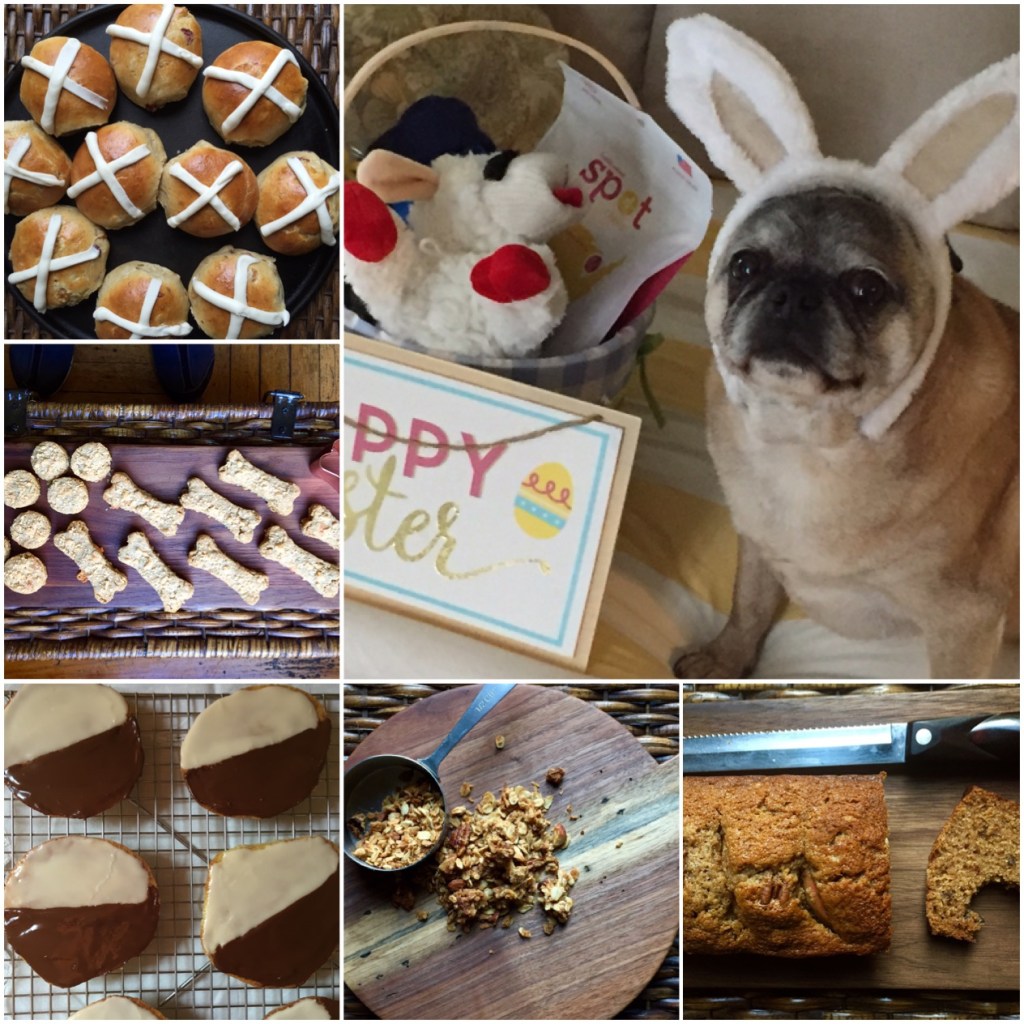
I will leave you with a photo of the goodies that were auctioned on Instagram, all the proceeds went to help a sweet little pug that needed life saving surgery, any of you that are pet parents know how expensive it is to take your dog or cat to the vet, no one should have to decide on whether or not their pet lives or dies because of money and we as a pet community on Instagram raise funds to help out those in need. I am currently finishing the baking and the box will get mailed this week. Full disclosure Easter Bunny Percy will not be included with the box of goodies. I think he makes a very handsome bunny!!