Skip to content

Posts from the ‘Meatless/Vegetarian’ Category

Cake – A Learning Experience And A Tip

This is a cake recipe that I have been making for years and years, the recipe is tried and true, tested and developed by my Mom many moons ago. Why then did it fail?  I posted this recipe a long time ago on Food52, it has been featured, made over and over again by hundreds and it’s a really good recipe. It all started a few weeks ago when I decided to make a cake, I followed the directions as I always do, did not deviate, everything looked good until I got the cake out of the oven, it looked different, the sides were shrinking, coming away from the sides of the pan, not just a little but dramatically and the texture just didn’t seem right. It was more like an angel food cake than a yellow cake and was mis-shapen and lopsided. I thought I had to have done something wrong, maybe I whipped the egg whites too long, so I threw it away and made it again this time being EXTREMELY careful with my preparation. Guess what, same outcome. I honestly didn’t know what to think, I am not a novice baker, I try to use quality ingredients and follow directions to the letter. It was discouraging to say the least. I systematically started analyzing everything that went into this cake, eggs were the right size and at room temperature, milk also room temperature, my baking powder was not expired, the only change was that I opened a new box of  cake flour so I thought hmmmm maybe it was the flour. I called King Arthur Bakers Catalog, who by the way are a wonderful company and spoke to one of their baking experts, they took down the lot number and other information on all 3 boxes that I had received and asked me to do an experiment, try making my own cake flour, in case you have never done this you remove 4 tbs of flour from 1 cup of all purpose flour and replace with 4 tbs of corn starch, btw, they refunded my money which I didn’t ask them to do but because they are an outstanding company they did it. A few weeks went by before I decided to give it another try.

The bottom layer is the one using the new cake pan, can you see the difference?

THE RESULT

I made the cake using homemade cake flour, it turned out really well except for one thing, one layer I baked in my Chicago Metal cake pan that I have been using for ions, the other layer I baked in a newish cake pan. The layer in my old pan was great, the other layer was good but not as good as the other layer, how could that be? To be fair I have used the new cake pan for other cake and it turned out just fine but for some reason not as much for this yellow cake. Truth be told I’m very picky and OCD about what I make and I notice even minor changes and they bother me. The cake was good, don’t get me wrong but there was a minute difference in that one layer. Going forward I will only bake my yellow cake recipe in the Chicago metal pans and will continue to be loyal to King Arthur flour but from now on I think I will make my own cake flour. Lesson learned.

I’ve posted this recipe before and it’s a favorite, Coconut Pineapple layer cake It’s delicious, the cake was perfect with a tender crumb, great flavor and very moist. I won’t post the recipe again just the story and some photo’s. Links are provided if you would like to give this a go.

single serve mixed nut milk

Nut milk is wonderful and a fantastic alternative to milk (dairy). I make nut milk all the time but sometimes would forget to soak my nuts overnight, the other problem is that nut milk doesn’t last long before it goes bad. I had an idea that ended up working out great, I soak a large quantity of nuts overnight, drain and freeze. That way I have pre soaked nuts ready to make milk and can portion out as much as I want. Don’t throw away the nut meal left from straining the milk, it’s fabulous when added to granola. Another perk is that when you add cold water to the cold nuts you have ice cold nut milk, delicious!!

frozen mixed nuts

I’ll leave you with a few photos of Percy and Jenna Rose who by the way is doing great and adapting to her new life in Brooklyn.


French Onion Soup

It has been a very long time since I have had a bowl of French Onion Soup, it’s one of my favorites but I rarely eat it. I don’t think I’ve ever made it either, at least that I can remember. This soup is not traditional, French onion soup is made using beef stock. Instead of beef stock I made a mushroom stock and honestly you cannot tell the difference. The stock was made a few days in advance by simply simmering dried mushrooms (I used cepe) with onion and carrot, strain and store in the refrigerator. I simmered it for about 4 hours so it was rich and meaty (without the meat). The soup came together pretty quickly, caramelizing the onions took a little time, about 30 minutes. All together it took a little over an hour to put this together. You can use commercially prepared broth of course, beef or vegetable and I am sure it would be just as good. The star of the show is the caramelized onions which give this soup it’s distinctive flavor. I served with wine, Syrah from Pug Wine, couldn’t resist the cute pug on the label and the wine is wonderful.

Mushroom Broth

4 oz dried mushrooms (shiitake, cepe or whatever you want to use)

8 cups water

1 onion peeled and cut in half

1 carrot peeled and cut in half

Season with salt and pepper if you like, I didn’t

Place all ingredients in a pot and bring to a boil, turn heat down to simmer and let cook uncovered for about 4 hours. Let cool, strain and place in lidded jar and refrigerate until ready to use. Save the strained mushrooms and freeze, you can use them for mushroom soup.

French Onion Soup

serves 3-4

4 small onions peeled and thinly sliced

4 tbs butter

2 sprigs thyme

1 bay leaf

1 tsp sugar

2 tsp flour

1/2 cup wine (white or red)

4 cups mushroom stock (or whatever you want to use)

1 1/2 cup water

salt and pepper to taste

baguette cut into slices

Gruyere, comte or raclette cut into think slices (I used raclette)

Some grated parmigiana

Caramelized onions

Melt butter in saucepan and add the onions, thyme and bay leaf and sugar . Cook stirring frequently on medium high heat. When onions are soft and starting to brown reduce heat to low and let cook until caramelized stirring frequently takes about 30 minutes.

Making the Soup

Add the flour to the onions and cook for approximately 1 minute, add the wine and when it starts bubbling add the stock and water. Cook on medium heat for approximately 30 minutes. Soup will thicken slightly. While soup is cooking heat the oven to 350 degree’s place the bread on a baking sheet and toast for about 15 minutes turning over after about 8-10 minutes. Remove bread from the oven and turn on the broiler.

Remove the bay leaf and thyme sprigs, ladle soup in bowls, add toasted bread one or two slices depending on the size of the bread. Top with the sliced cheese and sprinkle with a little parmigiana.

Place the bowls on baking sheet and broil for about 8 minutes until cheese bubbles and is lightly browned. Remove from oven let cool for a couple of minutes and serve.

Have to show a photo of the bottle of wine, love the label and the wine is so good.

pug Syrah from pug wine

Guest Post- Beet and Gorgonzola Cheese Pearled Barley with Cream Sauce

The first guest post is from my good friend Mimi whose gorgeous blog Chef Mimi blog  has inspired and delighted me for a long time. She is an amazing cook, prolific writer and world traveller and her delicious recipes are beautifully executed, photographed and I know eagerly gobbled up by her family. I am a big fan of risotto and love her take on it using barley and beets and creamy gorgonzola. Without further ado here is Mimi’s wonderful recipe, thank you so much for writing this post for my blog. Please pay Mimi a visit and if you want to print out this recipe you can do so from her blog.

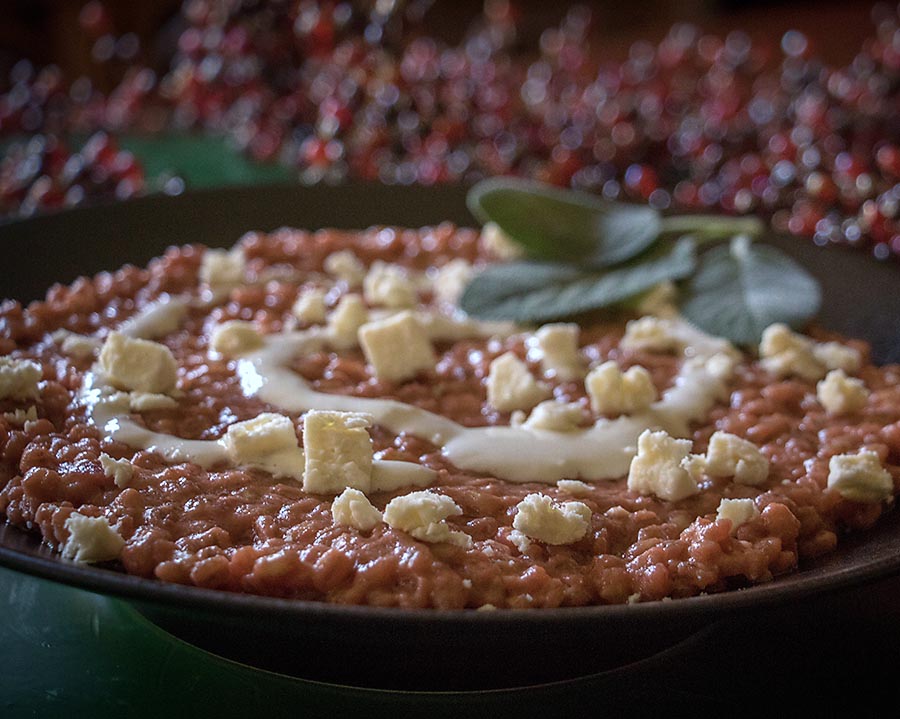
When I first read through Eataly, the cookbook, this recipe caught my attention. It’s risotto made with barley, flavored with beets, and topped with a Gorgonzola cream! Plus, it was really pretty.

The Eataly cookbook, featuring “300 landmark recipes highlighting the best of contemporary Italian home cooking,” is a hefty volume. I’ve already made one recipe for the blog, and although it was poorly written, which seems crazy these days, it turned out great.

Maybe the Italians don’t follow the same recipe protocol as we do here in the United States? I assumed it was a universal thing, but who knows?

In any case, I knew I just had to try this recipe. Full disclosure, however, I substituted feta for the Gorgonzola.

Beet and Gorgonzola Cheese Pearled Barley with Cream Sauce
(that’s the actual name of the recipe in the book)

9 ounces pearled barley
2 cooked beets, cut into cubes
4 tablespoons extra virgin olive oil
Generous 2 cups vegetable broth
7 ounces white wine
5 ounces Gorgonzola, cut into cubes
1 3/4 ounces whipping cream
2 ounces butter, cut into cubes
1 ounce grated Parmesan cheese
Salt
A few thyme sprigs to garnish (optional)

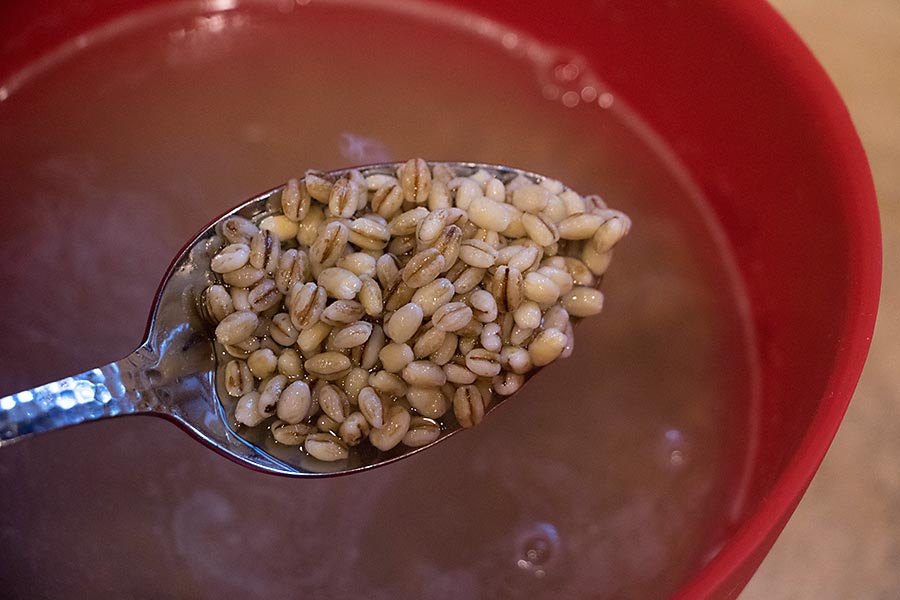
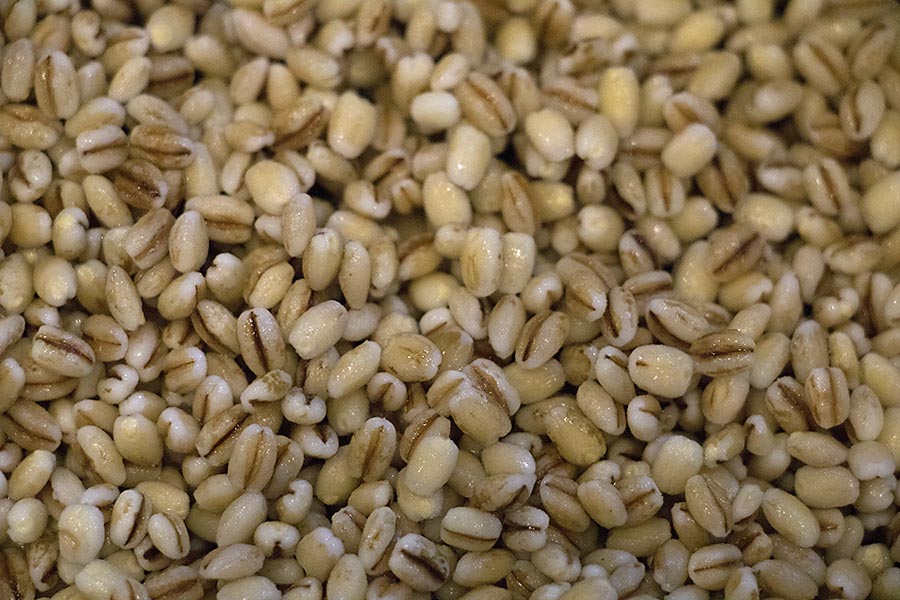
Soak the barley in a large bowl of cold water for 2 hours. Rinse and drain well.

Put the beets, 2 tablespoons of the oil, a pinch of salt, and 1/3 cup plus 1 tablespoon of the broth into a food processor and blend to a purée.

Pour the remaining broth into a pan and bring to a simmer. Keep over a low heat while you make the risotto.

Put the drained barley into a pan, add the remaining oil and a pinch of salt, and toast the barley over medium heat for 6 minutes, stirring continuously.

Add the wine and cook for a few minutes until the wine has evaporated, then add a ladleful of the broth.

Cook the barley over medium heat for about 30 minutes, gradually adding in more broth, a ladleful at a time, until all of the liquid is absorbed by the barley, adding the beet puree 10 minutes before the end of the cooking time.


Meanwhile, put half the Gorgonzola and the cream into a food processor and blend to make a light, creamy sauce.

Once the barley is cooked, remove from the heat and stir in the Parmesan, the remaining Gorgonzola, and the butter.

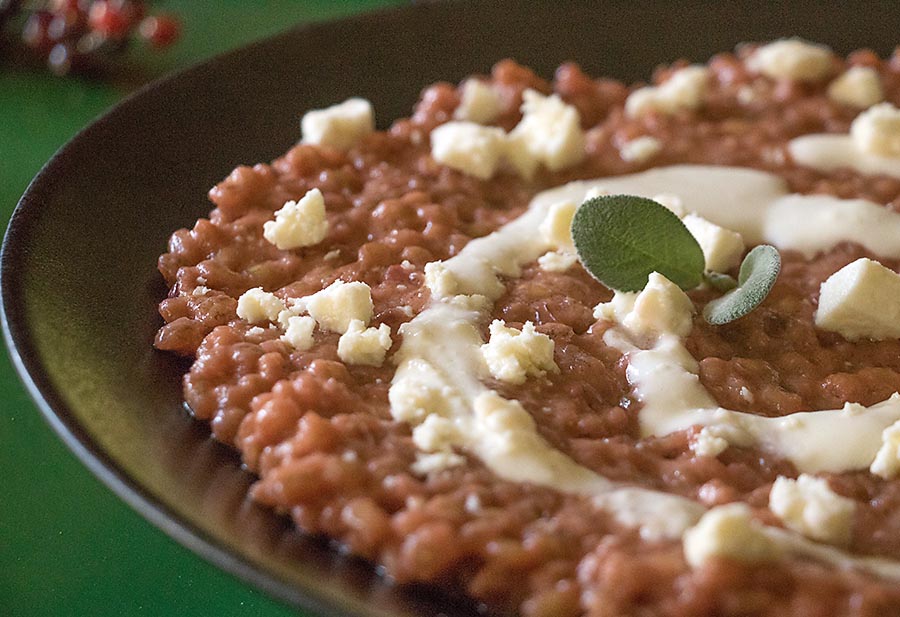
Divide among individual serving dishes, flattening the surface with the back of a spoon. Drizzle a spiral of Gorgonzola cream sauce over the top of each dish and garnish with a drizzle of oil and some thyme leaves. (I obviously didn’t use thyme leaves.)

I served the barley and beet risotto with some rosé to make the meal even more festive. Or, at least, pink!

This risotto, although really not a risotto, is absolutely fabulous. I was surprised there was no onion or garlic, but it’s more about the taste of the grain, plus the broth and cheeses.

I know this would also be really good with Gorgonzola, but the feta cream was outstanding with the beet-flavored risotto.


Beet and Gorgonzola Cheese Pearled Barley with Cream Sauce

9 ounces pearled barley
2 cooked beets, cut into cubes
4 tablespoons extra virgin olive oil
Generous 2 cups vegetable broth
7 ounces white wine
5 ounces Gorgonzola, cut into cubes
1 3/4 ounces whipping cream
2 ounces butter, cut into cubes
1 ounce grated Parmesan cheese
Salt
A few thyme sprigs to garnish (optional)

Soak the barley in a large bowl of cold water for 2 hours. Rinse and drain well.

Put the beets, 2 tablespoons of the oil, a pinch of salt, and 1/3 cup plus 1 tablespoon of the broth into a food processor and blend to a purée.

Pour the remaining broth into a pan and bring to a simmer. Keep over a low heat while you make the risotto.

Put the drained barley into a pan, add the remaining oil and a pinch of salt, and toast the barley over medium heat for 6 minutes, stirring continuously.

Add the wine and cook for a few minutes until the wine has evaporated, then add a ladleful of the broth.

Cook the barley over medium heat for about 30 minutes, gradually adding in more broth, a ladleful at a time, until all of the liquid is absorbed by the barley, adding the beet puree 10 minutes before the end of the cooking time.

Meanwhile, put half the Gorgonzola and the cream into a food processor and blend to make a light, creamy sauce.

Once the barley is cooked, remove from the heat and stir in the Parmesan, the remaining Gorgonzola, and the butter.

Divide among individual serving dishes, flattening the surface with the back of a spoon. Drizzle a spiral of Gorgonzola cream sauce over the top of each dish and garnish with a drizzle of oil and some thyme leaves.

Finding Inspiration

Hello everyone, today is a holiday, remembering the life and legacy of  Rev. Martin Luther King Jr. we should honor and remember this great man in our thoughts, actions and life everyday. He was a man of purpose and peace, his philosophy and life is celebrated and remembered by all on this day every January 15th. He changed the world not with violence but with words of peace delivered with absolute conviction and great faith. The world will forever be a better place because of him.

It has been almost a month since I last posted anything, thats terrible, but I simply have not been inspired to cook, create and blog. Has that happened to any of you before? My apologies for not keeping up with your blogs. I won’t go into details but a lot has been happening and it has taken it’s toll on me emotionally. I try, I really do but unless I actually want to cook or bake they just don’t come out well and frankly are not blog worthy. Hoping to do a Valentines post or posts and get baking again. I’ve ordered a couple of new cookbooks, searching for inspiration and ideas and they will be arriving soon. I feel like I have a blockage and just can’t seem to break out, maybe soon.  The weather has been extreme, cold, snow and ice which doesn’t help. I love to go to the farmers market for inspiration, in the winter months it’s not exactly inspirational but I can usually find something there that gets my creative juices flowing, it’s been too darn cold to even venture outside and walk to the market.

I have made a few things that turned out well no real recipes mostly using up leftovers, simple fare.  Will post a few photo’s of some things I have made recently, the first was homemade pasta using this really cool pasta maker I got from the Food52 shop. Sometimes I just don’t feel like getting my pasta machine out and this is the answer to that making quick and easy perfect noodles. Love it!!

Calling all bloggers!! Would anyone like to do a guest post while I am in this funk? Would be so happy and honored to post some of your delicious recipes on the blog. Let me know, email me or comment below.

no bigger than a small rolling pin

Homemade pasta with shaved Brussels sprouts, mascarpone,parmigiana and lemon

I mentioned before I much I detest wasting food, in an effort to use some vegetables in my refrigerator and half of a recipe for pie dough (don’t like leaving in freezer too long) I made vegetable pot pie using cauliflower, asparagus, carrots, peas. Roasted the vegetables drizzled with olive oil and seasoned with salt, pepper and turmeric (except the peas) in the oven on 400 degrees until tender. Made a simple béchamel and added some gruyere. Tossed in the veggies and spooned into bowls, covered with the pie dough and grated a little more gruyere. They were delicious and simple and perfect comfort food on a very cold day.

vegetable pot pie

More food that must be used is some fresh mozzarella, some baby tomatoes and fresh basil. Pizza is on the menu today and my simple no knead pizza dough makes a perfect Grandma’s pizza.


All About Pumpkin, Soup And Doughnuts

Recently I ordered 2 cans of pumpkin from my online grocer, I simply added to my cart without looking at the size of the cans, thinking it is the usual small cans of pumpkin puree. What arrived were the big cans, a whole lotta pumpkin and once opened it has to be used. I don’t really like freezing it because it becomes watery. I made 3 mini loaves of pumpkin spice bread, some chickpea pumpkin soup and pumpkin spice donuts and there is still enough leftover for a few pumpkin spice latte’s.

The pumpkin loaves I can practically make with my eyes closed, I use my recipe for banana bread and adapt to pumpkin adding spices.  The soup was my own creation and turned out quite well and is super easy to make. Now Doughnuts are another thing entirely. I have only made doughnuts once I think,  they were less than stellar so I abandoned  making those delicious little fried cakes and opted to buy them (the best doughnuts EVER are in my neighborhood).  We had a brief (2 days) of cool weather, back to warmer temps for the rest of the week but the soup on a cool day was just perfect. I used what I had in the pantry and refrigerator, threw everything in my oval roaster and slow cooked for about 6 hours. I didn’t pre soak the chick peas, just threw them in with some vegetable broth, carrot, onion, celery and everything cooked up beautifully. At the end I pureed some of the chickpeas, added pumpkin, Sri Lankan curry powder and some creme fraiche. So easy really, and no recipe required. You can add whatever you like or have on hand. I think that next I will try making yeast doughnuts now that I have cake doughnuts down.

curried pumpkin chickpea soup

Curried Pumpkin Chickpea Soup

2 cups dried chick peas

1 onion quartered

2 stalks celery

1 large or 2 small carrot

8 cups vegetable broth (you can also use water or chicken broth)

1 cup pumpkin puree

1 tsp curry powder (I used Sri Lankan)

Optional 1/2 cup creme fraiche

salt and pepper to taste

Heat oven to 325 degree’s. Put everything in the pot, put it in the oven and let it cook slow and long. I cooked it for 6 hours. When done, scoop out about 2/3 of the chick peas and a little of the broth along with the celery and onion. Puree in the blender until smooth, add the pumpkin, curry powder and optional creme fraiche. Add back to the pot, cut the carrots into bite size pieces and cook on medium heat for about 15 minutes. Adjust seasoning and if you like at the end add some spinach. I had some that needed to be used and it was nice in the soup.

Pumpkin Spice Doughnuts

Makes 12 doughnuts and holes

Recipe from Good Housekeeping

2 tbs softened butter

1/2 cup sugar

2 tsp baking powder

1/2 tsp salt

1 tsp cinnamon

1/4 tsp baking soda

dash of ground nutmeg or about 1/8 tsp

1/2 cup pumpkin puree

1/3 cup buttermilk

1 egg

1 egg yolk

1/2 tsp vanilla

2 cups all purpose flour

vegetable oil for frying

Cream butter until fluffy, it’s only 2 tbs so it won’t be that fluffy. Add the sugar, baking powder, salt, cinnamon and nutmeg. Beat until combined scraping sides of the bowl occasionally. Beat in the pumpkin, buttermilk, egg and egg yolk and vanilla until combined. Using a wooden spoon stir in flour until well combined. Cover bowl and chill for at least 3 hours or over night.

Heat the oil to 365 degrees. On work surface dusted with flour roll out the dough to about 1/2 inch thick. Using doughnut cutter or biscuit cutter cut the doughnuts and place on parchment lined baking sheet. When oil is at the right temperature drop 2 or 3 doughnuts at a time and turn once browned making sure they are evenly brown and cooked through. It takes about 3 – 4 minutest per doughnut. When done place on rack lined with paper bag or paper towels. Prepare some sugar and cinnamon and roll each doughnut while still warm in the sugar mixture. Let cool and enjoy!


Corn Chowder

Summer doesn’t want to let go. It’s been hot, well really warm out and I long for crisp cool Autumn weather. My last hoorah for summer produce,( the only thing I will miss about summer is the produce) is corn chowder. I can’t believe I’ve never made it before and honestly have never even tasted it either, and now I know what I have been missing out on all these years. It’s so simple to make, sweet and savory at the same time, loaded with vegetables and a fitting tribute to delicious sweet corn. After removing the kernels from the cobs I used them to make a corn cob vegetable stock which I used to make this soup. Note: I used sweet bi color corn, if you want a soup that is a little less sweet use yellow corn, it is slightly less sweet IMHO, or mix the two types of corn.

I am bringing this soup to Fiesta Friday # 193, I am honored to be co hosting this week with the amazing Ginger and Bread.

Corn Chowder

Serves 6-8

The stock

6 ears of corn, kernels removed and set aside (see video)

3 stalks celery

3 carrots

1 large onion

10 cups water (or vegetable broth)

salt and pepper to taste

Place everything in a large pot and bring to a boil on high heat. Turn heat to medium and cook for approximately 2 hours. It will reduce to about 6-8 cups. Remove the vegetables and strain if necessary.

Making the chowder

1 onion chopped

1 stalk celery chopped

1 large carrot chopped

1 red bell pepper chopped

Corn

2 potatoes peeled and cut into bite size pieces

6-8 cups corn stock

pinch of turmeric

1/4 cup heavy cream

2 tbs flour + 2 tbs water to make a slurry

2 tbs butter

salt and pepper to taste

Add a little olive oil to a dutch oven or soup pot, heat on medium high and add the celery, onion, carrot and bell pepper. Sauté until soft. Add the stock and cook for approximately 45 minutes to an hour.  Stir in the slurry and turmeric and continue to cook until it thickens a little, add the corn and potatoes and cook for another 20-30 minutes (until potato is tender). Scoop out about 3 cups of the corn and vegetables and puree in the blender until smooth. Add back to the pot along with the cream and butter, salt and pepper if needed. Serve hot or room temperature.

Watch this video on how to strip corn from Food52, I hate it when the kernels fly, this helps and there is very little flying kernels.


Basic Hummus And A Vegan Apple Tart

This recipe is from Ottolenghi’s cookbook “Jerusalem” it calls for dried chickpeas rather than canned. I always stayed away from recipes where you have to cook the beans/peas and rather opt for canned because it’s easy and I guess I am a bit lazy. Well, have to say there is a difference, a big difference in flavor and texture when you use freshly made chick peas. I love just about anything from any of the cookbooks by Ottolenghi or the team of Ottolenghi and Tamimi. The books are beautiful to look at, the ingredients they use are always fresh and the recipes are simple but creative and everything so far that I have made has been absolutely delicious. Like chocolate chip cookies there are thousands of recipes out there for hummus. It’s not rocket science and is made easily and quickly and has always been welcome as an appetizer or part of the main meal. It’s a wonderful recipe and if you are hesitant to use dried chickpeas, it takes a little more time and effort but the results are well worth the effort. The only change I made when making this recipe is that I use half the garlic indicated, I am not a big fan of raw garlic, the garlic is flavor is definitely there but is more subtle with 2 cloves, of course if your garlic cloves are very small use more.

I am bringing the hummus and tart to Fiesta Friday #191, this week, the co cohosts are Judi @ cookingwithauntjuju.com and Antonia@ Zoale.com thank you ladies for co hosting and as always a big thank you to Angie for putting this party together every week!

Basic Hummus

Serves 6 or more

1 1/4 cup dried chickpeas

1 tsp baking soda

6 1/2 cups water

1 cup plus 2 tbs light tahini

4 tbs lemon juice freshly squeezed

4 cloves garlic crushed (I used 2 cloves)

6 1/2 tbs ice cold water

The night before put the chickpeas in a large bowl and cover them with cold water at least twice their volume. Leave to soak overnight.

The next day, drain the chickpeas. Place a medium saucepan over high heat and add the chickpeas and baking soda, cook for about 3 minutes, stirring constantly. Add the water and bring to a boil. Cook, skimming off foam and any skins that float to the surface. The chickpeas will need to cook between 20-40 minutes, depending on the type and freshness, sometimes even longer. Once done, they should be very tender, breaking up easily when pressed between your thumb and finger, almost but not quite mushy.

Drain the chickpeas. You should have roughly 3 2/3 cups. Place the chickpeas in the food processor and process until you get a stiff paste. Then with the machine still running, add the tahini, lemon juice, garlic and 1 1/2 tsp salt. Finally, slowly drizzle in the ice water and allow it to process for 5 minutes until you get a very smooth and creamy paste.

Transfer to a serving bowl, cover with plastic wrap and let sit for 30 minutes before serving, you can also refrigerate until needed. Make sure to take it out of the refrigerator 30 minutes before serving. I drizzle the hummus with olive oil and sprinkle some sumac.

Delicious with fresh veggies and pita

I recently heard from friend I used to work with, it had been years since we have seen each other and I invited him over the other day to catch up, he is vegan and specifically requested pastry.  This tart is vegan,  has very little sugar, only about 2 tbs and is drizzled with apple cider cinnamon reduction. It couldn’t be simpler and it’s so beautiful. The pie crust is from the Crisco package and is one my Mother used for her pies, she didn’t even know her pie crust was vegan, I sliced the apples hasselback style, sprinkled with a little sugar, flour, cinnamon mixture, dotted a little earth balance and baked.

Simple, beautiful and delicious and it’s vegan

Flaky Pie Crust (Vegan)

Recipe on Crisco Shortening- makes single 9 inch pie crust

1 1/3 cup flour

1 tsp salt

1/2 cup vegetable shortening

6-8 tbs ice cold water

Whisk flour and salt together, add the shortening and with a pastry cutter combine until it resembles moist crumbs. Add water and stir with a fork. Gather together into a ball, wrap in plastic wrap and flatten into a disk and refrigerate for at least an hour. Roll the dough on floured work surface and line your tart pan. Refrigerate.

While dough is chilling, cut the apples in half, skin on, core and slice thinly keeping each half together, it’s easier to lift the sliced apples and place in pie shell. Heat oven to 400 degree’s. Mix 2 tbs sugar, 1 tbs flour, 1/4 tsp cinnamon in a small ramekin and set aside. Arrange the apples in the cold pie shell and sprinkle with the sugar, flour, cinnamon mixture. Dot with butter or vegan butter. Line a baking sheet with parchment and bake the tart until golden brown approximately 40-45 minutes.

Apple Cider Reduction

1 cup apple cider

1/2 tsp cinnamon

1 tbs sugar

Place everything in a non reactive heavy bottom saucepan and boil on medium high until it reduces to a syrup. Approximately 30-40 minutes.

Served with Vegan salted caramel ice cream.


A Tale Of Two Cobblers

Making cobbler with summers best produce is one of my favorites. Using fresh seasonal fruit and vegetables  makes this delicious dish even more amazing. I thought I would make both savory and sweet just for fun. The other day I went to the farmers market and stocked up on fresh vegetables and fruit without knowing what I would make with them, I was inspired by Mollie @frugalhausfrau, she and I were commenting about how much fun it would be to make cobblers, pandowdy’s, crisps etc… she has some awesome recipes make sure you check her blog out.

Both recipes are original or as original as any recipe can be. I posted the cobbler pastry on food52 years ago, it is adapted from Julia Childs Galette dough. The savory cobbler is Vegetarian, loaded with vegetables in a rich mushroom leek cream sauce. I used a biscuit cutter for the cobbler top rather than a rough look and to finish it, I grated some gruyere on top of each round. The beauty of the savory cobbler is that you can make the mushroom and leek base and add whatever kind of vegetables you like or have on hand. Note: For the savory cobbler I added some baking powder, I had thought about that before and my friend Emily who made this also suggested it. It’s not necessary for the sweet cobbler really as I treat it more like a pie crust but can be used for both.

The dessert cobbler is made with fresh ripe nectarines which are sweetened only with some gooseberry jam that I made a few weeks ago, the cobbler top is roughly pressed on top of fruit and sprinkled with a little sugar before baking. There is really no recipe required for this you can ad lib adding the type of fruit you like and sugar or jam. I love super easy to prepare foods.

This week I am honored to co host Fiesta Friday # 185 with the totally awesome Monika @ Everyday Healthy Recipes and I am bringing both a dessert and main with me, both in the form of cobbler

Pastry for Cobbler

1 cup flour

1/4 cup cornmeal

2 tsp baking powder (recommended for savory cobbler)

1/2 tsp salt

2 tsp sugar or brown sugar (Use 1 tbs for the savory cobbler pastry)

3 tbs cold butter cut into pieces

1/4 cup sour cream

1/4 cup whole milk

Whisk together the dry ingredients, add the cold butter and break up with your hands or pastry cutter until it looks crumbly. Add the sour cream and milk and mix with a fork. It will become a cohesive but slightly wet/moist dough. Set aside or refrigerate until ready to use.

Savory filling

3 small leeks, using only the white parts, cleaned VERY well (I cut into rounds and put in cold water rinsing until there is no sand in the bottom of the bowl)

1 package of mushrooms (I used white button) cleaned and sliced

String beans ( I used yellow) stem end removed (I did’t measure add as much as you like)

1 medium size zucchini – cut into bite size pieces

2 small carrots quartered lengthwise

2 tbs flour

cherry tomatoes cut in half

3 sprigs thyme

white wine (about 1/2 cup)

1 cup heavy cream (You can also use light cream, milk, half and half or non dairy milk)

splash of Worcestershire sauce (omit if making vegetarian or vegan)

salt and pepper to taste

Heat oven to 375 degree’s. Line a sheet pan with parchment, place the zucchini, carrots and beans on the pan, drizzle with olive oil and sprinkle a little salt and pepper and roast until tender (approximately 20 minutes. While the vegetables are in the oven, put a little butter in a sauté pan and add the leeks, cook on medium high until softened, add the mushrooms and continue cooking until soft. Add the flour and continue to cook stirring so that the flour coats the leeks and mushrooms, add the wine, continue to cook, it will thicken considerably, stir in the cream and thyme,  cook until thickened, you can add a little water to thin it out if desired. Add the Worcestershire sauce and cherry tomatoes and continue to cook for about 10 minutes, remove the thyme sprigs. When vegetables in the oven are done add to the cream sauce and let cool a bit and spoon into baking dish, or a  10 inch cast iron skillet.

Making the cobbler

Increase oven temperature to 400 degree’s. Press the pastry into a circle approximately 1/2 inch thick. Using a glass or biscuit cutter cut rounds using all the dough. Place on top of the filling, grate a little gruyere or your favorite cheese on top of the rounds and bake until golden brown and bubbly about 35-45 minutes depending on your oven.

Nectarine Gooseberry Cobbler

1 small cobbler made in 6 inch cast iron skillet – serves 2

First let me say many will not have gooseberry jam, you can use anything you want or omit jam and use just fruit mixed with a little sugar.  I happened to have gooseberry jam in the fridge but any jam would be good, cherry I think would be delicious.

2-3 nectarines, cleaned and sliced

1/3 cup gooseberry or your favorite jam (if using just fruit add 2-3 tbs sugar)

Heat oven to 400 degrees. Place a sheet of foil or parchment on baking sheet. Mix the fruit and jam or sugar and put into the skillet,  press the cobbler crust on top, sprinkle with a little sugar and bake until browned and bubbly approximately 30 minutes. Serve with a scoop of vanilla ice cream, whipped cream, heavy cream poured on or a spoonful of lightly sweetened creme fraiche.


Homemade Pasta

I grew up eating homemade pasta, my Mom made it all the time, she did it all by hand the rolling, cutting etc… no recipe she dumped flour on a work surface added eggs in a well she made in the middle of the flour and that was it. I remember seeing her knead the dough, roll it out and it was a lot of work but homemade pasta has always been one my favorite things to eat and a cherished childhood memory.

I take advantage of modern appliances and use my food processor to make the dough and have a pasta machine which really makes quick work of it all. One of my favorite ways to enjoy this pasta is simply with fresh tomatoes, basil, olive oil and garlic. For this dish I wanted to use some leftover very soft tomatoes and a friend gave me some tiny grape tomatoes and some basil from her garden. I planted 8 tomato plants this year and 2 basil plants, I was so optimistic about the tomatoes and had some beautiful  fruit on the plants, unfortunately I only got 1 tomato the squirrels got the rest and my basil died, both plants. I am lucky that the farmers market has beautiful heirloom tomatoes so like every year I will rely on my trips to the market for my tomato fix.

the almost ripe tomato that the squirrels decimated

Homemade Pasta

Serves 4-6 depending on serving size

2 1/2 cups flour

4 eggs

2-4 tbs water (start with 2 add more if needed)

2 tbs olive oil

I used my food processor it’s so easy, put all the ingredients in the bowl of your processor and pulse until it becomes a cohesive dough. Take the dough out and knead until it’s smooth and elastic, cover with a kitchen towel and let rest for at least an hour.

Homemade pasta

After resting, cut the dough into 4 pieces. Keep dough you are not working on covered with a tea towel. Use your pasta machine according to manufacturers directions. I start on 1 and work my way up, folding and re rolling as I go. I decided on fettuccine for this dish. After cutting the pasta place on baking sheet and toss with flour so it doesn’t stick together. Cover with towel while making each portion. Note: Pasta freezes beautifully so you can freeze whatever you don’t want to cook.

The pasta dish is so simple to make. I roasted tomatoes drizzled with olive oil and seasoned with salt and pepper in a 375 degree oven for about 20 minutes. Put a large pot of water on to boil, add about 1 tbs of salt, the water should be like sea water. In a skillet or sauté pan add some olive oil add some sliced garlic and sauté until the garlic is lightly browned and soft, add the roasted tomatoes. When water boils add the pasta, fresh pasta only takes a few minutes to cook. Using a strainer or pasta fork add it directly to the pan with tomatoes and garlic. Toss and cook for about 2 minutes. Add some fresh cherry tomatoes and some torn basil, grate some cheese, parmigiana or Romano or both, and enjoy!

Pies And Tarts: Blackberry Peach Pie And A Tomato Tart

In the summer it’s hard to find balance. I love to cook but it’s so hot out it kind of knocks the wind out of my sails but I was inspired to get in the kitchen after reading Teagan newest serial Thistledown.  I love the story and Teagan is so brilliant, her readers are part of the the story we were given faery names and oh well you’ll just have to read it, it’s wonderful!!! My characters faery name is Peaches Dragonfly and you might have guessed it yes, Peaches is a cook.

When I buy blackberries what I don’t eat I freeze, adding to the freezer container with each unused portion of berries. I do the same with other fruit, peaches, strawberries etc… There happened to be a rather large bag of blackberries and some peaches that I wanted to use and today the temperature is pleasant, a good day to fire up the oven and bake.

Pies are one of my favorite indulgences, especially fruit pies. They are simple to make, and are such a great dessert both homey and elegant. The combination of blackberries and peaches has always been one of my favorites and put them in a flaky buttery pastry crust and it’s pretty much heaven on earth. I’ve published the pie crust recipe I use probably more than a dozen times. It never fails, is always good and its from Julia Child.

I think I will bring both of these the pie and tomato tart to Fiesta Friday #182 the co hosts this week are Liz @ spades, spatulas & spoons and Jenny @ Jenny Is Baking

Blackberry Peach Pie

Makes one 9 inch double crust pie

Pastry

1 1/2 cup all purpose flour

1/2 cup cake flour

1 tsp salt

6 oz unsalted cold butter cut into pieces

4 tbs shortening (cold)

1/2 cup ice water

Whisk the flours and salt in large mixing bowl. Add the butter and shortening and using a pastry cutter or your hands break up the fat into the flour until it resembles crumbs. It’s ok to have small pieces of butter I actually prefer it the pastry is extra flaky. Mix together until if forms a cohesive dough. Divide into two disks, wrap each in plastic wrap and refrigerate for at least an hour.

Fruit and assembling the pie

approximately 3 cups blackberries

approximately 2 cups sliced peaches

2/3-1 cup sugar (depending on sweetness of fruit)

3 tbs-1/4 cup flour

pinch of salt and pinch of cinnamon

NOTE: If using frozen fruit use 1/4 cup flour + 1 tbs

Heat oven to 375 degrees

Mix the fruit with the flour and sugar, salt and cinnamon.

Roll out the bottom crust and place in your pie pan, add the fruit dot with some butter and place in the refrigerator while you roll out the top crust.  I made a lattice top crust  for this pie and all you do is cut strips and basket weave. Roll out the top crust and lay on the pie, crimp the edges however you like, cut a vent or prick with a fork, brush with egg wash and sprinkle with sugar and bake for 45-50 minutes.

Heirloom tomatoes

The first tomatoes of the season are also showing up at the green market and I love buying heirloom tomatoes, they are my favorite, different colors, sizes and shapes and other than enjoying in salad or on their own making a tart is a great way to eat them. This time of year with so much bounty and just me to eat, I end up preserving or freezing much of what I purchase. This year my basil died, not sure why and it was very upsetting so I ended up buying a huge bunch at the farmers market and thought I would make some pesto.

The tomato tart is made using Julia Childs recipe for a galette pastry, it’s very different from a traditional pie crust, you mix flour and corn meal, butter, sour cream or creme fraiche and ice water. It’s a delicious rustic pastry dough and this recipe is one I have been using for many years.

Because tomatoes are so juicy I roast the tomatoes first in the oven until they are soft and a bit drier, I made the mistake once of putting fresh tomato slices on a tart and the crust was soggy, not good.

Tomato Tart

Makes one 9 inch tart

1 cup flour

1/4 cup cornmeal

1 tbs sugar

1/2 tsp salt

7 tbs cold unsalted butter

3 tbs sour cream or creme fraiche

1/3 cup ice water

Put the flour, cornmeal, sugar and salt in mixing bowl, cut in the butter until it resembles crumbs. Mix the sour cream and ice water and add to the dry ingredients. Stir until it forms a cohesive dough. Wrap in plastic wrap and refrigerate 2-4 hours.

Roasting the tomatoes and making the tart

Heat oven to 400 degree’s

Line a sheet pan with parchment, cut your tomatoes into thick slices and place on parchment lined baking sheet, bake for about 25-30 minutes they will just start to caramelize and will dry out a bit. Remove carefully so they stay whole and set aside.

Press the dough into your tart pan or roll it out and place in the pan,  put in the freezer for approximately  15 minutes or until partially frozen. Remove from freezer and weight it down by placing a parchment sheet on the pastry and fill with pie weights or beans. Bake on sheet pan for 20 minutes, remove parchment and weights and place back in the oven for about 15 minutes or until lightly browned.

Spread some pesto on the bottom of the tart crust, sprinkle with some cheese and layer your tomato slices. Bake for about 25-30 minutes. Serve hot or room temperature.