Skip to content

Archive for

My Recipe Is Published!!

Food52 Cookbook Vol II

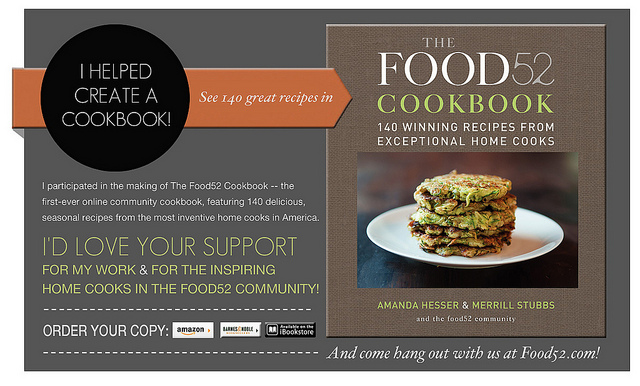
I am so excited, I just received my copy of the Food52 Vol II cookbook, my recipe for Flank Steak On Texas Toast With Chimichurri is included in the book. It’s the first time a recipe of mine has been published and I couldn’t be more thankful. It’s a wonderful book full of great recipes all from the Food52 community. It’s a great honor to be included in this book with so many great cooks.

My recipe

Prepararation

Thank You!!

I feel so lucky, receiving awards and recognition means so much to me. Thank you so much to daisyandthefox for awarding me the Sunshine Award!!

Sunshine Award

I also want to thank the healthyepicurean for awarding the liebster award to my blog. You both made my day, thank you so much!!

Liebster blog

I have not had time to answer the questions, I promise I will get around to it, have been VERY busy with work taking short breaks to post things on my blog (it’s fun and very important to me) I will pass this on, but honestly, there are so many blogs that I visit daily, receive email notifications for and avidly read I think everyone deserves awards for their hard work, creativity and dedication. Thank you again, I just wanted to acknowledge these two wonderful people and let them know how much I appreciate the awards.

The Tools Of The Trade

Essentials

There are certain things I can’t do without when making Thanksgiving dinner. I generally start prepping everything 3 days in advance. I make the pie dough and refrigerate, make the cornbread and bread cubes on Tuesday letting it oven dry for hours, make the mashed potatoes on Wednesday cover and refrigerate and make the dressing also that same day along along with the cranberry sauce and pies. You see in the picture my large graniteware roasting pan, the gravy separator and my food mill and you may wonder what that bottle of gravy master is doing there. The answer to that one is, I would not want to make gravy without it, I guess you can say its a habit or a tradition but I find that a dash of that mysterious brown stuff in my opinion makes the gravy better.

I make checklists for each day leading up to Thanksgiving and attach stickies (app on my computer) on the screen, deleting when the task is done. It’s not that I won’t remember, I probably would but I feel more organized when I have my list of things to do in eyes reach.

The gravy separator: Using my method for roasting turkey produces a huge amount of pan juices and because I slather that turkey with compound butter there is also a lot of oil, the separator is essential for me. It effectively separates the oil from the pan juice. To make gravy I scoop from the top of the separator about 1/4 cup of the fat, add to saucier or saute pan and heat on medium high, then I whisk in approximately 1/4 cup of flour and whisk it so there are no lumps it will be paste like in consistency, whisk constantly for a few minutes to cook the flour, you are making a roux. Once thats done, slowly pour in the pan juice whisking while pouring adding more as you need it, once it reaches a thickish but pourable consistency turn heat to low, add salt (if needed) pepper and a dash of gravy master. I always have smooth flavorful gravy every time. If your gravy is too thin, don’t worry make a slurry of flour and water and pour a little in the gravy and continue cooking it will thicken up nicely.

The Food Mill: I make enough mashed potatoes to feed an army. I like Yukon Gold but use russet if you like. I generally figure 1 1/2 potatoes per person. I use 10 largish potatoes, clean, peel and slice (try to get the slices as even in size as possible), place in salted COLD water and place on high heat until they start to boil, then reduce heat to medium and let them cook until fork tender. I place a large mixing bowl in the sink and position the food mill on top of it, the potatoes are then scooped (I use one of those spider scoop thingy’s) and add some to the mill, crank it and repeat, be sure to scrape the bottom of the food mill as potatoes tend to accumulate there. I like to use the mill because the potatoes are perfectly smooth and creamy no lumps at all! I then add softened butter, sour cream and salt and pepper (to taste), mix it all together, cover and refrigerate over night. I re heat the potatoes by placing the mixing bowl over a pot of simmering water, stirring frequently. Keep covered with foil to keep hot.

Classic Pecan Pie With A Twist

Pecan Pie

Pecan pie is a staple on Thanksgiving at my house. I took a classic pecan pie recipe that I have been using for years (it’s the recipe on a Karo syrup bottle) and I tweaked it by soaking the pecans in cognac (you can use the booze of your choice, bourbon or brandy come to mind) the pecans are then slowly oven dried I also subbed Lyles golden syrup for the clear Karo, I also added an extra egg. The cognac infused pecans are delicious (kept sneaking a nut or two) and for the filling I used vanilla sugar instead of adding vanilla extract and I flavored with cognac. The booze is optional of course you can use this recipe to make a classic pecan pie but the addition of the cognac makes it more festive. Use your favorite pastry recipe. I always use the Julia Child master pastry recipe. I always have a container of vanilla sugar on hand, simply add a split vanilla bean to a container of sugar, cover and let sit so that the vanilla infuses the sugar.

Makes One 9 inch pie

The boozy pecans:

  • 1 1/2 cup pecans
  • 1 cup cognac or bourbon or brandy
  • OPTIONAL you can add a cinnamon stick, whole allspice, cardamom pod or whatever spice you like to the cognac for spiced boozy pecans.
  1. Pour your cognac in a saucepan and bring to a boil, remove from heat and pour onto your pecans. Place them in a covered container and let them sit at least 6 hours preferably overnight.
  2. When the pecans have finished their soak, drain (don’t discard the booze it will look cloudy but thats ok, I use it for flavoring, you will need a tsp for the filling) Turn your oven on to the lowest temperature (mine is 170) line small sheet pan with parchment and spread the nuts. Let them dry in the oven for 4-6 hours.

Making the pie:

  • Your favorite pastry crust or store bought dough
  • 4  large eggs at room temperature (or 3 extra large)
  • 1/4 cup dark Karo syrup
  • 3/4 cups Lyle’s golden syrup
  • 2 tablespoons melted butter
  • 1 cup vanilla sugar or regular granulated sugar
  • 1 teaspoon of your reserved booze or vanilla extract
  • 1 1/2 cup of your boozy pecans
  1. Pre-heat oven to 350. In mixing bowl add the eggs, just break the yolks and lightly beat them, now add the syrups, sugar, butter and flavoring. Mix with a spoon just until combined. Add the pecans and stir just to mix it all together.
  2. Place dough into 9 inch pie pan, pour in the filling and bake for 60-70 minutes. The middle of the pie should jiggle slightly when lightly touched. Remove from oven let cool completely before serving.

Thank You For The Awards

I just want to thank two lovely bloggers for thinking of me and giving me these awards. I really do appreciate it, we food bloggers are a close knit community and really do appreciate each other, I know I love getting updates from all the blogs that I follow, seeing delicious and creative recipes that you  all prepare, I am constantly amazed and inspired by everyone, and I just want to thank you for allowing me into your kitchens and making me part of this big extended food family.

Thank you Veena from Vinasdeliciousrecipes for awarding me the very inspiring blogger award.

And thank you to Vinita  whose very beautiful and inspiring blog vinicooksveg also gave me the same award. I am so happy that in one day I have received 2 awards from these wonderful ladies. You inspire me!!

Check out both of these blogs, there is a treasure trove of delicious recipes, Indian food is just about my favorite and I look forward to trying the recipes on both of these sites.

How about a little teaser, Vinita’s recipe for Semiya kheer– an Indian sweet dish, the photo’s are beautiful and the dish, well I think I could eat the whole pot in one sitting.

I love Veena’s blog, it has a real international flair. Check out this recipe for Prawn Malai Curry

Thank you both for acknowledging my little blog and giving me the awards I really do appreciate it.

Potato Dinner Rolls

Just out of the oven

This is my go to recipe for dinner rolls on Thanksgiving, the rolls are soft and flavorful and are very simple to make.  It was the only bread that I would make for the longest time partly because it’s so easy to make but really because they are so good.  The dough is silky smooth and handles beautifully, I make it in my Kitchenaid Stand Mixer, it does the kneading for me. The recipe makes approximately 16 rolls and they freeze well so bake them, wrap well and freeze. This recipe is from King Arthur Flour under the title Amish Dinner Rolls.

Ingredients:

2 Large eggs lightly beaten and at room temperature

1/3 cups sugar

1 1/2 teaspoon salt

6 tablespoons Butter at room temperature

1 cup unseasoned mashed potatoes

2 1/2 teaspoons instant yeast

3/4 cups potato water (from the potato you boil ) cooled to room temperature

4 1/4 cups all purpose flour

In the bowl of your stand mixer fitted with the dough hook combine all of the ingredients. Mix until the dough starts to leave the sides of the bowl, approximately 6 minutes. The dough should be smooth and shiny, its a very soft dough and you might be tempted to add more flour, don’t do it that is the way it is supposed to be. Place the dough in a lightly greased bowl, turn the dough so that its coated with the oil. Cover the bowl in plastic wrap, then cover with a kitchen towel and let it rise until its doubled in bulk in a warm place for 90 minutes.

Ready for first rise
After almost 2 hours doubled in bulk

Once the dough has risen, remove from the bowl and on a lightly floured surface divide the dough into 16 pieces (if you want larger rolls like a sandwich roll you can make larger balls), each piece should be about the size of a handball. Gently roll the dough in your cupped hands until it forms a nice round ball.

Place the dough balls onto a parchment lined baking sheet leaving about 2 inches between each (You will have to use 2 sheet pans) Cover with well oiled plastic wrap and place a kitchen towel over them and let them rise again for 2 hours, the dough has risen sufficiently when you gently press with your finger and the indent stays. Alternatively you can refrigerate the dough balls overnight and continue the rise in the morning.

Pre-heat your oven to 350 degrees.

After the rolls have risen for 2 hours place in your pre-heated oven and bake for 20-25 minutes. They will be golden brown and when you tap them with your finger there will be a hollow sound. Brush the tops of the rolls with melted butter,

Butter And Herb Roast Turkey

I submitted this recipe on Food52 and it was chosen as a community pick, the food52 recipe testers made my recipe and their amazing photographer James Ransom took a photo. I am waiting for permission to use the photo, mine is not very good, so to see the turkey just click on the food52 link.

When I am preparing the Thanksgiving meal I am constantly doing something, and being chained to the stove having to baste a turkey just doesn’t fit into my schedule, I used to do it and sometimes forgot and the turkey was well, dry. My Mom aways used those big black and white speckled roasting pans so I decided to buy one and roast my turkey in the pan. They are made by Granitware and really are a revelation.I use the large rectangular roaster it will roast a large turkey up to 25 lbs.  Since using this pan I have always had a perfectly cooked turkey, moist and tender and copious amounts of pan juices for gravy and the best thing about this is that there is no basting required during the majority of the cooking time,it is basted only once just before you brown the skin. The turkey is roasted on a lowish heat 325 degrees covered with the lid, in essence it steams in the pan, because the heat is trapped in the pan it cooks much faster shaving about an hour or more off total cooking time. When the turkey is almost done I crank up the heat, remove the lid and brown the skin so it’s that beautiful golden brown and crisp.

For added flavor and moisture I make a compound butter and carefully place under the skin primarily on the breast, the flavorful butter melts into the bird, believe me it’s delicious and your  pan drippings are beautifully flavored and make the most wonderful gravy. The recipe for gravy will be a separate post.

Graniteware pans are very inexpensive about $30 for the largest pan and they last forever. My Mom’s pan is over 40 years old, and she still uses it.  I am not employed by graniteware nor am I being paid to extol the virtues of the pan, this is me saying I like it. If you don’t have or don’t want to purchase a graniteware pan you can use this cooking method with any roasting pan and some aluminum foil, just make sure you tightly cover the pan so that steam builds inside and doesn’t escape.

Serves 10 or more

Compound butter:

  • 16 tablespoons salted butter at room temperature (2 sticks)
  • 1 crushed garlic clove
  • 3 sprigs fresh thyme leaves removed
  • 3 chopped fresh sage
  • 2 teaspoons lemon zest
  1. Crush garlic with mortar and pestle with a pinch of salt.
  2. Remove the leaves of thyme from the stalk, add thyme and sage and lemon zest and crush it all together.
  3. In small mixing bowl, add the softened butter and garlic and herb mixture mix together.
  4. If you are going to insert the turkey right away, don’t refrigerate — if not, roll in plastic wrap and refrigerate. Bring to room temperature before you add to the turkey.

Turkey:

  • 1 18-20 pound turkey
  • Compound butter
  • Salt and pepper
  • Olive oil
  1. Preheat oven to 325°F.
  2. Put turkey on work surface and make sure it’s clean and dry. Insert fingers under skin to loosen the skin from the breast meat. Work slowly so you don’t tear the skin.
  3. Spread a generous amount of the compound butter under the skin on both sides of the breast. (Reserve a small amount of the compound butter to baste the turkey when you brown the skin.)
  4. Using butchers twine, bind the legs together and place the turkey on a rack in your roasting pan.
  5. Rub the turkey with some olive oil and generously salt and pepper the entire turkey. (I like to do this the night before baking refrigerating overnight, if you do this let sit at room temperature for an hour before placing in the oven). Place lid on pan and put into the oven. No basting required!
  6. After 3 hours, check the internal temperature of your turkey by inserting a thermometer in the thickest part of the thigh. When it has reached an internal temperature of 150°F, remove from the oven, and brush the turkey with the remaining compound butter. Crank up the oven to 450°F. Put back in the oven without the lid and let it roast until the skin is a nice golden brown. The internal temperature should be 160°F when you remove from the oven. Total cooking time for an 18-20 pound turkey is 4-4 1/2 hours approximately. Let turkey rest for at least 30 minutes tented with foil and final temperature should be 165°F-170°F.
  7. Note: If you don’t have a roaster with a lid just tent with aluminum foil, making sure its sealed well around the pan.

Holiday Dressing or Stuffing

Dressing or Stuffing

From now until just before Thanksgiving I am going to be posting recipes that I make for the big day. This is my dressing or stuffing recipe. I say stuffing but I don’t stuff a turkey, I always bake it outside the bird but in case you like to stuff you certainly can, just make sure you follow safety guidelines (stuffing should be the same temperature as the turkey).

This recipe is quite a few years in the making, it took a lot of tweaking, changing, and manipulating to get the results I wanted and by jove I got it, about 10 Thanksgivings worth of experimentation really.

Growing up, the mainstay of our Thanksgiving meal was pasta, primarily because of my Italian Father but my Mom always roasted a capon, made cornbread dressing and other side dishes along with the pasta. I always loved cornbread dressing and that is the base from which I started. You will see a lot of ingredients, don’t be intimidated, it really comes together fairly quickly and if you have a food processor it’s even quicker. I add a lot of nuts, walnuts and pecans. herbed bread cubes, vegetables, fruit, bacon or pancetta (your choice) and flavor with sage. It is so delicious and if I ever chose not to make this on Thanksgiving my family would be very upset.

Makes A lot of dressing/stuffing

Double your favorite recipe for cornbread

4 cups  cubed herbed bread

2 cups  ground walnuts

2 cups  chopped pecans

1 Chopped white or yellow onion

1 Chopped Granny Smith Apple skin removed

2 cups chopped celery

1 Pomegranate with the seeds removed its approximately one cup.(OPTIONAL)

1 pound good quality bacon cooked until crisp

2 tbs bacon fat

2-3 cups chicken stock (add in installments you don’t want your stuffing to wet)

2 large eggs lightly beaten

1 cup whole milk or half and half

2-4 teaspoons dried sage (If using fresh sage increase the amount to suit your taste)

2 teaspoons freshly ground pepper (black, mixed, your choice)

4-6 tablespoons butter to saute vegetables

  1. Double a recipe for cornbread, I like to bake it a day or two before I make the stuffing cut into cubes or break off small chunks and set out on a baking sheet to dry or you can scatter on two baking sheets and bake in a 200 degree oven until dried.You can also air dry uncovered but its quicker in the oven.
  2. You can make your own herbed bread cubes by cutting a day old loaf of artisan bread into cubes, toss with some chopped herbs (I like sage) and bake in a 200 degree oven until bread is toasted or you can use bagged cubed herbed bread if you wish
  3. Grind walnuts in food processor and brown in fry pan on low heat careful not to burn, You will know they are done when you can smell the walnuts.
  4. Chop pecans, onion, apple and celery. Melt butter (You can use olive oil if you like) in saute pan add the onions and celery saute until onions are translucent then add the pecans, pomegranate,apple and the sage continue cooking until the ingredients are cooked through but not mushy. Fry the bacon until its crisp break into bite size pieces set aside.Reserve 2 tbs of bacon fat and add to dressing.
  5. In large mixing bowl add the cornbread and bread cubes. Add all the other ingredients Toss to mix careful not to over mix you want the breads to retain its shape as much as possible. Now add the chicken stock, eggs and milk and mix everything together. Adjust seasoning, add salt if you wish or more sage to suit your taste.
  6. Butter your casserole or baking pan and put your dressing in. Bake covered with foil in a pre-heated 375 degree oven for 45 minutes then to crisp the top drizzle some of the pan juices from the turkey on top and put in broiler for a few minutes until the top is crisp. You can make this a day ahead and then refrigerate.(Let sit at room temperature for an hour before baking) NOTE: I like to cover and bake then crisp in the broiler you can with very good results just bake uncovered for 30-45 minutes.
  7. I like to use as few pans as possible, in the morning I add the dried cornbread and bread cubes to a large mixing bowl and add what I cooked to the bowl as I go using the same saute pan for everything. Since there are so many steps here I find this makes sense. In the end I only have one saute pan to wash.

Homemade Chicken Noodle Soup for Comfort Food Thursday #FBS4Sandy

Homemade Chicken Noodle Soup

Comfort food can encompass so many different varieties of foods depending on your culture or ethnicity. Meatloaf, pasta, mac and cheese all delicious and oh so comforting. This soup takes me back to my childhood and was the starter for almost every meal we had with my Italian family. Homemade chicken soup with pasta and escarole. It’s warm and comforting and delicious. I like to grate a little pecorino romano cheese on top and for me it’s heaven. If I have time I like to make the pasta for this soup but it’s perfectly fine with commercially prepared pasta of whatever size and shape you like. Making the chicken stock is so easy, basically throwing everything in a pot and let it cook for hours. The pasta takes a little work but is so worth it in the end.

Chicken Stock:

1 whole chicken, organic if possible

1 whole onion peeled and cut in half

2 stalks celery cut in half

2 cloves garlic

2 big carrots cut into big chunks

handful of cleaned parsley and whatever herbs you like to add

enough water to cover the chicken

salt and pepper to taste

4 cups torn or chopped well cleaned escarole

noodles or whatever type of pasta you like to add to the soup. About 2 1/2 cups cooked pasta

Add everything except the escarole and noodles to stock pot and boil for 2-3 hours on med/high heat or lower heat if you want to cook all day. When done remove chicken and vegetables from pot, add the escarole and cook for 20 minutes. In separate pot boil your noodles and add to chicken soup when they are done, Cut the carrots on the diagonal and add back to soup, You can serve with some of the boiled chicken in the bowl and I like to grate some romano cheese on top.

Pasta:
2 1/2 cups AP flour
4 large eggs
1 tbs water
2 tsp olive oil
On work surface dump flour and make a well in the middle, add the eggs, water and olive oil and beat with a fork, working in a circle incorporate the flour until you have a cohesive dough, add more flour if your dough is too sticky. Knead until dough is smooth, wrap in plastic wrap and let rest for 30 minutes.
Or by food processor (which I did)  place flour in bowl then add the eggs, oil and water and pulse until it comes together into a ball. Turn onto lightly floured work surface and knead until smooth cover with plastic wrap and let rest for 30 minutes.
If rolling by hand roll dough with rolling pin as thin as you can, the dough should be almost translucent. Fold and cut into thin strips like linguine. If using a pasta machine follow manufacturers directions. NOTE: You will only need half of the pasta for this, wrap the other half of the dough well and freeze for later use).
Bring a large pot of water to a rolling boil, when water is boiling add salt (the water should be salty like sea water) Add the pasta stirring to make sure each piece is separated and cook for 2 minutes.

No Words Necessary

Half a house in New Jersey

Staten Island

Devastation

Flooded subway

Atlantic City

Staten Island

La Guardia Airport

?

Tanker washed ashore Staten Island

Breezy Point Queens

FDR Drive Manhattan

Bed Stuy Brooklyn

?

Long Beach Long Island

Battery Park City Manhattan

Tattered and Torn But still flying

All photo’s from Fox Five NY website.