Skip to content

Archive for

Small Plates- Tapas

Cheese, wine and bread

Cheese, wine,olives and bread

Tapas anyone?

Tapas anyone?

I was recently inspired to make tapas after reading a post on the very beautiful blog Laura’s Mess. She and friends/fellow bloggers get together and prepare a feast frequently and it’s like a culinary tour of the world. I decided since I love the food of Spain and I am particularly fond of small portions that I would make tapas. You can eat a variety of foods and variety is the spice of life!!

For this meal I made some of my favorite Spanish dishes, they are simple and very tasty and I find that when you set out platters of a variety of food for friends it’s fun, add some good wine to the mix and it’s a great party. You can also make some of the food in advance. The meatballs and tomato sauce and the polenta keep very well for a day or two, I also boiled the potatoes for the patatas bravas a day ahead and fried them the day of, you can also make that yummy sauce ahead.

I am not going to post recipes for all,most of the recipes are not mine,  but I will provide the link to the recipe if you want to make. I served the polenta with the meatballs and tomato sauce, the grilled merguez goes beautifully with the patatas bravas.  The shrimp, well they are great on their own and don’t forget  the cheese and olives and bread with some good olive oil for dipping. Wash it all down with wine I chose Rioja. Sangria would also be lovely with this!!

Here is the menu:

Patatas Bravas

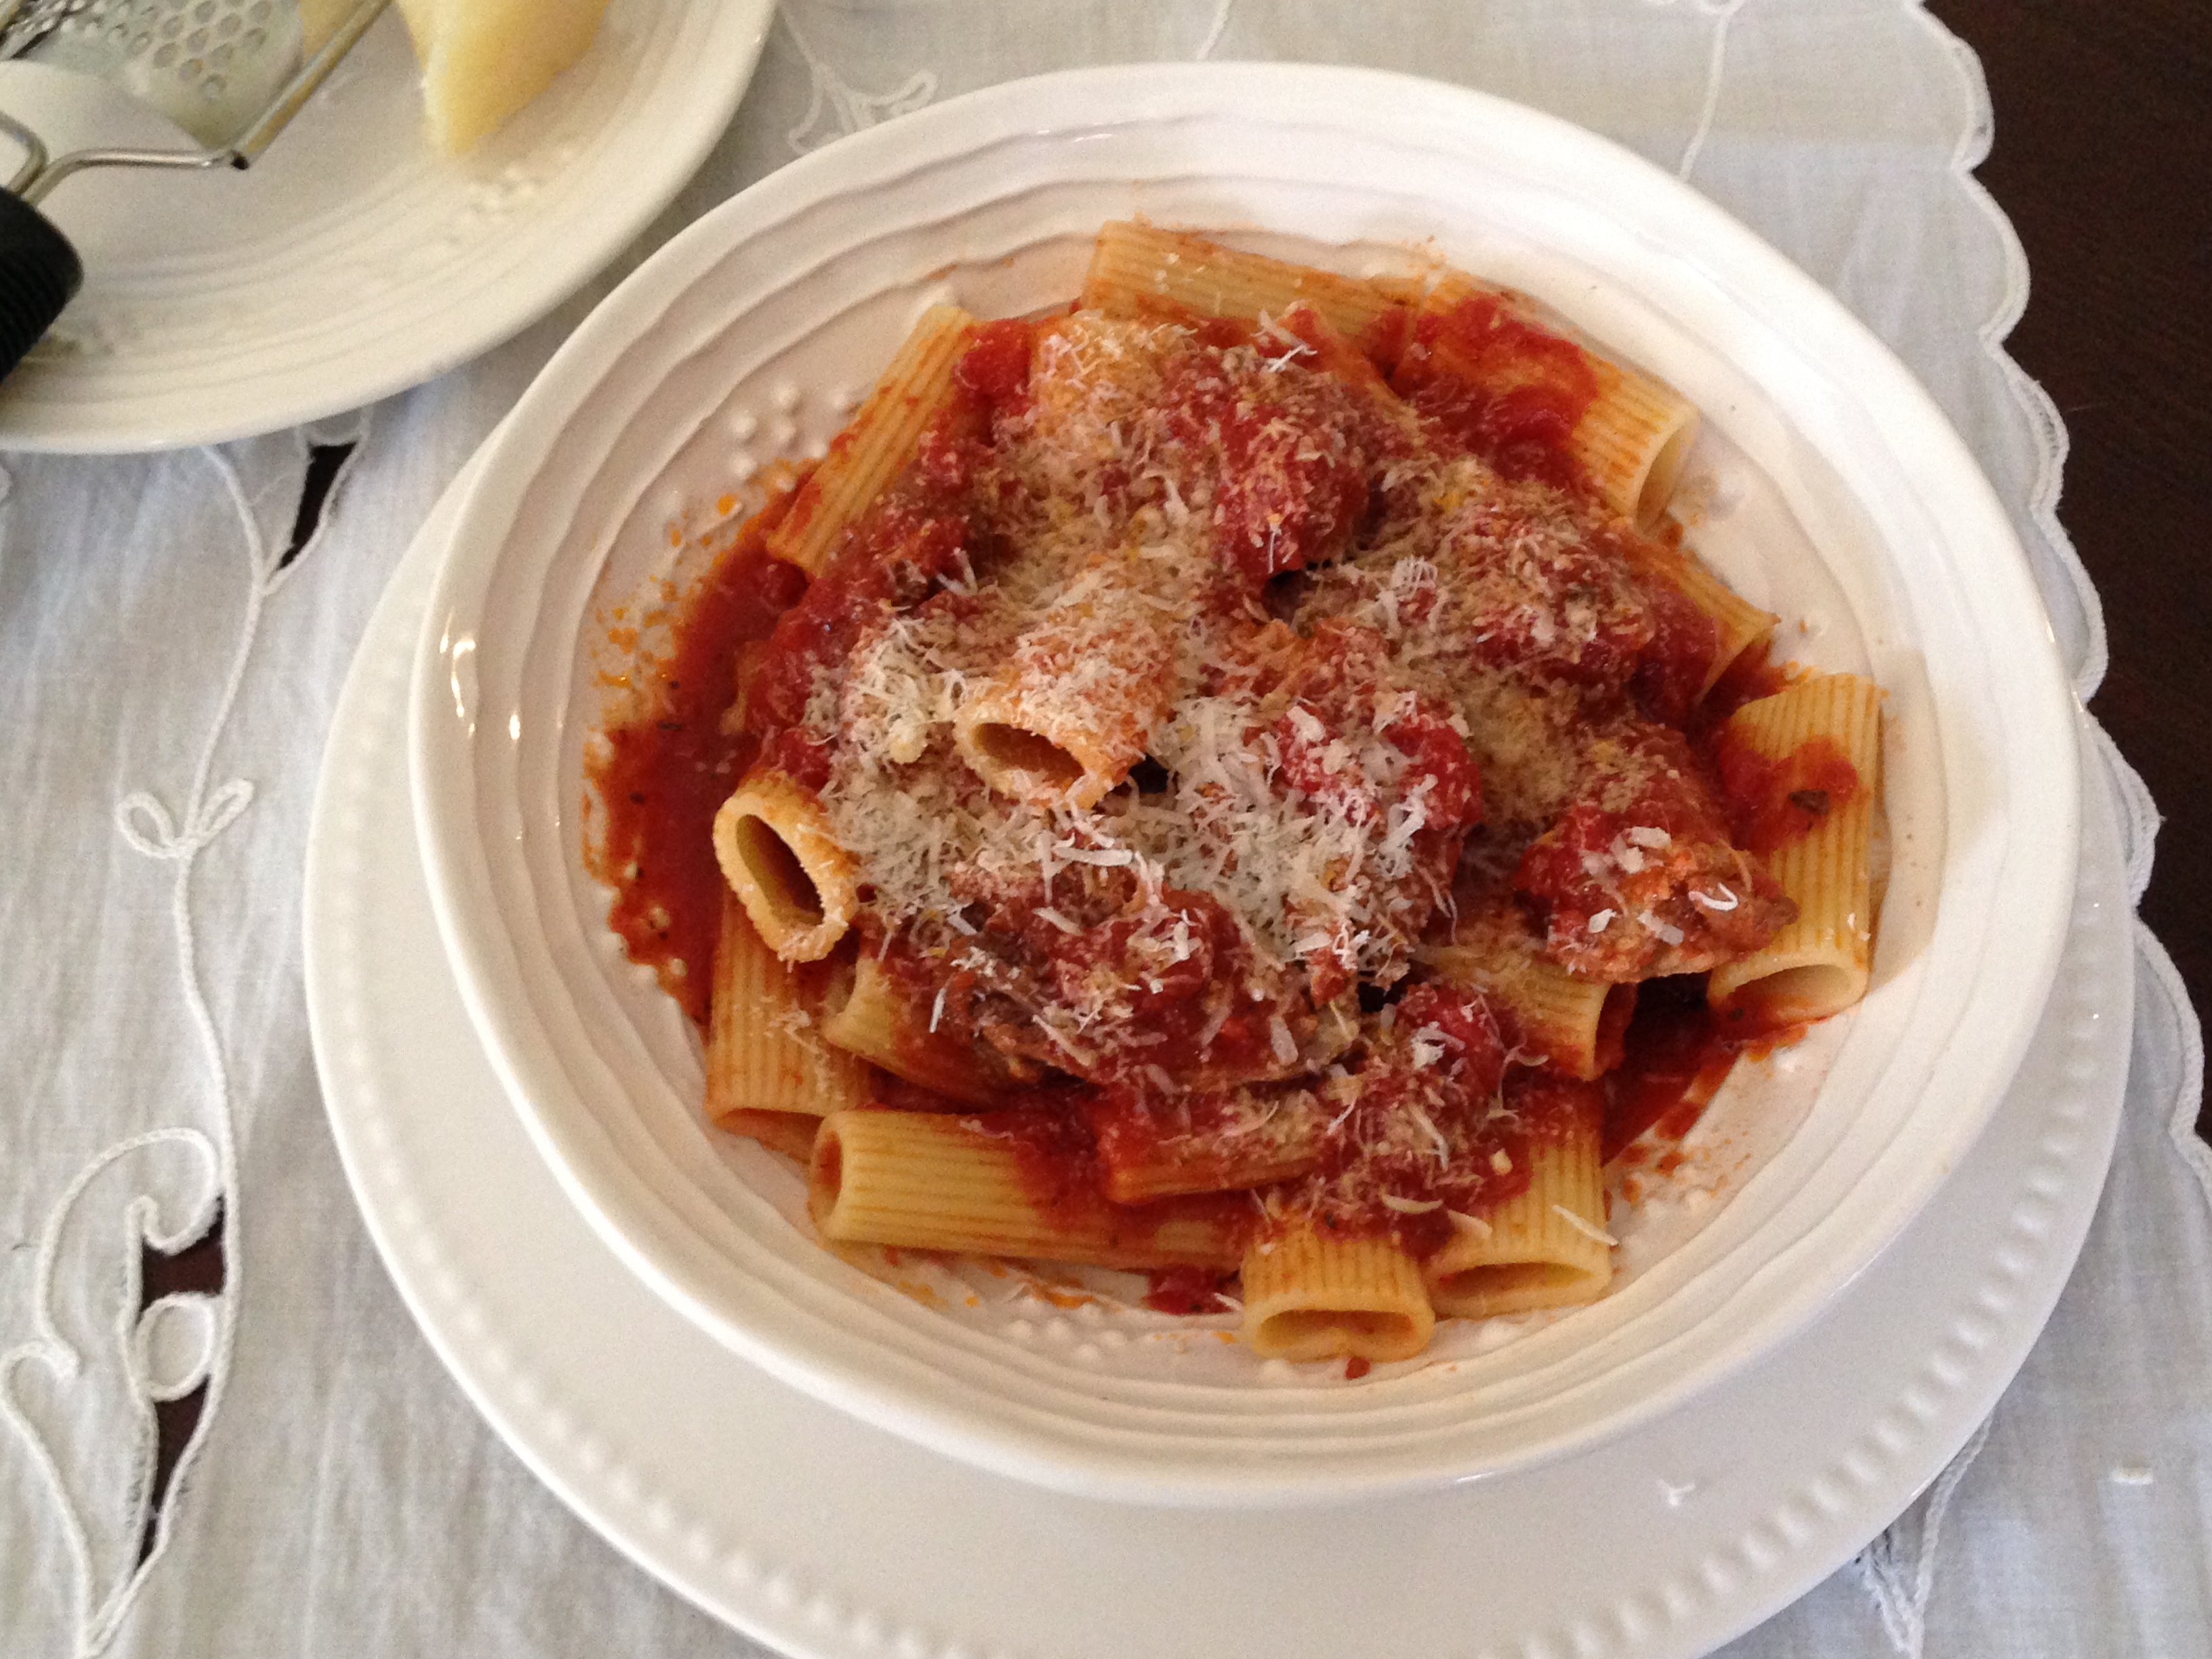
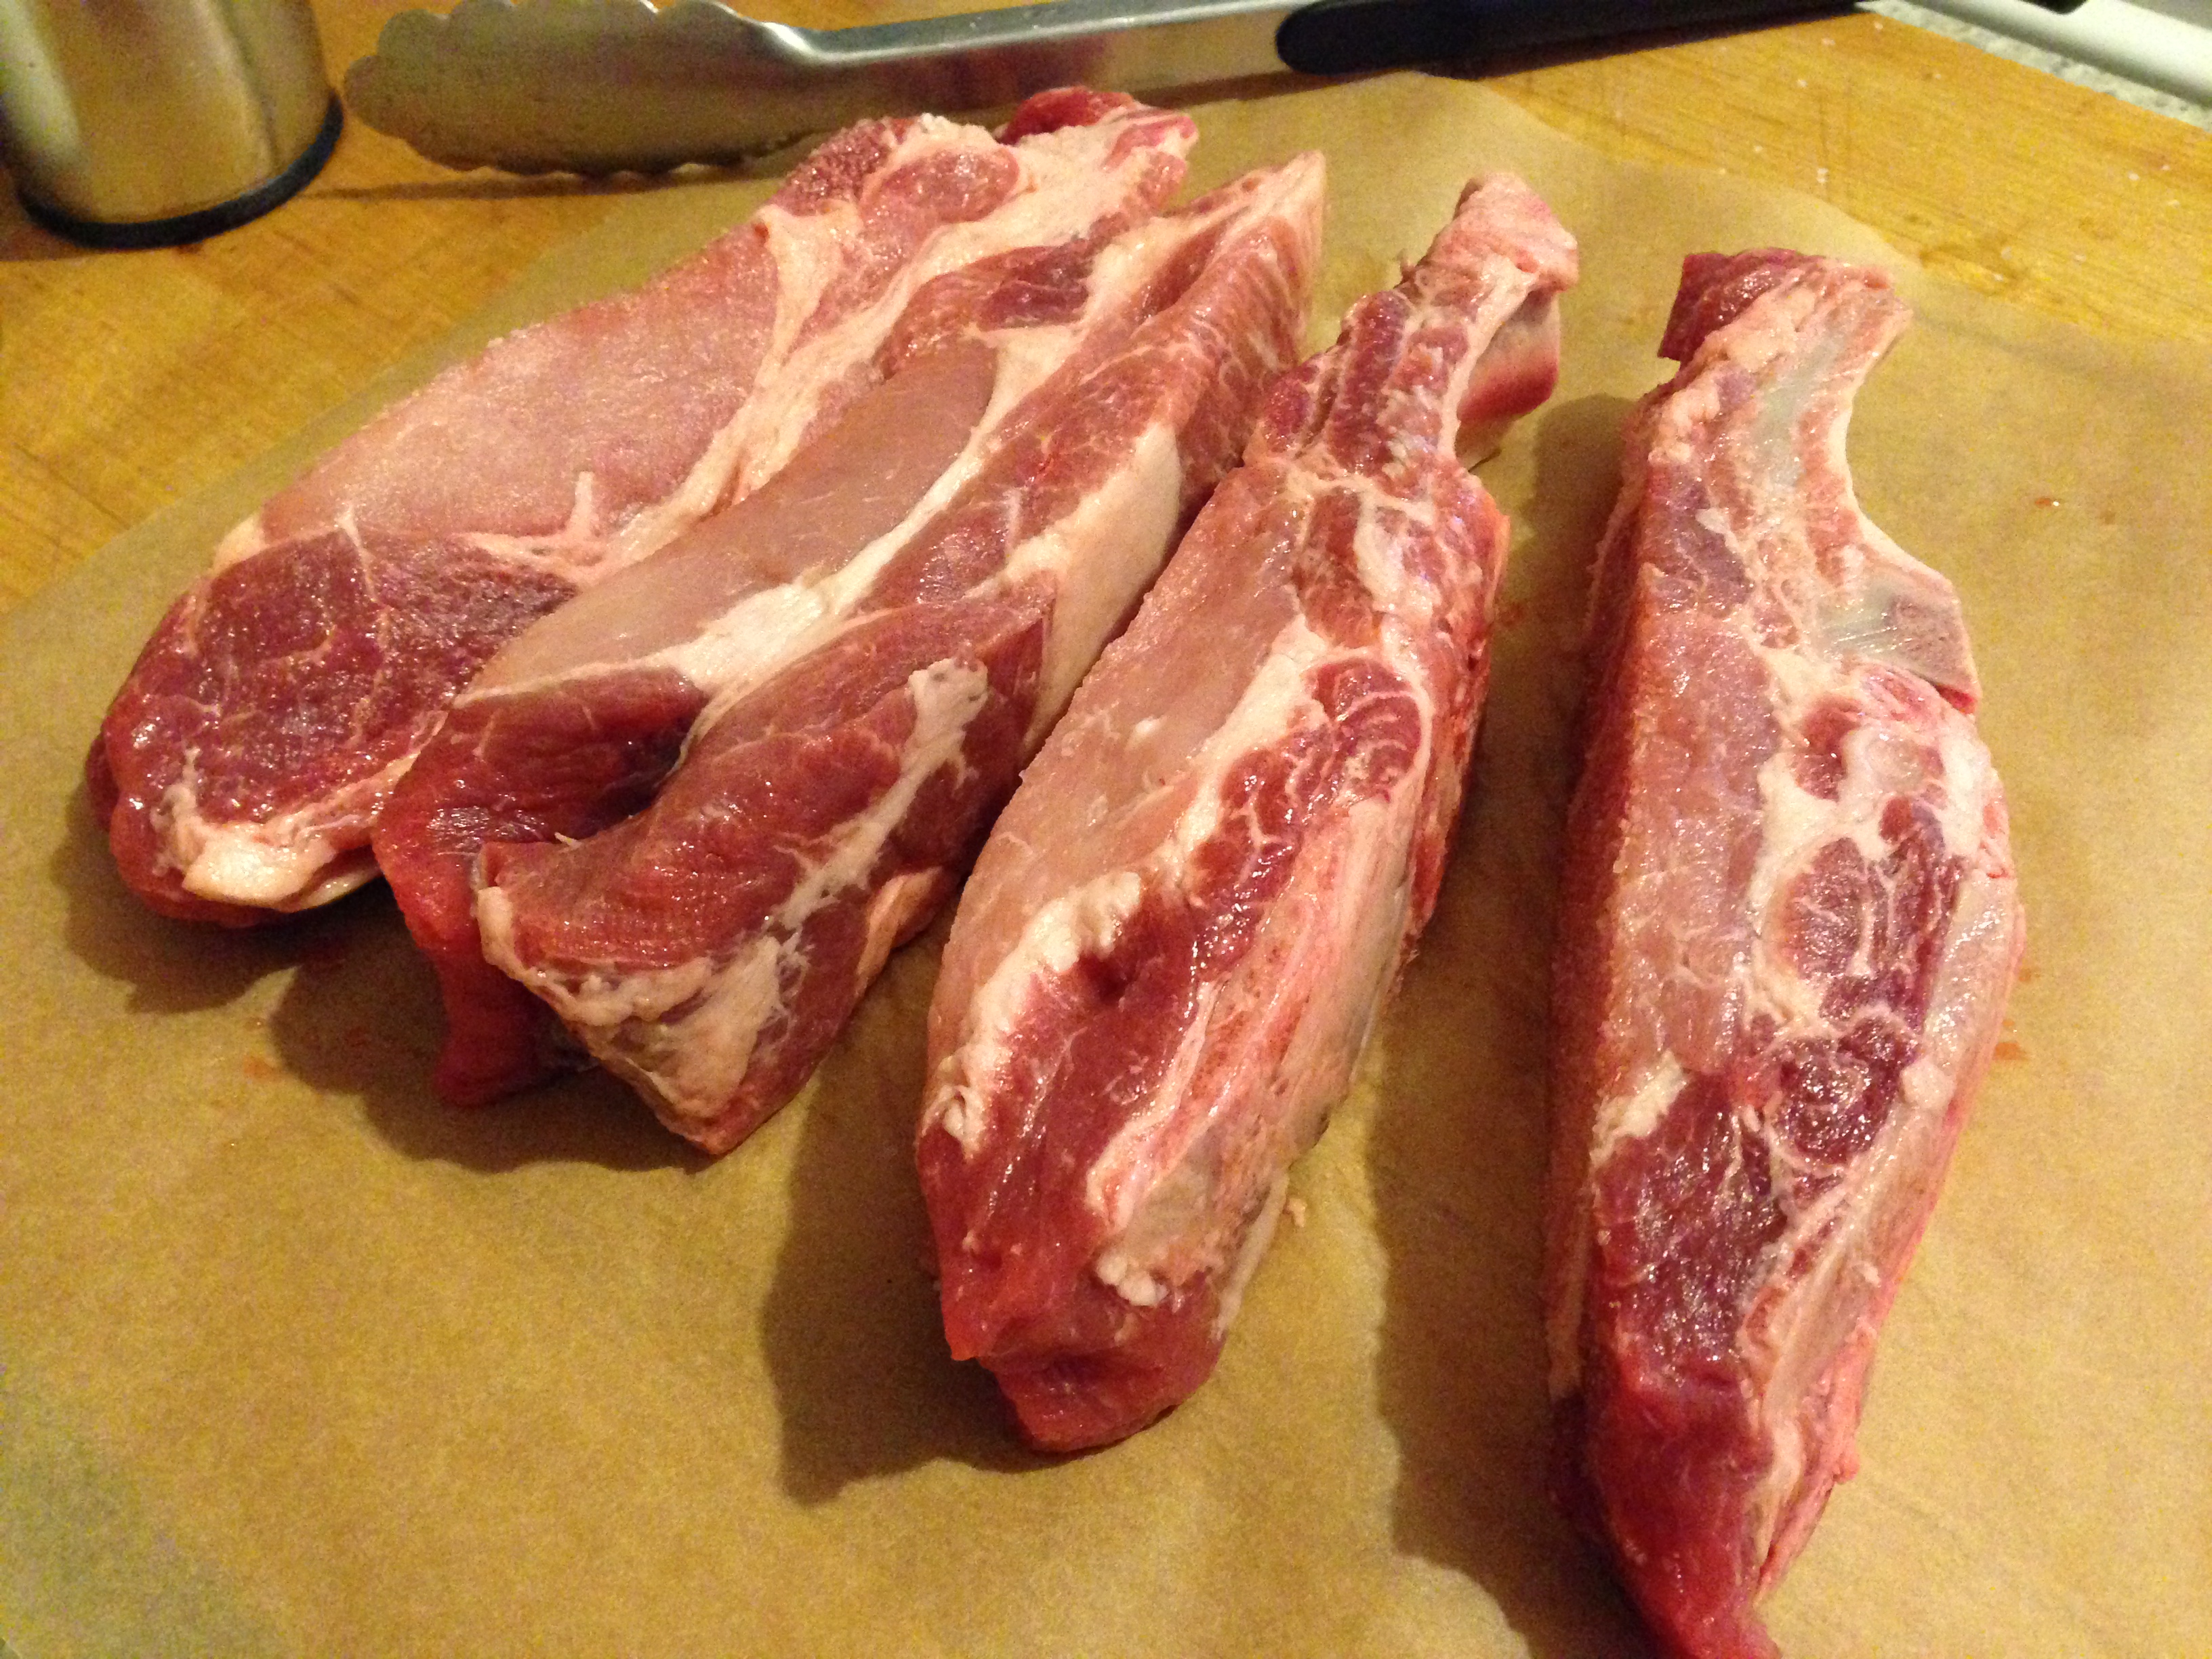
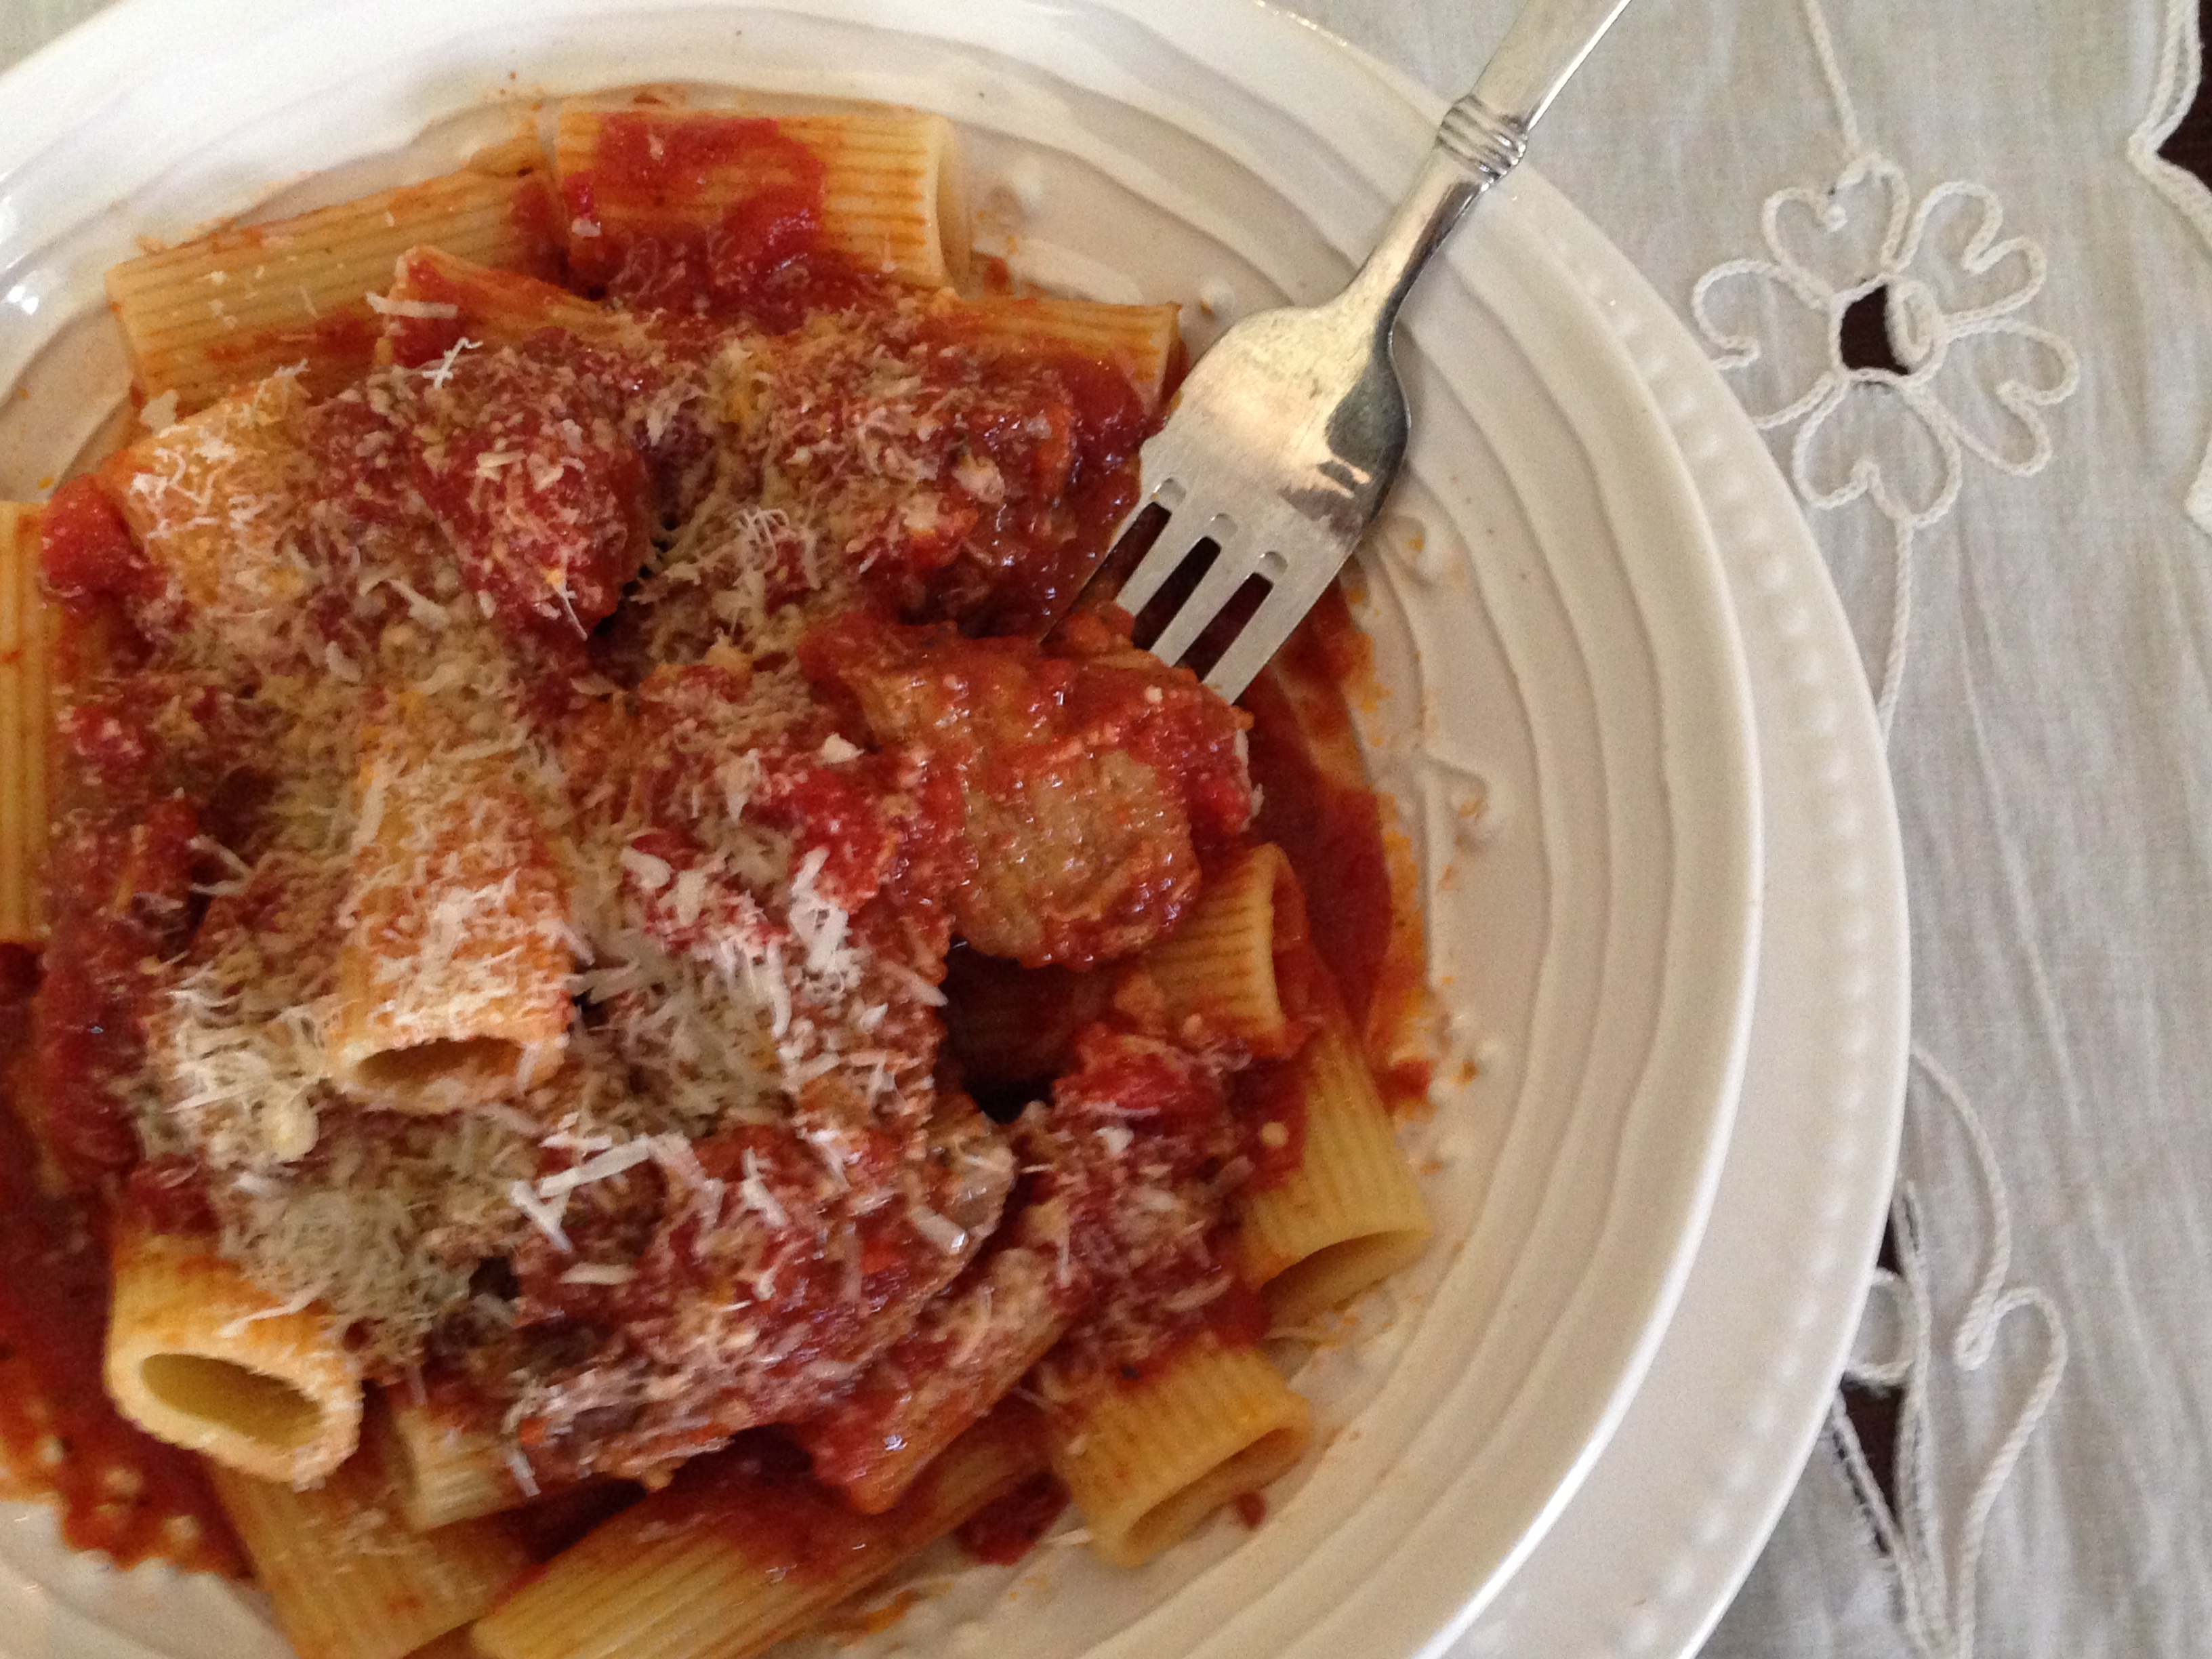
Albondigas- Spanish meatballs (Recipe calls for pork, I used pork and beef)

Merguez (grilled)

Roasted Tomato Sauce (No recipe needed see below for instructions)

Gambas Al Ajillo- Spanish Garlic Shrimp

Cheesy Manchego Polenta

Assorted cheese. bread, olives

Lots of wine

Oven roasted tomatoes for sauce

Oven roasted tomatoes and garlic

Sauce-fresh tomato, garlic,thyme and olive oil

Sauce-fresh tomato, garlic,thyme and olive oil

The tomato sauce is very simple, pre heat the oven to 375 degrees. Spread cherry tomatoes and at least 3 cloves garlic on sheet pan,  I used assorted heirloom, drizzle with olive oil, salt, pepper and sprinkle generously with thyme. Bake for approximately 20-30 minutes or until the tomatoes and garlic are softened and caramelized. Crush with fork or masher and add the meatballs, simmer on low heat for approximately 45 minutes to one hour. Serve with polenta.

Manchego Polenta

Manchego Polenta

Polenta ( You can easily half the recipe if doing tapas)

Serves 4-6 depending on serving size

4 cups whey or water

1 cup polenta (corn meal) I used stone ground

pinch of salt

1 cup grated manchego cheese

2 tbs butter

2 tbs heavy cream, creme fraiche or mascarpone

black pepper (2 or 3 turns of the pepper mill)

In saucepan add the whey or water and pinch of salt, bring to a rolling boil. Whisk in the polenta, don’t dump it all in add slowly while you are whisking it thickens very quickly. Lower heat to low and continue whisking until its done. It takes approximately 3-5 minutes for regular cornmeal and 7-10 minutes for stoneground. Remove from heat add the butter, cheese and heavy cream. Stir until its all incorporated. Cover pan and set aside.

Meatballs

Meatballs

I baked the meatballs at 375 degree’s for 30 minutes then finished on stove top simmering in fresh tomato sauce.


Bloggers Bake Sale For No Kid Hungry-One Week From Today!!

No Kid Hungry

No Kid Hungry

Lets face it, as food bloggers a good part of our day is spent thinking about food, I constantly think about what new recipe I can conjure up with the beautiful and seemingly unlimited supply of food available to us. How is it then in this vast country with so much food, that children can go to bed with an empty stomach? It’s a very sad thought and because of this I am participating with other food bloggers in a Bake Sale  to benefit “No Kid Hungry“, 100% of the proceeds go to this amazing charity. In America, one of the wealthiest countries in the world 1 in 5 children go to bed hungry, thats a staggering statistic and this has to end. Local food bloggers are all donating baked goods and we are selling them here in Brooklyn at “The Flea” in an effort to raise money and awareness.

We all love our children and knowing that we are doing something to help is the best feeling in the world. If you don’t live in NYC, no problem, make a donation. Think about it, ending childhood hunger in the USA is within our reach and a donation no matter how small brings us one step closer.

If any of you live in Brooklyn or NYC or any of the boroughs please stop by the Brooklyn Flea and buy some delicious baked goods all for a very good cause. I am making brown butter chocolate chip cookie bars and one more item yet to be determined for the bake sale. Visit the website, take the pledge, make a donation, stop by the flea and show your support for this great cause.

How My Garden Grows, Hopefully…..

Farmers market finds

Farmers market finds

I am a notoriously bad gardener, I admit my limitations and unfortunately I am the kiss of death for plants. I don’t know why or what I do wrong. I can over and under water, put way too much compost and burn the roots, have too much or too little sun, not feed or prune because I am afraid of over pruning and feeding, The only plants that thrive for me are weeds. Despite my limitations and lack of ability every year I plant something, it will be good for a while and some years I get lucky and something actually works for me. Pictured above is my recent plant purchases, we’ll see how these do. I have some flowers, flat leaf parsley, cilantro, lime and Italian basil, rosemary, sage, creeping and regular thyme and spearmint.

One of the farmers at the market told me to come back in two weeks for a much better selection. I hope to get a few tomato plants, some thai basil and maybe a few other things that catch my eye.

The very handsome kitty in the photo’s is Justin, he was thrown out I believe, he is not feral but now he lives in my backyard, We have a kitty condo on my covered terrace for him and I have fed him every day for the last 3 1/2 years. We take him for checkups and vaccinations and he gets lots of attention from me and my friends. I cannot have him in the house because of my pugs and also severe allergies. He needs a home and is such a sweet cat, how can people just throw an animal away. It makes me so angry.

herbs

herbs and a Justin photobomb

So 2 weeks later I still had not put my plants in soil, very bad I know. I lost the 3 basil plants, they were seedlings and I think the snow we had a week ago killed them, or maybe it was me. Today I planted what was left. We’ll see how they do. I may re plant them in larger containers later on but at least I got them out of their little plastic containers and in pots with soil, they are happy now I think, well watered and in direct sunlight.

Herbs

Herbs, cilanto, parsley, rosemary and sage

More herbs, chives

More herbs, chives, mint, thyme

flowers

flowers

Happy Easter

Wishing everyone a very Happy Easter and to all who celebrated Passover a slightly belated wish for a wonderful Holiday! I am not cooking or really doing anything today but I wanted to take this opportunity to wish you a very Happy Holiday!! It has been a hectic and crazy week and I hope to be back cooking very, very soon.

Photo's courtesy of google

Photo’s courtesy of google

Unknown-1

Coconut Pineapple Layer Cake

Coconut on the cake

Coconut on the cake

I guess you could call this a pina colada cake or a pineapple coconut layer cake, yellow cake, pineapple filling and a coconut whipped cream frosting generously covered in flaked coconut. I use my Tender Yellow Cake recipe, adapted James McNair’s whipped cream frosting and made a simple pineapple filling using crushed pineapple. I have been making this cake for years and it’s requested all the time.

The Yellow cake is a very old recipe penned by my Mom after years of research and IMHO it’s the best yellow cake ever. Tender, fine crumb and very moist. It contains vegetable oil, not  butter and the egg whites are separated and whipped making this cake light and it has a great rise. Click here for the recipe, I have published it several times.

Unflrosted

Unflrosted

Pineapple filling

1 20 oz can crushed pineapple, unsweetened in it’s own juice (or use fresh pineapple if you prefer)

1/2 cup sugar

1/4 cup corn starch

1 tsp lemon zest

pinch of salt

1 tbs butter

Place contents of the can of pineapple in a medium saucepan, add the sugar, cornstarch,lemon zest and salt and whisk or mix to combine making sure there are no lumps.

Turn heat to medium high and cook stirring constantly until mixture thickens. Remove from heat, add the butter and stir until it’s melted. Spoon into heat proof bowl, cover with plastic wrap that sits directly on the mixture. Let come to room temperature and then refrigerate until completely cooled or over night.

Coconut Whipped Cream Frosting

adapted from James McNair’s whipped cream frosting

1/2 cup full fat coconut milk

3 tsp corn starch

1/4 cup + 1 tbs powdered sugar

1 1/2 cup heavy cream very cold

1 tsp vanilla

Place coconut milk, cornstarch and powdered sugar in small saucepan, whisk to remove any lumps. Turn heat to medium high and cook until mixture thickens. Remove from heat and spoon into a bowl, let come to room temperature stirring frequently to keep skin from forming or cover with plastic wrap placed directly on the mixture and let sit until cool.

Coconut milk stabiizer

Coconut milk stabiizer

Chill the whisk attachment or beaters of your mixer along with the bowl. Add the heavy cream, beat until it begins to hold shape, now add the coconut milk mixture and vanilla extract and continue beating until it becomes thick and is a spreading consistency. Use immediately or refrigerate until ready to use.

Just whipped

Just whipped

To assemble:

Frost the cake with the whipped cream frosting, I start from the center and work the frosting down the sides of the cake doing a crumb layer first then finishing if off nice and smooth.

Frosting in the center

Frosting in the center

I like to mix sweetened regular flaked coconut with unsweetened large flakes, it looks nice but it also is a bit less sweet. using all one kind is either too sweet or not sweet enough and a mix I find to be perfect.

Mixed flakes of coconut

Mixed flakes of coconut


Springtime In Brooklyn


I am so excited to finally have some warmer weather, everywhere I walk I see buds and little bits of green popping up and the crocus are in bloom. When it’s Spring I can’t wait to get some herbs and veggies in the pots, I thought I would check out today what kind of plants they had at the Farmers Market and on the way back stop off at the Brooklyn Flea, today is the first day they are back after the winter hiatus. It was a little early for the plants but I managed to come back with a few, in 2 weeks I’ll go back for more.  I got some thyme, Italian flat leaf parsley, lime and sweet basil, pansies, begonia, mint, sage, rosemary. Can’t wait to plant them this week. I decided to try tomatoes this year too!! I am lucky enough to live and work in this wonderful community with it’s graceful architecture, century old homes, friendly neighbors, great shopping and food. Here are some photo’s of what I saw on my way around my neighborhood today.

Graham Home For Old Ladies now condo's

Graham Home For Old Ladies now condo’s

Graham Home for Old Ladies- I kid you not thats what the placard on the building really say’s, it used to be a brothel, and when the ladies aged it became a home for elderly ladies (of the night). They serviced the community many years and were frequented often by the sailors who came into the Brooklyn Navy Yard.


Clinton Avenue

Clinton Avenue

Rent a bike

Rent a bike

Contrast

Contrast, old 4 story mixed use buildings with high rise condo in background

Local Bistro

Local Bistro

Farmers Market

Farmers Market

Seedlings

Seedlings

More plants

More plants

The flea

The flea Food

Flea

Flea

I love glassware

I love glassware

More antique glassware

More antique glassware

The best doughnuts

The best doughnuts

The best brisket

The best brisket

Oh yes!

Oh yes!

Mixed Beef And Pork Ragu With Rigatoni

A bowl of pasta

A bowl of pasta

I saw a post the other day from The Seasoned Traveller for Pappardelle With Pork Rib Ragu and it immediately brought me back to my childhood, one of my favorite Italian dishes my Mom made was a mixed meat ragu, Mom used both beef and pork and it was delicious the meat was so tender it literally melts in your mouth and the sauce is rich and thick.  Laura (The Seasoned Traveller) made a mouthwateringly good ragu and served it with pappardelle, imagine that ribbon like pasta with the thick rich meaty sauce. Delicious right?  Laura inspired me to make a ragu, I used beef short ribs and pork country ribs. Now I don’t know if technically that is the correct name for those ribs but thats what I know them as. They are meaty with just the right ratio of fat to muscle. It’s one of my favorite cuts of pork. I first sauteed the ribs in a little olive oil, then added some garlic and basil, tomato and slow simmered for about 3 – 4 1/2 hours until the meat was falling off the bone. I decided to make Rigatoni to serve with this thick rich sauce, the pasta is not delicate and neither is the sauce, its a great match. I make this the day before I serve it, the meat is quite fatty so I refrigerate overnight, scrape off most of the fat, reheat and adjust seasoning before serving. Added bonus there is something about an Italian sauce that always tastes better the next day, it’s that much more delicious.

Country Pork Ribs

Country Pork Ribs


Mixed Meat Ragu

4 meaty pork country ribs

4-6 beef short ribs

olive oil for pan

fresh or dried basil (8 leaves fresh and approximately 2-3 tsp dried basil) I never measure so its approximate do according to taste

2 cans (28 oz each) good whole tomatoes I like San Marzano – pureed in blender, run through food mill or broken up with your hands

1 can (28 oz) crushed tomatoes

1 shallot minced

3 cloves garlic peeled and smashed

peperoncino or crushed red pepper a generous pinch

Salt and pepper to taste

Heat the olive oil in dutch oven, add the short ribs and sear, remove and sear the pork ribs, remove to plate. Add the shallot and saute until it softens, then add the garlic and lightly brown, if using dried basil add to the oil with the garlic also add the crushed red pepper when it is almost done. Add the crushed tomatoes and you can either put the whole tomatoes in the blender or food processor to puree or break with your hands or use a food mill. Add the whole tomato puree to the pot, season with salt and pepper, add the fresh basil. Now add the meat, bring to a boil then reduce to medium and simmer for 3-4 1/2  hours or until meat is fall off the bone tender.

To serve I remove the bones and leave the meat in nice size chunks, I don’t like to shred it. I add some of the sauce to a saute pan. add the al dente pasta and let it cook a minute or two in the sauce. Divide into bowls, add meat and a little more sauce and finish with a nice grating of cheese either parmigiano reggiano or pecorino romano or both.

Meaty and Delicious

Meaty and Delicious


Tiger Cake – Alice Medrich

I saw this cake yesterday on Food52, first of all I am a sucker for a marble cake always have been and then when I saw that it is made with olive oil I knew I had to make it. A cake made with oil would be incredibly moist and have a very tender crumb, both are requisites for a really good cake, IMHO. I also love recipes by Alice Medrich, she knows a thing or two about baking. With a little spare time today I undertook this cake, now I have made marble cakes before and you usually drag a butter knife around the batter to give the marble effect, well you don’t do that with this cake. You pour your batters separately, layering them and just bake it like that. I was a little skeptical. I had to force myself not to get the knife and start swirling,

Ready to bake

Ready to bake

Tiger Cake – Alice Medrich

Makes 1 cake in a 10-to-12 cup tube pan
1/2 cup (25 grams) natural cocoa powder (non-alkalized, non-Dutch processed)
1/2 cup (100 grams) sugar
1/3 cup water
3 cups (385 grams) all-purpose unbleached flour
2 teaspoons baking powder
2 cups (400 grams) sugar
1 cup extra virgin olive oil
1 teaspoon pure vanilla extract
1/4 teaspoon salt
1/2 teaspoon finely ground white pepper
5 cold eggs
1 cup cold milk
Position a rack in the lower third of the oven and preheat the oven to 350 degrees F. Butter or spray a 10-to-12 cup tube pan with oil spray and dust it with flour.
In a medium large bowl, whisk the cocoa, sugar, and water until well blended.
In another medium large bowl, whisk the flour and baking powder thoroughly and sift onto a piece of wax paper. Set aside.
In a the bowl of a stand mixer fitted with the whisk attachment, beat the sugar, oil, vanilla, salt, and pepper until well blended. Add the eggs one at a time, beating well after each addition. Continue to beat until the mixture is thick and pale, 3 to 5 minutes. Stop the mixer and add one-third of the flour mixture. Beat on low speed just until blended. Stop the mixer and add half of the milk. Beat just until it is blended. Repeat with another third of the flour, the remaining milk, and then the remaining flour.
Add three cups of the batter to the cocoa mixture and stir until blended. Pour one-third of the plain batter into the prepared pan and top with one third of the chocolate batter. Repeat with the remaining batters. Don’t worry about marbling the batters—that happens during the baking.
Bake 1 hour to 1 hour and 10 minutes, until a toothpick inserted into the middle of the cake comes out clean. Set the pan on a rack to cool. Slide a skewer around the tube and a thin metal spatula (or knife) around the sides of the pan. Lift the tube and slide the spatula under the cake to detach it from the pan bottom. Transfer the cake to a serving platter. The cake keeps for several days, at room temperature, under a dome or wrapped in plastic.

Just out of the oven

Just out of the oven

Came out of the pan like a dream

Came out of the pan like a dream

As you can see from the photo’s below, it swirled nicely on it’s own. I like the cake. It has good crumb, baked nicely.  I think it would be great with a chocolate glaze drizzled on top or with some ice cream.
The next time I will add more salt, like at least 1/2 tsp, and maybe some orange zest. Note: I forgot to add the white pepper.

So pretty

So pretty

Tiger Cake

Tiger Cake


Mary’s Secret Ingredients and Feed The Children

Mary's Secret Ingredients

Mary’s Secret Ingredients

Many of you may already know the wonderful Mary Frances and her blog, Love, the Secret Ingredient and if you are not familiar you should definitely check it out. Mary’s blog is loaded with great recipes, tips on cooking and entertaining and one thing I am excited about is her newest venture. It’s a box of ingredients that she will send to you, Mary’s secret ingredients. I don’t know about you but I love a surprise. I think this is a lovely idea and even better a portion of your purchase goes to the charitable organization Feed The Children.

We bloggers stick together and support each other so I wanted to let all of you know about Mary Frances, her exciting idea, wonderful blog and charitable work. It’s a win win as far as I am concerned. I can’t wait to get my box and see what she has put together for me. I hope you all will visit Mary’s blog, follow so you won’t miss any of her outstanding recipes and if you can check out her Secret Ingredient Box! I plan to post what I make with the contents of my Spring box. Very excited.