Skip to content

Archive for

Apple Pie

Apples

Apples

I felt the need to post a dessert recipe, it’s not earth shattering or different it’s as American as apple pie, well, it is apple pie. Simple and delicious, a touch of Americana. The recipes I have posted lately have been wholesome and healthful and thats really good, I love that, but my real love is baking and I have not really been doing that lately. Maybe when the weather turns cooler I will feel more inspired to crank up the oven and bake something. To inspire myself I just got the new cookbook from Zoe Nathan, Huckleberry, it’s beautiful, droolworthy and yes, very inspiring. I hope to share some recipes from the book with you, I have already chosen several to make immediately.

Every year when apples hit the green market one of the first things I like to make is apple pie. It’s an American classic and is still one of my all time favorite desserts. Buttery flaky pie crust and sweet/tart apples scented with warm spices, cinnamon and nutmeg. Served warm with a scoop of ice cream I am in heaven. There’s a million and one recipes for apple pie, it a classic dessert and this is probably no different than most but I wanted to post as a tribute  or an homage to Fall and apple season. I use several different types of apples in my pie, cortland, honey crisp, winesap,macoun,ginger gold,pink lady and always one granny smith, I don’t use Macintosh or apples with a similar texture they tend to turn mushy. Honestly, I forget what I got this go around but they looked good and I am sure they will make a great pie. Cut the apple slices fairly thin but not so thin that they will turn to mush but I do want them soft and well done. I like to use both granulated and brown sugar, a pinch of sea salt, some flour to thicken and a splash of apple cider. it’s not aggresively spiced just enough for a hint of cinnamon and nutmeg. I use 6-7 apples for a deeper pie dish and 4 or 5 apples for a normal size pie dish.

Juilia Childs Pastry Dough

Makes enough dough for a double crust 9 inch pie

1 1/2 cups all purpose flour

1/2 cup cake flour

1 tsp salt

6 oz cold unsalted butter cut into tbs size pieces

4 tbs shortening or leaf lard cold ( I weighed and used 2 oz of shortening or lard)

1/2 cup ice cold water

You can make this either by hand or in the food processor. To make by hand, put flours, salt, butter, lard or shortening into mixing bowl, use pastry cutter to combine until it resembles pea size crumbs. Add water mix with fork, gather with your hands, divide dough into a 2 discs and cover with plastic wrap. Refrigerate for 1 hour. Your dough may be pretty moist, thats ok don’t add more flour.

In Food Processor, add the flours, salt, butter and shortening or lard into the bowl of the processor. Pulse a few times until the mixture resembles pea size crumbs. Add the water and pulse a few times until it becomes a cohesive dough. Divide dough into two discs and wrap in plastic and refrigerate for 1 hour.

about this thickness

about this thickness

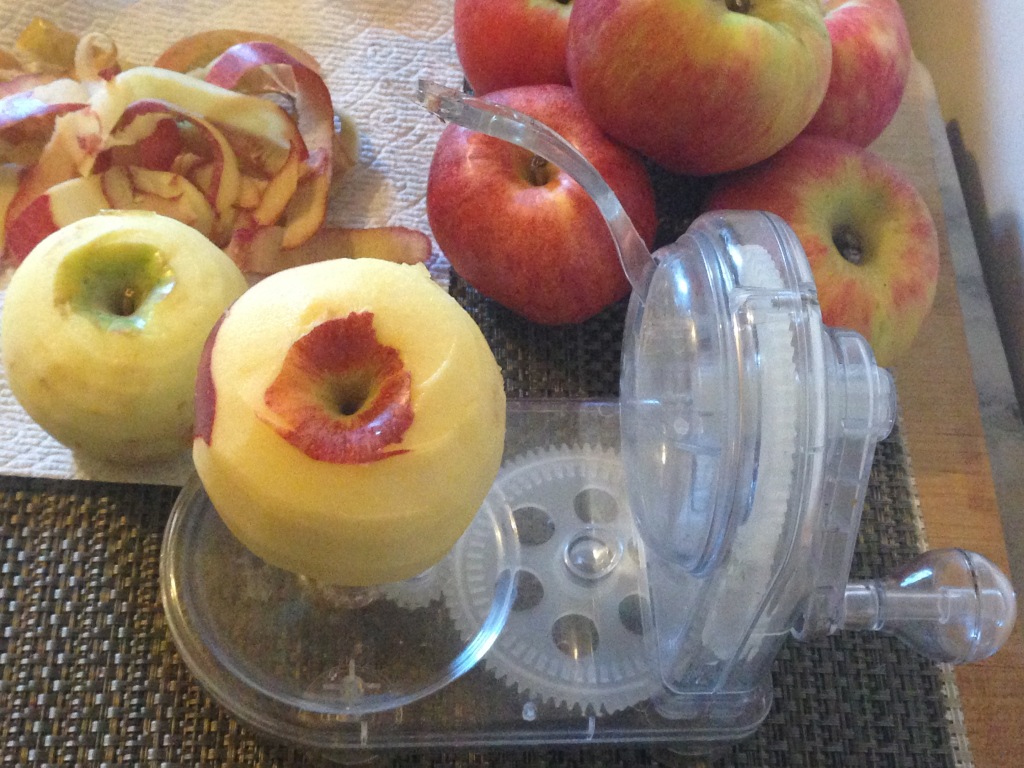
My apple peeler

My apple peeler

Apple Filling:

6 apples, I like an assortment and always have 1 granny smith in the mix – peel, core and slice

1/3 cup brown sugar firmly packed

1/3 cup granulated sugar

3-4 tbs flour (You can also use cornstarch or tapioca)

1 tsp cinnamon

1/4 tsp nutmeg

juice of half a lemon

Note: Try to get the apple slices about the same thickness, doesn’t have to be perfect but if most of them are it cooks more evenly in the pie.

Add everything to a mixing bowl, stir gently to combine and set aside. Add the lemon juice to the apples as you slice, it will keep them from turning brown. You can adjust the amount of sugar to your personal preference.

Ready for the oven

look closely you can see the little pieces of butter in the dough, makes it extra flaky!

Making the Pie:

Have your 9 inch pie dish ready, take out one disc of dough and roll out to a thinish round, make sure your work surface is well floured as is your rolling pin. Roll dough onto the rolling pin and gently lay into the pie dish. Add the apples and put a few dots of butter. Roll out top crust following the same procedure and lay on top of the apples. Crimp the edges, cut a few vents, decorate if you like, brush with egg wash or cream and sprinkle with some sugar. Bake in a pre heated 375 degree oven for 45-50 minutes or until it’s golden brown and bubbly. Note: leave the overhanging dough on the bottom crust, trim after you lay top ccrust on and fold under then crimp, This will give a good seal so that most of the juices stay in the pie.

Apple pie right out of the oven

Apple pie right out of the oven

The pie was wonderful but I could have added a bit more flour to the filling. The apples were really juicy and the juice was not thickened quite enough. It’s almost impossible to gage really. You could do the Julia Child method and let the apples rest in a bowl and whatever juice comes off drain before baking. I didn’t do that and had quite a bit of excess juice, but I never really do that for apple pies. The flavor was great and the crust was so flaky and tender.

IMG_1281

Fall Farro Salad For Fiesta Friday #35

Warm Farro Salad

Warm Fall Farro Salad

Wow, that’s a lot of F’s Fall Farro Salad For Fiesta Friday. I tested this recipe as a community pick on Food52 and it’s so delicious I wanted to make more and share with all my friends at Fiesta Friday. This warm or room temperature salad is so good for you and the flavor is amazing. I am a big Farro fan, love it in salads and think about it with roasted cauliflower and brussells sprouts, pancetta, feta cheese and other vegetatables toss it in a simple lemon,herb and olive oil dressing, The combination is absolutely heavenly. It’s from one of the very talented cooks on Food52 Wendy@healthier kitchen. This can be made vegetarian or vegan by simply omitting the pancetta and using vegetable stock or water instead of chicken stock also if vegan of course omit the feta cheese, but you know that. I opted for the vegetarian version and omitted the pancetta and cooked the farro in salted water, the only reason was that I didn’t have any pancetta and honestly, the salad is so good as it was I didn’t miss it at all. Note: Don’t skimp on the lemon I halved the recipe and still used the whole lemon, it adds such a bright delicious flavor also I used dried marjoram in place of the oregano.

This Friday Angie@the novice gardener has enlisted the help of two very talented ladies. Prudy@butter basil and breadcrumbs and Naina@spiceinthecity. With these two talented and lovely co hosts this promises to be one heck of a party, you must check out the food, what an array of delicious dishes. Join in, it’s fun!!

Fall Farro Salad

Serves 8 – 10
1 large head cauliflower, cut up into small florets (I sometimes do this with brussels sprouts in addition – they cook more quickly so only roast them about 15 or so minutes)
2 tablespoons olive oil
pinch salt
4 cups low or no sodium added chicken (or vegetable if you want to keep it vegetarian) stock
4 cups water
about 1 pounds farro, rinsed
4 ounces pancetta, diced (omit if you’re keeping this vegetarian)
1 medium onion, diced
1 carrot, diced
1 large stalk celery, diced
1/4 cup chopped fresh parsley
2 tablespoons chopped fresh oregano (or even marjoram if you’ve got it)
1/4 cup chopped fresh chives
juice of 1 large lemon
1/4 cup best quality olive oil
salt and pepper, to taste
about 1 cups crumbled feta, spread over top
Heat oven to 450 degrees.
Toss the cut up cauliflower with 2 tablespoons of olive oil in a Ziploc bag or large bowl. Make sure all pieces are lightly coated with olive oil. Spread cauliflower in a single layer in a shallow baking dish or half sheet pan. Sprinkle a pinch of salt over cauliflower.
Let cauliflower roast, stirring and turning pieces occasionally, until tender and golden brown, about 25 – 35 minutes.
While cauliflower roasts, bring the stock and water to a boil in a large saucepan over high heat. Once the stock boils, add the rinsed farro and stir. Reduce heat to low and simmer, covered, until tender, about 20 – 25 minutes. Drain farro, and set aside in a large serving bowl.
Meanwhile, in a large saute pan over medium heat, saute the diced pancetta unitl it darkens and gets a little crispy. Add the onion, carrot and celery and cook, stirring frequently, until onion is translucent and carrot has softened, about 10 minutes. You might have to lower the burner to medium-low if the onion is starting to crispen. Season vegetables with a sprinkle of salt and pepper.
Once cooked, add onion mixture to the farro in the serving bowl.
Add the cooked cauliflower to the serving bowl.
Add parsley, oregano and half the chives to the serving bowl.
Add lemon juice and olive oil to serving bowl and mix contents gently, but thoroughly. Taste for salt and pepper and add if necessary.
Garnish with remaining chives and feta.
Can be served warm or room temperature.

So good and good for you

So good and good for you

The Tomato Cobbler That Wasn’t….. It Became Soup

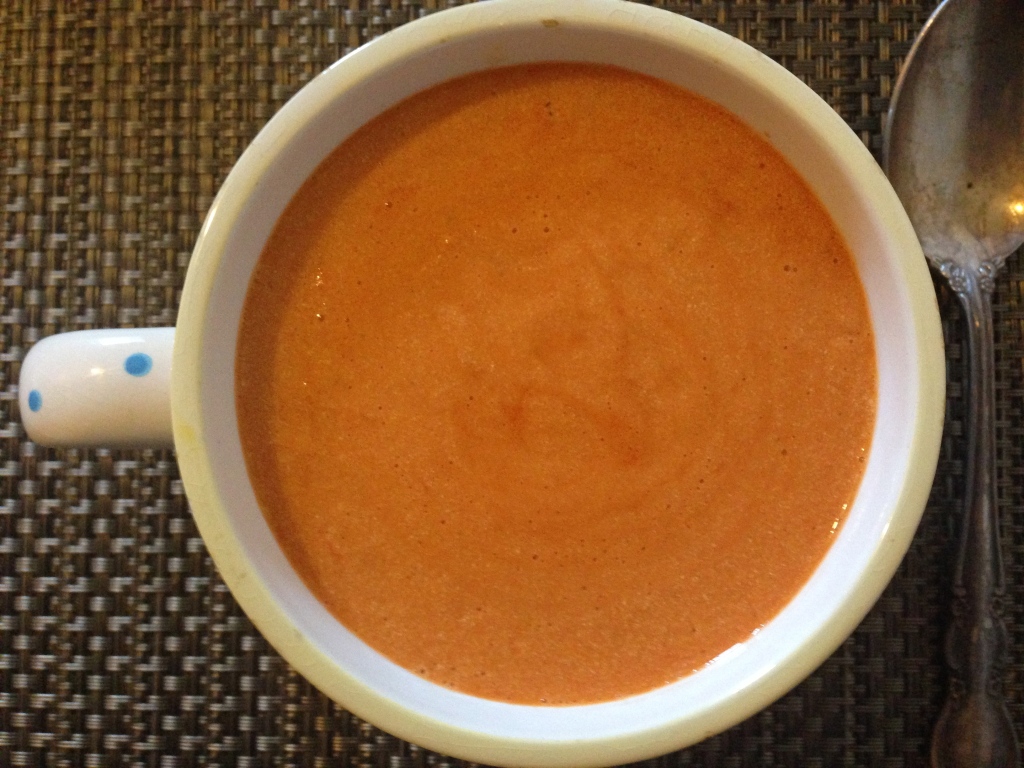
Tomato and farmers cheese soup

Tomato and farmers cheese soup

I recently saw a post on Food52 and it had a photo of a recipe from Huckleberry the new (brilliant) cookblook by Zoe Nathan, I ordered a book, my copy hasn’t arrived but I had some tomatoes I needed to use so I thought I will make the tomato and goat cheese cobbler that was pictured,(how hard could that be). It looked incredible. Long story short, mine didn’t work. I had some gorgeous cherry and small very ripe tomatoes that I cut in half and quartered, added minced garlic and shallot and put in a oval baking dish along with some farmers cheese instead of goats cheese (because thats what I had), off to a good start right? I made the top for the cobbler using my recipe that I use from my spiced plum cobbler. Put the dough on top of the tomatoes in rounds, put in a 375 degree oven and guess what, the tomatoes were so juicy they literally boiled the cobbler top. The tomatoes and cheese smelled great but I could see this was not going to have a happy ending. I removed from the oven, scooped off the cobbler top and unhappily threw it away but I saved the tomatoes, they were literally swimming in juice and tasted great. I did not want to waste the tomatoes so I put them in my blender and made soup. Fresh tomato and farmers cheese soup. It’s velvety, creamy, mildly cheesy has just a hint of garlic and onion and loads of fresh tomato taste, It really was a happy surprise. A little voice kept telling me that the tomatoes would get soupy but I didn’t listen, so it’s back to the drawing board on the cobbler. I’ll wait for my cookbook to arrive. But this soup is really good!! I was planning on taking this to Fiesta Friday #34 but I’ll have to make something else.

Tomato and farmers cheese

Tomato and farmers cheese

Tomato and farmers cheese Soup

Serves 4

3 cups ripe tomatoes (cherry tomatoes halved larger tomatoes quartered)

1 shallot minced

1 clove garlic minced

1 pinch red pepper flakes

1 tsp organic brown sugar (optional)

6 oz farmers cheese

salt and pepper to taste

Pre heat oven to 375 degrees. Place tomatoes, garlic, shallot, farmers cheese, red pepper flakes and optional brown sugar in the oven for 30 minutes. The tomatoes will become very juicy and soft. Remove from oven and let cool about 15 minutes. Pour all of it into the blender or food processor or use and immersion blender and process until smooth. Pour through sieve to remove any tomato skins and ensure a velvety smooth soup. Heat and serve.

Soup

Soup

Stinky McGee

American Made since 2012

American Made since 2012

Don’t you love the name of their company, Stinky Magee!!  I am so excited, my neighbors and friends Christine and Myles Ryan are finalists in Martha Stewarts American Made Contest, I think it’s brilliant, it celebrates handmade and local. as Martha would say “It’s a good thing”.  This is huge folks and I am so proud of them both.  Christine and Myles live a few doors away from me,  they have two adorable little boys and a very cute little dog are amazingly talented and so hard working. I have known them a long time and couldn’t be happier for them.

The reason for this post is that the contest is decided by us, the public and the number of votes that they receive determines the winner. You are allowed 6 votes a day, you have to register on Martha Stewarts site. Click here and you will be directed to their page and you can vote.

Christine and Myles make wonderful neckties, bow ties and suspenders. Adorable!!! They are hand crafted using top quality fabric. Read their Q & A to learn a little more about them. I hope everyone votes, I am voting every day 6 times (it’s easy and quick you do it all at once) and if you do thank you so much.

Onsie

Onesie

suspenders

suspenders

necktie

necktie


2 Recipes Eating Clean And Special Walnuts For Fiesta Friday #33

Fiesta Friday

Fiesta Friday

Eating clean, I’ve heard the term but never really grasped what it means, it’s quite simple really, read about it here in an article on Cooking Light, in a nutshell you eat unprocessed whole foods, nothing new really we should all eat like that, the term is new but not the concept.  I receive emails from Martha Stewart living and really love some of the recipes from her site, I always have admired Martha’s business acumen and respect how she has built her empire and she also has some amazing recipes. This particular email had recipes that focus on eating clean, the recipes are always simple and are prepared on video by Shira Bocar.  The salad contains Tuscan Kale (use tuscan its more tender when eaten raw), apples, beets and walnuts with a dressing made from avocado, white wine vinegar,  dijon mustard and oil. I don’t have a mandolin which is what you are supposed to use to cut the beets paper thin, so as a result my beets were a bit too thick and raw beets really need to be thin, next time I will roast my beets for a little while and then slice,or get over my mandolin phobia and get one of those.

In the same email there was a recipe (I guess you can call it that) for broiling broccoli rabe and chick peas. This was a revelation for me, I always steamed it and the florets become overcooked while the stems are still hard and stringy, I wanted to give this a try, the key is for the broccoli rabe and chickpeas to be dry so plan in advance and let your vegetables and chickpeas drain and dry completely. I must say I love Martha’s clean eating video’s here is the one with the broccoli rabe. Shira serves with some fresh ricotta drizzled with olive oil and a sprinkling of red pepper flakes.

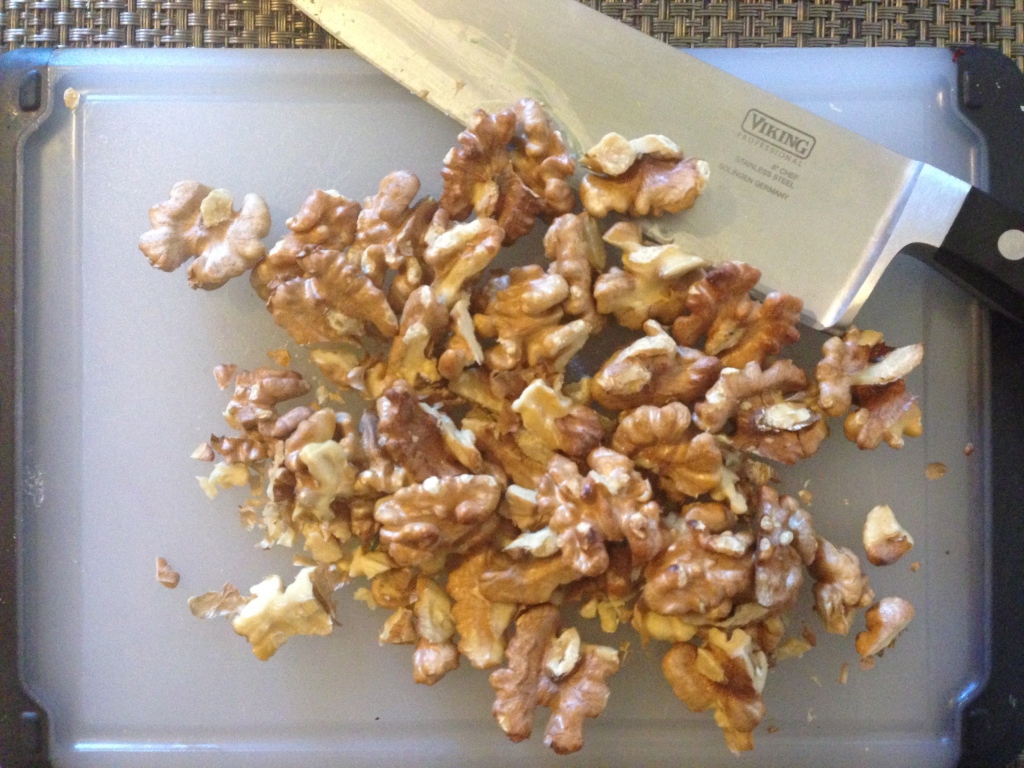
The walnuts in the salad were a gift from Patty Nguyen, I love her blog, she is a photographer and a great cook, she also has the most adorable little dog. She came to NYC to visit her brother and we met at the Brooklyn Flea, These walnuts (Chandler walnuts)  were hand cracked and are amazing, fresh and delicious.  I told Patty I would use them in a recipe and post it, so Patty,  here it is. Thank you for the delicious walnuts and I so enjoyed meeting you.

Chandler walnuts

Chandler walnuts

I am bringing both of these healthful vegetable dishes to the party, Angie@The Novice Gardener is hosting this gathering of friends and great cooks, imagine the line up with so many great and talented cooks preparing the food, The co hosts this week are Andrea @Cooking with a Wallflower and Sylvia @Superfoodista enjoy the clean food my dear friends.

Creamy kale salad

Creamy kale salad

Creamy Kale Salad

Ingredients
1 ripe avocado, halved, seed removed
2 tablespoons white wine vinegar (You could also use lemon juice) I added an extra tbs of vinegar
2 teaspoons Dijon mustard
3 tablespoons walnut oil or extra-virgin olive oil (I used walnut oil)
Kosher salt and freshly ground black pepper
1/2 bunch kale (8 oz.), stemmed and coarsely chopped
1 small red beet, peeled and thinly sliced (I used a golden beet also)
1 sweet, crisp apple, cored and cut into thin wedges
1/2 cup toasted walnuts, chopped
Directions
Combine avocado, vinegar, mustard, and oil in a food processor. Pulse until smooth. (It will be thick.) Season with salt and pepper.
Combine kale, beets, apple, and walnuts in a large bowl. Toss with avocado dressing. Season with salt and pepper. Serve immediately. Suggestion: Add Farro, freekeh or some whole grain to the salad, it will be filling and delicious.

salad

salad

ready for the broiler

ready for the broiler

Broccoli Rabe and chickpeas

1 bunch broccoli rabe cleaned and trimmed (Be sure to keep the leaves, they crisp beautifully in the broiler)

1 can chick peas drained and dried

6 tbs olive oil (If you use 2 small sheet pans 3 tbs per tray)

thinly sliced garlic 2 cloves

salt

Really important to make sure your broccoli rabe and chick peas are dry, moisture is the enemy for this dish Place dry broccoli rabe on sheet pan, don’t over crowd. Add the chickpeas and garlic. Spoon or drizzle oil and massage into the broccoli rabe and chick peas, sprinkle with salt and place in heated broiler for 2 minutes, take out of the oven and turn the broccoli and place back in the oven for another 2 minutes. Remove from oven and serve.NOTE: I washed and dried my broccoli rabe and chickpeas the day before I made the dish, just bagged and refrigerated and they were perfectly dry. I think it depend on your oven how long you leave in to broil. I found that after the prescribed 4 minutes in the broiler the broccoli rabe was still quite raw a bit too crunchy, it is probably my oven, I’m sure in the Martha Stewart test kitchen they have commercial grade ovens that have more BTU’s than mine. So I put it in an extra 6 minutes. It was done perfectly, a little toothsome but still tender. So the cooking time will vary.

ready to eat

ready to eat

A Tribute in Lights-9/11/2012

I wrote this post 2 years ago but the sentiments are the same. A day to Remember and a day that we will never forget…..

apuginthekitchen

Fox News Photo Of American Flags 9/11/2012

Sitting on my stoop in Brooklyn I have a beautiful view of the Tribute in Lights, it’s awe inspiring. It feels like yesterday when we were attacked and so many innocent people were murdered. I saw the Towers in billows of smoke on that day and every September 11th I re-live it. I count myself lucky that I wasn’t in Manhattan working when it happened but it still rips my heart out every time I think about it, for hours that day I didn’t know the whereabouts of my daughter. On that day she had to go to Battery Park City in the shadow of the World Trade Centers. There was no cell phone service that day and for what seemed like centuries I could not reach her. She left for work late that day, we both watched in shock and horror as…

View original post 275 more words

Italian Tapas For Fiesta Friday #32

Caponata

Caponata

Italian tapas, well it’s not really tapas in the truest sense of the word but it certainly can be eaten on small plates and it’s more of a prelude to the actual meal, I thought caponata, some good cheese and bread would be a nice addition to the party this week. Caponata is a Sicilian dish which is used as a side dish or condiment. I can remember my Mother serving on toasted Italian bread as a starter or appetizer. This is my version of my Mothers recipe, its less sweet and the vegetables are soft but still retain their shape.

Angie@The Novice Gardener is hosting this weeks event, she is always there for us and our co host is Hilda@along the grapevine. I hope everyone enjoys a little bit of Italy or Sicily. Buon Appetito!

Caponata

4 Italian eggplant washed and cut in half lengthwise. Skin on. (Or use 1 large eggplant)

1 Medium size onion chopped

2 Stalks celery (Use the tender inner stalks) chopped

3 cloves garlic minced

1 Red bell pepper de seeded and chopped

4 Fresh tomato’s chopped (I used 1 very large heirloom tomato and 1 smaller heirloom)

1/4 cup capers rinsed, rough chop

1/4 cup Olives Kalamata or green (I use a little of each) Rough chop the olives

2 tsp – 1 tbs organic brown Sugar (add 2 tsp taste and add more if needed)

1/4 cup red wine vinegar

Salt and pepper to taste

Pinch of crushed red pepper (optional)
Pre-heat oven to 450, clean the eggplant cut the tops off and cut in half lengthwise. On baking sheet lined with parchment brush a little olive oil on each half, both sides, place your eggplant cut side down and bake for 15 minutes. Remove from oven and set aside to cool. Chop the eggplant into bite size pieces.
In fry pan on med/high flame coated with olive oil add your chopped onion, cook until translucent. Add chopped celery and red bell pepper, continue cooking until they are soft and have started to caramelize. Add your minced garlic, cook for a minute or so don’t let garlic brown. Add your eggplant,tomato,capers, olives,crushed red pepper, sugar and vinegar continue cooking until mixture is thick. Eggplant will break down but thats ok this will take about 20 minutes. Season with salt and pepper. Let sit overnight. It tastes incredible when it has rested and all the flavors have blended together.

Caponata, bread and cheese

Caponata, bread and cheese

Fiesta Friday

Fiesta Friday

And The Winners Are……….

Cutting board and ice ream scoop

Cutting board and ice ream scoop

I entered all the names in random.org and the winner of the board is……….

 Sue@birgerbird

The winner of the ice cream scoop is……..

 Chef Amy@whats cooking with chef amy

Email me at: apuginthekitchen@gmail.com to claim your prize and give me your mailing address.

Congratulations to the winners, I wish I could have given one to each of you. But I am planning on another cutting board giveaway during the Holiday Season.

Hot Buttered Spiced Hard Cider

hot buttered spiced hard cider

hot buttered spiced hard cider

This is a twist on my own recipe for Brown Butter Spiced Ale. The challenge is to create a winter or cold weather cocktail by the totally lovely or should I say loverly website Lover.ly., I am not getting married but browsing through their site made me wish I were, the photo’s, the advice, planning,  literally everything you need to know or need to do to put together a wonderful and seamless wedding.  I was asked if I would submit a recipe for a cold weather cocktail suitable for a wedding or a soiree. Every Friday they share a drink and I am hoping they like my submission.

About 2 years ago I created this drink for a recipe challenge on Food52. I wanted to create another drink along the same lines that reflects Fall and Winter, and what reflects fall and winter better than apples, the drink is warming and would be suitable for a special occasion. I used Angry Orchard Hard Cider, Apple/Ginger instead of the Ale. This drink is rich and sweet, buttery and spicy, has a kick from the ginger in the cider and the cognac and is so warming. Note: If you don’t have or like Cognac you can substitute brandy, bourbon or whiskey.

First apples of the season

First apples of the season


Hot Buttered Spiced Hard Cider

Serves 2

12 ounces hard cider ( I used Angry Orchard Apple/Ginger)
2 tablespoons unsalted butter
3 tablespoons packed dark brown sugar
1/4 teaspoon ginger (fresh or powdered either is fine)
1/4 teaspoon cinnamon
1/4 teaspoon nutmeg
1 tbs cognac per glass (2 tbs cognac)
1 Cinnamon stick and slice of apple to garnish

Add butter to small saucepan and melt on medium heat. Reduce heat to low and add brown sugar and spices,  cook until brown sugar is dissolved and the mixture is paste-like. Scrape into small bowl or ramekin and cover with foil to keep warm.
Add the cider to the same saucepan and heat on medium until hot (don’t bring to a boil). Spoon a heaping tablespoon of the spiced butter mixture in serving glass, pour hot cider into glass add the cognac and stir. Garnish with cinnamon stick and apple.


Uncommon Goods


Brooklyn Flag Project

Brooklyn Flag Project

Disclaimer: Uncommon Goods contacted me and asked to write a product review, I was allowed to pick out the products and they were given to me as compensation. The opinions are 100% mine and my assistant reviewers.

Bloggers have a voice,  we put our stories and really our lives out there for the public to see,  so we will sometimes be asked by companies to review or talk about or recommend their products to our readers. That is a big responsibility,  at least I think it is, and I don’t want to represent anything that I don’t feel strongly about in a positive way, I was approached by Uncommon Goods and asked if I would consider writing a review of some of their products. I first visited their website and browsed, I liked what I saw, then I read about the company and liked them even more. As I scrolled down one of the first things I saw was the Brooklyn Flag Project click here to learn more about it, it’s wonderful and I am so proud that someone from my block association has entered this contest. I would love to see a flag for our neighborhood.

Uncommon Goods is an online store with offices and warehouse located right here in Brooklyn, they are a company that is much more than simply a great place to buy things. They are responsible employers paying a generous living wage, they are a company that gives back to their community, they showcase products from local Brooklyn artists and entrepreneurs as well as Fair Trade and sustainable products.  They are all about community and for me that’s very important,  when they contacted me and asked me to review some products I was happy to do it, they are my neighbors and in my opinion a business that I will not hesitate to recommend. They told me to look through their incredible online catalog and pick some items. They have gifts for everyone, gifts for her, gifts for him and gifts for kids of all ages, prices are varied and mostly very reasonable.  I write about food,  so I chose a few things for the home cook as well as a couple of kids gift items.

I picked out a 100% cotton apron and hand towel set, a herb oil infuser, a potholder loom and an Hypotrochoid art set for kids. My items arrived and the first thing I did was open the oil infuser.  I knew it may take a few days for the oil to infuse with the herbs. I cut some rosemary and sage from my garden and filled the center tube with the herbs.

Ready to infuse

Ready to infuse

The instructions are on the side of the box, it’s pretty simple but I managed to add too much oil to the bottle and when you insert the tube with the herbs there will be spillage if you over fill. So watch that you fill exactly as its pictured.

instructions

instructions

After I cleaned up the olive oil spill here is what it looks like in the bottle, Now I just need to let it sit for a few days to infuse the oil with the herbs. I really love this infuser, it’s a great idea. Easy to use, attractive and who doesn’t love infused oil. This would make a great stocking stuffer or hostess gift. (NOTE: 4 days later the oil is nicely infused, used it to make a lovely fresh tomato sauce).

oil infusing

oil infusing

Salt and Pepper apron and towel

Salt and Pepper apron and towel

This is a really great apron, the quality is excellent, it’s hand drawn (so cute), the neck strap is adjustable and there is ample length straps to wrap and tie in the front,  it has lots of pockets, I love that.  One other feature I thought was a great idea is that it comes with a hand towel and there is a place you can hang it on the apron, it’s very convenient. This also will make a great gift either to yourself or anyone that cooks. Honestly, when I bake I always wear an apron, for everyday cooking, not all the time,  but I really appreciate the quality and practicality.

hypotrochoid art set

hypotrochoid art set

I picked out two items for kids (adult kids would like too). The Hypotrochoid Art Set and the Potholder Loom. Both are great fun and my two assistants, Maia (9 yrs) and Laila (6 yrs) tested these items for me. Here is Maia’s review of the Hypotrochoid Art Set:

This hypotrochoid art set is really fun, but I think it needs more instructions. The instructions are on the back of the box. You have to write lightly or it will rip the paper, it takes practice but in the end it’s all worth it.

I will add that both girls used the art set the younger of the two lost interest after a few minutes,  but Maia, age 9 really got into it and when she successfully made some beautiful shapes she was immensely proud and happy. This is a really fun item with a lot of learning potential and I highly recommend it. It got a thumbs up from the girls.

Maia using the art set

Maia using the art set

Success

Success

When I saw the potholder loom it was exactly like the one I had as a child, it hasn’t changed. When I was young I spent hours with my loom making potholders and I was a young entrepreneur and took them door to door and sold to my neighbors. I chose this item partly for nostalgia but I also wanted to see how the girls would like it. Laila, chose this item and quickly set out to stretch the cloth bands on the loom. The instructions are clear but I think that this turned out to be a little more than Laila could handle so she handed off to Maia who finished it. If your child loves crafts this is a great product, it’s fun, teaches dexterity, patience and develops a love all things handmade. The girls both gave this a thumbs up and so do I.

First layer done

First layer done by Laila

Maia finishes

Maia finishes