Skip to content

Posts tagged ‘tart’

Salt of the earth…A sweet and salty tart

I am so excited to collaborate with Saltverk to create recipes using their amazing sea salt. If you don’t know about them I urge you to read about the company and try the salt. Saltverk hand harvests the salt from Westfiords in Iceland using 100% green geothermal energy. The raw material is from the clean and pristine sea water of the Westfiords. Using quality ingredients for me is extremely important and this artisanal salt is just that, high quality, sustainable and environmentally friendly. Its more than just about flaky sea salt, Saltverk produces an array of flavored salts.

Flaky sea salt, birch smoked salt, black lava salt, licorice salt, seaweed salt, arctic thyme. Each salt with a distinct and complex flavor that adds incredible flavor to any dish.

I thought I would start this journey with dessert, as a child I always wanted to have dessert first. I’m certain you have seen recipes for chocolate chip cookies topped with flaky sea salt or have had salted caramel, well that was my inspiration when I created this recipe. Salted Caramel and Chocolate Ganache Tart. For this recipe I used the licorice sea salt, the Persian licorice root is subtle and the resulting flaky sea salt infused with this root is amazing, the caramel, dark chocolate ganache and whipped cream are taken to another level when finished with this salt.

Pastry (Based on recipe by Martha Stewart)

4 oz (1 stick) unsalted butter at room temperature

1/2 c powdered sugar

1 c flour

1/4 tsp salt ( used flaky sea salt)

1 egg yolk

Cream butter and powdered sugar, add the egg yolk and beat just until combined, add the flour and salt mix just until its cohesive, don’t over beat. Press into a disc and refrigerate for one hour. Pre heat oven to 400 degrees, roll out or press dough into tart pan or pastry rings, place in freezer for 30 minutes. Line tart or tartlets with parchment and fill with pie weights or whatever you like to use. Bake for 18-20 minutes you will see the edges just starting to brown, remove pie weights and parchment and continue baking until golden brown, another 10-15 minutes (baking time will vary as all ovens are different).

Caramel (Inspired by recipe from Bon Appetite)

1 1/2 c sugar

1/8 tsp cream of tartar

1/3 c water

6 tbs unsalted butter

1/3 c heavy cream

1 tsp salt (licorice sea salt)

In heavy bottomed non reactive largish (4 qt) saucepan bring the sugar, cream of tartar and water to a boil stirring only until the sugar melts. Reduce heat to medium continue cooking, swirling the pan every few minutes until it turns a deep amber color. Remove from heat, add the butter 1 tbs at a time stirring constantly (It will bubble so be careful) Once butter is all incorporated add the heavy cream and salt. Set aside to cool to room temperature. Once cooled pour into tart shell, not to the top of the shell about halfway and refrigerate while you make the ganache.

Ganache

4 oz dark chocolate (chopped)

4 oz (1/2 cup) heavy cream

Place the chopped chocolate into a mixing bowl. Heat the milk to scalding, pour over the chocolate and let it sit for 5 minutes. Start stirring it from the middle until all the chocolate is melted and you have a creamy smooth mixture. If all the chocolate has not melted place bowl over some hot water in a pot and stir until completely smooth and silky. Remove caramel filled tart(s) from refrigerator and pour enough ganache so that it reaches the top of the shell. Refrigerate until set. Serve with whipped cream and a sprinkling of sea salt. Whip heavy cream to stiff peaks adding powdered sugar to desired sweetness.

The salt really makes this dessert special. If you love salt, if you love artisanal products, if you love products that are sustainable and environmentally friendly I highly recommend finding some Saltverk Sea Salt. More recipes are coming… Love this product and the company.

Lemon Cream Tart

I have posted this recipe and several variations multiple times but the lemon cream is so good it’s time to post it again. Recipes get lost in the volumes of pages on the blog and are all but forgotten. This creamy lemon filling has been used in cakes, to stabilize whipped cream and as is the case here in a tart. I love just eating it on its own, it’s that good!! You can use other fruit and fruit juice besides lemon, I’ve made this with blackberry, orange, raspberry. It always turns out delicious.

The recipe is from Tartine Bakery and I saw it years ago on Food52. Its super easy to make and has always turned out perfectly. The only change I made was that I added some lemon zest to make the lemon flavor even more intense. I used my go too pie crust by Julia Child and whipped some heavy cream for the top, it would be equally good with meringue.

Lemon Cream

 Recipe for Tartine Bakery’s Lemon Cream

Makes about 2 1/2 cups (625 ml)

1/2 cup + 2 tbsp (5 oz/155 ml) lemon juice (Meyer or regular)

3 large eggs

1 large egg yolk

3/4 cup (6 oz/170 g) sugar

Pinch of salt

1 cup (8 oz/225 g) unsalted butter

zest of 2 lemons (0ptional)

Pour water to a depth of about 2 inches into a saucepan, place over medium heat, and bring to a simmer.

Combine the lemon juice, lemon zest, whole eggs, yolk, sugar, and salt in a stainless steel bowl that will rest securely in the rim of a saucepan over, not touching, the water. (Never let the egg yolks and sugar sit together for more than a moment without stirring; the sugar will cook the yolks and turn them granular.) Place the bowl over the saucepan and continue to whisk until the mixture becomes very thick and registers 180° F on a thermometer. This will take 10 to 12 minutes. If you don’t have or trust your thermometer, don’t worry. It should thicken to the point that your whisk leaves a trail through the curd. NOTE: I don’t use a thermometer, the lemon mixture will thicken and coat the back of the spoon, draw a line on the back of the spoon with your finger, the line will stay intact. It took about 11 minutes for mine to thicken properly.

Remove the bowl from over the water and let cool to 140° F, stirring from time to time to release the heat.

Meanwhile, cut butter into 1-tablespoon (15-ml) pieces. When the cream is ready, leave it in the bowl if using an immersion blender, or pour it into a countertop blender. With the blender running, add the butter 1 tablespoon at a time, blending after each addition until incorporated before adding the next piece. The cream will be pale yellow and opaque and quite thick.

You can use the cream immediately, or pour it into a storage container with a tight-fitting lid and refrigerate for up to 5 days.


Happy Easter, A Chocolate Banana Vegan Tart

Happy Holidays to everyone, Easter, Passover or just celebrate that Spring is finally here.  Honestly, it has not really felt like Spring with blustery cold and snow and unfortunately more in the forecast for this week. I see signs of the change of seasons everywhere, flowers popping up, longer daylight, warmer weather trying to take hold.

I often make pie dough and will line a tart pan and freeze, this tart is delicious, no animal products were used in making it but you can easily adapt using cream for the ganache and whipped cream to top it. The ganache was made with dark chocolate, sweetened condensed coconut milk and coconut milk. The whipped topping is made by simply refrigerating a can of coconut milk, the cream will rise to the top and become solid. All you have to do is scoop it out and whip it with sweetener and flavoring.

Chocolate Tart (Vegan)

Pie crust ( use your favorite recipe or commercially prepared)

4 oz dark chocolate (I used vegan chocolate)

1/4 cup sweetened condensed coconut milk

1/4 cup coconut milk (Note: for non vegan or regular ganache use 1/2 cup heavy cream)

1 banana sliced

coconut or regular whipped cream

Toasted coconut (optional)

Place a can of coconut milk in the refrigerator before you begin or even better the night before. The coconut cream will separate from the liquid and you will use that (saving the liquid for another recipe)

Heat oven to 400 degree’s. Place pie dough in 8 or 9 inch tart pan. You are going to blind bake the pie crust, place a sheet of parchment on top and fill the pan with pie weights or beans or whatever you like to use. Bake for approximately 20 minutes, remove parchment and weights and bake for another 15-20 minutes or until golden brown. Remove from oven and let cool. Note: the oven should be quite hot, I baked the first tart shell at 375 and even with pie weights it shrunk down the sides.

Ganache

Heat the coconut milk or heavy cream to scalding. Place the chocolate in a small bowl and pour the hot cream over the chocolate, let sit for 5 minutes and stir until the chocolate is melted and the ganache is smooth and shiny. Pour into the cooled tart shell and refrigerate until set, approximately 1-2 hours or overnight.

To serve

Place sliced banana on top of the chocolate. Scoop the coconut cream from the cold can of coconut milk. Whip with electric mixer adding sugar to taste and flavoring of your choice (vanilla)  or you can add 2 tbs of the sweetened condensed coconut milk that is left from making the ganache. Heat oven to 350 and toast flaked coconut until golden brown, watch it closely it will burn and only takes a few minutes. Spread some of the whipped cream (coconut or other) on top of the banana’s and sprinkle with toasted coconut.

Happy Easter from Percy and Jenna Rose!

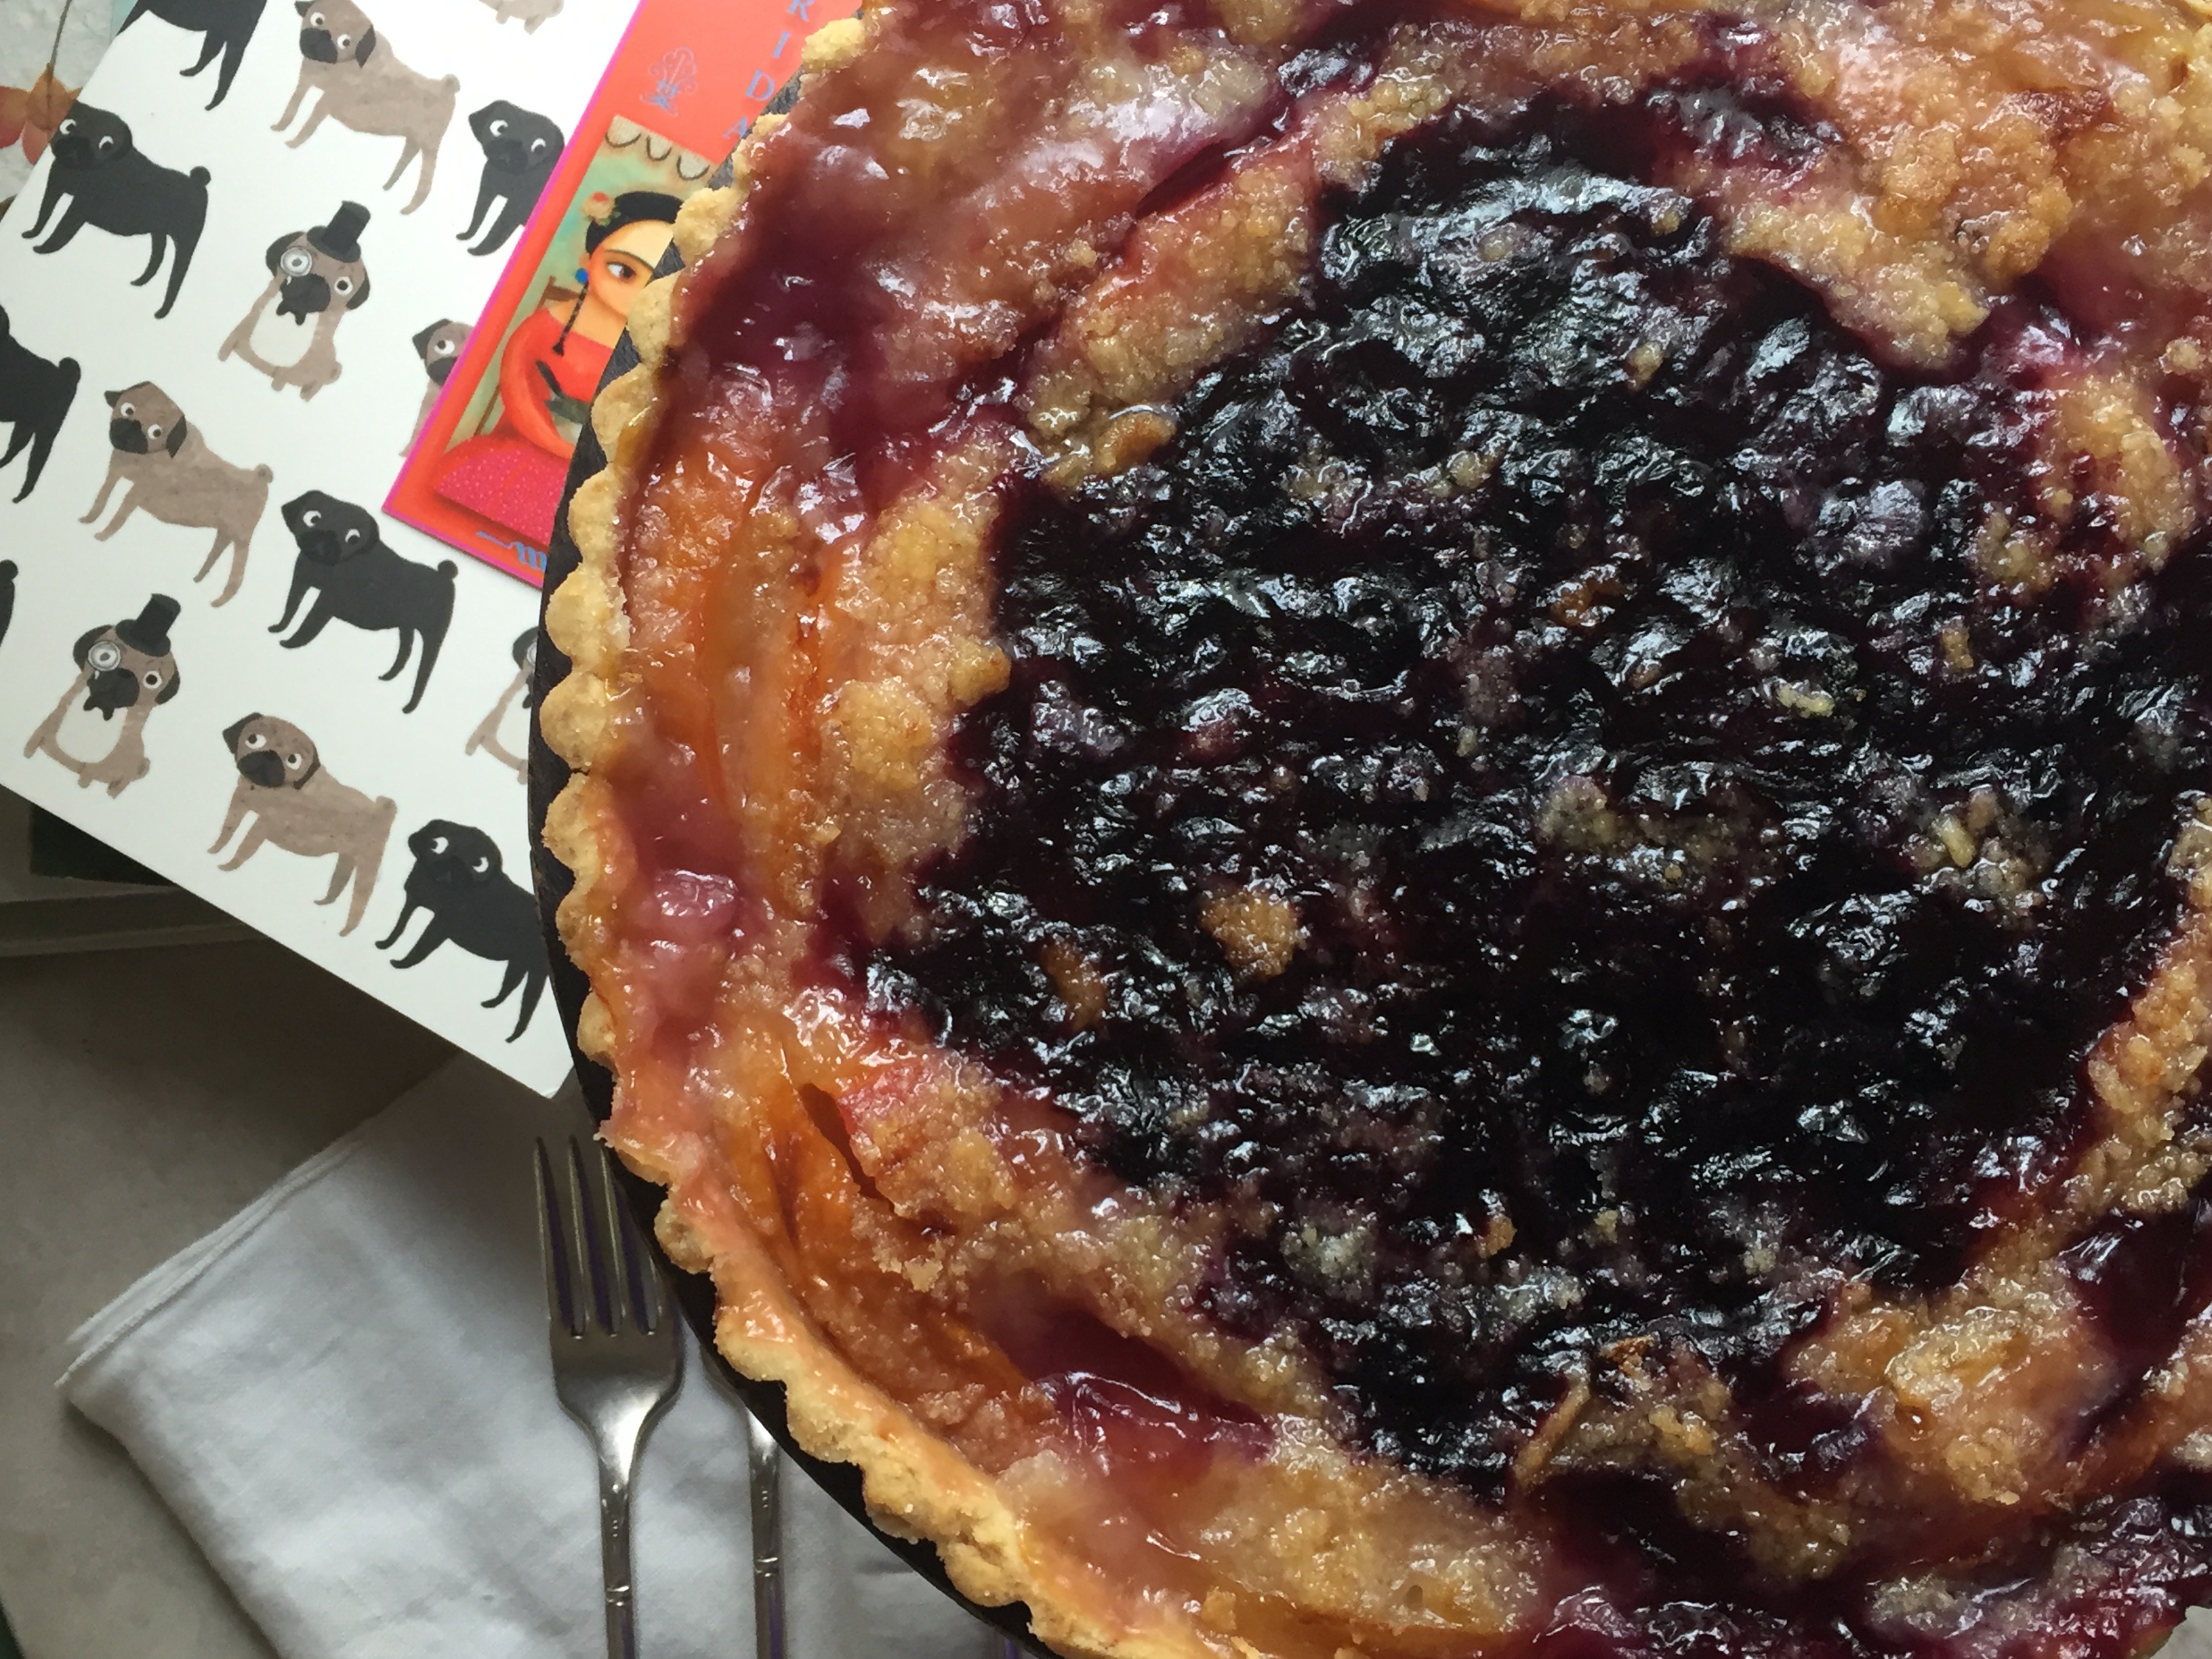
Peach And Blueberry Tart

IMG_3976

This was a really busy week, I have neglected the blog, between work, the community work I do and this oppressive heat I haven’t had time or the inclination to use my stove/oven. On Thursday I got to meet one of the bloggers that I have been following for a long time, Shashi whose wonderful blog Runnin Srilankin is always chock full of delicious healthful recipes. We met at the Brooklyn Ice Cream Factory and had pizza at Grimaldi’s. It was great finally meeting her in person.

Last weekend I went to a barbeque, and decided to be daring and try a new recipe. This is a tried and true recipe that is very popular on Food52, it’s by Amanda Hesser and she got it from her Mom.  I used frozen peaches which is not the best idea as they produced a lot of juice and some plucots. The party was great but I had to leave before dessert was served and I didn’t get a chance to try it. The feedback though was that it was amazing. The simplicity of this recipe is what drew me, a press in crust that uses oil not butter, fresh fruit and you make a sugar, flour and butter crumble topping and sprinkle it on before baking.

Today I went to the farmers market and got some great produce, tomatoes, zucchini, peppers, nectarines and blueberries. Since I didn’t get to taste the tart I decided to make it today using the nectarines. Best laid plans don’t always work, the nectarines were very ripe and I put them at the bottom of my cart without thinking and 3 of them got squished, I will blame it on the heat,  for once I only bought enough for the tart, since I had some blueberries I decided to use them as well.

This tart is a winner, and I hope you give it a try. The ease of preparation, use of delicious seasonal fruit and beautiful presentation make this tart one that I will make over and over again. Next time with only peaches or nectarines, it’s not as pretty with the blueberries after it’s baked but still delicious.

This tart is coming with me to Fiesta Friday #130, Angie is away but has left the party in very good hands the co hosts this week are Judi @ cookingwithauntjuju and Petra @ Food Eat Love

IMG_3935

Peach Tart

Made 1 9 inch tart (the recipe said 11 inch but I didn’t have enough fruit)

Pie Dough

1 1/2 cups flour

1 tsp sugar

3/4 tsp kosher salt

1/4 cup neutral oil (I used grapeseed)

1/4 cup olive oil

2 tbs milk (I used half and half)

6-8 peaches, nectarines sliced thickly (I added a pint of blueberries also)

Place the flour, sugar and salt in a mixing bowl and whisk or stir with a fork. Add the oil and milk and mix with a fork until cohesive.

Press into tart pan with your fingers pressing on the bottom and up the sides. Make sure there are no cracks in the dough. Trim and set aside. Pre heat the oven to 425 and line a sheet pan with parchment.

Arrange the fruit however you like in the tart pan.

IMG_3945

Crumble topping

3/4 cup sugar

2-3 tbs flour

2 tbs cold butter

pinch of salt

Mix with your hands until it resembles fine crumbs. Distribute the crumbs on top of the tart and bake until golden brown and bubbly, approximately 45 minutes. It will seem like a lot of the topping, it’s ok use all of it.

Just out of the oven

Just out of the oven

fiesta-friday-badge-button-i-was-featured1


Happy Valentines Day, Tartlets With Blood Orange Curd, Whipped Cream And Nutella

tarts

tarts

This combines two wonderful celebrations, Valentines Day and Fiesta Friday. This post has morphed several times with some failed attempts at a cake (cake pan problems) and I have now settled on tartlets with a layer of nutella and filled with blood orange curd. They are delicious and I hope you enjoy!

This Friday, the day before Valentines Day is very special because we are celebrating two occasions, Valentines Day and Fiesta Friday #55, how great is that?  Thank you Angie@The Novice Gardener for hosting you rock,  the co hosts this week are Sue@birgerbird and me, moi, yep I’m a co host this week no link necessary because if you are reading this you are already here!! Very excited to host with my buddy Sue.

I needed to use the blood oranges so I squeezed the juice ahead of making the curd and froze in ice cube trays, I also threw in 2 mandarins. the color is incredible!!!


Look at the color of the blood orange juice

Look at the color of the blood orange juice can you figure out which is the mandarin

Blood Orange Curd

adapted from lemon cream recipe from Tartine Bakery Cookbook

Makes about 2 1/2 cups (625 ml) (It made exactly 16 oz for me)

1/2 cup + 2 tbsp (5 oz/155 ml) Juice from Blood Oranges

3 large eggs

1 large egg yolk

1 tsp orange zest

3/4 cup (6 oz/170 g) sugar

Pinch of salt

1 cup (8 oz/225 g) unsalted butter

zest of one whole orange (medium size)

Pour water to a depth of about 2 inches into a saucepan, place over medium heat, and bring to a simmer.

Combine the orange juice, whole eggs, yolk, sugar, zest and salt in a stainless steel bowl that will rest securely in the rim of a saucepan over, not touching, the water. (Never let the egg yolks and sugar sit together for more than a moment without stirring; the sugar will cook the yolks and turn them granular.) Place the bowl over the saucepan and continue to whisk until the mixture becomes very thick and registers 180° F on a thermometer. This will take 10 to 12 minutes. If you don’t have or trust your thermometer, don’t worry. It should thicken to the point that your whisk leaves a trail through the curd. NOTE: I don’t use a thermometer, the mixture will thicken and coat the back of the spoon, draw a line on the back of the spoon with your finger, the line will stay intact. It took about 11 minutes for mine to thicken properly.

Remove the bowl from over the water and let cool to 140° F, stirring from time to time to release the heat. Again I didn’t use a thermometer, I poured into the blender, and by the time I cut the butter into tbs size pieces it was just the right temperature.

When the cream is ready, leave it in the bowl if using an immersion blender, or pour it into a countertop blender. With the blender running, add the butter 1 tablespoon at a time, blending after each addition until incorporated before adding the next piece add the additional orange zest and pulse once or twice.. The cream will be quite thick.

Blood Orange Curd

Blood Orange Curd

You can use the cream immediately, or pour it into a storage container with a tight-fitting lid and refrigerate for up to 5 days. To use after refrigeration, if necessary, gently heat in a stainless steel bowl set over simmering water until it has softened, whisking constantly. Note: Your beautiful vibrant, brightly colored blood orange juice will turn a sort of beige color after mixing with the eggs and butter, you can if you wish add a tiny drop of food color to turn it pink, more fitting for valentines day or go au naturale and as you can see I went natural.

Pate Sucree

From Martha Stewarts Pie’s and Tarts

2 1/2 cups all purpose flour

1/4 cup sugar

1/4 tsp salt

1 cup (2 sticks or 8 oz) unsalted butter cold cut into small pieces

2 large egg yolks

2-4 tbs heavy cream or ice water

Pulse flour, sugar and salt in food processor until well combined. Add butter and pulse until mixture resembles course meal. Add the egg yolks and drizzle the cream or ice water and pulse until it forms a cohesive dough. If mixture is too dry add cream or water a tsp at a time until it is cohesive. Remove from processor, wrap in plastic wrap and refrigerate for at least an hour.

To blind bake the tartlets:

Pre heat oven to 375 degree’s. Roll out or press dough into tartlet pans and refrigerate or put in freezer for 15-30 minutes before baking. Place sheet of parchment in each and fill with pie weights or place another tartlet pan on top and place them on a baking sheet. Bake for 8-10 minutes you will notice the edges lightly brown. Remove parchment and weights or pan and place back in the oven another 4-6 minutes or until golden brown. Remove to a wire rack to cool completely before filling.

nutella

nutella

To make your tarts

Spoon some nutella in the tart shell ( I like to do it when the shell is still a little warm so the nutella is easier to spread) place in the refrigerator for about 15 or 20 minutes so the nutella hardens a bit, be generous, don’t skimp on the nutella. Spoon in the curd, top with some whipped cream and chocolate shavings and serve.

Happy Valentines Day to all!!

fiesta-friday-badge-button-i-was-featured1


IMG_5020

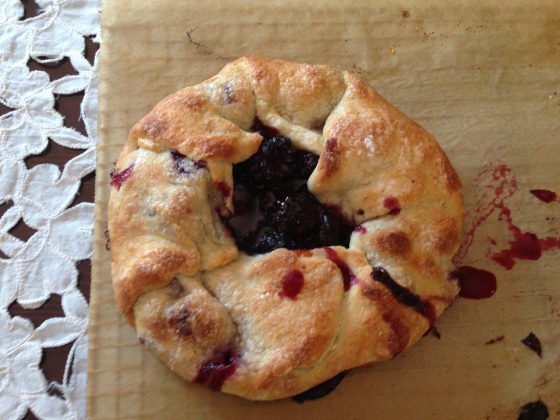
2 Galettes And a Trip to Mealku

Galette

Galette #1

I was asked to visit the office of a food website called Mealku, and thrilled that they want to feature me as a cook on their site. They needed to do a photo shoot and asked me to bring a signature dish or something that is going to give people some insight into my cooking style. Well, that’s not so easy as I am all over the map and it’s very hard to figure out what screams me when it comes to food. It’s wonderful that this is happening in the summer when fresh produce is at it’s peak and there is a bounty of fresh and delicious fruit and vegetables to choose from. I thought that making something with a pastry crust really does represent me, I am well known in my neck of the woods for my pies. I decided for transport purposes it would be easy to make a free form tart or galette. I have used Julia Childs recipe for many years and love it. The recipe allows either one large tart or two smaller. So I decided to do two small tarts, blackberry nectarine. I am also bringing some homemade vanilla ice cream. I will tell you more about Mealku in another post, it’s a very exciting and innovative venture. Galette #2 is going to my Daughter today is her birthday!!
Galette Dough
From Baking With Julia written by Dorie Greenspan
1/3 cup ice water
3 tbs sour cream, yogurt or buttermilk
1 cup all purpose flour
1/4 cup cornmeal
1 tsp sugar
1/2 tsp salt
7 tbs cold unsalted butter cut into tbs size pieces
Stir the sour cream and ice water together. Put flour, cornmeal, sugar. and salt into your mixing bowl and whisk to combine. Add the cold butter and toss to coat with the flour mixture. Using either your hands or a pastry cutter work the butter into the flour until it resembles large crumbs (about the size of peas) Add the sour cream/water and stir with fork to combine. Gather the dough and gently press into a disk, wrap in plastic wrap and refrigerate for at least 2 hours or overnight. This is enough dough for 1 large or 2 smaller galette’s, if making 2, divide dough in half and wrap each individually. Dough can be frozen also for later use. Defrost in the refrigerator.
To make the galette’s generously flour your work surface, remove one of the disks and roll into a rustic looking circle, place whatever fruit or filling you like in the center and gather up the edges, leaving some of the filling exposed. Brush with egg wash or heavy cream, sprinkle with some sugar (optional). Place in the freezer for at least 15 minutes before putting in the oven. Bake at 400 degree’s for 40-45 minutes or until golden brown and bubbly.

Looks like large crumbs

Looks like large crumbs leave some pea size chunks of butter

Dough is wet but thats ok!

Dough is wet but thats ok!

Wrapped in neat packets

Wrapped in neat packets

Galette #2

Galette #2

Fig And Goat Cheese Tart

Fig And Goat Cheese Tart

Figs are in season and then they are gone like a flash. I wanted to take advantage of the beautiful fresh figs available in a recipe using Mosto Cotto syrup. It’s delicious, and can be used in both sweet and savory recipes. I used it as a syrup to pair with a buttermilk panna cotta and as a glaze for ribs. It’s so versatile. For this recipe I steeped fresh mission figs in Mosto Cotto with black peppercorns, orange and cointreau. I wanted the figs to retain their shape and texture so instead of poaching in the syrup I steeped them for a few hours. The figs were soft but firm enough to retain their shape and the flavor of the syrup permeated each fig. I then sliced them, and reduced the syrup by about half and used it as a glaze for the figs. The tangy goat cheese only slightly sweetened with honey and  the figs steeped in delicious Mosto Cotto syrup is delicious. I made a traditional pie dough because I wanted something flaky and a bit more delicate than a tart dough, I used my go to recipe from Julia Child. This would be equally delicious though in a more substantial tart crust or even puff pastry.I created this recipe when I was asked to do a guest post for Marx Foods, who carry Mosto Cotto,  and I happily agreed to do so. I will always keep a bottle in my pantry, it’s just that good.  The beauty of this tart is how easy it is to prepare. It really takes almost no time at all to put together, and makes a lovely not too sweet dessert or put a slice or two of prosciutto di parma on top for a nice lunch. NOTE: If you can purchase Mosto Cotto I highly recommend but if you can’t use wine, the Mosto Cotto is made from Montepulciano grapes from the Abruzzo region of Italy and also Amarena Cherries, try to find a wine using those grapes if you can (Montepulciano d’Abruzzo)  for the syrup if you cannot then use a good red wine it will be fine.

Figs and Syrup

1lb (6-7 fresh ripe figs)
1/2 cup Mosto Cotto Syrup
1/2 cup sugar
2 strips (approx 2 inches wide) orange skin- careful not to include the pith
3 whole black peppercorns
1 tbs cointreau
Bring mosto cotto, sugar, orange rind, peppercorns and cointreau to a boil, reduce heat and simmer for 10 minutes. While it’s simmering slice the figs in half and place in heat proof bowl. Pour the hot syrup over the figs and cover. Let sit until it reaches room temperature.
Making the tart
10.5 oz soft goat cheese (chevre) at room temperature
1 heaping tbs honey (I used peach blossom)
Favorite pie dough, tart crust recipe. (You could also use puff pastry for this)

Juilia Childs Pastry Dough

Makes enough dough for a double crust 9 inch pie

1 1/2 cups all purpose flour

1/2 cup cake flour

1 tsp salt

6 oz cold unsalted butter cut into tbs size pieces

4 tbs shortening or leaf lard cold

1/2 cup ice cold water

You can make this either by hand or in the food processor. To make by hand, put flours, salt, butter, lard or shortening into mixing bowl, use pastry cutter to combine until it resembles pea size crumbs. Add water mix with fork, gather with your hands, divide dough into a 2 discs and cover with plastic wrap. Refrigerate for 1 hour.

In Food Processor, add the flours, salt, butter and shortening or lard into the bowl of the processor. Pulse a few times until the mixture resembles pea size crumbs. Add the water and pulse a few times until it becomes a cohesive dough.  Divide dough into two discs and wrap in plastic and refrigerate for 1 hour.

Blind bake your pie dough, I like to use a rectangular shape for this tart, either use a fluted rectuangular tart pan or a small 1/2 sheet pan. Pre heat oven to 375 degrees. Roll out your dough to fit into the tin, prick with fort multiple times, ( chill in refrigerator at least 20 minutes before baking) place a piece of parchment on top and add pie weights or beans.Bake for 15-20 minutes, remove parchment and weights and bake again for another 15-20 minutes until golden brown. Remove from oven and cool. While the pie crust is cooling slice the figs into thin slices approximately 1/4 inch thick, set aside. Pour the remaining syrup into sauce pan, removing peppercorns and orange zest and bring to a boil, reduce heat to medium and reduce by 1/2 (It takes about 10 minutes) or until syrup thickens.  Let cool.
Place goat cheese in mixing bowl add honey and whip until fluffy.
Smooth onto tart, arrange figs on top and brush some of the reduced mosto cotto syrup over the fruit. Serve as is or it’s delicious to lay a slice of prosciutto di parma on top.

Mango Cream Tart With Mango Whipped Cream

Mango Cream Tart

The contest on Food52 is all about mango’s and this is my entry. I love that you can use mango in both sweet and savory applications. I chose to highlight a dessert. The mango cream is adapted from the genius recipe for lemon cream from Tartine Bakery. I really love how creamy and thick the curd is and it works beautifully as a filling for tarts or cakes, it is truly genius. When I think of mango, tropical flavors come to mind, so I added coconut to the pastry dough, its filled with mango cream and topped with mango whipped cream. The mango cream stabilizes the whipped cream and gives a subtle mango flavor, it’s not too sweet I just used a tbs of powdered sugar. I suggest serving with julienned fresh mango.
 Mango Cream
2 large ripe mango pureed – Tommy Atkin mango are quite large or use 3 ataulfo mango’s
3 tbs lime juice
1/2 cup sugar
pinch of salt
3 egg yolks + 1 whole egg
8 oz cool but not cold butter cut into tbs size pieces
Set double boiler with a few inches of water to simmer on stovetop. Place all the ingredients in bowl and whisk to combine. Place over simmering water and bring to 175-180 degrees. It will be quite thick when done, remove from heat strain through a sieve and cool to 140 degrees.  Add to blender, with blender running add the butter a tbs at a time making sure each tbs is incorporated before adding the next one. It will be very thick and creamy. Refrigerate at least 4 hours preferably overnight before using.
Coconut Tart Dough
2 1/2 cups all purpose flour
1/4 cup shredded coconut (toasted coconut would also be delicious)
8 ounces cold butter chopped into pieces
3 tbs sugar
1/2 tsp salt
3 egg yolks
2 tbs heavy cream
Pulse the flour, coconut, sugar and salt in food processor, add the butter and pulse until it resembles fine crumbs. Add the egg yolks and cream and pulse until it forms a cohesive dough. Dump onto work surface and form into two discs, wrap in plastic and refrigerate at least one hour. You can make this the night before and refrigerate overnight. When you are ready to assemble the tart remove dough from the refrigerator, preheat oven to 375 degrees. Press one dough disc into 9 inch tart pan or tartlet pans, prick bottom with fork. Put back in the refrigerator for 30 minutes you want the dough to be chilled before baking. Bake until golden brown approximately 25 minutes depending on your oven. Let cool before adding the filling.
Mango whipped cream
4 ounces very cold heavy cream
1/4 cup mango cream
1 tbs powdered sugar
Whip cream until it is thick and billowy, add the mango cream, powdered sugar and vanilla and continue beating until thick and soft peaks form. Fill tart shell with mango cream and pipe on the mango whipped cream.