Skip to content

Posts from the ‘Features, Articles and Recipes’ Category

Happy St. Patricks Day- Irish Soda Bread

Happy St Patricks Day

Happy St Patricks Day

I want to wish everyone a Happy St. Patricks Day.  To celebrate the day I made a loaf of Traditional Irish Soda Bread, the recipe comes from Jessica@What Jessica Baked Next, this recipe is great by the way, very moist and delicious and excactly how I imagine a loaf of soda bread to be..

I think Irish Soda bread is the perfect way to celebrate this day, a shout out to my Irish friends and all those that celeberate this day and the beloved St. Patrick, the patron Saint of Ireland. I love Ireland, I want to go there it is #1 on my list of places I want to visit and I’m afraid that if I go I just might not come back. By all accounts it looks like heaven on earth, lush green land, friendly people, quaint and beautiful cottages, I could go on and on. So here is to Ireland and it’s wonderful people. A loaf of soda bread, served hot with some good butter, jam and a cup of strong tea.

Happy St Patricks Day

Happy St Patricks Day

Ireland

Ireland


Leek, Asparagus,Chanterelle And Gruyere Mini Quiche For Fiesta Friday #59


Mini quiche

Mini quiche

I am not re-inventing the wheel here, quiche in all it’s forms with varied and myriad ingredients has been made over and over but no matter how many times you see, eat or make it’s always delicious. I decided to make individual quiche, no cutting just grab and go.

I like to blind bake my crust so it doesn’t get soggy, use half and half in the custard, I’m generous with the cheese and vegetables making this a substantial and satisfying meal. I used fresh asparagus, chanterelle mushrooms, a young leek, and some lovely gruyere. One of my favorite meals is a fresh salad with quiche and look at this salad that Margi@La petite casserole made.

Angie@The Novice Gardener and her cohosts this week Jhuls@The Not So Creative Cook and for the first time Mila@Milk And A Bun are ensuring that a good time is had by all, the drinks are flowing and the food is plentiful. Thank you all!!

Quiche With leek, asparagus, chanterelle, gruyere

Makes approximately 8 mini tarts(4 inch)

Recipe for double crust flaky pastry I used my go to Julia Child recipe

Approximately 1/2 lb gruyere grated

4 large or extra large eggs

1 1/2 cup half and half

asparagus (enough for 3 stalks on each quiche)

mushrooms (I used chanterelle) about 1 cup chopped

1 spring or young leek cut into rounds and cleaned thoroughly

pinch nutmeg

salt and pepper to taste

Blind baking your pie crust:

1. Press your pie dough into tart pans and refrigerate (I like to make the night before and refrigerate covered overnight. Preheat oven to 400 degree’s

2. Place parchment in each tart pan and add beans or pie weights

3. Bake for 15 minutes, remove parchment and pie weights and bake for another 15 minutes or until just lightly browned.

Making the quiche:

Place mushrooms and asparagus on baking sheet lined with parchment, brush with olive oil and bake at 375 for 15 minutes. Remove from oven to cool and keep the oven temp at 375 degrees.

Heat a tbs of butter in saute pan and saute the leeks after they have been cleaned and dried.

Grate the cheese and set aside.

Beat the eggs and half and half, salt, pepper and nutmeg.

Assembling:

Place some cheese at the bottom of each tart pan, add leek and mushroom filling to the top of each pan, pour enough egg custard to fill each, lay the asparagus on top and add a little more of the grated cheese. Bake for 20-25 minutes or until the egg is set.

Enjoy with a fresh salad.

IMG_5700

IMG_5730


fiesta-friday-badge-button-i-was-featured1

Pureed Vegetable Soup-Spring Cleaning My Refrigerator And Cupcakes


Vegetable soup

Vegetable soup

This is an incredibly delicious soup, I’m not reinventing the wheel here but this particular combination is wonderful and I wanted to share, I was spring cleaning my refrigerator and found some vegetables I needed to use and thats how this soup was born. The combination is wonderful, honestly, I didn’t know how it would come out, I just started adding things. After boiling the vegetables and pureeing and seasoning with salt and pepper it tasted a bit blah, not very exciting, it’s amazing really what a touch of this and that can do to the flavor of a dish, first I added the pinch of nutmeg, that was good, then added the butter and some cream, ok even better then a teaspoon of honey. It was the perfect combination to bring that soup from blah to wow.  The soup looks dark and brooding but it couldn’t be further from how it tastes. It’s fresh and slightly complex and undeniably vegetable.  Here we go:

Soup

Broccoli tough part of the stem removed and cut into pieces

Green Curly Kale – 1 head tough stems removed

1 potato peeled and cut into quarters

carrots peeled and cut into chunks

onion peeled and cut into quarters

1 clove garlic – smashed

1 stalk celery- cut into chunks

broth (chicken, vegetable or just use water) 6 cups approximately I used chicken

pinch of nutmeg

salt and pepper to taste

2 tbs butter

2-3 tbs heavy cream (you can also use cashew cream, soy or almond milk or do without)

1 tsp honey (yes honey)

Add a little olive oil to your soup pot, sauté the onion until soft, now add the garlic and don’t let it brown just soften it a little. Add the vegetables and give them a good stir. Pour in the broth or water just enough to cover the vegetables. Cover the pot and boil until everything is tender.

Let cool and puree either with your blender or immersion blender If using an immersion blender take out some of the broth, you can always add it back to thin. you take a chance on your soup being too thin if you blend with all the liquid in the pot. I found that I had about 2 cups of broth left which I froze to use later. Season with salt and pepper, add the nutmeg (very important), the butter, cream and honey and heat through. Is even better the next day.

monster and dirt cupcakes

monster and dirt cupcakes

Sweet Maia celebrates her 10th birthday today and  she asked me to make cupcakes for her class at school, I think it’s great that they celebrate the kids birthdays with a party. She saw these cupcakes on Pinterest and this is what she wanted to take to class. The monster cupcakes are chocolate cake with a cream cheese buttercream piped on with Ateco tip #133, I wish I had #234 the holes are a little larger. It was hard piping that buttercream, the frosting was thick and it took every ounce of strength to get that on the cupcakes which is why they look somewhat different, but variety is the spice of life and no two monsters are alike, made pink, blue and green. The finishing touch are googely eyes. Gotta love that. The last 4 cupcakes were not piped as you can see, I couldn’t press on that bag one more time so just spiked the frosting and added multiple googely eyes.

The second cupcake is a dirt cupcake. sounds appetizing right? Again used the chocolate cake, I used the recipe for Hershey’s Perfectly “chocolate” chocolate frosting, it’s quick and easy and very smooth. Thought that would make a good base wherewith to hold the dirt. The dirt is chocolate Teddy Grahams whizzed in the processor. The cupcakes are filled with chocolate pudding. The piece du resistance is the gummy worm sticking out of the icing. They are fun and really delicious and the Birthday Girl and her class loved them. What fun it was to make them!!

monster cupcakes

monster cupcakes


Spring Forward, A Fresh Salad With Creamy Meyer Lemon Dressing And Some Shopping

Spring salad

Spring salad

Although it won’t officially be spring until Friday, March 20th at 6:46 PM, we have taken one giant leap by changing the clocks, moving them forward one hour which gives us an extra hour of daylight, in my opinion having to wake up an hour earlier is cruel and unecessary, leave the clocks be please (editorial opinions are strictly my own).  I have proclaimed that it is Spring in my house today by opening some of my windows to let in some fresh (cold) air and although there is still snow piled up outside, I made a fresh salad in honor of Spring, This salad was born out of necessity, I needed to use watermelon radish, frisee, beets, spring onion and blood orange before they went bad,  threw some garbanzo beans in and had a small wedge of 2 day old sourdough bread that I cut into cubes and made some pan fried croutons.  The dressing is simple, meyer lemon juice, mayonaise, olive oil, mint and basil (both dried), the flavor is creamy and bright and it went so nicely on the salad, you don’t have to use mayonnaise you can use yogurt for a lighter dressing or simply lemon, oil and herbs for an even lighter one. I hope you all enjoy your extra hour of daylight and we will all soon be enjoying lovely Spring weather and beautiful produce.

Vegetables

Vegetables

Salad for one:

handful of frisee

beet cut into bite size pieces

scallions or spring onion

watermelon radish cut into strips

1 blood orange, or orange supremed used half the orange in the salad and squeezed the juice of the other half on top of the salad

garbanzo beans about 1/4 cup

croutons

Toasted nuts would also be a great option in this salad

Instead of croutons you could add a whole grain like farro, freekeh, barley or whatever you like.

Toss it all in a bowl (pretty easy right)

IMG_5522

Meyer lemon dressing

2 tbs mayonaise

juice of a meyer lemon a (you determine how thick or thin you like your dressing)

drizzle of olive oil

dried mint and basil or whatever herbs you want to use, fresh is best but dried will do nicely.

salt and pepper to taste

Whisk everything together, add the lemon juice little by little until you reach the desiered consistency.

IMG_5477


One of my favorite things to do is go to the local Marshall’s houseware department. They have great stuff for the kitchen an home. I could literally spend hours there and never leave empty handed. Today I got some assorted bowls, a great ceramic pitcher and found this pug mug that I couldn’t resist, I needed a new spoon cradle and I fell in love with a vibrant ceramic eggplant spoon cradle. Last month I decided to re furnish, my guest room, I bought new furniture and rugs, today I found some cool accessories, throw pillows, and some really nice baskets,  it’s so much fun to shop.

Pug mug

Pug mug

spoon cradle

spoon cradle

Bread, Butter, Radishes For Fiesta Friday #58

bread, butter and radishes

bread, butter and radishes

This is so simple, no recipe required all you need is good bread, butter, radishes, sea salt and honey. I wanted to bring something to the party that just screamed Spring, I am still digging out from yesterdays snow storm and am a bit tired of the heavy food that is prevalent in winter. I got some beautiful watermelon radishes from Farmigo, the CSA I use, I also have some of their hand churned butter and a loaf of my homemade sour dough bread. This is so simple it’s almost stupid but take a slice of bread, slather with a lot of butter, add some sliced radishes, sprinkle with sea salt and drizzle some honey on it, Enjoy!!!

I want to thank Angie@The Novice Gardener for hosting all these fabulous get togethers, they are the best and the highlight of my week. The co hosts this week are , Caroline @Caroline’s Cooking and Elaine @foodbod. Elaine is no stranger to Fiesta Friday and it’s always fun when she is hosting, this is Caroline’s first so a big welcome and thank you to Caroline and Elaine.

Slice some bread

Sourdough loaf

Sourdough loaf

A watermelon radish, it’s really big and so pretty!!

watermelon radish

watermelon radish

Some good butter:

Farm fresh butter

Farm fresh butter

Peel and slice the radish, place on top of your bread and butter, sprinkle with some sea salt and drizzle with some honey.

A taste of Spring

A taste of Spring

fiesta-friday-badge-button-i-was-featured1

Whats Up This Week, More Snow, A Loaf And A New Toy For My iPhone Camera

intrepid Brooklynite Biking in the snow

intrepid Brooklynite Biking in the snow

Well the week is almost over, I have to say I am so sick of this snow and cold it makes my head hurt to think about another snow storm but here we are, yet another one with plunging bitter cold temperatures. I am not a hot weather sort of gal, I hate heat and humidity and look forward to cooler temps after oppressingly hot summers. That said this winter is trying, it is compounded by the difficulty I have getting my elderly, frail little dog out to do his business. Luckily I have a covered outdoor patio area that I can use when I cannot get down the stairs of my front stoop with him.

My back yard

My back yard

This week has been really busy with work, I haven’t really had a lot of time in the kitchen, I did however make a few things.  Maybe you remember my post on sour dough bread and the starter, I am happy and thrilled to report that the starter is still alive and doing very well. I keep it covered in the back of my refrigerator and when I want to make a loaf of bread I feed it and leave it in the oven with the light on for 12+ hours to do it’s thing. This starter is the best and consistently produces lovely and delicious loaves of bread. As a matter of fact this is my 6th loaf using the same starter/Levain.

Sourdough loaf

Sourdough loaf

With two slices of this delicous loaf of bread I made this fantastic BLT using Nitrate free bacon (just got from CSA, tomatoes, frisee and homemade mayonnaise. I have to say a BLT is and always will be one of my all time favorite sandwiches.

Mayonnaise

Mayonnaise

BLT

BLT,homemade sourdough loaf, mayo, frisee and tomato

I have mentioned before that I use my iphone for my photo’s, because it’s easy, I’m not a great photographer and I live in a historic townhouse that is light challenged. I saw on the apple site some incredible photo’s taken using iphone 6 and they mentioned the app’s used as well as peripheral apparatus. One thing that peaked my interest was the “Olloclip” its a clip on multi lens device, it has wide angle, macro 10x and macro 15x. I just got it yesterday so still have to learn exactly how to use it as it pertains to my food photo’s but I am excited to give it a try.

olloclip

olloclip

This super cold, icy and snowy winter has been rough on Nando. He is 14 years old, has diabetes and is blind. He also has neuropathy which is very hard on him. I have to keep him very warm, here are some of the items I have had to purchase for him to help ward off the cold. He has terrible circulation in his feet/legs and numbness associated with the neuropathy. I found these socks that have rubber bottoms so he has traction on slippery floors, protection from ice and salt and they keep his little feet warm. He has a wardrobe of sweaters and jackets but this year I had to call in the big guns and I got him a warm jacket from Canada Pooch, it looks a little too Santa Clauseish for my taste but keeps him warm. He doesn’t like wearing it at all, hates clothes but it’s necessary when I take him outside.

Nando's cold weather gear

Nando’s cold weather gear

He sleeps in socks and his hoodie.

Nando

Nando

We are expected to get about 8 inches of snow today, it’s coming down fast and furious. I will leave you with a couple of snow shots, 2 hours later, can you believe more people are riding their bikes today? Amazing.

another bicyclist

another bicyclist

view from my stoop

view from my stoop

Edamame Gyoza With Dipping Sauce For Fiesta Friday #57

Ready to eat

Ready to eat

One of my favorite things to eat besides sushi in a Japanese restaurant is Gyoza. Traditional Gyoza has a minced pork filling, they are succulent and delicious and loaded with umami especially when dipped in the very flavorful dipping sauce. I made these vegetarian combining my love of edamame and gyoza. The edamame are steamed, then sautéed then mashed and used as filling for these lovely little dumplings. The dipping sauce is my version of the typical gyoza dipping sauce. I added some chili paste to give it a little kick, traditional dipping sauce contains something called Rayu, I don’t have it and it’s too cold to venture out looking for it so I adapted and made my own version using soy, mirin, a little sweetness and chili paste. It tastes wonderful with the gyoza.

I thought these little beauties would make a nice addition to the hottest party in town, Fiesta Friday #57. Angie@The Novice Gardener is hosting as always and this week her co hosts are everyone, as in all of us, how about that. We are all tasked with voting for the feature recipes.

Makes 18
Making the edamame filling and gyoza:
1 cup shelled edamame cooked
1 garlic clove minced
1 tablespoon toasted sesame seeds
1 tablespoon rice wine vinegar
1/2 teaspoon fresh ginger minced
1 heaping teaspoon  light miso paste (It’s actually closer to 2 tsp)
splash of sriracha
season with salt and pepper to taste
18 wonton or gyoza wrappers
water to seal the edges
sesame oil and vegetable oil to fry the gyoza
Steam the edamame, I used the microwave following package directions, cooking for 3 minutes on high. Heat a small amount of vegetable oil in a skillet, add a splash of sesame oil add the garlic and saute until soft, add the edamame and continue to saute for approximately 1 minute, add 4 oz of water and cover, let cook until all the water evaporates. Remove from heat. Add all the ingredients to the food processor and pulse a few times to break up the soy bean and mix everything together. Test to make sure it will hold together, should be a rough paste. Note: I did not need to add salt, the miso paste added more than enough for me and the dipping sauce is salty from the soy sauce. So use salt gingerly if so desired.

Making the gyoza

Making the gyoza

Place the wrappers on your work surface. Have a cup of water and the filling ready. Place a tsp of the filling in the middle of the wrapper. Wet the edges of the wrapper all the way around and fold over, press on the edge using your thumb and index finger until you know that it’s bonded. Heat a skillet ( I used a 12 inch skillet) on high with a little sesame oil (Note: I used the same skillet I used for the edamame so it was already oiled a splash of sesame oil was all I needed), place the gyoza seam side standing up in the skillet. Brown them, it takes only about a minute or two. Now add about 2/3 cup water to the skillet and cover. Let cook for 4-5 minutes or until the water completely evaporates. Serve immediately.
Dipping sauce:
1/4 cup soy sauce
2 tablespoons mirin
1 tablespoon rice wine vinegar
1 teaspoon sugar or honey
1 teaspoon chili paste (or more if you want it spicier)
1 teaspoon sesame seed oil
Whisk all ingredients together and serve with the gyoza

Yum1

Yum!

fiesta-friday-badge-button-i-was-featured1

Dessert And Wine A Valentines Day Tasting And Guest Pairing From Anatoli@ Talk A Vino!

Pug and wine Print (Easy)

Pug and wine Print (Etsy)

This is Part II of my Valentines Post, the cake will be paired with wine,  I am not adept at pairing so I looked to my friends, the experts for the perfect pairing for this dessert. Anatoli whose wonderful, informative blog Talk A Vino is one of my go to sources when I want information regarding wine and everything involving the wine culture. I will be posting the wine pairing in a separate post. Anatoli has gone above and beyond and we will be comparing 3 different wines, I felt that this deserves a separate post. I had no idea pairing wine or Champagne or sparkling wine with chocolate is difficult but it is. Isn’t that pug the cutest, Michelle from Rockin Red Blog tweeted to me and when I saw it I had to have it, found on Etsy, bought it and I am now the proud owner of this print. The pug looks like my Izzy.

I thought it would be fun to invite some friends over on Valentines Day and have them participate in the dessert/wine tasting.  Anatoli chose a sparkling red, a Brachetto di Acqui from the Piedmont region of Italy. He suggested Rosa Regale and while searching for this wine I also came across one that sounded interesting also and Anatoli gave it his stamp of approval so I got both the one I added is Marceno Brachetto di Acqui, now this is not the wine I ordered, I wanted the Marceno Spumante Brochette di Acqui but they sent the wrong one, same grape so we’ll give it a go.  The other suggestion was a Port Wine. When I told Anatoli I didn’t like Port, he asked if I have ever tried a 20 year old Tawny to which I said no I hadn’t. I decided to add  a bottle of Taylor Fladgate 20 year Tawny port also.
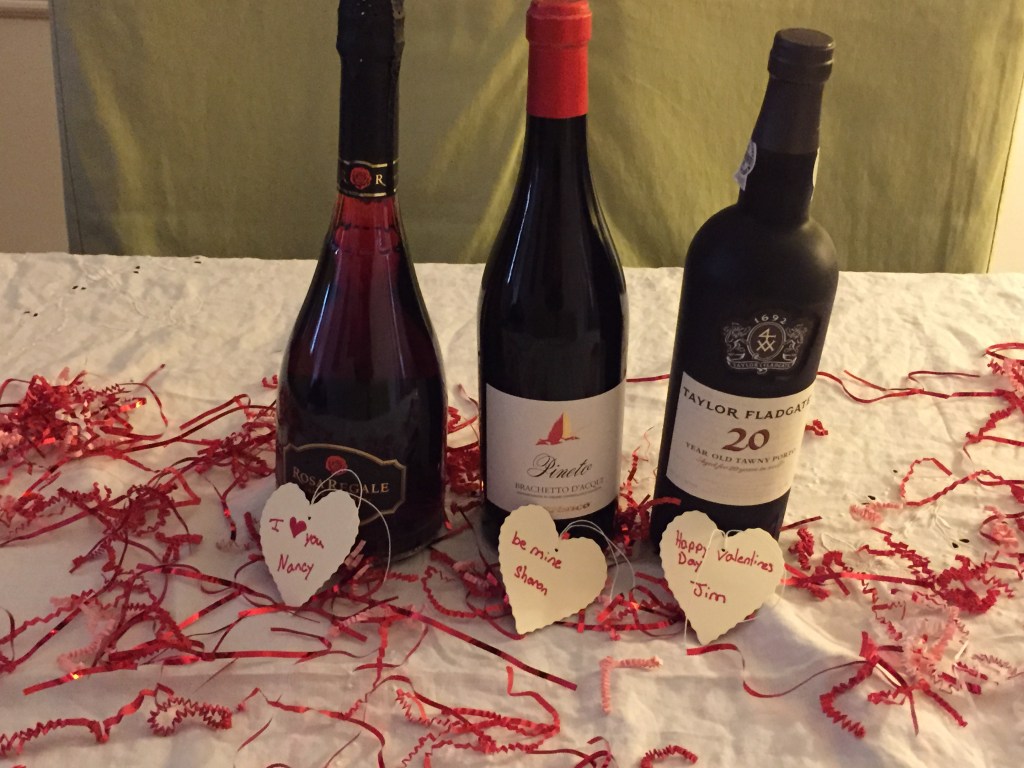
The lineup of wines

The lineup of wines

Here is Anatoli’s Write up:

Pairing Dessert with Wine
When fellow blogger and a wonderful cook Suzanne asked me if I would be interested in providing some suggestions for Champagne or Sparkling wine to pair with dessert, I bravely said “of course”. Yes, “of course”, but pairing dessert with wine is generally not an easy fit, outside of nice Cabernet Sauvignon or Merlot with equally nice dark chocolate. And Champagne or Sparkling wine don’t bode particularly well with the desserts, unless we are talking about lightly fizzed Moscato, which generally stands a better chance of pairing with the dessert.
Next email brought in more details about the dessert: it will be a “Chocolate cake filled with blood orange curd.cream and frosted with chocolate nutella buttercream”. Urgh. Lots of ingredients, lots of flavors – no straightforward pairing.
Pairing of the wine and food can go in three different ways. Well, to be precise, there is another option, but it it is not worth talking about as the option #4 is called “fail” – this is when wine and food don’t work together. Three positive variants can be called indifferent, complementing and contrasting. Indifferent simply means that even when you take a sip of wine with your food, both wine and food stay in their own realm and don’t bother each other. Complementing and contrasting usually means that your experience is enhanced by adding wine to the food. Big tannic wine is often works well with the steak by complementing the flavors. Cutting acidity of the white wines can be great with appetizers by bringing out sweet notes. So all of this is good in theory, but then we have a particular pairing to do at hand.
So for the dessert above, I need to think about it. First we got chocolate cake – but then we got blood orange cream, and lots of sugar – we need to go into the sweet wines here, and sweet Champagne is simply not something I have a knowledge of. Moscato? Might be, but I wouldn’t do Moscato with chocolate, we need deeper flavors. So, what to do, what to do – ahh, I know – how about some Brachetto d’Aqcui? Brachetto d’Acqui is an Italian wine, produced from Brachetto grape and typically fizzed and sweet. The red grape profile of this wine makes it better suitable for the dishes with chocolate, and sweetness typically is not overpowering, which should make it a good complement. So my recommendation was Banfi Rosa Regale Brachetto d’Acqui, which also comes in a very nice and presentable bottle (remember, your enjoyment of the wine starts form the bottle and the label, so bottle matters).
Okay, so I found a suggestion for the sparkling wine, but considering the complexity of the flavors (don’t forget “chocolate nutella buttercream”), I wanted to suggest something else to complement this dessert. One of the first thoughts was about Pedro Ximenez Jeres, but it might be way too sweet for this seemingly delicate dessert. So, if not Jerez, then may be Port? Yes, Port should work perfectly! Not any Port – the young Vintage port will overpower the dessert, and the young Ruby or Tony will be lost on it. But 20-years old Tawny ( or anything older that that), should work fine, considering the variety of flavor such port possesses – all of the hazelnut and almond flavors, dry figs, raising, dates – there is a lot in the aged Port profile which could make it an ideal suitor of the this dessert. As an additional bonus, going with 20+ old year’s Port gives an additional advantage – lots of choices. You can go with Graham, Taylor, Sandeman, Burmester and many many others, and they all should work quite well with the dessert.
Well again – for me, it is just a theoretical exercise. For Suzanne? She actually will have to do the hard part – entertain people and drink the wines with the dessert – and I’m really curious to know how did it go.

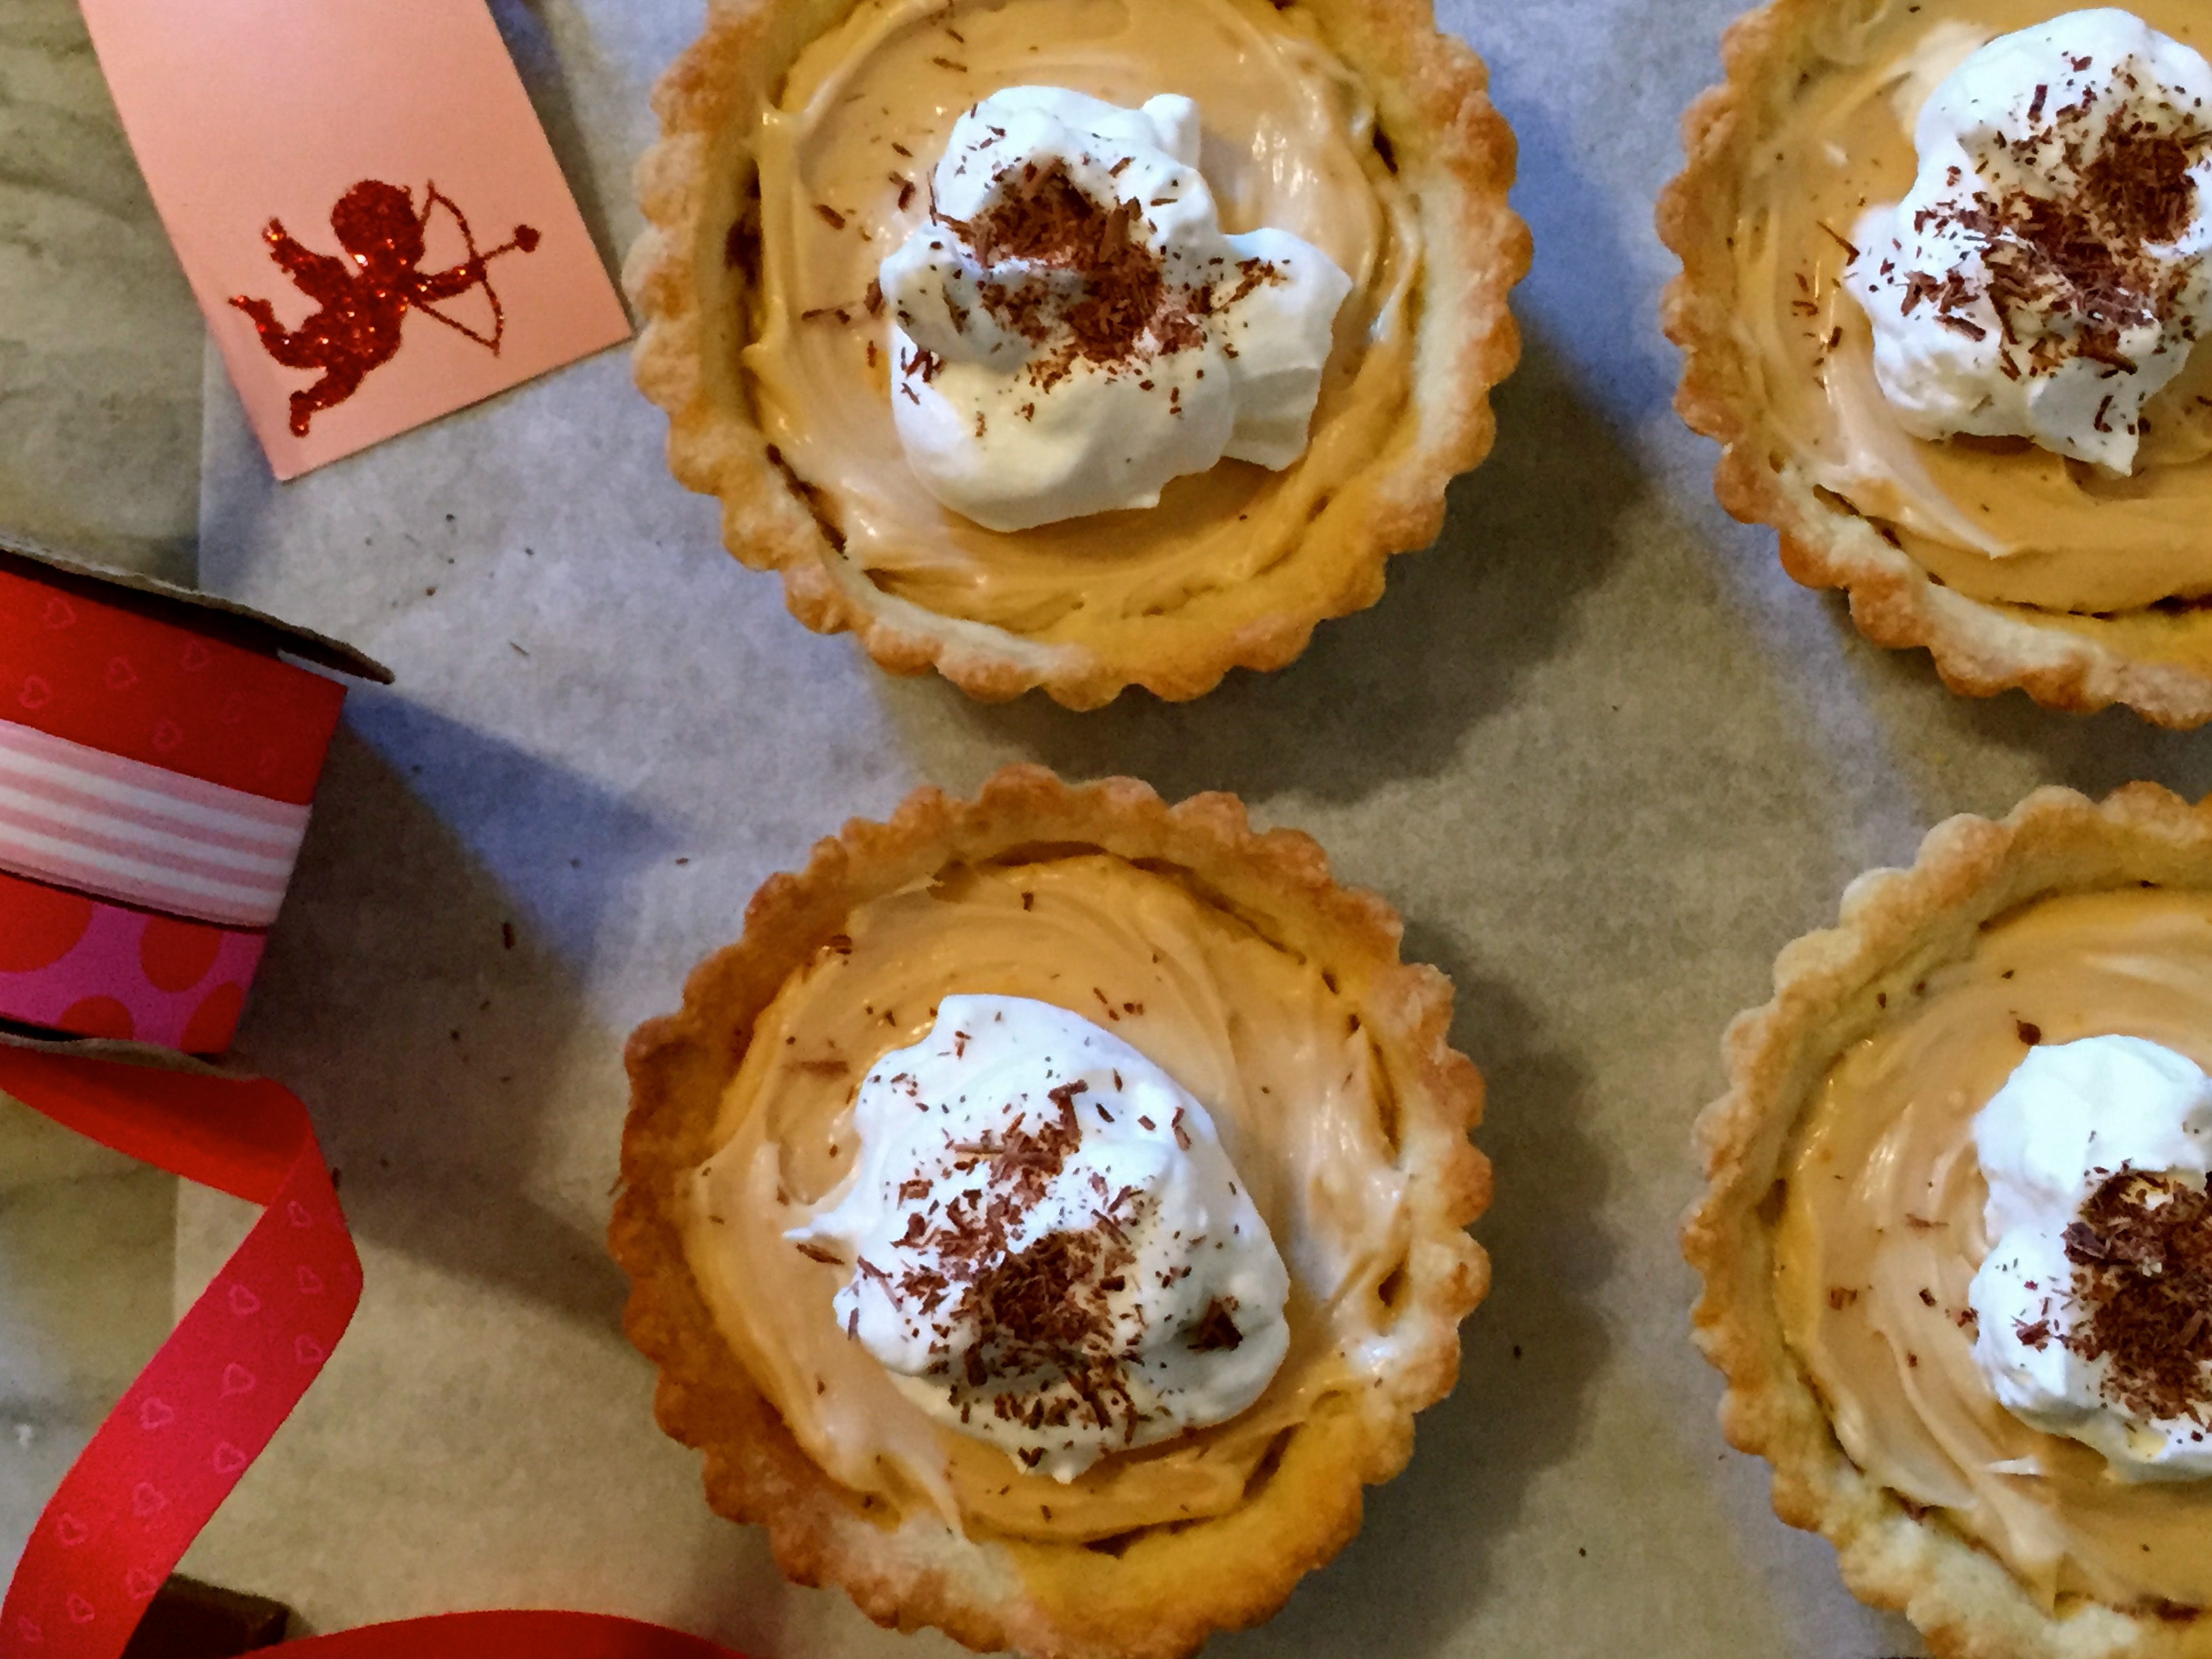
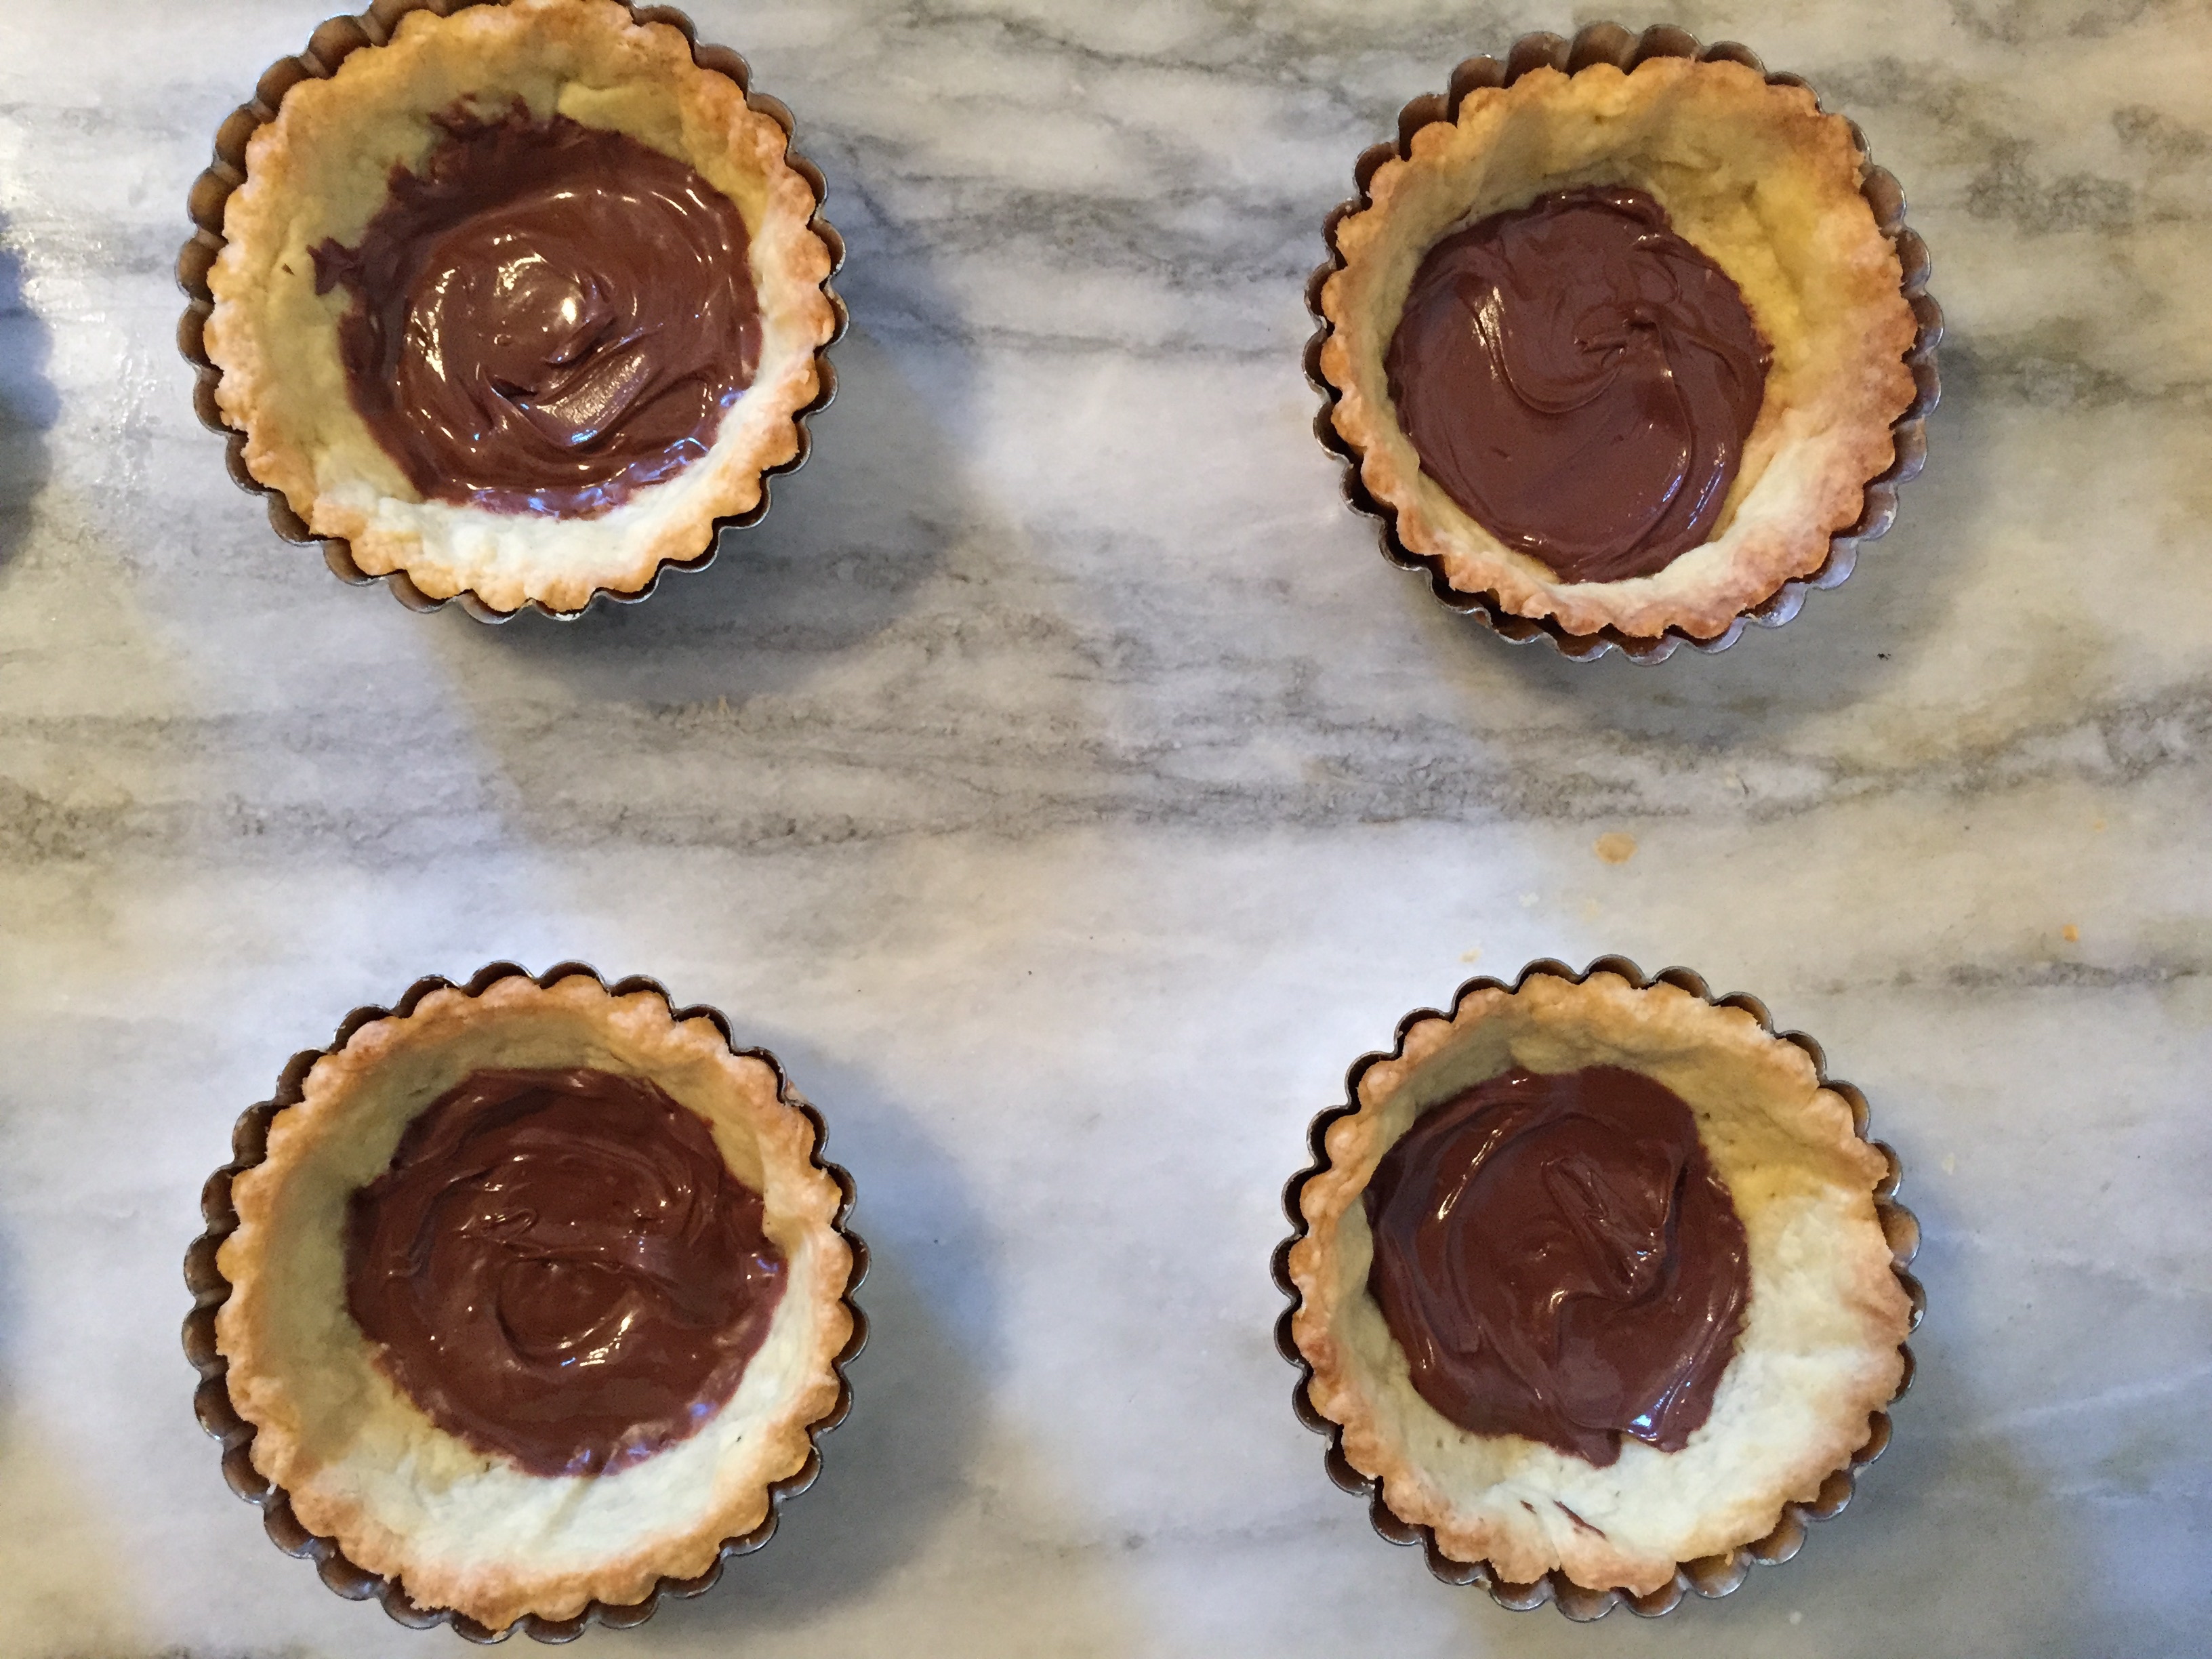
Well, before I will turn it over to Suzanne to tell the rest of this pairing story, I have to also share my scary moment with this pairing (happy food and scary moments don’t bode well together, don’t they?) After all was said and done and Suzanne got the wines and was ready for her evening, I saw her latest post popping up on Friday, talking about “Tartlets With Blood Orange Curd, Whipped Cream And Nutella”. My heart literally sunk – this is the dessert Suzanne is serving, and it is apparently different from the original – and she has the wines – how is it going to work now? Well, Nutella still was the there, and it technically represents both hazelnuts and chocolate, so I shouldn’t lose the hope…
Now it is really the time for Suzanne to tell the rest of the story…

Dessert is served

Dessert is served

First of all I feel so badly that I changed the dessert, well it really was the same flavors but in a different form. My cake failed mainly because of the pan I bought, long story that I won’t get into now. I decided to make the tartlets, I’m sure you saw my FF#55 post. I planned a Valentines Day dinner party and invited some close friends, we had lamb kofta in a tomato sauce with eggplant, basmati rice prepared in the Persian way,  labneh  and lots of salads, and with this I served a wonderful 2008 Napa Valley Zinfandel (Green and Red from Chiles Mill Vineyards) and it paired very nicely it was really a great wine.

I served the dessert to my friends with the Rosa Regale Brachetto di Acqui. The wine was bubbly, and I served well chilled in champagne flutes. Everyone got some of the tart and I also served the chocolate cake with a simple cream cheese buttercream. The wine was light and fruity, on the nose fresh berries, it’s like springtime in a glass, tasting this wine you are immediately overwhelmed with the lovely taste of fresh fruit, strawberries, peaches and nectarines. It’s a bit sweet but in a very good way. All of my guests including myself absolutely loved this wine with the tart, it was in my humble opinion a perfect pairing, honestly it could not have been better. We finished the wine and dessert and at that point could not have anymore so decided to save the port for the next day.
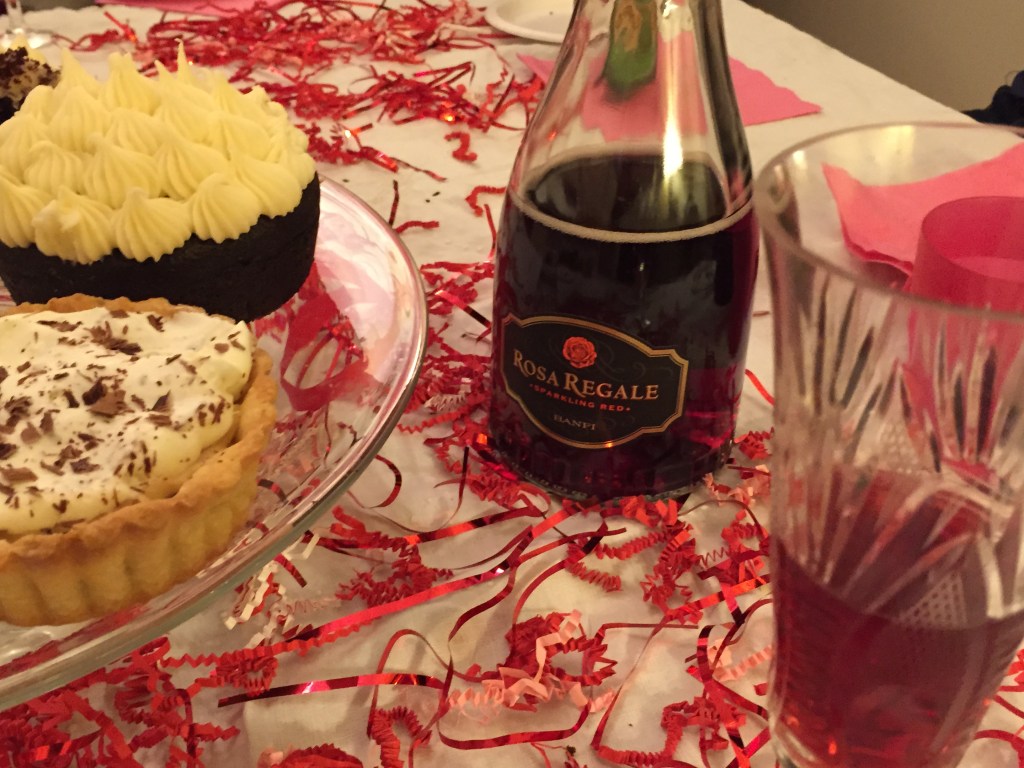
Rosa Regale

Rosa Regale

I want to thank Anatoli@Talk A Vino  for helping me with this very special and highly successful pairing. It was a wonderful evening and thanks to Anatoli’s expertise and intuitive pairing a really wonderful and delicious dessert. Thank you so much Anatoli!! Please check his blog out, there is a wealth of information about wine, including great recommendations, reviews and tutorials. A definite must read for anyone interested in learning more about wine and the wine culture.

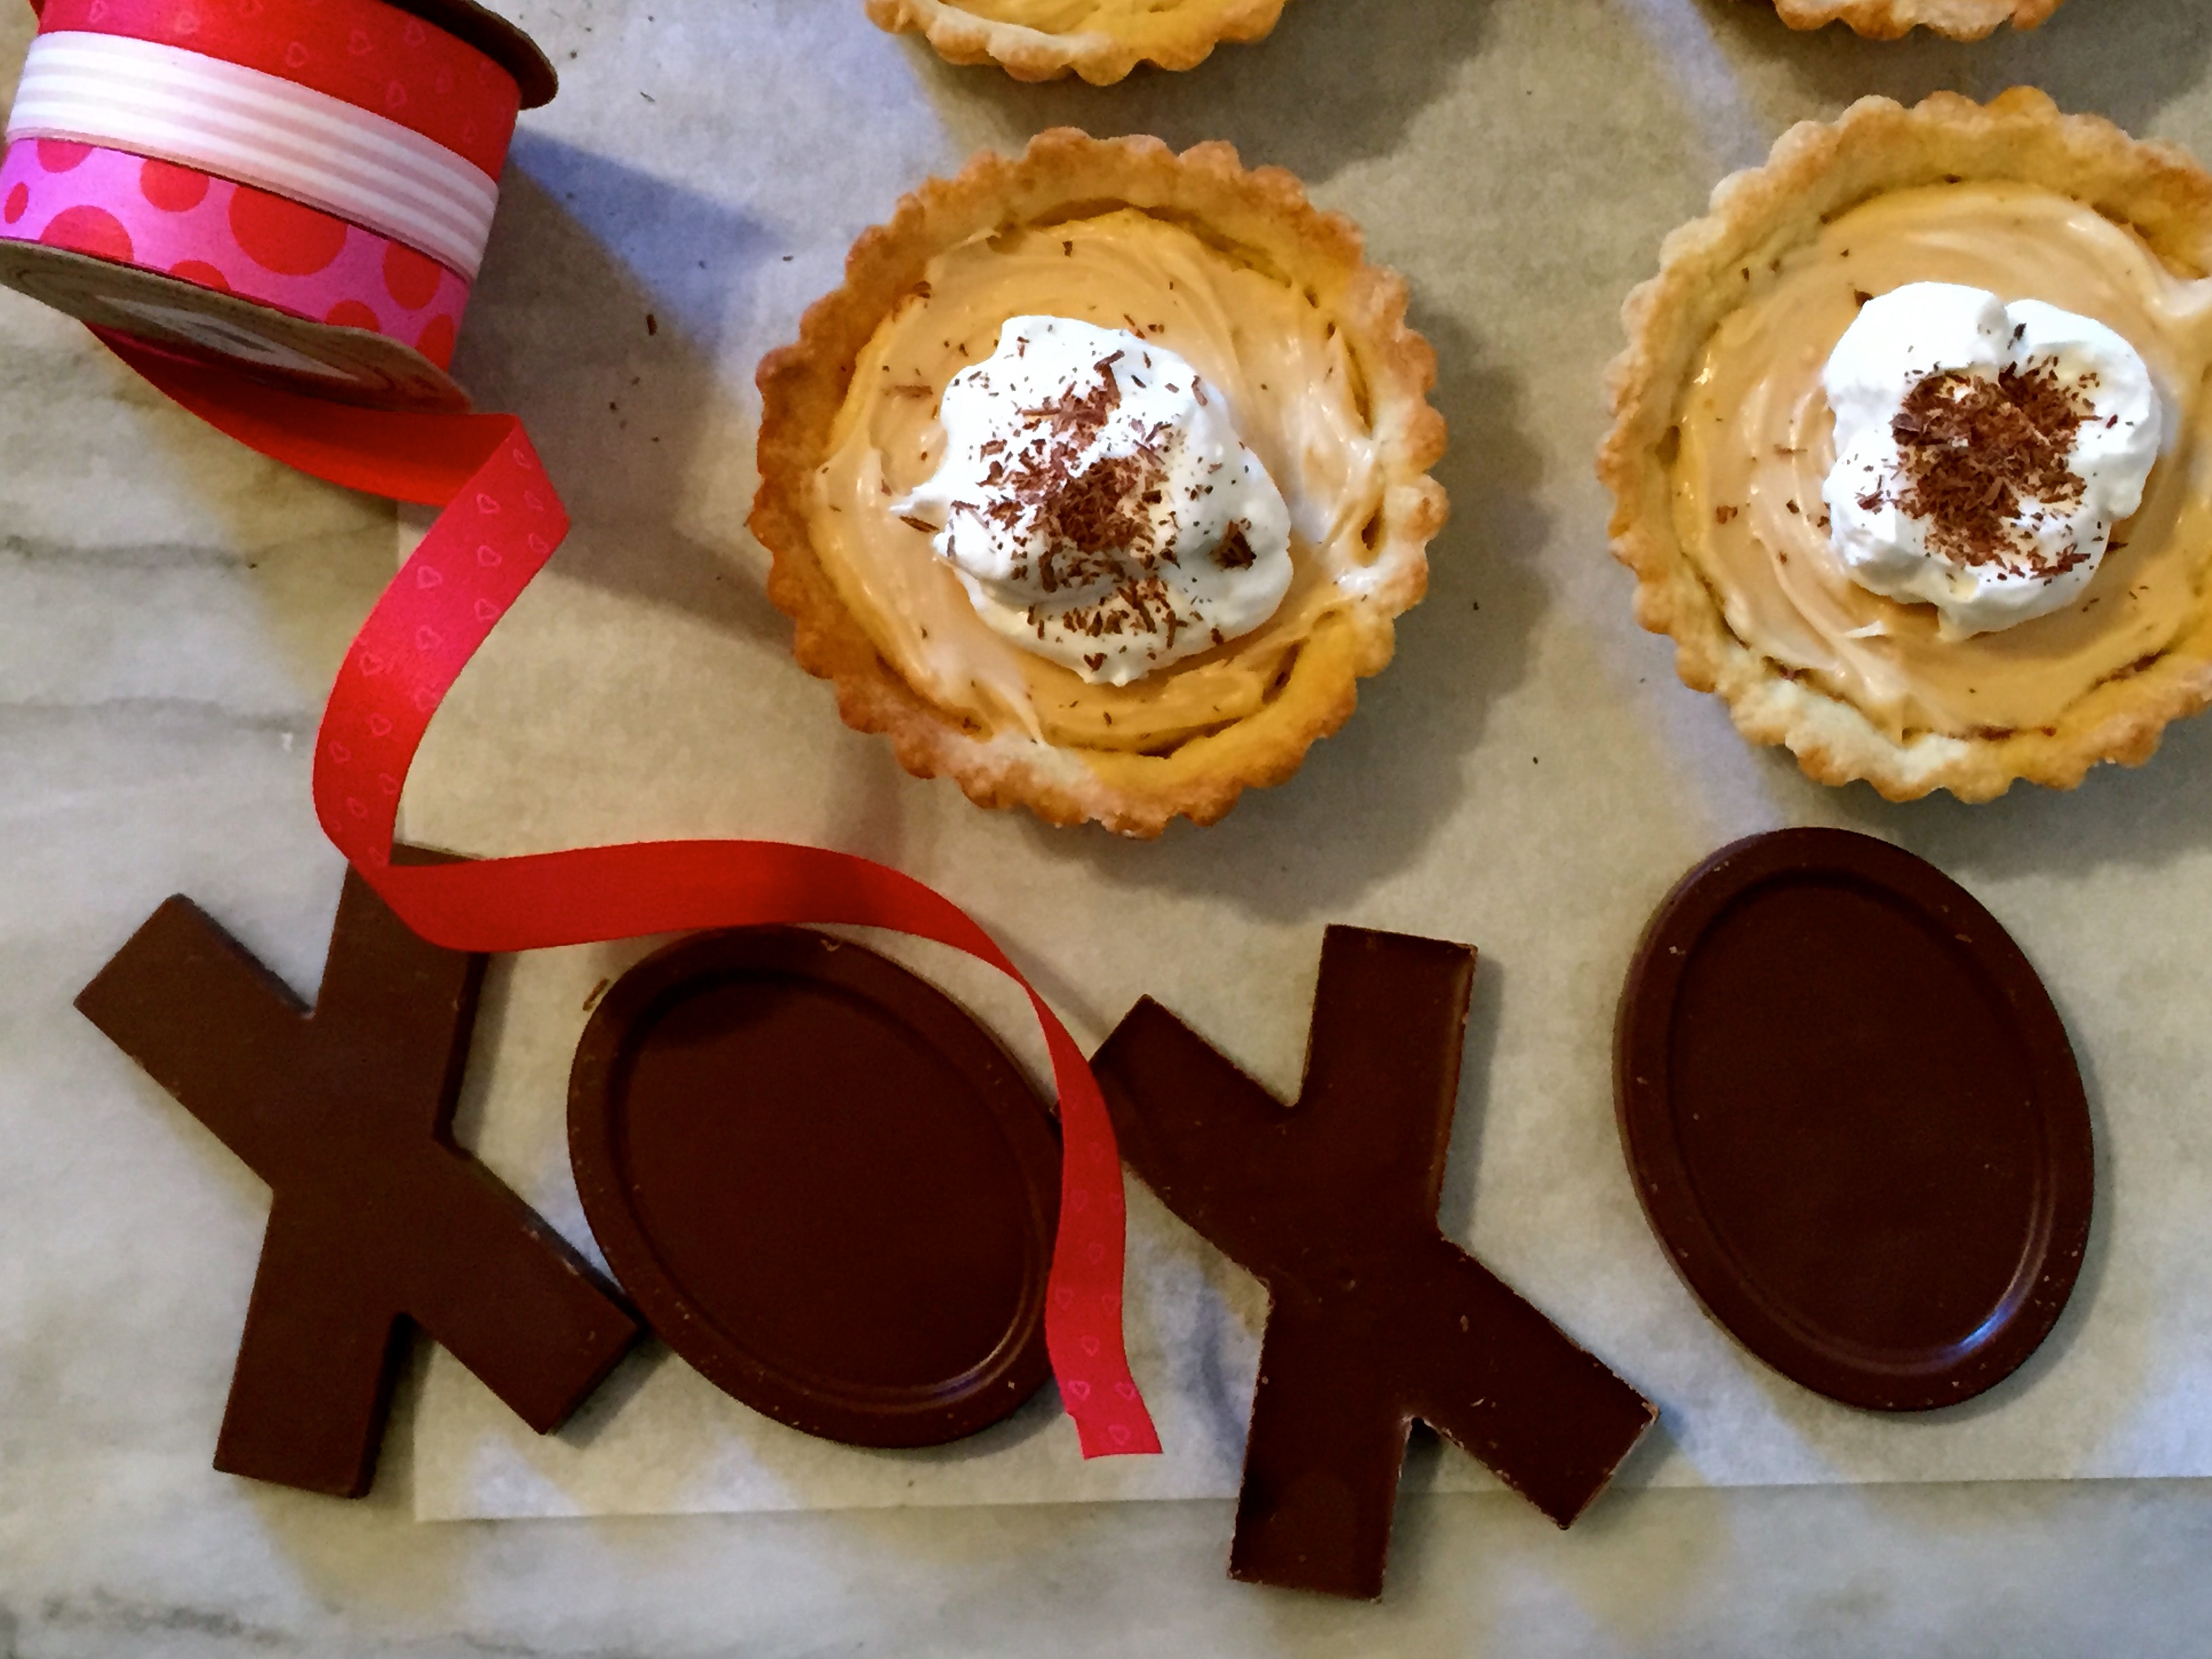
A very special thank you to Maia and Laila my young and willing helpers who decorated the Valentines table for me, isn’t it pretty!!!


Happy Valentines Day, Tartlets With Blood Orange Curd, Whipped Cream And Nutella

tarts

tarts

This combines two wonderful celebrations, Valentines Day and Fiesta Friday. This post has morphed several times with some failed attempts at a cake (cake pan problems) and I have now settled on tartlets with a layer of nutella and filled with blood orange curd. They are delicious and I hope you enjoy!

This Friday, the day before Valentines Day is very special because we are celebrating two occasions, Valentines Day and Fiesta Friday #55, how great is that?  Thank you Angie@The Novice Gardener for hosting you rock,  the co hosts this week are Sue@birgerbird and me, moi, yep I’m a co host this week no link necessary because if you are reading this you are already here!! Very excited to host with my buddy Sue.

I needed to use the blood oranges so I squeezed the juice ahead of making the curd and froze in ice cube trays, I also threw in 2 mandarins. the color is incredible!!!


Look at the color of the blood orange juice

Look at the color of the blood orange juice can you figure out which is the mandarin

Blood Orange Curd

adapted from lemon cream recipe from Tartine Bakery Cookbook

Makes about 2 1/2 cups (625 ml) (It made exactly 16 oz for me)

1/2 cup + 2 tbsp (5 oz/155 ml) Juice from Blood Oranges

3 large eggs

1 large egg yolk

1 tsp orange zest

3/4 cup (6 oz/170 g) sugar

Pinch of salt

1 cup (8 oz/225 g) unsalted butter

zest of one whole orange (medium size)

Pour water to a depth of about 2 inches into a saucepan, place over medium heat, and bring to a simmer.

Combine the orange juice, whole eggs, yolk, sugar, zest and salt in a stainless steel bowl that will rest securely in the rim of a saucepan over, not touching, the water. (Never let the egg yolks and sugar sit together for more than a moment without stirring; the sugar will cook the yolks and turn them granular.) Place the bowl over the saucepan and continue to whisk until the mixture becomes very thick and registers 180° F on a thermometer. This will take 10 to 12 minutes. If you don’t have or trust your thermometer, don’t worry. It should thicken to the point that your whisk leaves a trail through the curd. NOTE: I don’t use a thermometer, the mixture will thicken and coat the back of the spoon, draw a line on the back of the spoon with your finger, the line will stay intact. It took about 11 minutes for mine to thicken properly.

Remove the bowl from over the water and let cool to 140° F, stirring from time to time to release the heat. Again I didn’t use a thermometer, I poured into the blender, and by the time I cut the butter into tbs size pieces it was just the right temperature.

When the cream is ready, leave it in the bowl if using an immersion blender, or pour it into a countertop blender. With the blender running, add the butter 1 tablespoon at a time, blending after each addition until incorporated before adding the next piece add the additional orange zest and pulse once or twice.. The cream will be quite thick.

Blood Orange Curd

Blood Orange Curd

You can use the cream immediately, or pour it into a storage container with a tight-fitting lid and refrigerate for up to 5 days. To use after refrigeration, if necessary, gently heat in a stainless steel bowl set over simmering water until it has softened, whisking constantly. Note: Your beautiful vibrant, brightly colored blood orange juice will turn a sort of beige color after mixing with the eggs and butter, you can if you wish add a tiny drop of food color to turn it pink, more fitting for valentines day or go au naturale and as you can see I went natural.

Pate Sucree

From Martha Stewarts Pie’s and Tarts

2 1/2 cups all purpose flour

1/4 cup sugar

1/4 tsp salt

1 cup (2 sticks or 8 oz) unsalted butter cold cut into small pieces

2 large egg yolks

2-4 tbs heavy cream or ice water

Pulse flour, sugar and salt in food processor until well combined. Add butter and pulse until mixture resembles course meal. Add the egg yolks and drizzle the cream or ice water and pulse until it forms a cohesive dough. If mixture is too dry add cream or water a tsp at a time until it is cohesive. Remove from processor, wrap in plastic wrap and refrigerate for at least an hour.

To blind bake the tartlets:

Pre heat oven to 375 degree’s. Roll out or press dough into tartlet pans and refrigerate or put in freezer for 15-30 minutes before baking. Place sheet of parchment in each and fill with pie weights or place another tartlet pan on top and place them on a baking sheet. Bake for 8-10 minutes you will notice the edges lightly brown. Remove parchment and weights or pan and place back in the oven another 4-6 minutes or until golden brown. Remove to a wire rack to cool completely before filling.

nutella

nutella

To make your tarts

Spoon some nutella in the tart shell ( I like to do it when the shell is still a little warm so the nutella is easier to spread) place in the refrigerator for about 15 or 20 minutes so the nutella hardens a bit, be generous, don’t skimp on the nutella. Spoon in the curd, top with some whipped cream and chocolate shavings and serve.

Happy Valentines Day to all!!

fiesta-friday-badge-button-i-was-featured1


IMG_5020

The Best of Fiesta Friday Anniversary Part 2

Look at the incredible lineup of dishes both sweet and savory and big thanks go to Angie for putting it all together and her gorgeous co hosts Selma and Nancy!!

Angie | Fiesta Friday's avatarThe Novice Gardener

The Fiesta Friday Anniversary was a stunning success! It was an incredible 2-week event with a total of 226 amazing recipes being submitted. I found it extraordinary how you were able to come up with such exquisite creations. Partying for 2 weeks seemed to have helped those creative juices running, instead of depleting them. Party animals!! 😀 I want you to know that I find inspiration in each and every one of you. Thank you so much!

These posts are the best of the best! Share them with your readers by posting the collages on your Facebook page, pinning on Pinterest or tweeting about them. You can also blog about them or reblog this post. You have my permission to reblog the post in its entirety. It’s not about me getting more views. It’s about spreading the word on these extraordinary recipes.

The Best of Main Courses

the best of Fiesta Friday main courses

Here’s why they’re…

View original post 1,029 more words