Skip to content

Posts from the ‘Desserts’ Category

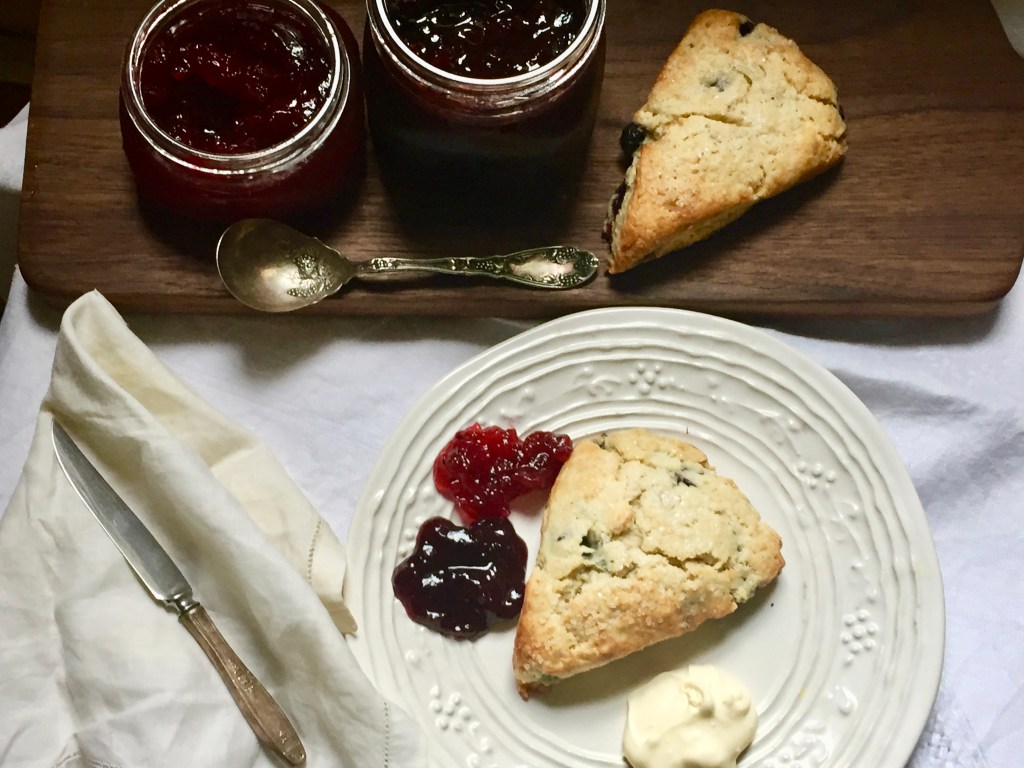
Some Jam, Scones And Sour Cherry Hand Pies

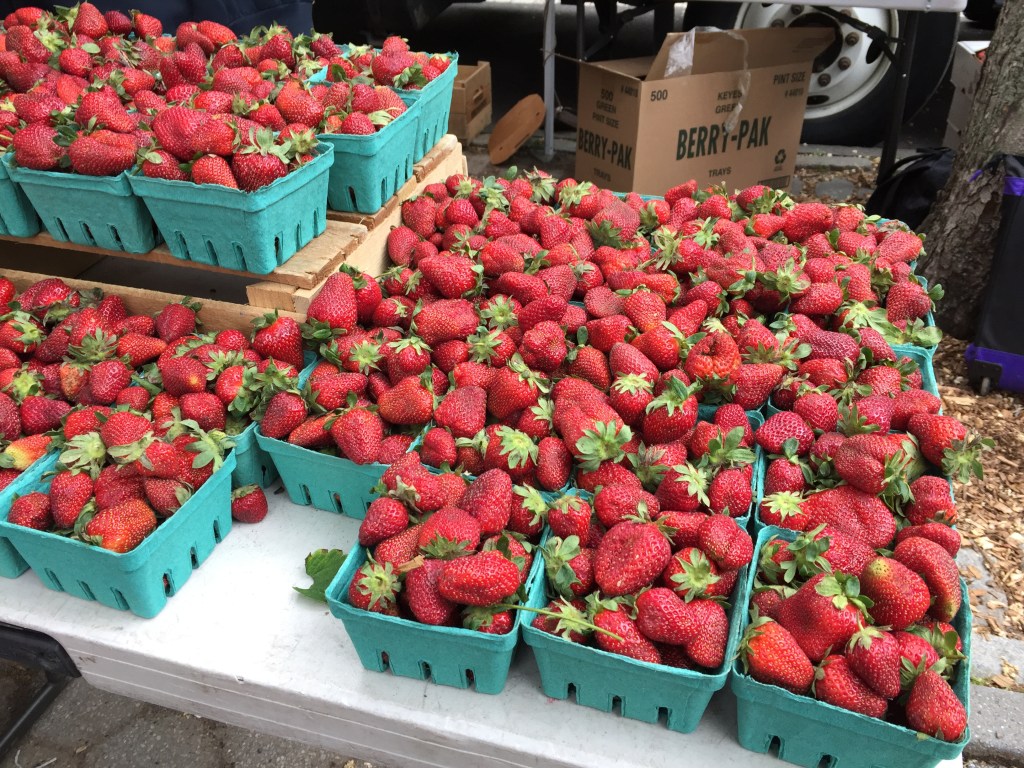
When I saw the baskets of sour cherries and gooseberries at the farmers market I had to buy them. Both are delicious but really not great eaten fresh/raw. They are very sour on their own and I thought they would be best made into jam or preserves and a small jar of sour cherry pie filling. They are very tedious to prep, the sour cherries are small and soft and juicy and hard to pit, (please don’t eat cherry pits you can actually get sick when eaten in large enough quantities, saw this article on food52) and the gooseberries need to have the ends pinched off, both ends. Luckily I did not buy a huge amount of the fruit so although tedious it didn’t take me all day to prep them. I have been working on recipes for Teagan’s wonderful Thistledown episodes, I absolutely love this story and am inspired by the magickal world of faeries.

Refrigerator jam is a wonderful thing, no muss no fuss, no canning or preserving, it’s stored in the refrigerator rather than sealed properly and stored in the pantry. I still use sterilized jars and it does seal somewhat but not enough to make me comfortable storing unrefrigerated. It really lasts a long time in the fridge and if you haven’t ever made your own jam or preserves you must give it a go, it really is delicious.

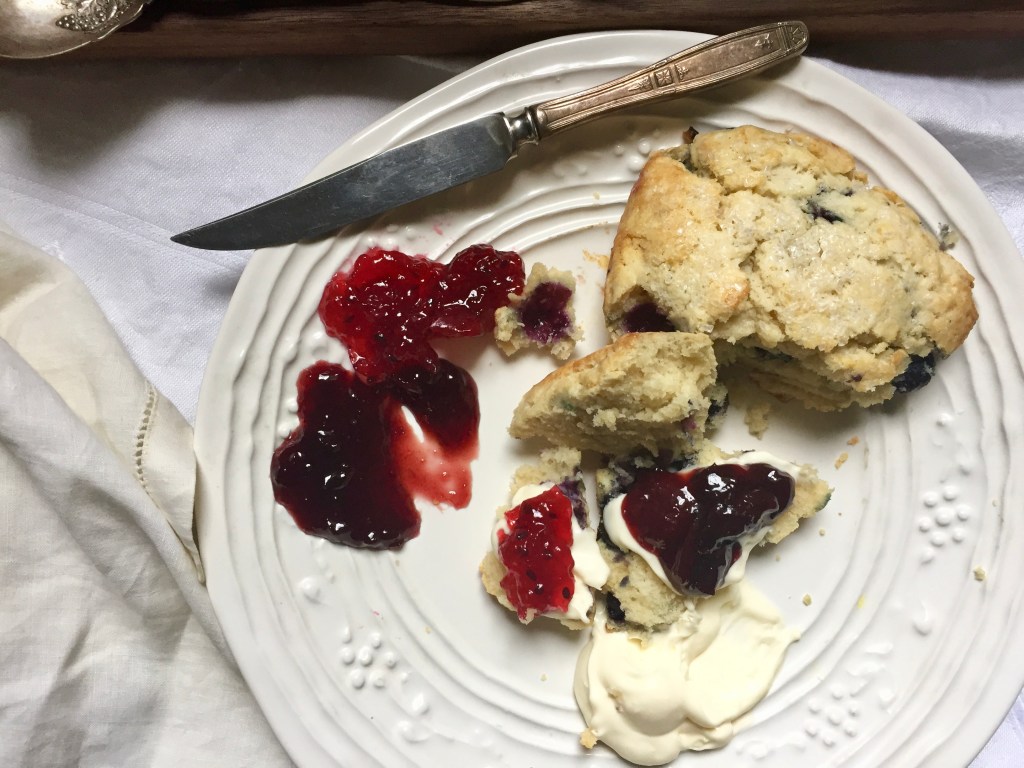
I had 3 pints of sour cherries and 2 pint of gooseberries which was enough to make 2 16 ounce jars and 8 ounces of cherry pie filling. The scones are my favorite recipe from my friend on Food52 Liz Larkin aka @sconeladylarkin on Instagram. The recipe for scones IMHO is the best scone recipe ever, they are tender and light and delicious.

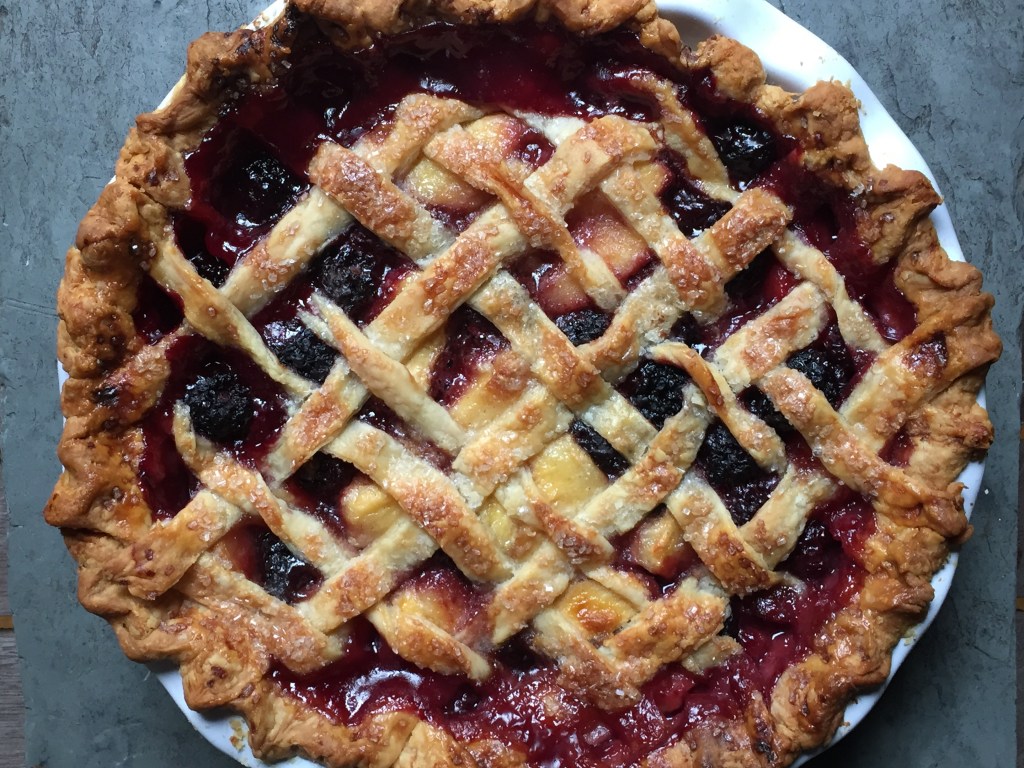
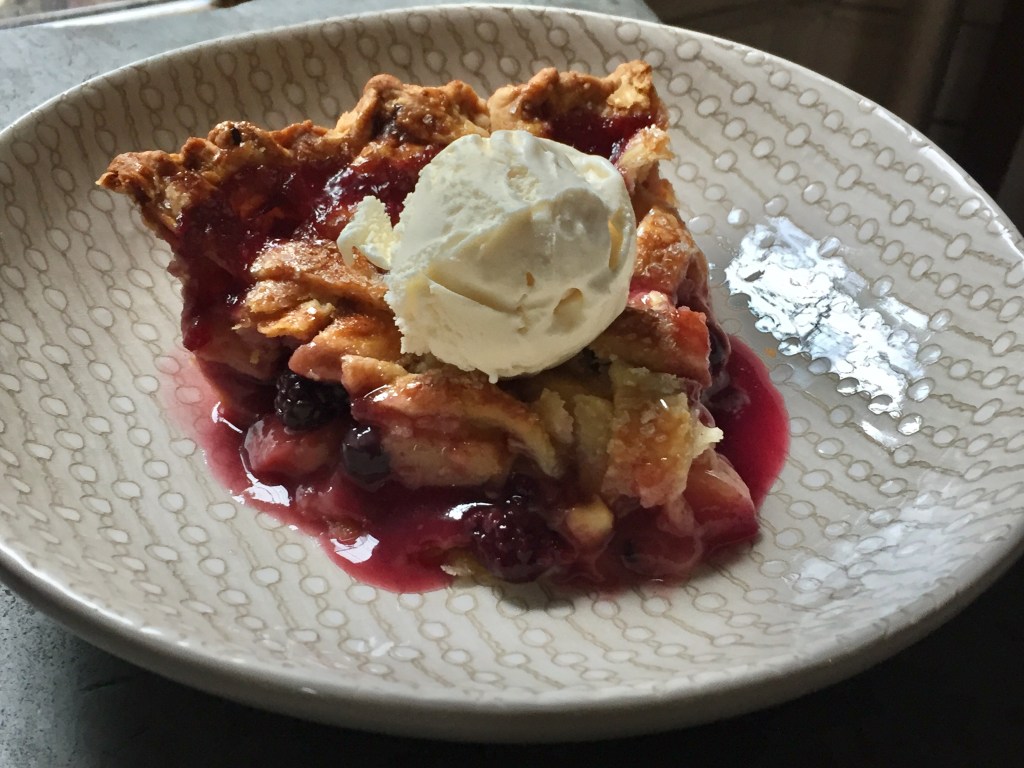
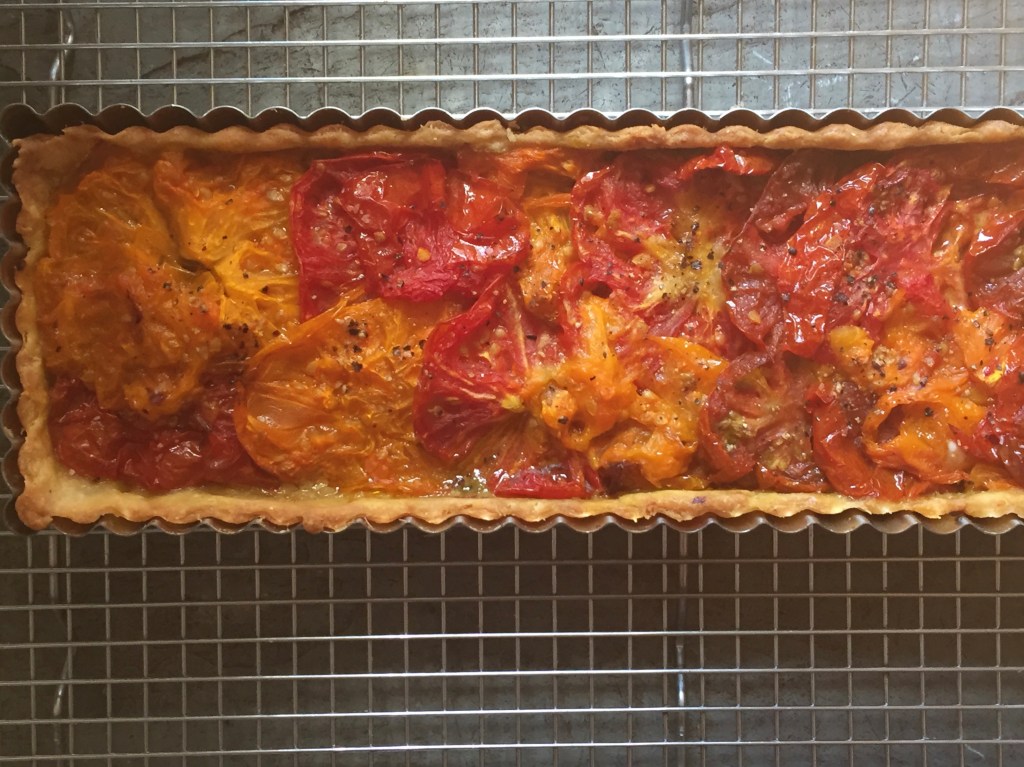
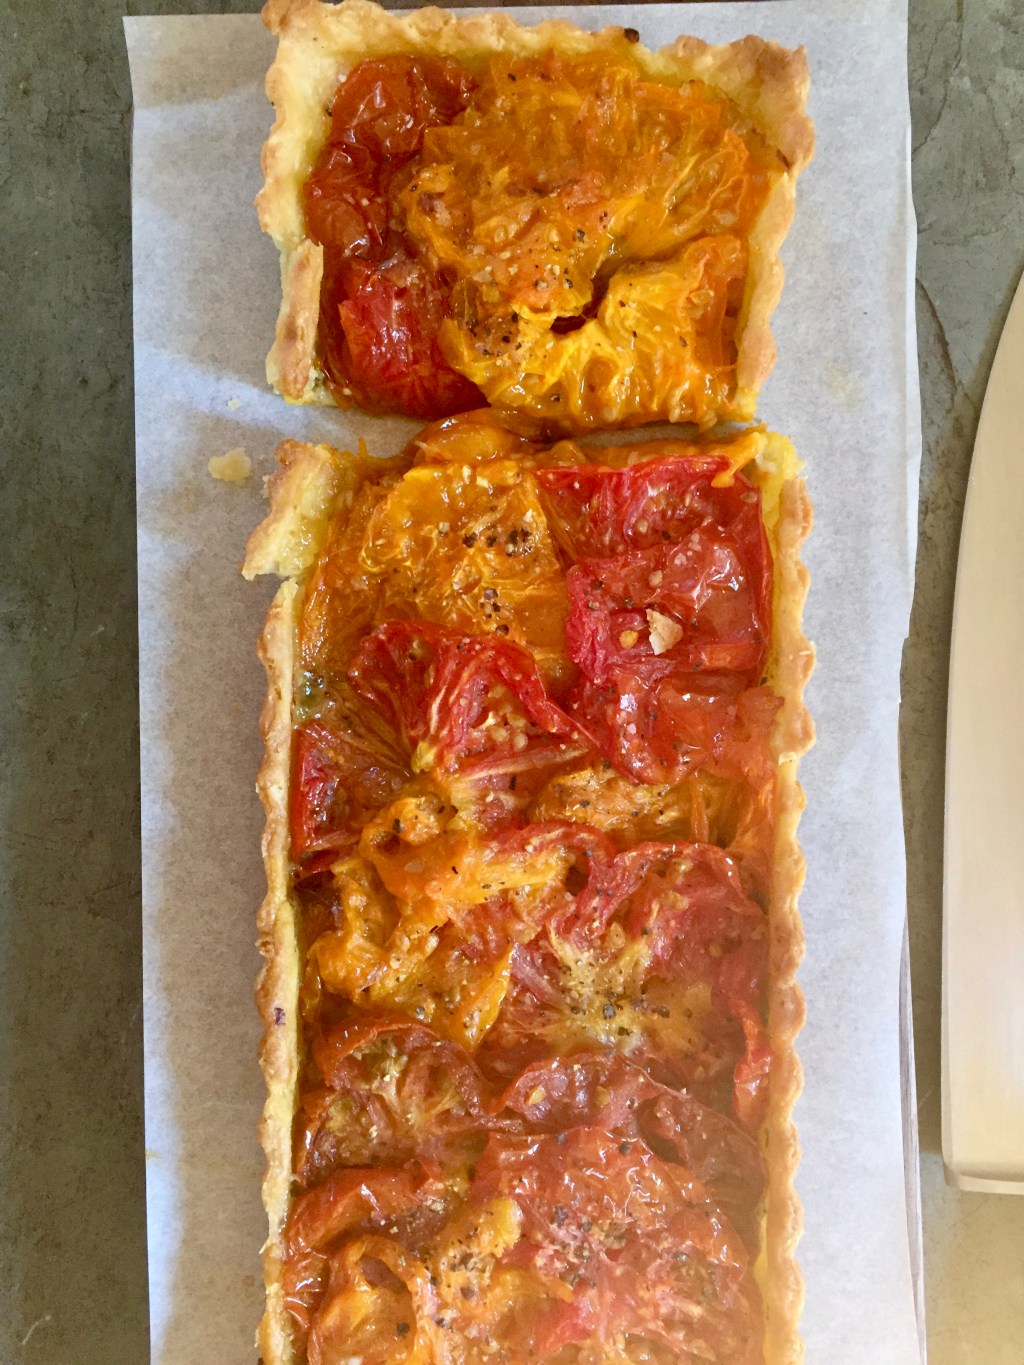
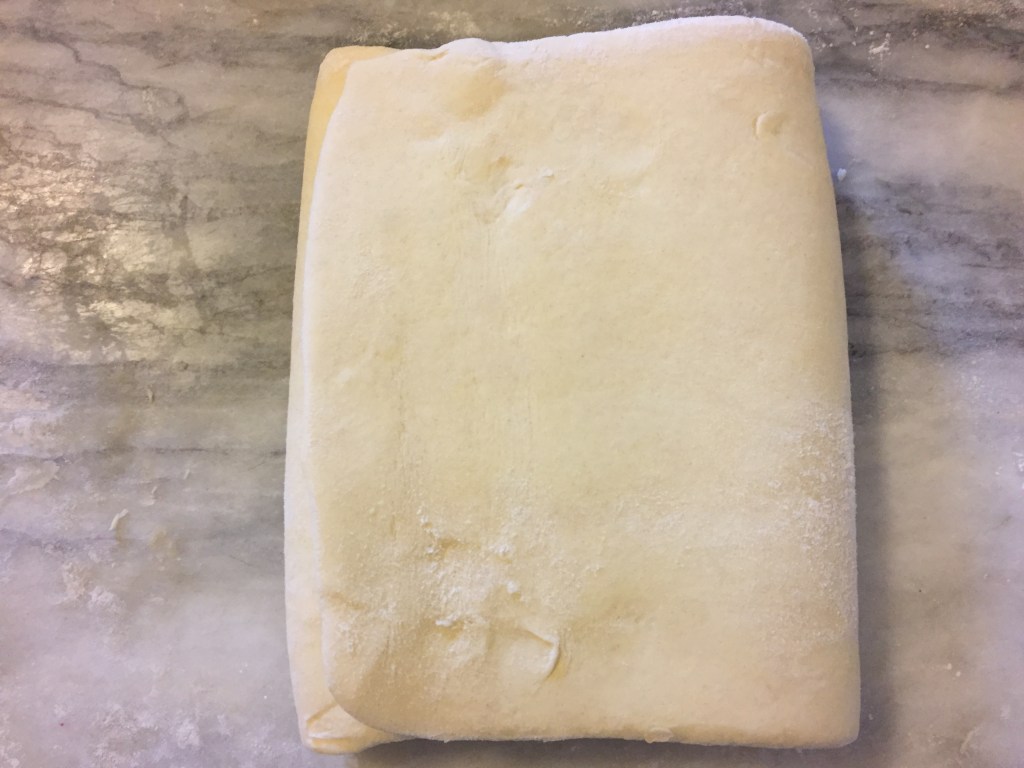
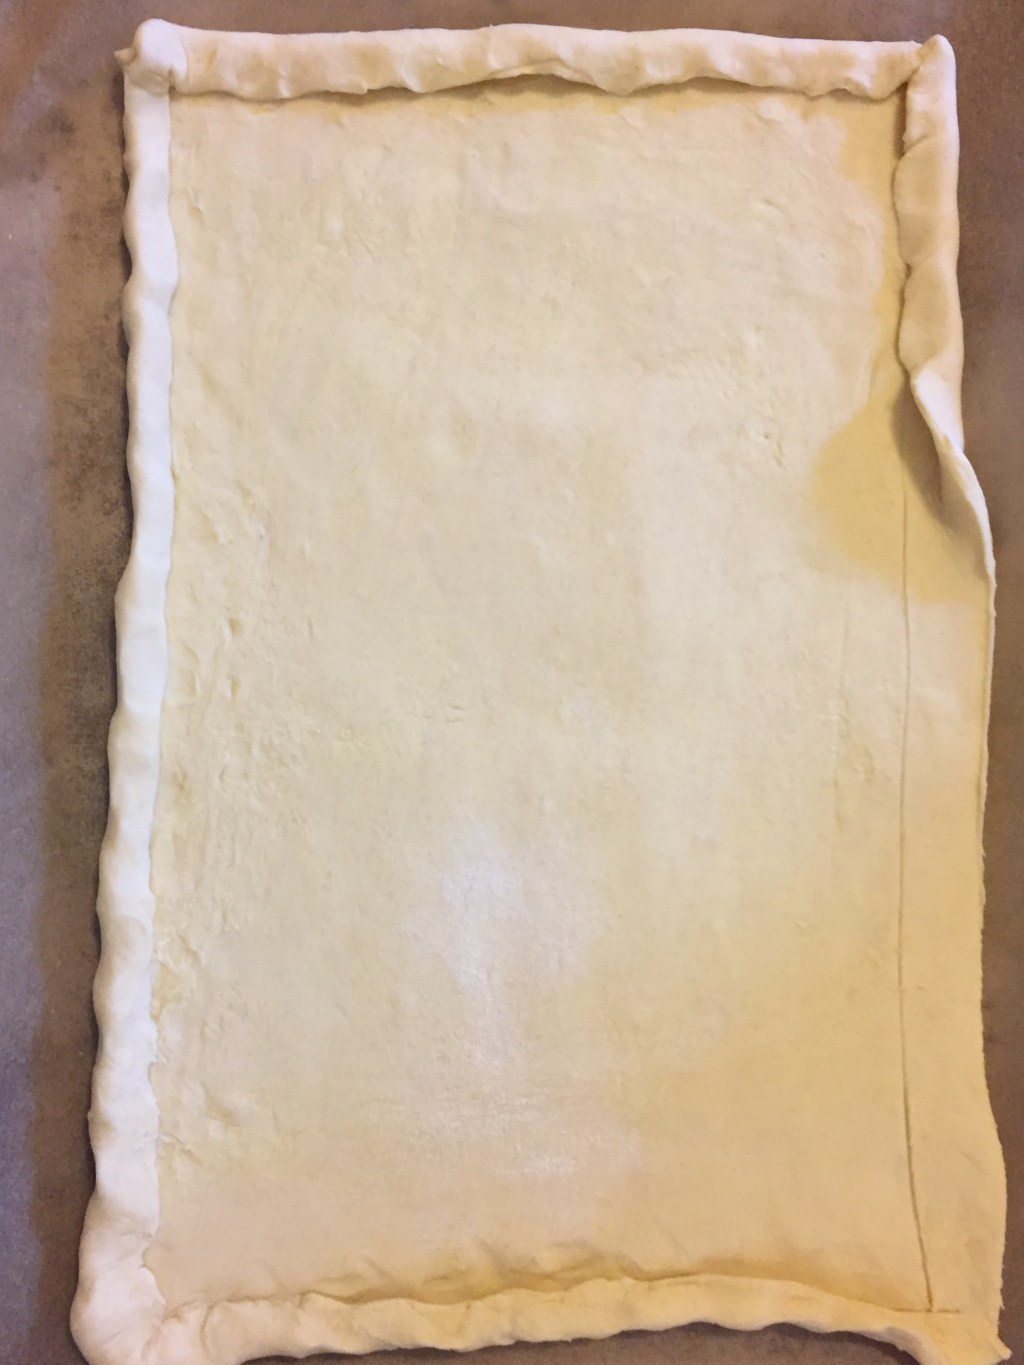
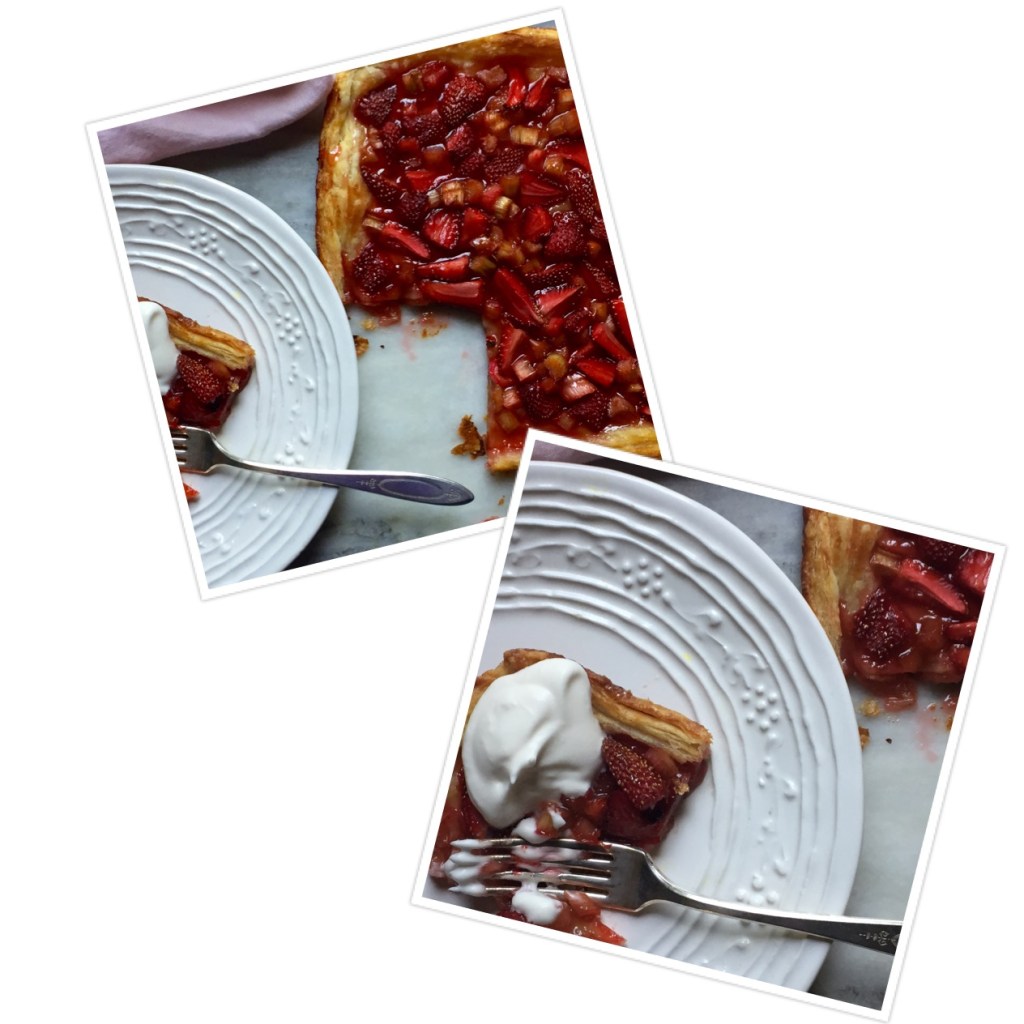
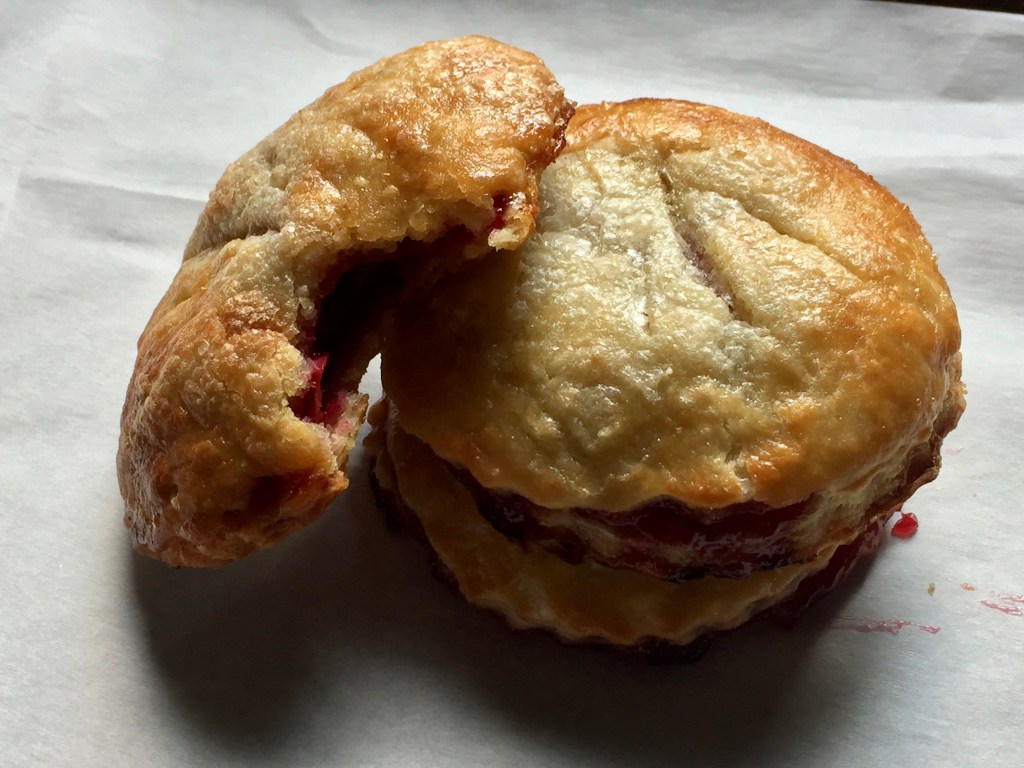
The hand pies were an after thought. There was leftover galette dough after making the tomato tart, and the small jar of cherry pie filling. Cherry pie has always been one of my favorites especially warm with a scoop of vanilla ice cream

Royal Wedding Scones

Recipe by Liz Larkin on Food52

2 1/2 cups all purpose flour

3/4 tsp salt

1/4 cup sugar

1 tbs baking powder

6 tbs cold unsalted butter

1 large egg

1 cup heavy cream

1 tsp vanilla extract

3/4 cup frozen blueberries

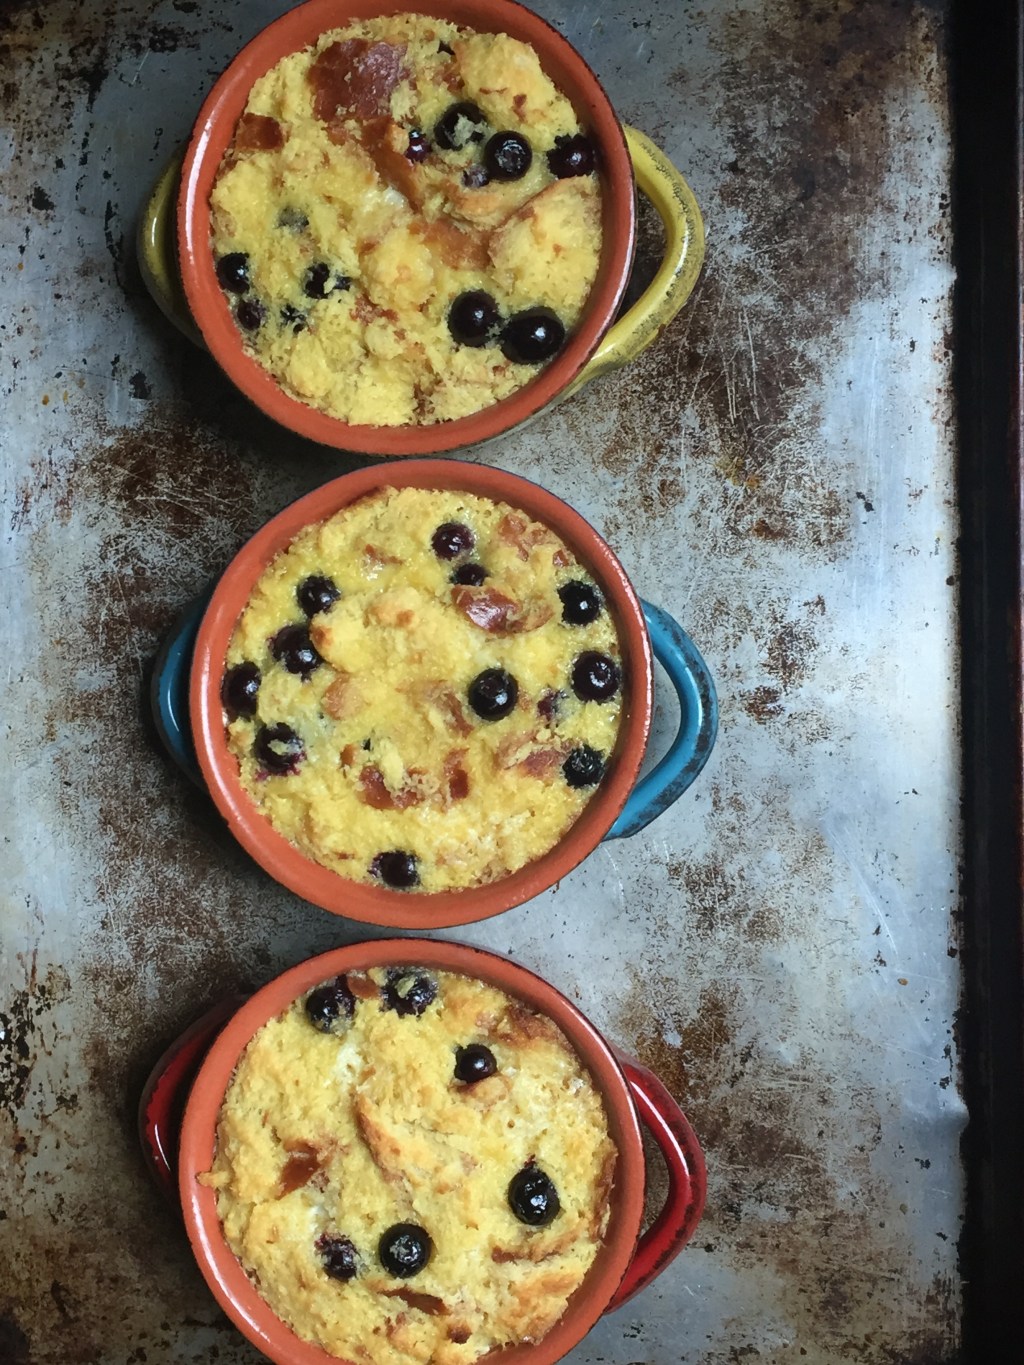
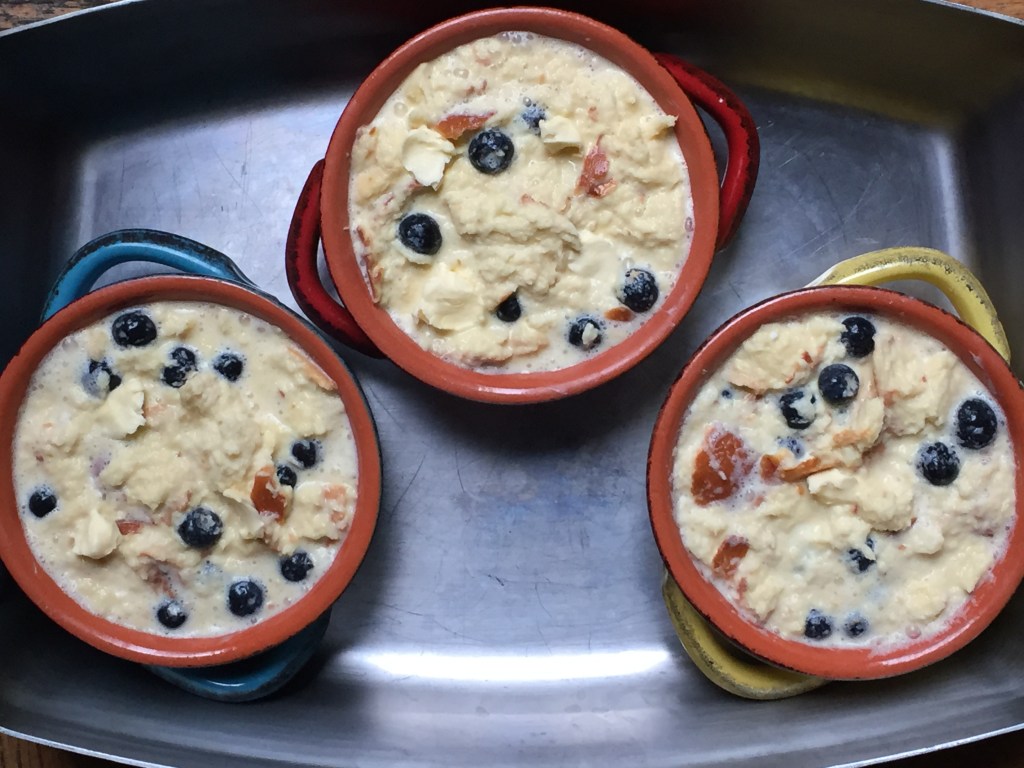
Pulse the flour, salt, sugar and baking powder a couple of times in the food processor, add the butter and pulse about 10 times until the butter is broken up in the flour mixture don’t worry if there are some larger pieces butter it doesn’t have to be uniform crumbs. Dump the mixture into a large bowl and add the frozen blueberries. Mix the egg, cream and vanilla together and add to the flour mixture. Mix with a fork until just combined, be careful not to over mix.

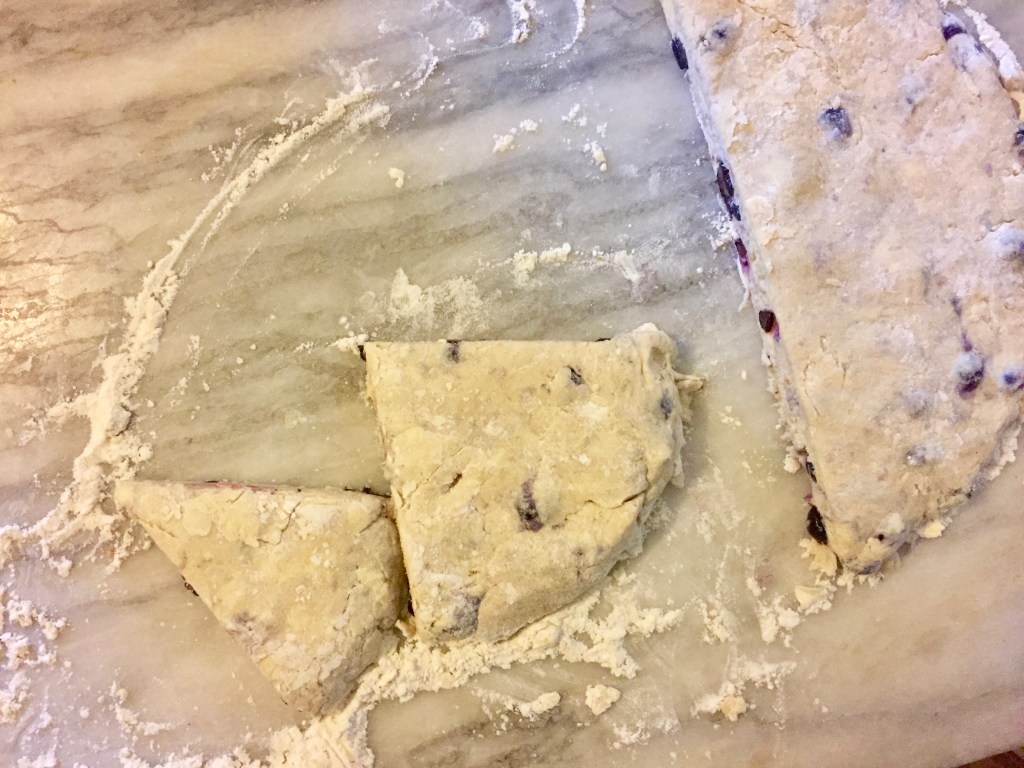
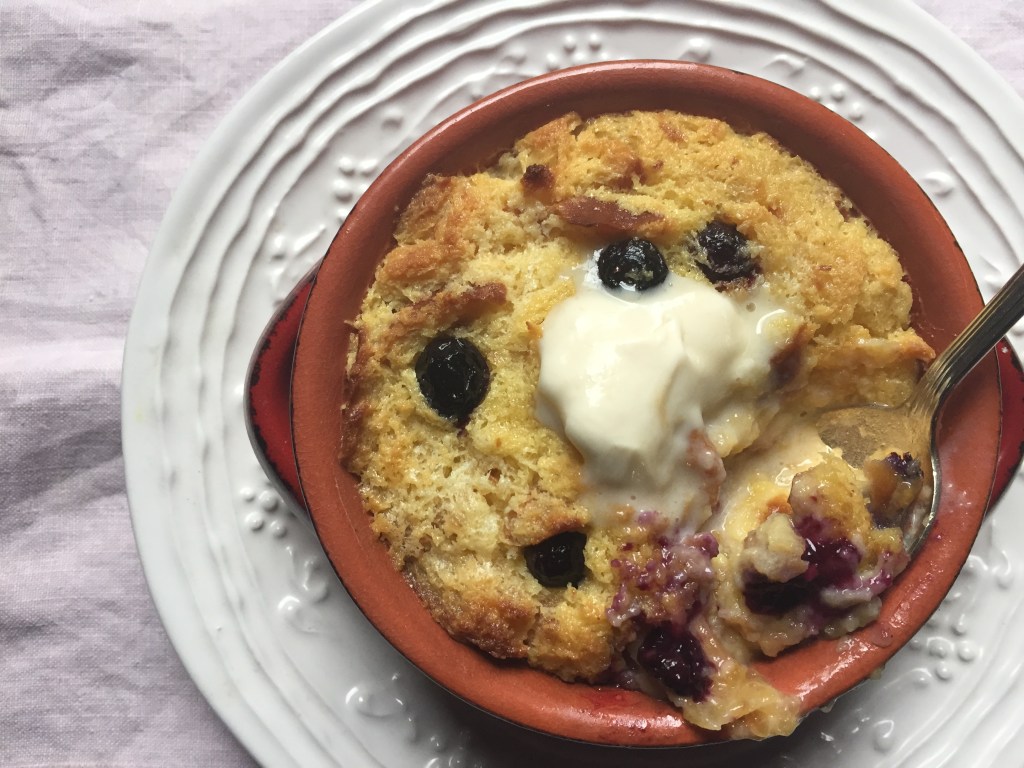
The dough will be a bit shaggy, place on floured work surface and press gently into a circle that is about 1/2 inch thick. Cut in half, in half again and then each quarter into two wedges you will have 8 scones. Place on parchment lined baking sheet and freeze until completely frozen about 1 hour. You can then bake them or store in freezer bags until ready to use, I like to wrap each frozen scone individually in either plastic wrap or parchment.  Before baking brush the scones with some heavy cream and sprinkle some sugar on them. Bake in a 420 degree oven until golden brown, when touched with finger they will feel solid. Don’t over bake, because they are frozen it can take a little longer than usual approximately 20-25 minutes.

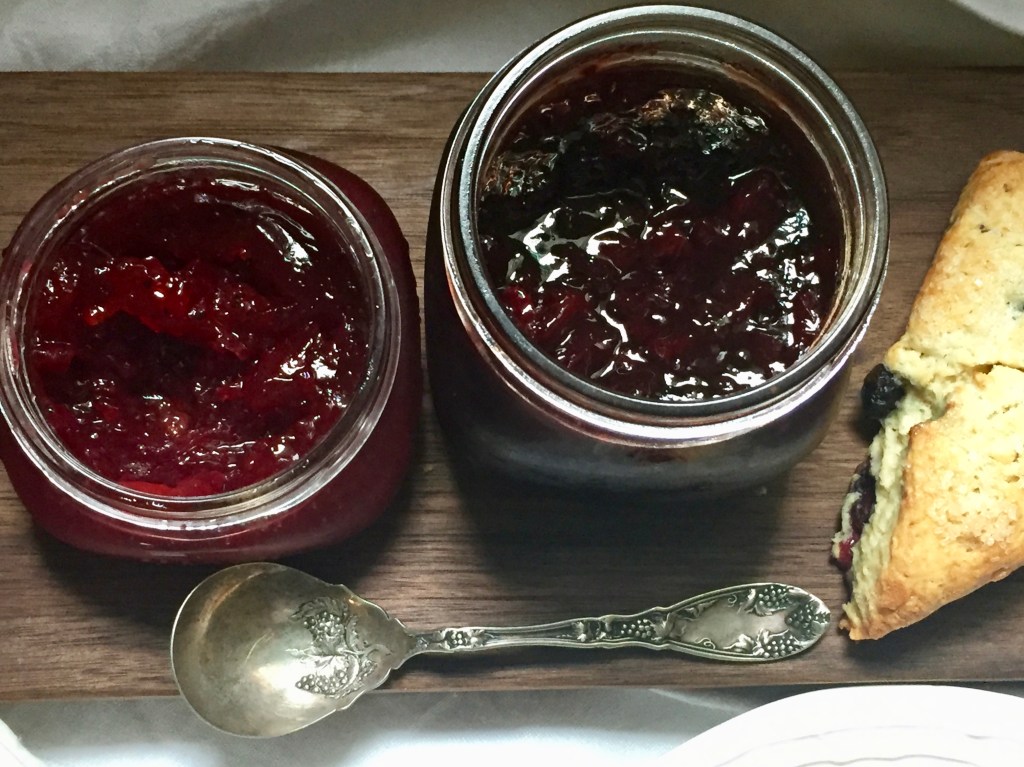
Sour Cherry Jam and Gooseberry jam

Makes 2 16 oz jars

2 pint sour cherries pitted, in separate pot 2 pint gooseberries trimmed

1 1/2 cup sugar each

pinch of salt

Cook on medium high heat until thickened. Test to see if its ready by spooning some of the jam on a very cold spoon, if it thickens it’s ready because it was not a lot of jam it only took a little less than 30 minutes to cook. Pour into sterilized jar, let cool to room temperature and refrigerate. Note: The longer you cook the thicker your jam will be, I like mine on the loose side so for my taste about 30 minutes was perfect.

Sour cherry pie filling

Makes 8 ounces

1 pint sour cherries pitted

2/3 cup sugar

4 tsp corn starch

pinch of salt

pinch of cinnamon (optional)

place everything in a medium non reactive pot and cook on medium high heat until thickened. Pour into clean or sterilized jar and refrigerate after it’s cooled to room temperature.

To make the hand pies use your favorite recipe for pie dough or pre made dough works great as well, using a biscuit or something round cut out circles, you will need 2 for each pie. Spoon a little filling in the middle, brush some egg was on the edge of the circle place the other round on top, seal, cut a vent in the top, brush with egg wash and sprinkle with sugar and bake in 375 degree oven for about 20-25 minutes.

Pies And Tarts: Blackberry Peach Pie And A Tomato Tart

In the summer it’s hard to find balance. I love to cook but it’s so hot out it kind of knocks the wind out of my sails but I was inspired to get in the kitchen after reading Teagan newest serial Thistledown.  I love the story and Teagan is so brilliant, her readers are part of the the story we were given faery names and oh well you’ll just have to read it, it’s wonderful!!! My characters faery name is Peaches Dragonfly and you might have guessed it yes, Peaches is a cook.

When I buy blackberries what I don’t eat I freeze, adding to the freezer container with each unused portion of berries. I do the same with other fruit, peaches, strawberries etc… There happened to be a rather large bag of blackberries and some peaches that I wanted to use and today the temperature is pleasant, a good day to fire up the oven and bake.

Pies are one of my favorite indulgences, especially fruit pies. They are simple to make, and are such a great dessert both homey and elegant. The combination of blackberries and peaches has always been one of my favorites and put them in a flaky buttery pastry crust and it’s pretty much heaven on earth. I’ve published the pie crust recipe I use probably more than a dozen times. It never fails, is always good and its from Julia Child.

I think I will bring both of these the pie and tomato tart to Fiesta Friday #182 the co hosts this week are Liz @ spades, spatulas & spoons and Jenny @ Jenny Is Baking

Blackberry Peach Pie

Makes one 9 inch double crust pie

Pastry

1 1/2 cup all purpose flour

1/2 cup cake flour

1 tsp salt

6 oz unsalted cold butter cut into pieces

4 tbs shortening (cold)

1/2 cup ice water

Whisk the flours and salt in large mixing bowl. Add the butter and shortening and using a pastry cutter or your hands break up the fat into the flour until it resembles crumbs. It’s ok to have small pieces of butter I actually prefer it the pastry is extra flaky. Mix together until if forms a cohesive dough. Divide into two disks, wrap each in plastic wrap and refrigerate for at least an hour.

Fruit and assembling the pie

approximately 3 cups blackberries

approximately 2 cups sliced peaches

2/3-1 cup sugar (depending on sweetness of fruit)

3 tbs-1/4 cup flour

pinch of salt and pinch of cinnamon

NOTE: If using frozen fruit use 1/4 cup flour + 1 tbs

Heat oven to 375 degrees

Mix the fruit with the flour and sugar, salt and cinnamon.

Roll out the bottom crust and place in your pie pan, add the fruit dot with some butter and place in the refrigerator while you roll out the top crust.  I made a lattice top crust  for this pie and all you do is cut strips and basket weave. Roll out the top crust and lay on the pie, crimp the edges however you like, cut a vent or prick with a fork, brush with egg wash and sprinkle with sugar and bake for 45-50 minutes.

Heirloom tomatoes

The first tomatoes of the season are also showing up at the green market and I love buying heirloom tomatoes, they are my favorite, different colors, sizes and shapes and other than enjoying in salad or on their own making a tart is a great way to eat them. This time of year with so much bounty and just me to eat, I end up preserving or freezing much of what I purchase. This year my basil died, not sure why and it was very upsetting so I ended up buying a huge bunch at the farmers market and thought I would make some pesto.

The tomato tart is made using Julia Childs recipe for a galette pastry, it’s very different from a traditional pie crust, you mix flour and corn meal, butter, sour cream or creme fraiche and ice water. It’s a delicious rustic pastry dough and this recipe is one I have been using for many years.

Because tomatoes are so juicy I roast the tomatoes first in the oven until they are soft and a bit drier, I made the mistake once of putting fresh tomato slices on a tart and the crust was soggy, not good.

Tomato Tart

Makes one 9 inch tart

1 cup flour

1/4 cup cornmeal

1 tbs sugar

1/2 tsp salt

7 tbs cold unsalted butter

3 tbs sour cream or creme fraiche

1/3 cup ice water

Put the flour, cornmeal, sugar and salt in mixing bowl, cut in the butter until it resembles crumbs. Mix the sour cream and ice water and add to the dry ingredients. Stir until it forms a cohesive dough. Wrap in plastic wrap and refrigerate 2-4 hours.

Roasting the tomatoes and making the tart

Heat oven to 400 degree’s

Line a sheet pan with parchment, cut your tomatoes into thick slices and place on parchment lined baking sheet, bake for about 25-30 minutes they will just start to caramelize and will dry out a bit. Remove carefully so they stay whole and set aside.

Press the dough into your tart pan or roll it out and place in the pan,  put in the freezer for approximately  15 minutes or until partially frozen. Remove from freezer and weight it down by placing a parchment sheet on the pastry and fill with pie weights or beans. Bake on sheet pan for 20 minutes, remove parchment and weights and place back in the oven for about 15 minutes or until lightly browned.

Spread some pesto on the bottom of the tart crust, sprinkle with some cheese and layer your tomato slices. Bake for about 25-30 minutes. Serve hot or room temperature.


Paleo Gluten Free Frosted Cake Brownies

I really want to expand my horizons, I have always been a butter and sugar kind of gal and use it when I bake just about everything. On July 4th I went to a BBQ at a friends house and one of the guests practices a paleo lifestyle and has really done amazingly well. While we all enjoyed the cheesecake for dessert I watched her sit there with nothing and felt kind of bad. On Instagram I noticed a post for paleo brownies with a peanut butter frosting that looked amazing and I decided to give them a try. If you follow strict paleo, the brownies in the recipe are not 100% paleo as they have a peanut butter frosting and peanuts are not permitted. I chose to follow in that same line of thinking and the frosting I made is also not 100% paleo but it’s close. It really is delicious, I paleo-ized  (don’t think thats a word) Merrill Stubbs buttercream recipe on food52, the same one I used for the dacquoise that I made a few months ago. Since the recipe calls for powdered sugar (not paleo) and coconut palm sugar is allowed, I thought I   would make my own powdered sugar using the coconut palm sugar and a little coconut flour. It worked well, if I had a vitamix it probably would have been a little better but my Ninja did a pretty good job. There are a few pieces of the coconut sugar that didn’t break down but IMHO that gives it character. The coconut sugar gives the buttercream a caramel flavor.

The brownies which are really more like a cake are so easy to make, you put all the ingredients in a blender, process until smooth and pour into a prepared pan. Got to love that! NOTE: Be careful not to over bake, I think I did and they got a little dry. Whenever I make a recipe for the first time I follow it to the letter but if I make these again I will make a few changes. I am not going to embrace a paleo lifestyle although in theory it sounds good and I know people that have lost an incredible amount of weight and feel great but I find it too restrictive, but rather choose to try to eat healthfully with portion control and limit sugar. I also could not eat as much meat as you are supposed to eat on paleo, not my thing.

  1. Add chocolate chips or chunks or shaved chocolate (if going paleo find paleo friendly chocolate)
  2. The recipe said to use a 7 inch square pan, I have never seen a 7 inch pan and used my 8 inch pan which made them a little thinner than the ones pictured in the original recipe. It would be even better to use a 6 inch square if you can find one.
  3. Might increase the coconut oil a bit adding an additional tablespoon or 2.

Paleo/GF Brownies

Recipe from paleo gluten free eats

1 cup coconut sugar

1/2 cup coconut flour

1/2 cup unsweetened cocoa powder

1/3 cup melted coconut oil

1/4 cup coconut milk (full fat is best)

6 large eggs

1 tsp baking soda

1/4 tsp salt

Heat oven to 350 degree’s.

Line 8 inch square pan with parchment paper so there is an overhand on 2 sides. Grease the sides and bottom with a little coconut oil.

Add all the ingredients to your blender and process until smooth, you may need to scrape the sides once or twice. Scrape into prepared pan and bake for 20-25 minutes (test after 20 minutes). Cake tester should come out fairly clean (a few crumbs are fine). Better to be a little under done than over done, it continues to bake a little after removed from the oven.

Powdered coconut sugar

1 cup coconut sugar

1 tbs coconut flour.

Place in high powered blender like vitamix and process until it’s powdery. It took about 10 minutes. If you have a vitamix use the dry container for this if not it’s ok, I used my to go cup on my ninja and it worked great. Place in a covered container. You might want to double the recipe if making the frosting because you need 1 1/2 cups.

Frosting

1 egg yolk from farm fresh egg or pasteurized egg

1 1/2 cup powdered coconut sugar

4 1/2 oz earth balance vegan butter or you could use coconut butter or even  pure cocoa butter (earth balance is not paleo because it contains soy)

1 tsp vanilla extract

Place everything in a bowl and beat with your electric mixer until smooth and creamy.

Frost the brownies when cooled and cut into pieces after frosting. Refrigerate until ready to use. NOTE: the egg can be eliminated but it gives a silky smooth texture that I love. The egg is not cooked or heated so make sure you use eggs from a trusted source, fresh or pasteurized.


Chocolate Marbled Banana Bread

This banana bread recipe has been featured on this site many times, as banana bread and also using other fruits like apples and figs. It is IMHO the best banana bread recipe I have found. While perusing recipes I saw a gorgeous chocolate marble banana bread and although I have added chocolate chips never a chocolate swirl. I used my go to recipe and copied how the chocolate marble swirl was made. The bread is delicious, simple and I like to make 3 mini loaves and freeze them, it freezes beautifully.

It’s moist and chocolaty with lots of banana flavor. The spelt adds some texture and a delicious nuttiness that you only get from spelt.

Chocolate Marbled Banana Bread

Makes one 9 inch or 3 mini loaves

Adapted from a recipe by Martha Stewart

1 stick 4 oz softened butter

1 cup sugar

2 large eggs at room temperature

1 cup flour

1/2 cup spelt flour

1 tsp baking soda

1 tsp salt

1 heaping cup mashed very ripe banana (2 1/2 large or 3 medium bananas)

1/2 cup sour cream or creme fraiche

1 tsp vanilla

3 oz dark chocolate melted

2 tsp unsweetened cocoa powder

Heat oven to 350 degree’s. Prepare your baking tins by greasing generously either with cooking spray, butter or shortening. Place flours, baking soda and salt in bowl and whisk to combine.

In the bowl of a stand mixer add the butter and sugar. Cream until light and fluffy scraping the sides occasionally. Add the eggs one at a time beating well after each addition. Add the flour mixture and beat on medium high speed just until combined. Now add the banana, sour cream and vanilla and mix to combine.

Remove one cup of the batter to a small bowl. Melt the chocolate and add the cocoa powder, stir. Add to the 1 cup of batter and fold in.

Spoon some of the regular batter into the baking pan if using a 9 inch loaf pan add half the batter, now half of the chocolate batter in two spoonful. Add the rest of the plain batter and spoon the rest of the chocolate batter on top. Swirl gently with a knife or skewer being careful not to over swirl, a few times back and forth will be enough.

Bake the 9 inch loaf approximately 50-55 minutes and the 3 mini loaves approximately 25-30 minutes. A cake tester or toothpick should come out clean when inserted in the center. The loaves will be browned and feel firm.


No Bake Cheesecake And A New Computer

Hallelujah!  My new computer was delivered yesterday and I couldn’t be happier. It is so nice, pleasant and so much easier to write a post on my laptop. I had a Mac Air and got the same computer, I still have to go to Genius Bar at the Apple Store to see if my old computer’s hard drive is damaged, if it is, my data cannot be retrieved but if not they can transfer to the new one. Fingers crossed.

On July 4th I went to my friends house for a BBQ, I made some hummus using Ottolenghi’s great recipe, some pita bread, veggie burgers and a cheesecake. I found this recipe on Food and Wine, it looked ethereal, light and creamy and I had to give it a try. This is a no bake cheesecake so no hot oven and no eggs. It is very easy to make and the recipe calls for cream cheese, ricotta, mascarpone or sour cream (I used creme fraiche) and whipped cream, it is flavored with a little lemon juice. In the recipe they use a combination of amaretti and graham crackers, I used only graham crackers. Everyone at the BBQ said it is the best cheesecake they have ever had, I have to agree it is wonderful and this recipe will go into my must make again SOON file. They call for a 8 inch springform pan, I only had a 9 inch so I doubled the recipe. There was leftover filling which I made into a small upside down cheesecake. My cousins were in town and came over for dinner and I served it for dessert. The bottom layer was roasted rainier cherries, filing on top of the cherries and crushed graham crackers on top. This was also exceptional.

I am bringing this dessert with me to Fiesta Friday #179. This weeks co hosts are Petra@Food Eat Love and Laura@Feast Wisely. Hope you all have a chance to stop by, it’s always a fun party!!

Triple Cheese Cheesecake

Food and Wine

Makes an 8 inch cake

Graham Cracker Crust

1 1/2 cups crushed graham crackers (approx 12 crackers)

pinch of kosher salt

1/4 cup sugar

5 tbs melted butter

Mix the crushed graham crackers, salt, sugar and melted butter until fully incorporated. Heat oven to 350 degree’s. Press the graham cracker mixture into the spring form pan coming about half way up the sides of the pan. Bake approximately 12 minutes. When you smell it it’s done, it should be lightly browned. Let cool and set aside while you make the filling.

Filling

1 tsp powdered gelatin

2 tbs cold water

3/4 cup chilled heavy cream

2 8 oz packages cream cheese, softened

3/4 cup ricotta (whole milk)

3/4 cup sugar

pinch of salt

1/4 cup mascarpone, sour cream or creme fraiche

1/4 cup fresh lemon juice

In a microwave safe bowl sprinkle the gelatin over 2 tbs of cold water. Set aside.

Whip the cream into soft peaks and refrigerate.

Add the cream cheese, ricotta, sugar and salt to mixer and whip on high speed until light and fluffy about 5 minutes. Beat in the mascarpone/sour cream or creme fraiche and lemon juice until combined.

Microwave the gelatin for about 5-7 minutes until it melts. Scrape into the cheese mixture and whip until combined.  Fold in the whipped cream. Spoon into the baked graham cracker crust, smooth the top, cover and refrigerate at least 3 hours but best overnight.

Serve with fresh fruit, fruit compote or roasted or poached fruit.

Upside down cheesecake with leftover filling


Strawberry Rhubarb Tart Using Puff Pastry

I have a ritual that I do every time I cook, my kitchen must be thorougly cleaned, counters, floor, no dishes in the sink, every surface clean, for me it creates new energy and clears my kitchen. I also try to make sure everything I need is ready so I don’t have to go finding and grabbing with flour on my hands. So the ritual began early this morning in preparation for my puff pastry adventure. I had the butter in the freezer all night, the flour weighed and in the fridge as well. In retrospect I would not freeze the butter quite so hard because let me tell you it was hard work pounding that butter when it’s rock hard. In the video he makes it look easy, well not so much. I had it wrapped in plastic wrap which after a good pounding broke and I had to peel off the pieces from the butter. I decided to use a zip lock bag and sprinkled a little flour on the butter as per The Kitchn. It worked and I got the butter in a nice square and it was still pretty cold. The butter went back in the refrigerator while I rolled out the dough.

The dough comes together nicely in the food processor and forms a cohesive ball which I let rest for a few minutes under a damp tea towel. The hardest part of this recipe is pounding the butter initially, the rest goes very smoothly and if you have any frustration or feel the need to pound something try making puff pastry, it’s a stress reliever.

The first two turns went pretty well, it was hard to make it a neat rectangle but I did the best I could. After a 30 minute rest in the refrigerator I took it out for 2 more turns and there was a marked difference in the dough, it’s very soft, tender and pliable. Rolling it out was a breeze and doing the second set of 2 turns was easy. With only 2 more to go I have to say puff pastry is not all that much work but the proof is in the pudding I guess you can say and I was nervous to see how it turns out when baked.

Final Analysis: AMAZING recipe, with the exception of trying to pound frozen butter it was so easy to make. Honestly, I will never buy puff pastry again. It’s tender, flaky, buttery, pretty much perfect. I have enough dough in the freezer for another large tart. This recipe is a keeper. Also note, I am convinced using a good European butter is key, I used Kerrygold unsalted butter and it really does make a difference.

ready for the 4th turn see the flecks of butter

6 turns and I’m done, smooth, supple and feels like a beautiful dough if you look closely you can still see pieces of butter


strawberries and rhubarb

3 stalks rhubarb, washed, ends removed and cut into approximately 1/4 inch pieces

1 punnet of strawberries, trimmed, hulled and cut into pieces (quartered or halved depending on size)

1/2 cup sugar

1/2 tsp orange zest

dash of salt

2 tsp cornstarch

Mix everything in a bowl and let sit until sugar has melted and fruit has given off juices. Drain but save the juice. After draining sprinkle the cornstarch on the fruit and mix with a spoon. Pour the saved juice into a sauce pan and cook on medium heat until thick and reduced slightly. When you remove the tart from the oven cool for about 15 minutes then drizzle the thickened syrup on top of the tart. It’s delicious.

docked and ready for the fruit

Making the tart

Cut your dough in half and freeze the other half. Roll into a rectangle, using a sharp paring knife make a slice not all the way through so cut gingerly, you want the slice about an inch from the edges. Roll the edges to the cut line, dock the inside of the dough well with a fork (this is so it doesn’t puff). Arrange fruit on the dough, brush the edges with egg white that has been beaten with a fork. Sprinkle some finishing sugar or turbinado sugar on the whole tart. Bake in a pre heated 400 degree oven until golden brown and bubbly this tart took about 35-40 minutes.


Challenge Number 2- Puff Pastry

I have never made puff pastry, always buy it already made and that certainly is the easiest way to produce delicious tarts or baked goods with this wonderful dough. When buying already prepared puff pastry I like Dufour’s, it is consistently the best, buttery, flaky and delicious. In researching how to make puff pastry I first saw a post from The Kitchn, she gave a wonderful tutorial with photo’s each step of the way, it was quite involved and fussy but I was game. After reading the entire post and the comments I noticed someone mentioned this video with Julia Child and Richard Medrich, she said his method is simple and her puff pastry always turns out well. One never has to second guess anything from Julia and Mssr. Medrich is an expert. This is the recipe I chose to make. See the video below, he makes it look so easy.  I HIGHLY recommend you watch the video, I tried to write directions but it’s difficult as the instructions for this pastry really makes sense when you watch. I am making this tomorrow, dividing this into two posts.  Today at the farmers market I found some strawberries and rhubarb and decided I will go with full out spring flavors, using both in a tart made with my homemade puff pastry. Don’t know how it will turn out. I just put the butter in the freezer where it will sit all night, weighing my flour and refrigerating it as well. Julia mentions how important it is for everything to be very cold. I will place ice packs on my marble board so even it is cold.

I plan on starting bright and early in the morning. Does anyone want to make this with me? Who is game?

Puff Pastry

Julia Child and Richard Medrich

1 lb flour

1 lb unsalted butter frozen (you can freeze sticks of butter or cut into pieces)

1 1/4 cup ice water

1 1/2 tsp salt

Add the flour, salt and water to the food processor. Pulse until it becomes a cohesive dough. Remove and form into a disk, make slices in the dough first across then in a diamond pattern across again. Cover with a wet tea towel and remove the butter from the freezer. Pound the butter into a 4×4 square (approximately). Roll out your dough into a rectangle so that it is a bit thicker in the middle (see the video) you want the rectangle slightly larger than the 4×4 butter square. Place the cold pounded butter on the dough and fold so that the dough is completely covering the butter. Pound with rolling pin and roll sprinkling with flour so it doesn’t stick to the pin. You want it in a long rectangle. Fold like an envelope, then pound and roll again, fold again like an envelope. Mark twice with your finger imprint and wrap in a damp towel and refrigerate for 30 minutes. Repeat the turns as described above marking 2 more times for a total of 4 turns now, again wrap in a damp towel and refrigerate another 30 minutes. Roll out again 2 more turns (total is 6 turns) and your dough is ready. You can wrap it in plastic wrap and refrigerate or freeze until ready to use.

Happy Mothers Day, Waste Not Want Not Bread Pudding

My Mama taught me not to waste food, I had to clean my plate and sit at the table until either the food was gone or one of us, both stubborn by nature gave in. One day my Mom made liver and onions, bleh, hate it still do. I refused to eat it and literally sat at the table all night long with the food in front of me and still wouldn’t touch it.  To this day I have not eaten liver and onions and won’t make it.

Honoring my wonderful Mother on this day I decided instead of baking something new I decided to repurpose leftovers and make this bread pudding. Here is what I had:

2 challah rolls (more than a day old but still good)

4 egg yolks (left over from my dacquoise)

peaches from the peach ice cream

1/2 container of blueberries

creme fraiche

With those ingredients I made bread pudding.  Bread pudding is simple rustic down home fare. I remember Mom made bread pudding often and it was one of my favorite desserts. She was frugal and never wasted anything and would save bread that wasn’t eaten to make this pudding. This is not her recipe it’s mine but it’s equally as good as hers. Mom is a great cook, intuitive, creative and accomplished. I learned so much from her and wish that I were with her this Mothers Day!

Bread Pudding With Peaches and Blueberries

2 large challah rolls day old or older is best, brioche is also good

4 egg yolks plus 1 whole egg

1 cup whole milk

1 1/4 cup heavy cream

1/3 cup creme fraiche

1/2 cup sugar

1 1/2 tsp vanilla extract

dash of salt

Peaches (optional) chopped or crushed or even a peach jam or preserve

fresh blueberries (you decide how much to add)

Heat oven to 350 degree’s. Whisk the egg yolks and whole egg with the sugar in a mixing bowl. Add the milk, cream and creme fraiche and continue whisking until combined. Add a dash of salt and the vanilla and whisk just until mixed.

Add the torn bread and stir until the bread is completely immersed in the custard base, add the blueberries and fold them in.

Butter your ramekins or baking dishes, spread some peaches on the bottom and spoon the bread pudding mixture, dividing into 3 large or 6 small baking dishes.

Place the baking dishes in a large roasting pan or baking dish place into the oven and then add enough hot water so that it comes halfway up the sides of your dishes. Bake for 30-40 minutes or until set.

I served it with some creme fraiche gently sweetened with brown sugar. It’s fantastic and adding the peaches and blueberries make this dessert so good!

Happy Mothers Day to all of you whether you have children, fur babies, a classroom of children, do volunteer work with kids or just love them it’s a day to celebrate women and Mothers and caregivers. I hope you all have a wonderful day.

Fresh Peach Ice Cream In Profiteroles With Blackberries

I am becoming more involved again at Food52, testing recipes and entering contests. This is all part and parcel of my need to challenge myself. I signed up to test a recipe for Fresh Peach Ice Cream by Chef June, it is on the list for a community pick, which is step one of the contest protocol. Chef June is an amazing cook/chef and has been a community member for a long time and her recipes are always spot on. What intrigued me about this recipe is that it has a custard base but the custard is uncooked. You should use the freshest eggs you can get your hands on and if you have compromised health or are very young or very old you may want to cook your custard. Since I don’t fall into any of those categories I gave this a go, have to be honest I hate standing over the pot cooking the custard, constantly stirring it and stressing about whether I’ve cooked it too little or too much (scrambled eggs).  I was happy that step was eliminated. Fresh peaches are not in season yet so I had to use frozen and although they were ok they were not the same so the peachy flavor was a little absent. I can’t wait for peaches to hit the market so I can make this again as it’s a wonderful recipe.

I had some profiteroles left from my post a few weeks ago which I froze, and I thought that this would make a lovely dessert. One of my favorite pies is peach and blackberries so the blackberries were macerated in sugar and cassis and served on the side. It’s delicious and simple, yes profiteroles are really easy to make and I can attest to the fact that they freeze well. I thawed them in the oven on 200 degree’s for about 15 minutes, they were just like freshly made. When making this I again I would make the following changes, instead of 2 cups whole milk I would add 1 cup whole milk, 1 cup half and half and 1 cup heavy cream, reduce the nutmeg to 1/4 tsp/.

Fresh Peach Ice Cream

Recipe by Chef June on Food52

2 cups peaches (approximately 8 peaches) peeled and chopped, broken up retaining their juices

1 cup sugar

1/2 tsp nutmeg

Juice of half a lemon

2 extra large eggs (I used 3 large eggs)

1/8 tsp fine sea salt

1/2 tsp vanilla extract

2 cups whole milk

1 cup heavy cream

Peel the peaches, Chef June suggests blanching first by dipping the peach for 30 seconds in boiling water,(like tomatoes) the skin will come off very easily. Slice into a bowl and break the peaches up with your hands, add 1/4 cup sugar, the lemon juice and nutmeg and stir to combine. Refrigerate for about 2 hours covered stirring every so often.

After the peaches are cold drain them retaining the juices and put the peaches back in the refrigerator, also refrigerate the retained peach juice.

Meanwhile in a mixing bowl whisk or beat with hand held mixer the eggs, the remaining 3/4 cup of sugar, salt and vanilla until thick and creamy and lighter in color.

Add the milk, heavy cream and peach juice and stir to combine. Process in your ice cream maker following manufacturers directions. About 2 minutes before the ice cream is done add the peaches. Spoon into your freezer container and let sit in the freezer until it’s scoopable.


Mocha Dacquoise Cake And The Winners Of the Giveaway

Dacquoise is a layered cake comprised of layers of meringue and ground nuts (like a macaron) filled with buttercream. I usually try to keep my posts consise, short,  but this one requires a lot of explanation so in advance let me apologize. This was quite an ordeal, the cake did not turn out exactly like I wanted, there were a few bumps in the road, as a matter of fact I had to keep changing things as I went along. The fillings were a disaster, I originally had the idea to use a Mocha Mousse as one of the fillings which sounds good in theory, but in practice not so much. When I put the mousse on the bottom layer and placed another layer on top of it and gently pressed down it oozed out all over the sides, it was not firm enough. The meringue layers although they feel firm in reality are fragile, very fragile. The French Buttercream was a disaster. I beat the egg yolks until tripled in volume and were thick and light in color. I brought the sugar syrup to 265 which is really past the hard ball stage on the thermometer, with the mixer running drizzled the hot syrup down the side of the bowl as directed, two problems with this 1. the sugar syrup when it hits the side of the bowl hardens so I moved it away from the side of the bowl and 2. the beater flung hardened sugar strands everywhere. OMG, it was a mess. I managed to make it adding the butter in pieces until combined. I had sugar candy stuck on the side of the bowl and sugar strands wound around the whisk from when the syrup hit it. Because the syrup was hard ball stage the buttercream was very stiff, which I guess is a good thing because it stays put unlike the mousse. Last minute I also made a buttercream recipe I saw on Food52 from Merrill Stubbs. It is a quick and easy version of a French buttercream using egg yolks, butter, powdered sugar and flavoring of your choice. It takes about 10 minutes to make is silky and thick and really a great frosting or filling. This went in as a filling, it wasn’t quite enough for a thick layer of filling but at this point it was ok. To cover up all the imperfections I frosted with the Chantilly but used my recipe for stabilized whipped cream frosting.

I tried the recipe from Saveur for the meringue layer and failed pretty badly, not exactly sure what happened. The batter was runny, the layers were like thin crisp mishapen sugar cookies. I know there is supposed to be a crispness but this was more cookie like.  IMHO I think there is too much sugar in the recipe. It’s also possible I over processed the almonds and sugar. The batter spread and didn’t look anything like the photo’s (sorry no photo’s) and video’s I’ve seen of how to make a meringue for dacquoise and certainly didn’t look like the one in the Saveur video (the video is included in the link above). Humph… I decided to search for another recipe and found one from Fine Cooking that looked good. It seemed pretty simple, the proportion of the ingredients sounded right and loved that it used hazelnuts and almonds (love hazelnuts).

misshapen, flat and really crisp first attempt

Second attempt, instead of rounds I made a rectanglar cake.  The recipe from Fine Cooking is wonderful, the batter is perfect, holds it’s shape when piped onto the baking sheet, I feel like this will be a success. The batter is super easy, and quick to put together. I have actually become quite good now at the dacquoise. Because one of the layers bit the dust, I quickly made a half a recipe which I can now make without even looking at the recipe and put it on top.

Final Analysis:

Perfect batter, ready for the long bake

The Meringue

From Fine Cooking

1/2 cup toasted hazelnuts

1/2 cup toasted almonds

1 1/3 cup powdered sugar

1/8 tsp kosher salt

6 egg whites

1/3 cup granulated sugar

French Buttercream

7 large egg yolks (about 1/2 cup)

12 oz- 3 sticks usalted butter softenend

2/3 cup strong coffee

1 cup (7 1/2 oz) sugar

 Chantilly

2 cups heavy cream divided

2 1/2 tsp cornstarch

1/4 cup confectioners sugar

1 1/2 tsp vanilla extract

Buttercream

Recipe on Food52 by Merrill Stubbs

6 oz soft unsalted butter

2 egg yolks

2/3 cup confectioners or powdered sugar

1 tbs vanilla extract

Put all the ingredients in the bowl of the stand mixer fitted with the whisk attachment and beat until thick, silky and spreadable. Thats it, so easy!!

Instructions

making meringue

Pre heat oven to 225 degree’s and position a rack in the middle of the oven. Draw three 10×3 rectangles onto parchment paper, turn over and place on sheet pan spray with cooking spray, butter or oil and set aside.

Add the hazelnuts to food processor and pulse just until it is a fine powder, no longer otherwise it will turn to paste. Next pulse the almonds the same way. Place the nut flour in mixing bowl and sift the powdered sugar over and add the salt. Stir with rubber spatula to combine.

In stand mixer fitted with whisk attachement beat the egg whites for 3-4 minutes until there are soft peaks. Add the granulated sugar in 3 additions beating well after each addition and the egg whites are thick and glossy and hold a stiff peak.

Sprinkle the nut mixture on top and gently fold into the meringue until combined. The consistency will be thick and gooey. You can either use a piping bag with a 1/2 inch plain tip or spread the batter in the rectangles 3 inches apart as they will expand.  Place in the oven and bake for approximately 2- 3 hours or until they are firm to the touch. Turn off the oven and let them sit with oven door closed for 6 or more hours. NOTE: Although the recipe does not say to, I rotated the pans every now and then to ensure even baking. I used 2 sheet pans because I was afraid they would run (they didn’t) and the pan on the lower rack browned more quickly. Also the dacquoise were done at just slightly over 2 hours, so I turned off the oven and let them sit for about 6 hours. After turning off the oven I waited about 20 minutes and then gently loosed them. Believe me, it helped greasing the parchment they gave way easily and there was no sticking.

 French Buttercream

In a high sided saucepan over medium heat, add the coffee and sugar, set a candy or deep fry thermometer in the pan and cook until it reaches 265 degrees.

Meanwhile in the clean bowl of a stand mixer whip the egg yolks until tripled in volume and the color has lightened significantly, approximately 8 minutes.

Once the syrup has reached the temperature, remove and slowly pour the mixture into the yolks, whisking on medium low speed. Continue to run the mixer for 20-30 minutes, letting it cool completely. Once fully cooled, add the butter one tbs at a time, whisking until fully incorporated after each addition. The buttercream will thicken noticeably when all the butter has been fully incorporated.

Chantilly

To a small saucepan add 1/2 cup cream, whisk in the confectioners sugar and corn starch. Cook on medium heat until the mixture thickens. Immediately remove from the heat, scrape into a bowl and set aside, stirring frequently until cooled completely.

Place 1 1/2 cup cold heavy cream in mixing bowl and start beating using either whisk attachment on your stand mixer or hand held is fine also, add the cream cornstarch mixture and flavoring of your choice, continue to beat until thick and stiff peaks form. Cover and refrigerate until ready to assemble the cake.

Assembly

The layers were not even at all, some were smaller, some larger, there was some overhang and the layer that had the failed mousse attempt was cracked and broken. The meringue is very fragile so handle with care, it does well when filled, covered and refrigerated overnight or longer. Because the layers were uneven in size I trimmed them with kitchen shears as a knife just doesn’t cut it. The pieces and crumbs I pressed into the bottom layer that had some canyon size gaps, mixing with a little of buttercream from the sides of the cake. Talk about kitchen hacks, this cake was hacked every step of the way.

Anaylysis:

Will I ever make this again, maybe. The perfectionist in me wants to keep making it until I get it right but it literally was hours and days of work. The meringue I have down pat and it’s really not hard. I don’t think I will ever make the French buttercream again, it’s just not worth the effort and the results did not knock my socks off. I really like Merrill’s shortcut version of a French Buttercream, it tastes almost exactly like it, it’s fool proof, quick and easy. All in all I actually loved the challenge, it didn’t matter that it was a partial fail, I learned a lot and made something with a fair degree of difficulty and it was edible, I learned what to do and what not to do, what works and what doesn’t. Because of that I view this as a success for the simple fact that I did it! Tasting it though, it did kind of knock my socks off, the cake is delicious, the meringue retained its crunch kind of a melt in your mouth crunch and I am really glad I used hazelnuts. Ok maybe I will make it again.

The Winners

Selected by feeding everyone’s names into Random.org the winners of the cookbooks are and Annie@Give me meatloaf and Teagan@Teagans Books. Congratulations to you both. Watch for an email, I will need your mailing address so we can get those books out to you asap.