Paella
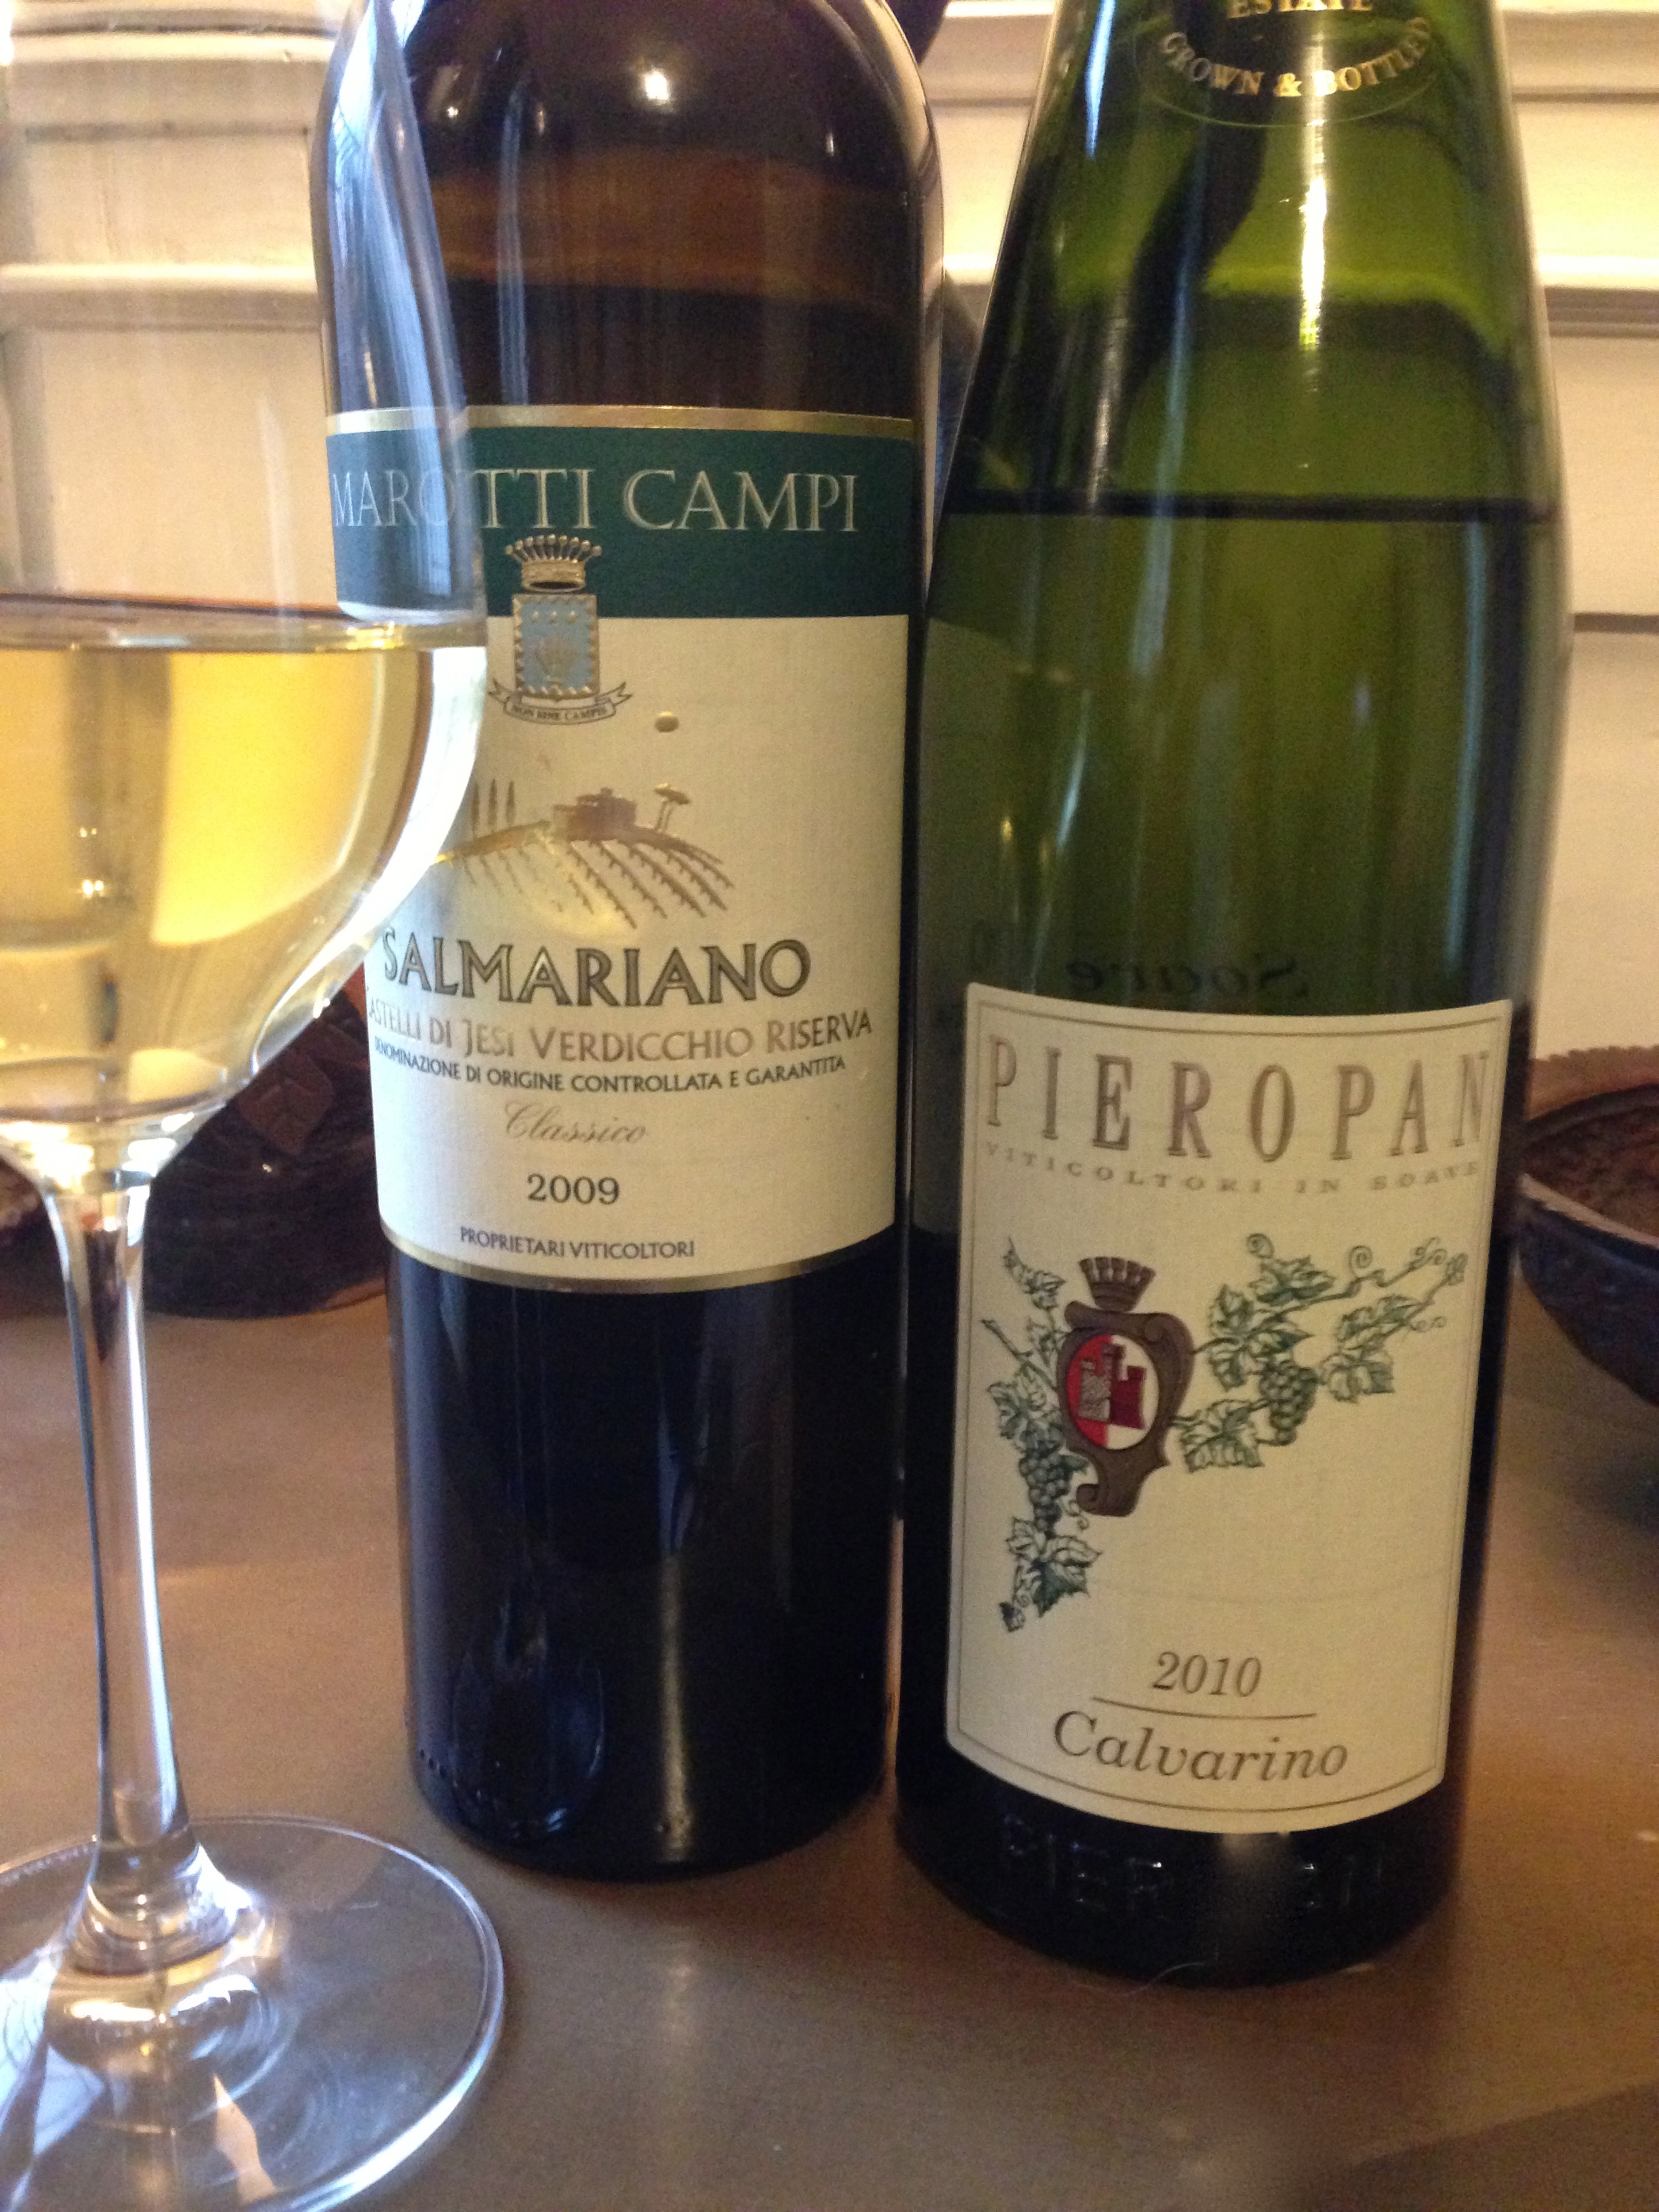
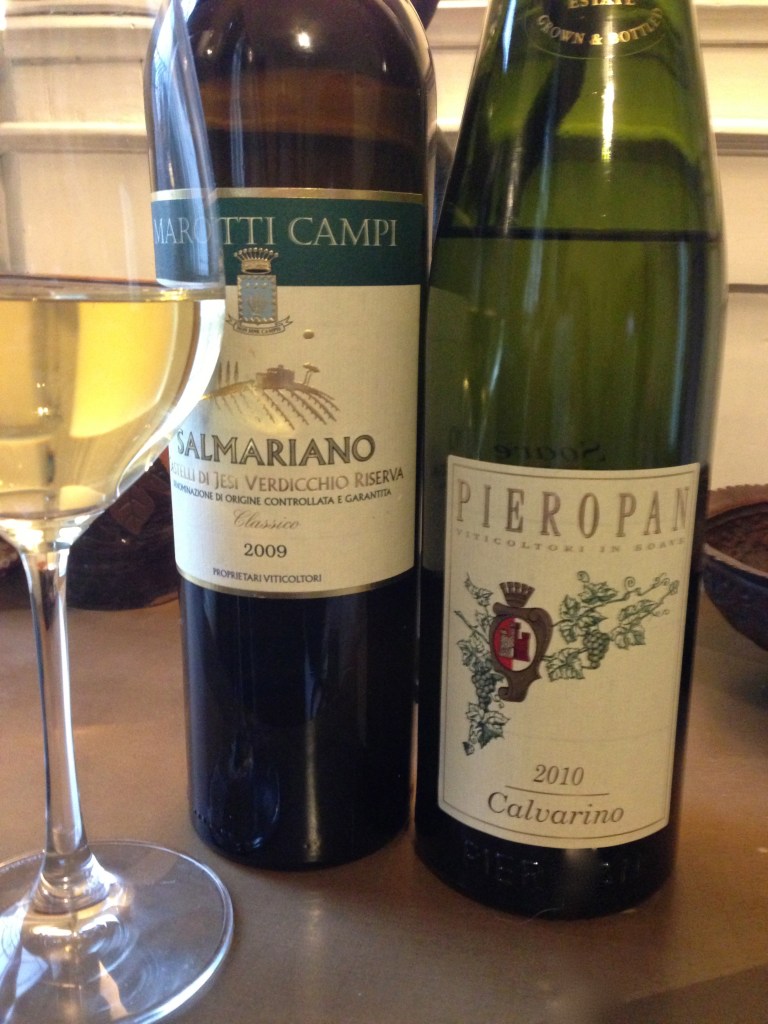
I am so excited about this post, not just because I have made paella, one of my favorite dishes but because I have collaborated with a wine expert who graciously paired wine specifically for this dish. I contacted Stefano a certified sommelier and asked him if he would lend his expertise, choosing wine that would compliment the paella. He accepted, and I am so pleased to bring you his choices. Stefano is a brilliant photographer and sommelier and his blog Clicks & Corks recently launched. He previously posted with his wife Francesca on her beautiful blog Flora’s Table. I love their posts, the food, wine and photographs are amazing. I enjoy wine, drinking and cooking with it but I am not an expert, I rely on my local wine merchant to help me pick wine based on what and how I cook and drink. I know what I like but ask me to tell you about it and I become verklempt. Clicks & Corks has a wealth of information regarding wine, there is a glossary full of interesting and helpful information. I sent Stefano what I was making along with the ingredients and based on that he was able to choose 2 wines specifically for this dish. My favorite wine purveyor, Brian who owns Gnarly Vines in Brooklyn did not carry the exact wine that Stefano recommended but went above and beyond for me and found both wines, I was thrilled. Here is a link to the ISA guidelines for wine pairing that was posted on Flora’s table, it’s fascinating. I chose to drink the Soave Classico “Calvarino” with the meal and loved it, this wine paired perfectly with the paella, it’s clean and light and very smooth, there is a minerality that is very distinct, I could tell the soil in which the grapes were grown is rich and produces exceptional grapes. The wine complimented the paella so well, the crisp clean white wine offset the richness of the dish. Stefano knows what he is doing when he chose this wine. I haven’t opened the other wine yet but have no doubt that it will also be amazing. This wine will pair perfectly with seafood also, in my non expert opinion.
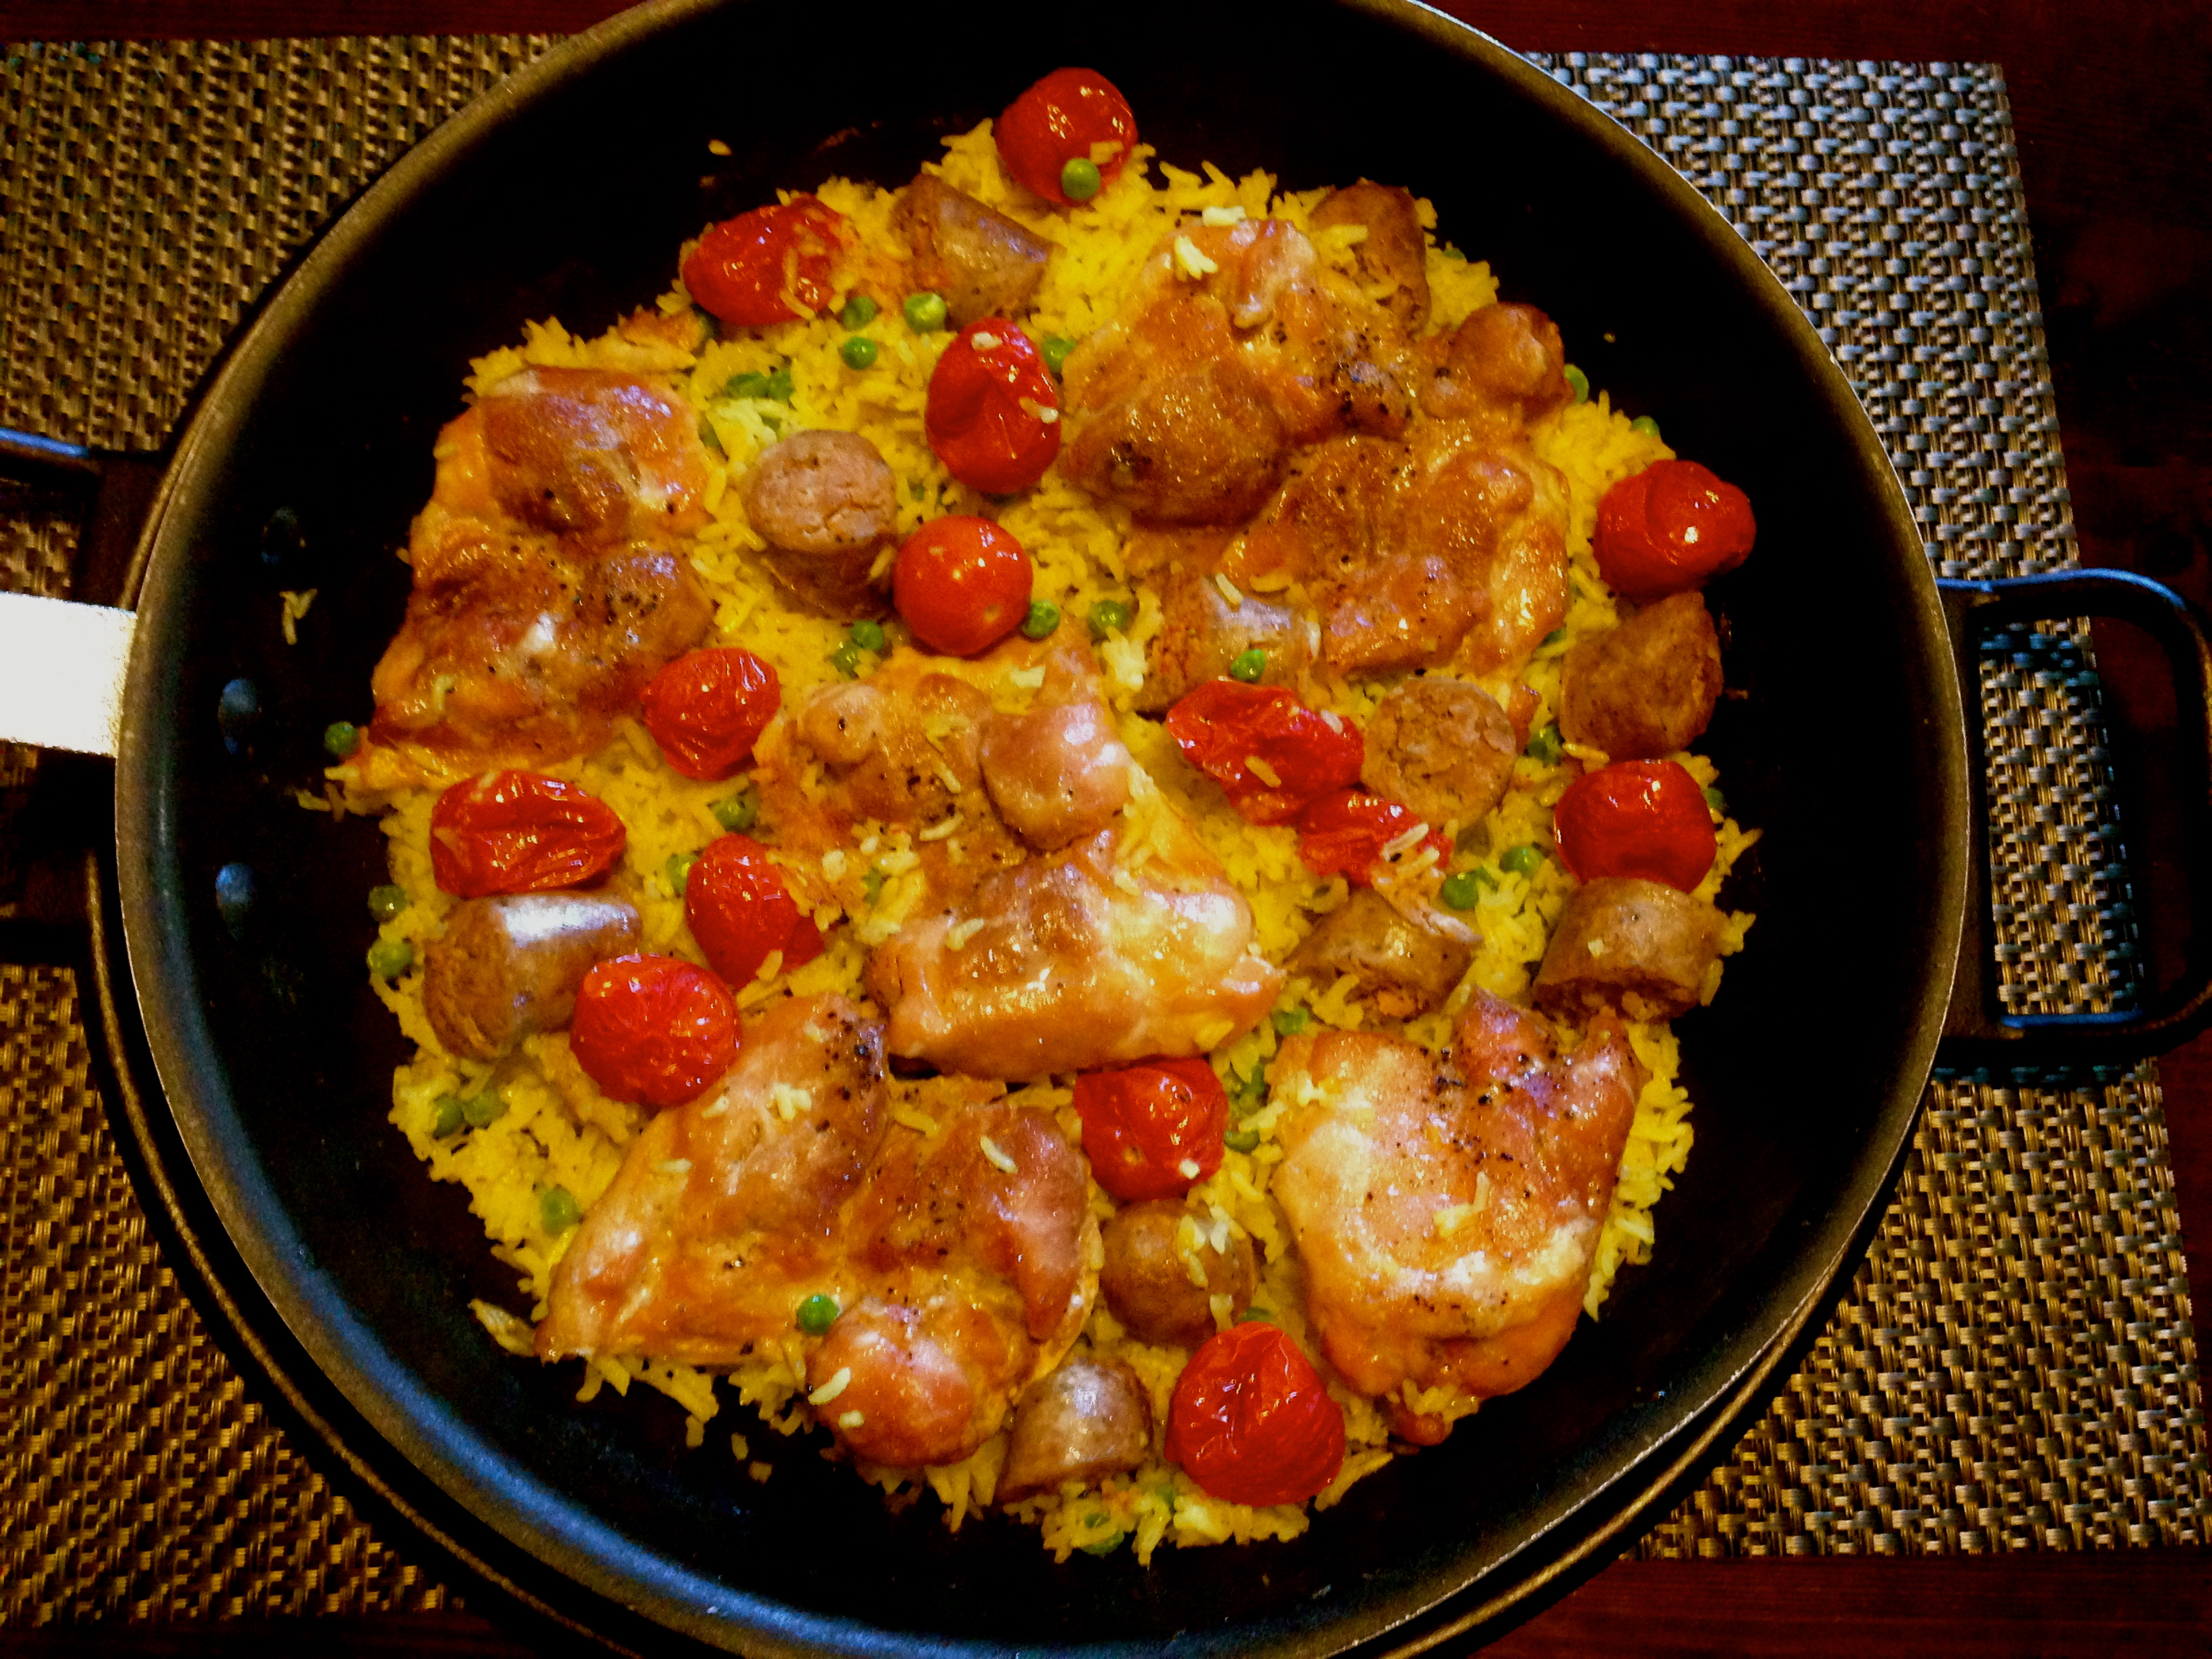
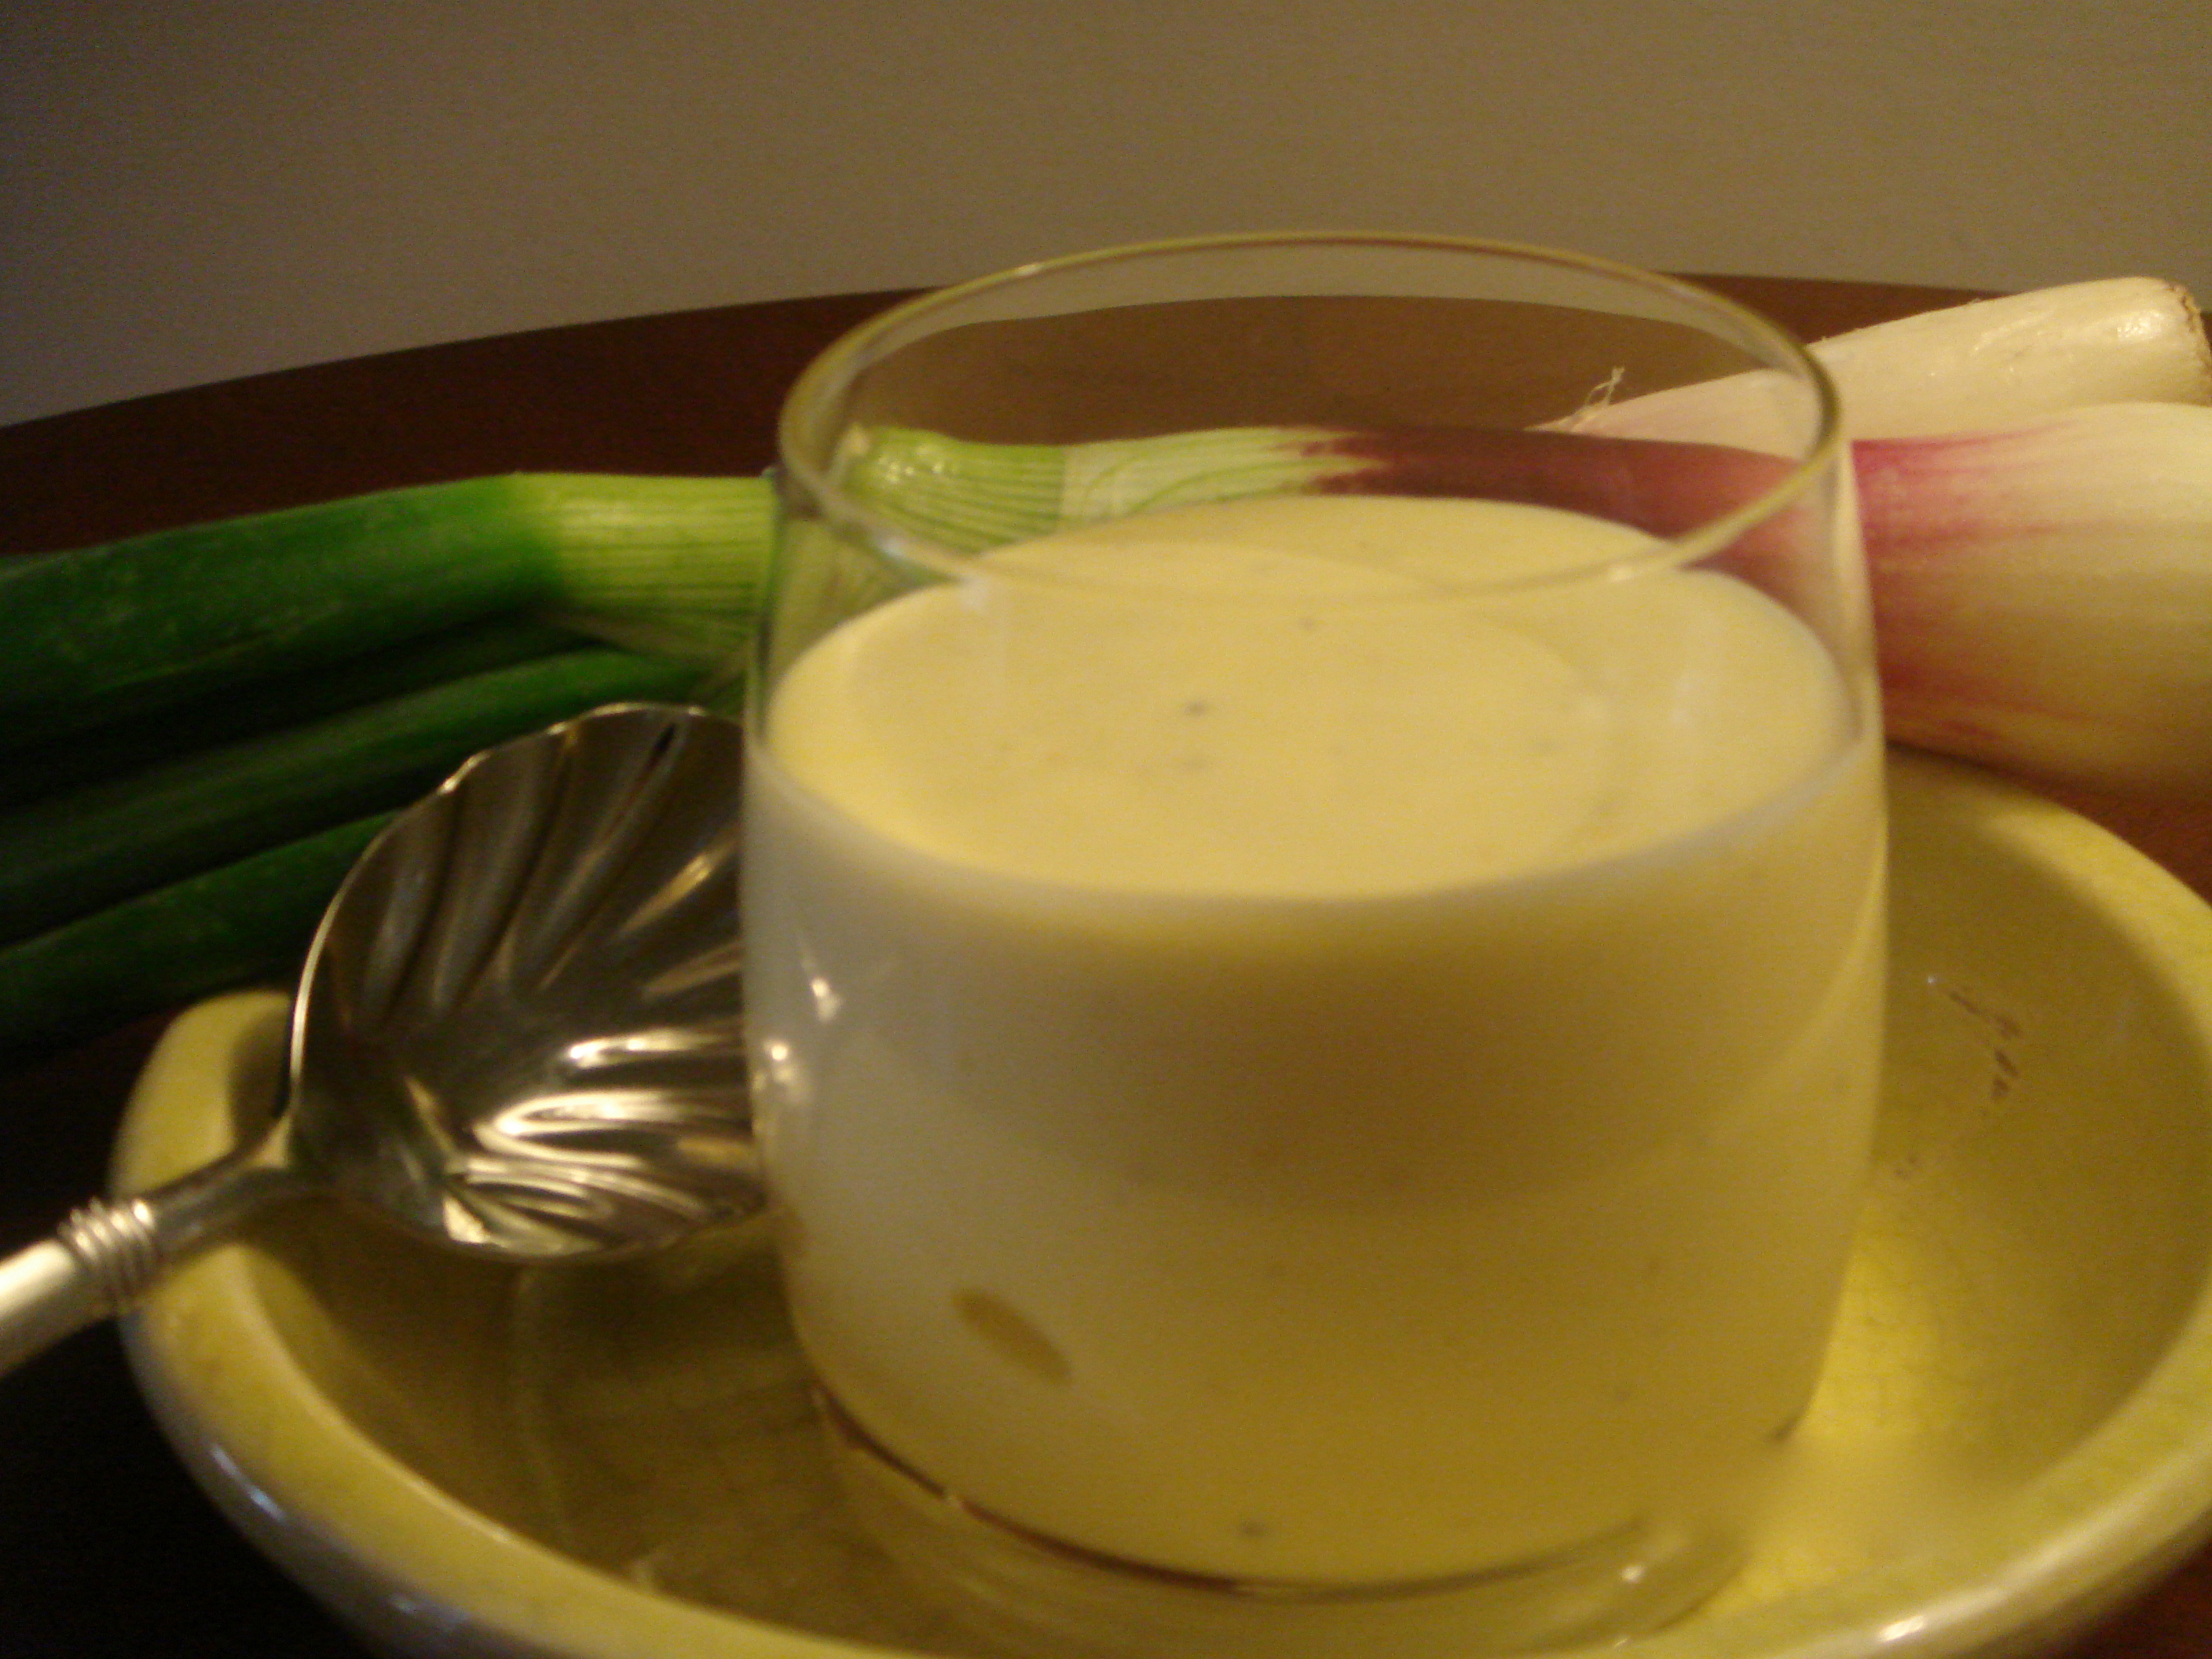
This paella is pretty simple, I chose to use chicken thighs and sausage and no seafood, it’s easy to make and isn’t as finicky as paella that contains different types of seafood. I love to drizzle it with aioli, now aioli is traditionally made with raw garlic, oil and an acid. Because I am not a fan of raw garlic I roasted it, used both olive and vegetable oil and added saffron building on the flavors in the paella.
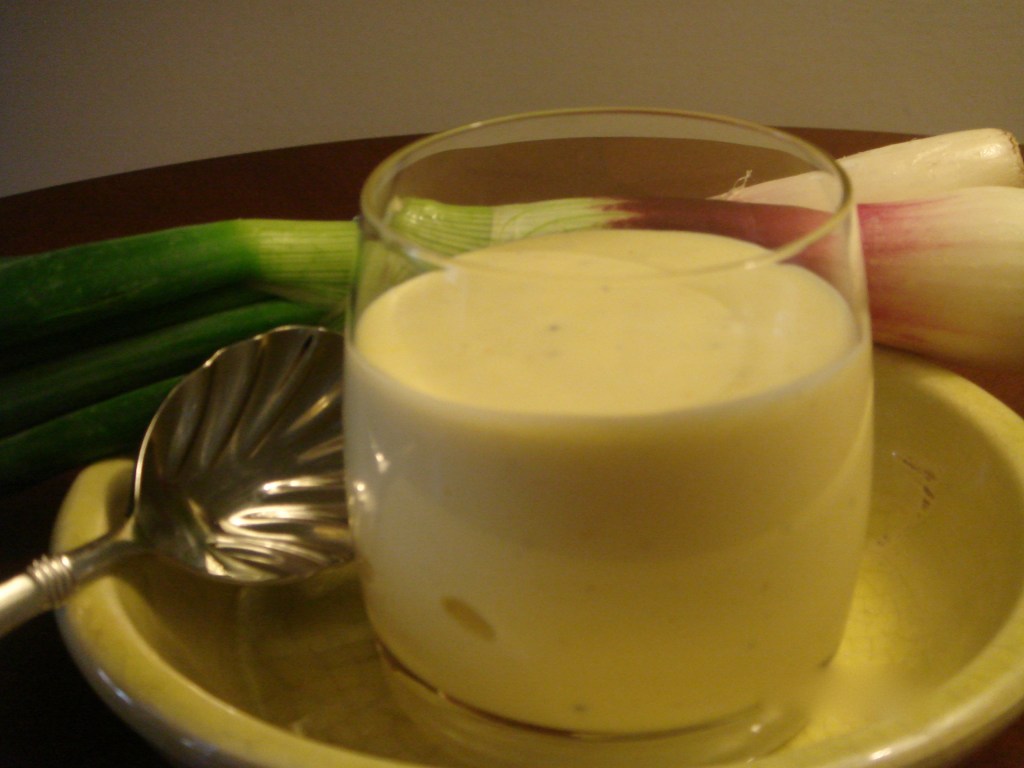
Roasted garlic, saffron,lemon aioli
The Aioli:
- 3-4 large cloves of garlic (3 if you want it subtle and 4 for stronger garlic flavor)
- 1/2 teaspoon Sea Salt
- 2 Egg yolks
- 1/4 cup Freshly squeezed lemon juice
- 1 teaspoon Lemon Zest
- Freshly ground white or black pepper
- 1/2 cup Vegetable Oil (Canola works well)minus 2 tbs
- 1/4 cup + 2 tbs olive oil.
- A generous pinch of saffron
- Preheat your oven to 350 degrees, while oven is heating peel 4 large cloves of garlic place on aluminum foil and drizzle with olive oil and make a packet. Place on sheet pan and bake for 15 minutes or until garlic is soft.
- Let garlic cool, while it’s cooling squeeze and zest the lemons. Add the generous pinch of saffron to the lemon juice and let sit for approx. 10-15 minutes the lemon juice will turn a lovely vibrant yellow.
- In your blender place the garlic cloves,egg yolks, lemon juice w/saffron, lemon zest, salt and pepper. Blend until garlic is completely incorporated it doesn’t take long as the garlic is soft.
- With blender running, slowly add the oil, the mixture will become thick. Adjust seasoning if you desire. Refrigerate while you make the Paella. This can be made in advance it keeps for 2-3 days in refrigerator.
Paella with saffron rice:
- 3 cups long grain white rice
- 6 cups chicken stock to cook the rice heated.
- 1 small sweet onion chopped
- 2 tablespoons Butter
- 2 tablespoons Olive Oil + plus more for chicken and tomatoes
- 6 chicken thighs (bone in and skin on)
- 1/2 pound Italian sausage (sweet or hot)
- 1 cup frozen peas
- 1/14 cup chicken stock for paella
- A generous pinch of saffron for the rice.
- 12 cherry or grape tomatoes
- First make the saffron rice. Heat the olive oil and butter in large saucepan, add onion and cook until soft and translucent, add the rice and stir to coat. Add the saffron to the heated stock and add to the rice, let it come to a boil, reduce heat, cover pan and let cook for approx. 15 minutes. Remove cover and fluff the rice with a fork. Set the rice aside.
- Season the chicken thighs with salt and pepper and place in baking pan, drizzle with olive oil and bake in 450 degree oven for 20 30 minutes. Don’t discard the pan juices, pour some onto the rice when you are putting the paella together.
- Reduce oven temp to 375 degree’s, lay a piece of parchment on baking sheet and place tomatoes on parchment, drizzle with olive oil, salt and pepper and bake until tomatoes become soft and start to caramelize. It takes approximately 15- 20 minutes. Remove from oven and set aside.
- Heat a fry pan(use the large pan you will use for the paella) coated with a little olive oil and brown the sausages. Remove from the pan and set aside covered. Don’t drain the oil (it won’t be much) or pan juices you will use this same pan to cook the paella). Slice sausage just before assembling the paella.
- If you have a paella pan thats wonderful but if you are like me and do not use a large (14″) fry pan with a lid. Using the same fry pan you used for the sausage, turn flame to medium/high. Add the saffron rice and peas mix to incorporate the peas with the rice, then start layering. Add the chicken thighs and sausage. Pour the 1 1/4 cups of chicken stock over the paella, spoon some of the pan juices from the chicken on top cover and cook for 15 minutes, approximately 3 minutes before its done add the tomatoes, put the lid back on and cook for the remaining time. Remove from heat. Garnish with chopped parsley and drizzle with the aioli.
Fantastico!!
Wine Pairing:
By Stefano Crosio-Clicks & Corks
In order to pair well with Suzanne’s delicious paella, the wines that we are going to pick need to have good acidity, a good extent of smoothness, quite intense nose-mouth flavors and decent structure, as in a medium to full bodied wine. The reason why these characteristics (and not others) are desirable to achieve a pleasant food-wine pairing is the result of application of the wine pairing criteria codified by the Italian Sommellier Association, which I will discuss in a future post on Flora’s Table.
Based on the above guidelines, I am going to recommend two wines that I have recently tasted at the Vinitaly/Slow Wine trade fair in New York: they both possess the desired characteristics to be good companions to Suzanne’s paella and they both have particularly impressed me when I tasted them. Clearly, these two wines are by no means the only ones that go well with Suzanne’s paella! However, on the one hand their descriptions, coupled with the general guidelines provided above, should point you in the right direction should you wish to consider different alternatives and, on the other hand, if you are going to give either or both of these wines a try, they might introduce some of you to two Italian wines that are maybe not so “mainstream” or widely known in the US market and that yet are excellent and showcase the treasure chest of indigenous grape varieties that constitute the backbone of centuries of Italy’s wine culture.
I will now leave you with my tasting notes for the two recommended wines, plus the certainty that you will enjoy Suzanne’s delicious paella dish and the hope you will get to drink some good wine with it! 🙂
Option 1: Soave Classico, from the Veneto region
Pieropan [http://www.pieropan.it/en/], Soave Classico “Calvarino” 2010 DOC: a very good Soave made of a blend of 70% Garganega and 30% Trebbiano di Soave grapes which literally hits you in the nose with an exhuberant minerality and aromas of apple, citrus and white flowers; in the mouth a lively acidity and distinct minerality are balanced by a good extent of smoothness – long finish. ABV: 12.5% VOL. If interested, here [http://www.pieropan.it/en/index.php?id=73] is the winery’s technical sheet for this wine. Retails in the US for about $28.
Grape varieties’ quick facts: Garganega is a grape variety that is indigenous to the Veneto region, where it has been cultivated since at least the XIII century. Wines made of Garganega grapes are generally acidic and spicy.For more information about the Trebbiano di Soave grape variety, please refer to the quick facts about Verdicchio in option 2 below.
Option 2: Verdicchio dei Castelli di Jesi, from the Marche region
Grape variety’s quick facts: Verdicchio grapes are also known as Verdicchio Bianco, a grape variety which, although it has been cultivated in the Marche region since the XVI century, was said to originate from Veneto. It is interesting to notice that DNA profiling has confirmed this theory, indicating that Verdicchio as a grape variety is identical to Trebbiano di Soave, a grape variety that is widely planted in Veneto and that we have just come across describing the wine in option 1. Verdicchio wines tend to have marked acidity and good structure.