Skip to content

Posts from the ‘Desserts’ Category

No Kid Hungry Bake Sale And Divine Fair Trade Chocolate

Divine Chocolate

Divine Chocolate

Lets face it, as food bloggers a good part of our day is spent thinking about food, I constantly think about what new recipe can I conjure up with the beautiful and seemingly unlimited supply of food available to us. How is it then in this vast country with so much food, how is it that children can go to bed with an empty stomach?  It’s a very sad thought and because of this  I am participating with other food bloggers in a Bake Sale this weekend to benefit “No Kid Hungry“, 100% of the proceeds go to this amazing charity. In America, one of the wealthiest countries in the world 1 in 5 children go to bed hungry, thats a staggering statistic and this has to end. Local food bloggers are all donating baked goods and we are selling them here in Brooklyn at “The Flea” in an effort to raise money and awareness.

Divine Chocolate is one of the sponsers, click on the link to find out more about this wonderful company. They are the only fair trade cocoa company owned by it’s farmers. What a wonderful concept, the farmers/owners share in the company profits. You might ask why the photo of that luscious chocolate, well the good people from Divine have generously donated some chocolate to a handfull of bloggers that we will use in making our goodies for the bake sale and one of the lucky bloggers is moi!!!  I am very excited, because not only is this chocolate delicious, and the baked goods are going to help a very worthy cause but I am so happy to use chocolate that comes from a company that is owned by the farmers themselves. It’s a win win as far as I am concerned.

Back to the bake sale, visit the website to find out more information and what you can do to help. You can make a donation, there are raffles with fantastic prizes and this is something you can feel good about. We all love our children and knowing that we are doing something to help is the best feeling in the world. If you don’t live in NYC, no problem, enter the raffle or make a donation. Think about it, ending childhood hunger in the USA is within our reach and a donation no matter how small brings us one step closer.

I will be posting photo’s of the items I am making and also of the bake sale itself this weekend. We will also be able to meet some of the farmers from Ghana who offer their support for this very worthy cause. More to come….

Preview of the baked goods!

Double Chocolate Espresso Cookies

Double Chocolate Espresso Cookies

Photo taken by Whole Foods

Photo taken by Whole Foods

tumblr_inline_mhj1l1FBgF1qz4rgp

DÉLICES FONDANTS AU NUTELLA // NUTELLA BITES

I want to introduce you to this wonderful blog, Weights And Measures, I fell in love with the beautiful photography and wonderful recipes. It is in French but if you need a translation Mrs. DeYarmond aka Sarah is more than happy to translate a recipe. I saw these wonderful Nutella Bites and felt I MUST share this with you. I know you will love her blog as much as I do, the recipes are impeccable and so delicious. I am a big fan of anything chocolate and when you throw Nutella in the mix I am in heaven.

Mrs. DeYarmond's avatar

DSC_0584Si vous n’aimez ni le chocolat, ni le Nutella, alors cet article ce blog n’est pas pour vous.
Cette recette de petits gâteaux au Nutella, je l’avais griffonné un jour rapidement et c’est dernièrement que j’ai voulu les réaliser {edit : j’ai pu retrouvé l’auteur initiale de cette recette, c’est la talentueuse Sandra Avital, vous trouverez son article ici}. En même temps, pas de grands risques à prendre (sauf peut être de devenir accros et d’en vouloir encore et encore !). J’ai donc trouvé la recette parfaite, sachant qu’à la maison, on est des grands amateurs de pâte à tartiner mangée à la cuillère !

DSC_0560Ces gâteaux au Nutella sont indécemment chocolatés ! Ils restent bien coulants à l’intérieur et gardent le goût intense de la pâte à tartiner. On a la sensation de croquer dans de la pâte à tartiner légèrement biscuitée. Un délice ! Les petits noisettes…

View original post 321 more words

An Easter Dessert- Yellow Cake,Lemon Cream,Whipped Cream Frosting

Lemon filled yellow cake with whipped cream frosting

Lemon filled yellow cake with whipped cream frosting

Growing up one of my favorite cakes was a simple yellow cake with lemon filling and whipped cream frosting. The tender cake filled with a bright, tangy lemon filling and topped with whipped cream is delicious and makes me think of Spring. This Easter I decided to make this cake and it brings back such wonderful memories of my Mother and childhood. My Mom used lemon pie filling, you know the kind that came in a box like pudding and had that yellow hard candy type thing, I guess it was lemon flavoring. I amped this cake up a bit by using the genius recipe on Food52 from Tartine bakery’s cookbook for lemon cream. This lemon cream or curd is wonderful, and is made in your blender. I love it, it’s so creamy, easy and delicious. The whipped cream frosting is from James McNair’s Cakes, what I love about it is that the whipped cream is stabilized using a cornstarch pudding. If you have ever made whipped cream frosting you know it can break down after a short time, this will not. This recipe was a revelation and I use it all the time. The cake recipe is from my Mom, it is the best yellow cake recipe IMHO, it took her quite some time and a lot of testing to finally come up with this recipe and it’s a keeper. The cake is like a cross between a regular yellow cake and chiffon, there is no butter used in the cake only vegetable oil and to make the cake light and airy you fold in the whipped egg whites, it’s so light and the crumb is just perfect. Thanks Mom for a great recipe. Happy Easter to all of you, I hope you have a wonderful day!

Lemon Cream

Lemon Cream

 Recipe for Tartine Bakery’s Lemon Cream

Makes about 2 1/2 cups (625 ml)

1/2 cup + 2 tbsp (5 oz/155 ml) lemon juice (Meyer or regular)

3 large eggs

1 large egg yolk

3/4 cup (6 oz/170 g) sugar

Pinch of salt

1 cup (8 oz/225 g) unsalted butter

Pour water to a depth of about 2 inches into a saucepan, place over medium heat, and bring to a simmer.

Combine the lemon juice, whole eggs, yolk, sugar, and salt in a stainless steel bowl that will rest securely in the rim of a saucepan over, not touching, the water. (Never let the egg yolks and sugar sit together for more than a moment without stirring; the sugar will cook the yolks and turn them granular.) Place the bowl over the saucepan and continue to whisk until the mixture becomes very thick and registers 180° F on a thermometer. This will take 10 to 12 minutes. If you don’t have or trust your thermometer, don’t worry. It should thicken to the point that your whisk leaves a trail through the curd. NOTE: I don’t use a thermometer, the lemon mixture will thicken and coat the back of the spoon, draw a line on the back of the spoon with your finger, the line will stay intact. It took about 11 minutes for mine to thicken properly.

Remove the bowl from over the water and let cool to 140° F, stirring from time to time to release the heat.

Meanwhile, cut butter into 1-tablespoon (15-ml) pieces. When the cream is ready, leave it in the bowl if using an immersion blender, or pour it into a countertop blender. With the blender running, add the butter 1 tablespoon at a time, blending after each addition until incorporated before adding the next piece. The cream will be pale yellow and opaque and quite thick.

You can use the cream immediately, or pour it into a storage container with a tight-fitting lid and refrigerate for up to 5 days. To use after refrigeration, if necessary, gently heat in a stainless steel bowl set over simmering water until it has softened, whisking constantly.

The Best Yellow Cake Ever!

photo courtesy Food52!

Tender Yellow Cake

  • 3 large eggs separated and at room temperature
  • 1 1/2 cup sugar divided
  • 2 1/4 cups cake flour
  • 3 teaspoons baking powder
  • 1 teaspoon salt
  • 1/3 cup + 1 tbs vegetable oil (I use canola)
  • 1 cup whole milk (1 or 2% work also)
  • 1 1/2 teaspoon pure vanilla extract

Pre-heat oven to 350 degrees

Line your pans with a parchment round, butter the bottom of the pan, lay the parchment then butter again on bottom and sides and then flour the pans.

Beat egg whites until frothy then add 1/2 cup of the sugar (reserving the rest) a tablespoon at a time until egg whites are stiff and glossy

Sift flour, remaining 1 cup sugar, baking powder and salt into large mixing bowl or bowl of a stand mixer. If using a stand mixer use the paddle attachment.I actually prefer to use my hand held mixer for this recipe. Add the oil, 1/2 cup of the milk and the vanilla. Beat for 1 minute on medium speed, mixture will be quite thick.

Add the egg yolks and remaining milk and beat on medium speed for 1 minute. Fold in the egg whites.

Pour the batter into the prepared pans dividing evenly, bake for 30-35 minutes. Cake will be golden brown. Be careful not to overbake start checking the cake at 25 minutes. Cake tester will come out clean.

Let cool in pans for 10 minutes then turn out onto cooling rack remove parchment and cool completely before frosting.

Whipped Cream Frosting:

From James Mcnair’s Cakes

  • 1/4 cup powdered sugar
  • 2 1/2 teaspoons cornstarch
  • 2 cups Heavy whipping cream Divided
  • 1 teaspoon Pure vanilla extract
  1. Place metal bowl and wire whisk beater or beaters in freezer to chill.
  2. In a small saucepan combine the powdered sugar and cornstarch whisk until mixed. Slowly whisk in 1/2 cup heavy cream whisk until smooth. Place on medium heat and stir constantly to prevent scorching at the bottom stir constantly until mixture thickens and almost comes to a boil. Remove from heat, transfer to a bowl and set aside stirring occasionally until it reaches room temperature.
  3. In the chilled bowl combine the remaining 1 1/2 cups of heavy cream and the vanilla beat with the chilled whisk of your stand mixer or your hand held mixer until the cream begins to hold shape. While still beating add the powdered sugar mixture a little at a time. Beat just until the mixture forms stiff peaks when the beater is raised and is spreadable, be careful not to over beat. Use immediately.

Blood Orange Simple Syrup

Blood Orange Simple Syrup

Blood Orange Simple Syrup

When I was at the store buying fruit and vegetables I saw some beautiful blood oranges, I love them, juiced, in baked goods or straight up. After using all but 2 I wondered what I could do with the last of my oranges. Simple syrup is something I always keep in the refrigerator, I use it for baking, drinks or spoon on fruit salad. It’s a staple item for me. The blood oranges made a beautiful and delicious syrup, a gorgeous color, and that unmistakable blood orange flavor. It’s so simple to make, taking only a few minutes. I’m saving some of it for the Semolina Olive Oil Cake, I think it would make a delicious soaking syrup. Mix it in sparkling water to make soda, you control the sweetness, it’s great in mixed drinks, Sangria, there are so many possibilities.

2 blood oranges juiced it yielded  a little over 1/3 cup

zest of both oranges

3/4 cup sugar

2/3 cup water

2 tbs honey

Place everything in a medium size saucepan, bring to a boil on high heat, when there is a rolling boil, reduce to medium/high and cook on a low boil uncovered for 10-15 minutes. The syrup will reduce a little, for a thicker syrup you would have to boil longer, 20-25 minutes.  Remove from heat, let cool and pour into a lidded jar. Refrigerate.

Pairing Desserts and Wine- Part 3 How And Why!

This is the final installment of the dessert and wine pairing series, If I had tried to put all of this in one post it would be as long as a novel, so I decided to break this up into a series of 3 posts. The first was an explanation of desserts wines and the science involved in pairing taken from Julians blog, Vino in love. Post #2 is the actual desserts and the wine recommendations,  and the third will tell you why the wines were chosen for each dish.

Below is an explanation as to why these particular wines were chosen for each dessert. Cheers!

When desserts meet wine

Only recently, I wrote about pairing wine with desserts. I have teamed up with Suzanne from apuginthekitchen to present to you awesome dessert and wine pairings. If you want to know more about the desserts that Suzanne and I picked to pair with wine then read this post on apuginthekitchen.

In the final part of this mutual collaboration, I want to talk about why I decided to pair these wines with Suzanne’s desserts.

Stuffed pears en papillote

Suzanne’s Stuffed pears en papillote pair very well with a Passito di Pantelleria. For example we could pair this dessert with the Ben Rye from Donnafugata. Why? The answers is quite simple. The pears are steamed in brown sugar and stuffed with walnuts. Sweet desserts like this one call for a wine that has a good amount of sweetness itself. It should not be overly sweet though. Furthermore, the Ben Rye has a bouquet that includes candid oranges, which pair with pears en papillote very well.

Trabucchi d’Illasi’s Recioto di Soave is a great match for a fig and goat cheese tart. The flavor of the figs and the aromas of the Recioto di Soave (elderflower, chamomile, white chocolate, aromatic herbs, etc.) pair well together. This Recioto is also not that sweet. We also need a wine with an ABV between around 10% and 13.5%. A Passito di Pantelleria would be too intense and also too strong. That would cause the wine to dominate the dessert, which we want to avoid. The Recioto di Soave however, is a very elegant wine. It has an ABV of 12.5% which is perfect for this dish.

Ceretto Asti Spumante
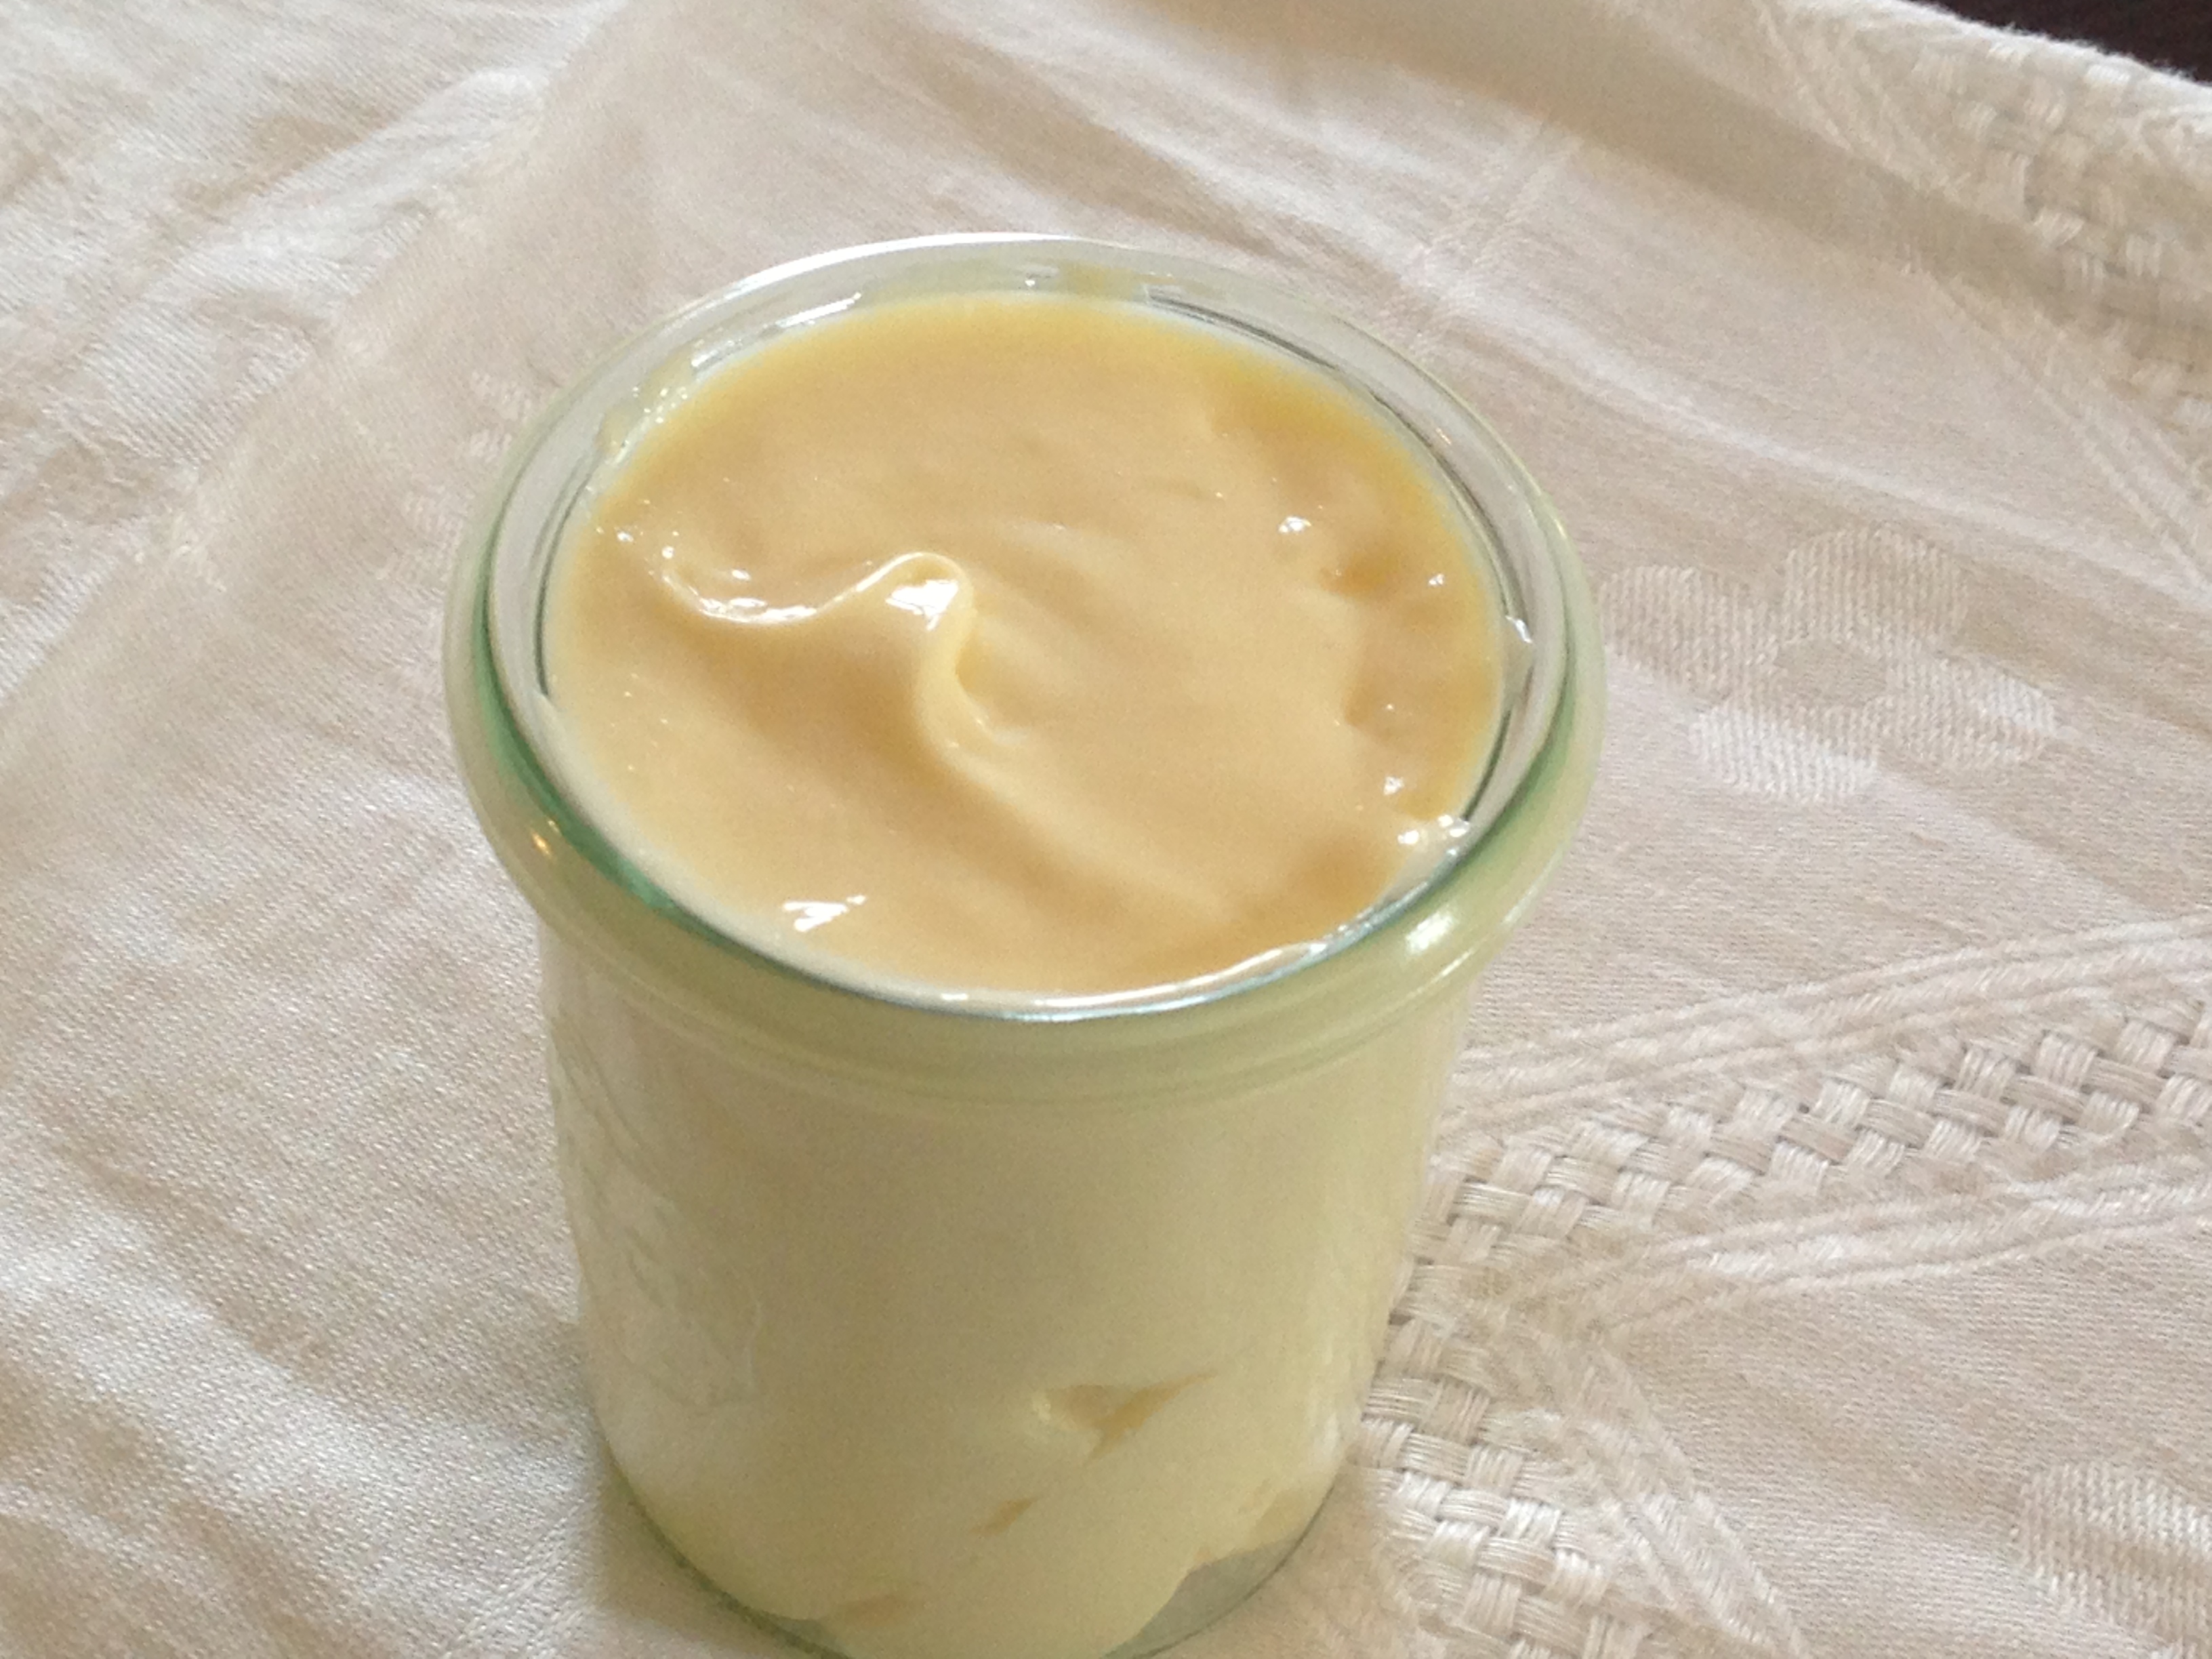
The buttermilk panna cotta called immediately for a Moscato d’Asti Spumante. Moscato d’Asti Spumante are sweet, fruity and usually have a very low ABV (often around 7%). These wines have a little bit of acidity as welll. And with pannacotta we want exactly that. The Moscato d’Asti Spumante from Cerotto has a good quality-price ratio and is the perfect match for Suzanne’s buttermilk panna cotta.

Pasticciotti filled with vanilla cream are a traditional dessert from Apulia, Italy. These delicious pastries also call for a sparkling wine and why not pair Apulian food with Apulian wine? Sometimes it is best to go with food and wine from the same region. Therefore, I decided to pair Suzanne’s Pasticciotti (you have to try them! They are so tasty!) with a Moscato di Trani Spumante. Pasticciotti are dry and pretty sweet. One of my favorite Moscato di Trani Spumante is produced by Azienda Agricola Franco di Filippo. Both of their Moscato di Trani Spumante will work excellent with Pasticciotti. These “Champagne-like” sparkling wines (“Champagne-like” because they are manufactured after the Classic-Method process) have a long-lasting perlage, an intense nose and a great palate. They tend to have less acidity then Moscato d’Asti Spumante. However, Moscato d’Asti Spumante are usually produced after with Martinotti-Method and not with the Classic-Method.

Recioto della Valpolicella - Trabucchi d'Illasi

Trabucchi d’Illasi does not only make a stunning Recioto di Soave but also an even better Recioto della Valpolicella. Recioto della Valpolicella is produced similar to Amarone. Grapes get sun-dried for around 40 days on straw-mats where they lose around 80% of their weight. This gives Trabucchi’s Recioto della Valpolicella a rich nose and an intense palate. The nose is incredible with a lots of different aromas. The finish is persistently long. I have baked Suzanne’s semolina olive oil myself and served it with Trabucchi’s Recioto della Valpolicella. A good match which I highly recommend.

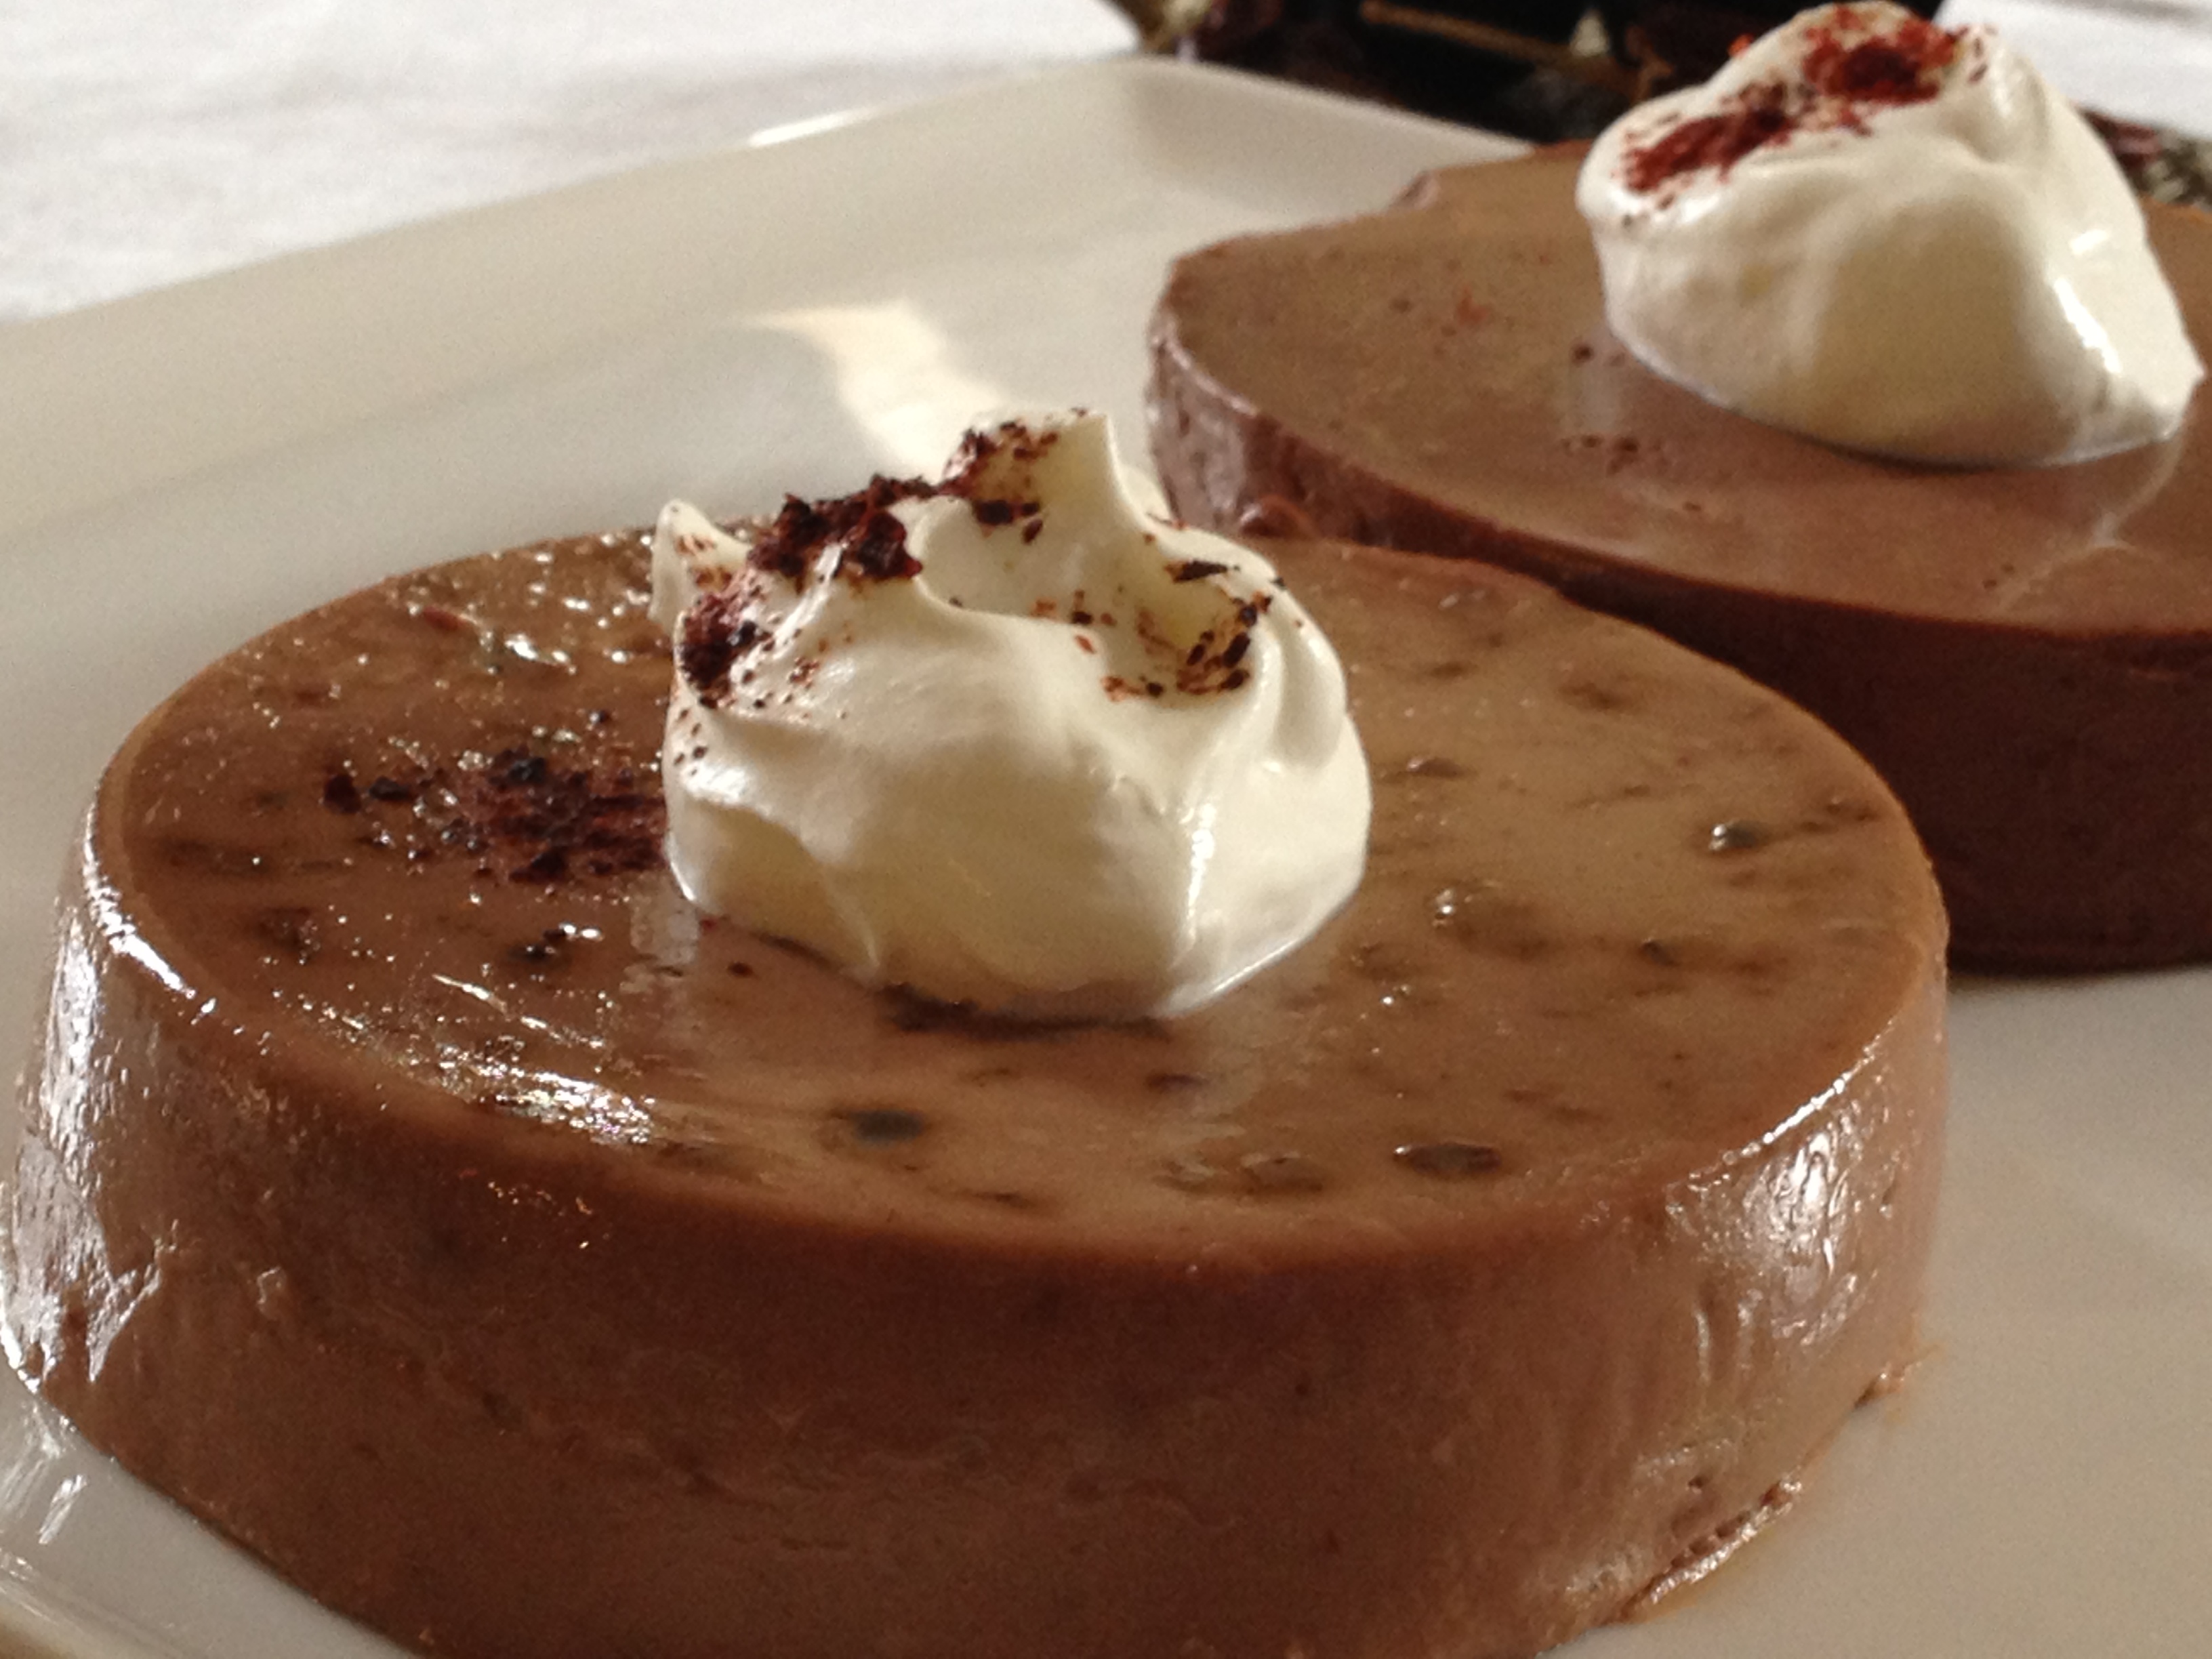
Last but not least I paired the spicy chocolate panna cotta with aCognac. I am of the opinion that chocolate desserts like chocolate panna cotta or chocolate cake do not pair well with wine. A Portuguese Port wine would have worked as well but with these type of desserts your best bet are spirits like Brandy and Cognac – in fact Cognac is a type of Brandy from France. If matching chocolate desserts with alcohol then you have to go with strong spirits. Of course, we could also serve this delicious dessert with an espresso which would be the “Italian way”.

Photo Credits: Stuffed pears en papillote by Suzanne. All rights reserved
Ceretto Asti Spumante by Ceretto 
Recioto della Valpolicella – Trabucchi d’Illasi 
by Julian Rossello. All rights reserved.

This brings our dessert and wine pairing series to an end. I hope you have enjoyed it. Let me know what you think about these pairings. With what do you pair your favorite dessert usually with?


Pairing Wines With Dessert Part 2

When Julian from Vino In Love  and I first started talking about dessert wines and pairing wines with desserts I was so excited and thrilled that he agreed to collaborate with me on this. I sent him a list of desserts that I posted here on my blog and asked him to pair wines or spirits with the desserts. Here is the list and I can’t wait to try each of these. I am learning a lot from the wine experts that I am now following and I look forward to each of their posts. All of the desserts below are featured on my blog, to get the recipes just click on desserts on the category cloud. I didn’t include the recipes on this post because this is about the wine that you would eat with the dessert. You can pair the wine below the photo with a similar dessert without using the exact recipe. To locate these wines you can use this handy dandy tool http://www.wine-searcher.com/ or do like I do, contact your local wine merchant and see if they have them, if not, hopefully your favorite wine shoppe is as wonderful as mine and they can locate these wines for you. Below is the photo of the dessert and Julian’s excellent recommendations. Thank you so much Julian for helping me with this it was so much fun and a real learning experience for me and I hope for all those that follow my blog. Thank you!

Baked Pears

Baked Pears

Stuffed pears en papillote + Donna Fugata – Passito di Pantelleria (intense white sweet wine from Sicily) More info on Donna Fugata: http://www.donnafugata.it/pagine/Homepage.aspx

Mosto Cotto Fig And Goat Cheese Tart

Mosto Cotto Fig And Goat Cheese Tart

Fig and goat cheese tart + Trabucchi d’Illasi – Recioto della Valpolicella (red sweet wine from Veneto. Produced like Amarone but tastes even better.) More information: http://vinoinlove.com/2006-trabucchi-dillasi-amarone-della-valpolicella-doc/

Buttermilk Panna Cotta

Buttermilk Panna Cotta

Buttermilk panna cotta with mosto cotto Champagne grape syrup  + Ceretto – Moscato d’Asti (light, sweet sparkling wine from Piedmont. More information on Ceretto: http://www.ceretto.com/

Pasto Ciotti

Pasti Ciotti

Pasticciotti filled with vanilla cream + Moscato di Trani or with a Passito di Trani (Sweet (sparkling) wine from Apulia; the same region where Pasticciotti are from). Here is a link for information on the wine: http://www.wine-searcher.com/regions-moscato+di+trani

Semolina Olive Oil Cake

Semolina Olive Oil Cake

Semolina olive oil cake +  Trabucchi d’Illasi – Recioto di Soave (white sweet wine from the Veneto) Here is more information on this wine from Julians site: http://vinoinlove.com/2006-trabucchi-dillasi-recioto-di-soave-recioto-di-soave-docg/

Fire On Ice Light and Dark Chocolate Panna Cotta

Fire On Ice Light and Dark Chocolate Panna Cotta

Spicy chocolate panna cotta + Cognac (Brandy from France) NOTE from Suzanne: I am so glad that Julian paired this with cognac, I have been doing something right. I like to serve cognac with this type of dessert, I have Pierre Ferrand Cognac (It’s wonderful with this).

Alice Medrich Cocoa Brownies- Food52 Genius Recipe

Brownies

Brownies

I talk about Food52 a lot, it’s a site I love, am active on and have met some really great people through. I previously posted the genius recipe for caramelized white chocolate, I really love that recipe. Today, Kristin Miglore one of the editors from Food52 posted a recipe for Cocoa Brownies by the great Alice Medrich. I immediately set out to make these brownies, you see I have been wanting to find a brownie recipe for quite a while that just uses cocoa powder, well here it is, and I am very excited.

The recipe is simple to make and yields a moist, rich brownie, I thought that a glaze would be nice, I  didn’t want a thick icing, just a hint is all thats needed, so I mixed some Kahlua with butter and confectioners sugar, chocolate and coffee are a very happy match in my opinion, Well these brownies are tremendous and if you are a fan of chocolate and brownies you will love this recipe and I wanted to share this you. I am including the headnote with the recipe. Enjoy!!

This recipe is one part of a master brownie recipe Medrich designed to use whatever chocolate you have in the house — but the best version happens to be the one that only requires cocoa powder. By taking out the chocolate, with its inevitable fat and almost-inevitable sugar, Medrich was able to control and fine-tune the proportions of both. When she added back in the fat (via butter), the middles stayed softer. When she added back in granulated sugar, the crusts were shinier and more candy-like. Any cocoa will work, but natural (not Dutch process) will taste more richly of chocolate. Recipe adapted slightly from <strong><a title=”Amazon: Bittersweet” href=”http://www.amazon.com/Bittersweet-Recipes-Tales-Life-Chocolate/dp/1579651607/?tag=food52-20“>Bittersweet</a></strong> (Artisan, 2003)

Makes 16 large or 25 smaller brownies

  • 10 tablespoons (1 1/4 sticks) unsalted butter
  • 1 1/4 cup sugar
  • 3/4 cups plus 2 tablespoons unsweetened cocoa powder (natural or Dutch-process)
  • 1/4 teaspoon salt
  • 1/2 teaspoon pure vanilla extract
  • 2 cold large eggs
  • 1/2 cup all-purpose flour (unsifted, measured by stirring briefly, spooning into the measuring cup until it’s heaped above the rim, then leveling it with a straight-edged knife or spatula — it should weigh nearly 5 ounces)
  • 2/3 cups walnut or pecan pieces (optional)
  1. Position a rack in the lower third of the oven and preheat the oven to 325°F. Line the bottom and sides of an 8-inch square baking pan with parchment paper or foil, leaving an overhang on two opposite sides.
  2. Combine the butter, sugar, cocoa, and salt in a medium heatproof bowl and set the bowl in a wide skillet of barely simmering water. Stir from time to time until the butter is melted and the mixture is smooth and hot enough that you want to remove your finger fairly quickly after dipping it in to test. Remove the bowl from the skillet and set aside briefly until the mixture is only warm, not hot.
  3. Stir in the vanilla with a wooden spoon. Add the eggs one at a time, stirring vigorously after each one. When the batter looks thick, shiny, and well blended, add the flour and stir until you cannot see it any longer, then beat vigorously for 40 strokes with the wooden spoon or a rubber spatula. Stir in the nuts, if using. Spread evenly in the lined pan.
  4. Bake until a toothpick plunged into the center emerges slightly moist with batter, 20 to 25 minutes. Let cool completely on a rack.
  5. Lift up the ends of the parchment or foil liner, and transfer the brownies to a cutting board. Cut into 16 or 25 squares.

Glaze:

1 tbs softened unsalted butter

1/2 cup confectioners sugar

1 tbs Kahlua

Mix the butter and sugar together, add the kahlua and mix to combine, spread on cooled brownies. You can add a little more Kahlua if you like, I did, just watch that the glaze doesn’t get too thin. You can play around with it, add a little less of one ingredient and more of another. It’s fun to play!

Cupcake Therapy

Cupcakes

Cupcakes

I see so many beautiful cakes and cupcakes I decided I want to start honing my piping skills, I have never been very good at this and want to do better. I will experiment using different tips and techniques. These cupcakes are pretty basic, I used my recipe for white cake and Hershey’s cooked frosting (because it was easy). I love making swiss meringue buttercream frosting but the egg whites and all that butter on a practice run are not really practical. I have a long way to go before my piping skills look effortless. I have Carpal Tunnel Syndrome and had surgery 2 years ago, my right hand is still weak and I still have nerve damage so this is difficult but good therapy.

Makes 24 regular size cupcakes or 12 jumbo
  • 4 large egg whites at room temperature (1/2 cup egg whites)
  • 1 1/2 cup sugar divided
  • 2 1/4 cups cake flour
  • 3 teaspoons  baking powder
  • 1 teaspoon  salt
  • 1/3 cup  + 1 tbs vegetable oil
  • 1 cup whole milk at room temperature + 1 tbs heavy cream
  • 1 1/2 teaspoon pure vanilla extract

Pre-Heat oven to 350 degrees. Place cupcake liners in the cupcake tins

In stand mixer fitted with whisk attachment beat egg whites until frothy, add  1/2 cup sugar, 1 tbs at a time beating after each addition. Continue beating until egg whites are thick and glossy. They should be stiff enough that when the beater or whisk is lifted they stay on the beater and don’t drop off.

In large mixing bowl sift flour, remaining 1 cup sugar and salt. Add the vegetable oil, milk,cream,and vanilla, beat with hand mixer on medium high speed for 2 minutes. Gently fold in the egg whites.

Pour into prepared pans and bake for 15=20 minutes or until lightly browned and cake tester comes out clean. Let cool in pan for 10 minutes and invert onto cooling rack. Cool completely before frosting.

Frosting:

Recipe from Hershey’s

1 stick (4 oz) butter (I used salted)

2/3 cup natural cocoa (I used Hershey’s)

3 cups powdered sugar

1/3 cup milk (divided)

1 tsp vanilla extract

1 tsp orange zest (optional)

Melt butter in saucepan, add the cocoa and powdered sugar and optional orange zest, mix with hand held mixer, add half the milk and vanilla and continue mixing until the frosting is smooth add the rest of the milk if you feel the frosting is too thick. If you are going to pipe the frosting you will need to cool the frosting first, I put in the refrigerator for 1 hour.

Stuffed Pears en Papillote

Baked Pears

Baked Pears

I made this over a year ago and posted on Food52, it’s a light and delicious dessert and thought it was a good idea to re-visit and post here. Baked pears remind me of the fall and winter.  For this dish I used forelle pears, they are very small and you will need 2 pears per serving I stuffed them with walnuts that I toasted with butter, cinnamon and brown sugar and added dried cranberries, then I slathered them with softened butter and rolled in turbinado sugar. I wanted to try a different method to bake them and I decided to try baking in parchment. The result is a tender pear steamed in its own juices its sweet and buttery. Delicious on its own or served with some ice cream, whipped cream,mascarpone, soft cheese or creme anglaise. You can use the pear of your choice for this recipe.

Serves 4

The filling:

  • 1/4-1/2 cup walnuts (depending on the size of the pears)
  • 1/4-1/2 cup dried cranberries (depending on the size of the pears)
  • 1-2 tablespoon salted butter melted
  • 1 tablespoon brown sugar packed
  • 1/4 teaspoon cinnamon
  1. Pre-heat oven to 350 degrees. Line a small baking sheet with parchment. Melt your butter. In bowl add the walnuts and pour melted butter on the nuts toss to coat, Add the brown sugar and cinnamon toss again to make sure the brown sugar and cinnamon coat each walnut.
  2. Pour onto baking sheet and spread out. Bake for 5-8 minutes careful not to burn the nuts. Remove from oven and let cool. When they are cooled give the nuts a rough chop and add the cranberries, toss to combine and set aside.

The Pears and baking:

  • 8 forelle pears cored and peeled
  • 3 tablespoons butter softened (use more or less as needed)
  • 1/4-1/2 cup turbinado sugar(start with 1/4 cup add more if you need it)
  • parchment paper and butchers twine
  • walnut and cranberry mixture
  1. Pre-heat oven to 375 degrees. Wash and core your pears from the bottom leave the stem intact. Peel the pear. Stuff each with the walnut and cranberries. Rub each pear generously with the softened butter, roll the pear in the turbinado sugar.
  2. Tear off 8 generously sized pieces of parchment, place the pear in the middle and gather up around the stem and tie off with butchers twine if there is too much on top trim with scissors, Place on baking sheet and bake for 20-25 minutes. If you use larger pears the baking time will increase to 35-40 minutes approximately. Enjoy alone or with ice cream,whipped cream or cheese.

DSC02121

Happy Valentines Day- Caramelized White Chocolate Ice Cream, Chocolate Madeleines And Chocolate Caramel Sauce

Valentines Day

Valentines Day

Happy Valentines Day everyone, I felt I must make something chocolate for today, but didn’t want anything too heavy. This has 3 components, a chocolate madeleine, caramelized white chocolate ice cream and a chocolate caramel sauce. I built this around the caramelized white chocolate that I made, at first I was going to do a mousse but decided on ice cream, after searching the internet I found David Lebovitz recipe and saw that he took a chocolate course that Valhrona offered and made this very same thing. I am therefore crediting the great Mr, Lebovitz for the ice cream recipe. The chocolate caramel sauce is my own creation and is amazing, I sort of winged it having only made caramel sauce for the first time a few weeks ago.  I used the same recipe and simply added dark chocolate to the cream, it worked out perfectly.  I hope everyone has a wonderful day!

Madeleines

Madeleines

Chocolate Madeleines:

A recipe by Gale Gand

Makes 2 dozen

  • 1/2 cup, plus 4 tablespoons unsalted butter softened, for buttering madeleine molds
  • 3 large eggs
  • 1/2 cup granulated sugar
  • 2 tablespoons packed dark-brown sugar
  • 1 cup cake flour (not self-rising)
  • 1/4 cup cocoa powder, preferably Dutch-processed
  • 1 1/2 teaspoons baking powder
  • 1/8 teaspoon salt
  • 1 tsp vanilla extract
  1. Preheat oven to 325 degrees. Brush madeleine pans well with 4 tablespoons softened butter; refrigerate 5 minutes.
  2. In a small heavy-bottomed saucepan, melt remaining 1/2 cup butter over medium heat. Continue to cook until butter turns golden brown, being careful not to let the butter burn. Remove from heat and strain through a fine mesh sieve into a small bowl; set aside.
  3. In the bowl of an electric mixer fitted with the whisk attachment, whip eggs with granulated and brown sugars until light and thickened, 3 to 5 minutes. Add flour, cocoa powder, baking powder, and salt, and stir on low speed until combined. Add vanilla and reserved browned butter; mix just until blended.
  4. Insert a 1/2-inch plain tip into a pastry bag and fill with batter. Pipe mounds of batter into prepared pans until each mold is full, mounding batter in the center of the molds but not filling to the edge. Alternatively, you can use a teaspoon to fill the molds with batter (which is what I did). Bake until madeleines are firm and a little mound is puffed up in the middle, 10 to 12 minutes. Madeleines are best eaten the same day they are baked.

Chocolate Caramel Sauce:

1 cup granulated sugar

6 tbs salted butter (yes salted) cut into tbs size pieces

2 oz bittersweet chocolate chopped (I used scharffen berger 62%)

1/2 cup heavy cream

1 tsp vanilla extract

Put the heavy cream in a glass measuring cup and microwave on high for 45 seconds, add chocolate and microwave another 30 seconds Stir until its smooth, set aside so that it will cool before adding to the caramel.

In large saucepan add the sugar, turn heat to med/high and let sit until it starts to liquify. Start stirring with a heat proof spatula, the sugar will crystalize but thats alright keep stirring until its all liquid. Stop stirring and let it cook until it turns amber in color, now add the butter, stir to combine. Remove from heat and add the chocolate cream. Stir until its incorporated in the caramel. Store in container at room temperature until ready to use. Note: If you make this ahead of time, simply place the bottle or jar in hot water to warm the caramel so it’s pourable.

Ice Cream

Ice Cream

Caramelized White Chocolate Ice Cream:

A Recipe by David Lebovitz

Makes about 1 quart (1l)

Make sure the caramelized white chocolate is warm when you mix it with the cream. You can reheat it in a bowl set over a pan of simmering water, or in a microwave on low power, stirring until smooth.

8 ounces (240g) caramelized white chocolate

1 cup (250ml) heavy cream

2 cups (500ml) whole milk

1/2 cup (100g) sugar

1/8 teaspoon sea salt

5 large egg yolks

1. Mix the warm caramelized white chocolate in a large bowl with the heavy cream, and set a mesh strainer over the top.

2. In a medium-sized saucepan, heat the milk, sugar, and salt.

3. Whisk together the egg yolks in a small bowl and gradually whisk in half of the warm milk, then scrape the warmed yolks back into the saucepan.

4. Cook over moderate heat, stirring constantly with a heatproof utensil, until the mixture thickens and coats the utensil.

5. Immediately pour the custard through the strainer into the white chocolate mixture and stir until smooth. Put the bowl in an ice bath, and stir until cool.

6. Chill thoroughly in the refrigerator, then freeze in your ice cream maker according to the manufacturer’s instructions.

This is the best ice cream I think I have ever had, it’s so creamy and the perfect consistency, thank you Mr, Lebovitz for a wonderful recipe.

Note: In step one I deviated slightly, I heated the cream in the microwave to warm it for 30 seconds, I then added the chocolate and put it back in the microwave for another 20 seconds. It melted the chocolate and made a ganache. It was easier to combine with the custard when it was already melted.

Dessert is served

Dessert is served

img_a2632312aa1