Skip to content

Posts from the ‘Desserts’ Category

Mini Chocolate Sponge Cakes With Buttercream Frosting

This is a simple chocolate sponge cake, the one I have always and will always use because it never fails, NEVER. So easy to make and the cake is tender and soft but still maintains the sponge like quality that, well makes it sponge cake. It’s made on a half sheet pan and is the recipe I used for my Brooklyn Blackout Semifreddo cake that was posted on Food52 and also featured in their cookbook “Ice cream and Friends”. For this little dessert I cut out small ( 3.5 inch) round layers and filled with the super simple French Buttercream that I used in the Dacquoise last year. I layered 3 rounds per mini cake and the sheet cake will give you 4 mini three layer mini cakes and don’t throw out the scraps you can freeze them and make something with them.

Cake

  • 1/4 cup milk
  • 2 tablespoons unsalted butter
  • 8 large eggs at room temperature
  • 2 cups sugar
  • 3/4 cups flour
  • 1/2 cup unsweetened cocoa powder
  • 1 teaspoon baking powder
  • 1 teaspoon salt
  • 1 teaspoon vanilla

Pre heat oven to 350 degrees. Place milk and butter in glass measuring cup and microwave for 45 seconds or until butter is melted. Using stand mixer with wire whisk or electric mixer whip the eggs and sugar on med/high for approximately 8 minutes or until the mixture is pale yellow, tripled in volume and thick, with the machine running slowly add the heated milk and butter. Sift the flour, cocoa, baking powder and salt. Fold into the egg mixture, there should be no lumps. Fold in the vanilla. Grease a 1/2 sheet pan, lay parchment sheet and grease the parchment, and sprinkle with sugar. Pour batter into the pan, spread so that it is evenly distributed and bake for 20-25 minutes. Allow to cool for a couple of minutes in the pan run a knife around the edges to loosen then invert onto wire rack, remove parchment and let cool completely.

Buttercream

Recipe (doubled) food52 – Merrill Stubbs

12 oz soft unsalted butter

4 egg yolks

1 1/3 cup confectioners or powdered sugar

2 tbs vanilla extract

Put all the ingredients in the bowl of the stand mixer fitted with the whisk attachment and beat until thick, silky and spreadable. Thats it, so easy!!

Chocolate Caramel Ganache

1/3 cup heavy cream

2.5 oz dark and milk chocolate chopped

2 tbs caramel sauce (I had some homemade caramel sauce in the refrigerator but you can use whatever is your favorite this is optional).

1-2 tbs clear karo syrup

Bring cream to scalding, add chocolate and caramel sauce and let sit for 5 minutes. Stir until smooth and glossy, stir in the karo syrup. Let cool to room temperature before pouring on cake.


Boston Cream Pie


It’s almost Valentines Day and in the days leading up to this day that celebrates love I am going to post a few recipes for desserts.  The first is Boston Cream Pie which is one of my all time favorite desserts, I love it, can’t resist it and I think that if I could pick only one dessert that I couldn’t live without this would be it. As a child this was the cake I always picked for my birthday, there was a bakery in my home town that made one of the best and my Mom after we moved from there developed a cake recipe just so she could make me this cake. I didn’t use the recipe for Tender Yellow Cake for this dessert however, I recently purchased a new cookbook “Bravetart” by Stella Parks and decided to try her recipe for the cake. Before putting the recipe on the blog I checked and it was published on the internet by Food and Wine. I have to say I love this cookbook, Stella has taken so many iconic American treats (it’s like a trip down memory lane) and developed them so that you can make them at home, the goodness of a Hostess Twinkie or cupcake or Little Debbie snack cake without all the additives, love it!

Boston Cream Pie is a cake not a pie and I am not sure why they call it pie not cake but whats in a name anyway, it’s wonderful. The original recipe uses sponge cake, a vanilla pudding or pastry cream filling and it is covered with a wonderful chocolate ganache although there seems to be debate as to whether or not the original actually had the chocolate glaze. Simple and unadorned, nothing intricate about it but the sum of all it’s parts makes an absolutely delicious dessert.

Instead of the pudding in the book I used my favorite pastry cream recipe which always holds up beautifully.  I sometimes have problems with corn starch based fillings, they often are not stiff enough and I didn’t want to take a chance having never used that recipe before. I have a lot of egg whites left over so an angel food cake will be in the works soon.

The cake is moist and a cross between a sponge and yellow cake. Next time I will mix some milk chocolate with the dark for the ganache because I like it just a little sweeter but it is still very good even with only dark.  I kept the cake in the refrigerator overnight so it was cold when I poured the ganache on and the chocolate kind of stopped in its tracks and I had to spread it, I recommend bringing the cake to room temperature before pouring the ganache so you get that smooth mirror like finish.

Boston Cream Pie

The Cake – Recipe by Stella Parks in “Bravetart”

Makes one 2 layer 8 inch cake

2 cups (8 oz) bleached cake flour

2 tsp baking powder

1 1/3 cup sugar

1/4 tsp kosher salt (I used a heaping 1/4 tsp)

1 tbs vanilla extract

3/4 cup egg yolks (from approximately 12 large eggs) It was 11 eggs for me depends on size

4 tbs unsalted butter, melted (I used salted butter)

1 cup milk at room temperature

Oven rack should be in the middle of the oven. Heat to 350 degree’s. Line 2 8″x3″ round cake pans with parchment and grease with cooking spray (like Pam). Sift flour into a medium bowl and whisk in baking powder.

Combine sugar, vanilla and egg yolks in the bowl of a stand mixer fitted with the whisk attachment. Mix on low to moisten and then increase the speed to medium high and whip until thick, light and doubled in volume, approximately 6 minutes. Reduce speed to medium low and drizzle in butter followed by the milk. Once added shut off the mixer, detach the bowl and gently incorporate the flour with a balloon whisk Fold the thin batter with a flexible spatula once or twice  from the bottom up. Divide between prepared cake pans.

Bake until cakes are lightly browned and firm approximately 20 minutes. Let cool in the pans for 10 minutes and then gently loosen and invert onto cooling racks. Place the pans over the cakes to trap steam and cool to room temperature. NOTE: my cakes took almost 30 minutes to get a light (golden brown)

Once cakes have cooled slice a little off the tops of each layer (so the pudding will soak into the cake. Place one layer on cake stand and spread a generous amount of the pudding and place the other layer on top. Cover and let sit at least 2 hours or overnight in the refrigerator.

Ganache

1/3 cup heavy cream

1/2 cup (2 1/2 ounces) dark chocolate roughly chopped

Bring cream to a simmer, remove from heat and add the chocolate. Let sit for 5 minutes and then whisk until thick and creamy. Refrigerate for about 25 minutes don’t let it cool completely the ganache must still be a bit warm. Pour over the cake, let set and refrigerate until ready to serve.

Cookies, Fruitcake and More Cookies

I am going to try to keep this short and sweet. I have been baking and packing gift boxes for the last week. My meals are take out or a quick sandwich. Have to say my new oven is amazing. It literally cuts baking time in half having an oven that actually works like it’s supposed to. My first attempt at convection baking wasn’t the best, not a disaster but not great, I read that it automatically converts the temperature and I didn’t realize you have to change the setting on the stove to convert the temp. Second round was perfect.

Got 3 gift boxes mailed, no small feat as I had to wait almost 2 hours in line at the post office. It’s been pretty busy around here, I volunteered as a foster for a rescue organization and they had an urgent need to foster a little chiweenie (chihuahua dachshund mix). He is about 7-8 yrs old and is named Gosha. He will stay with me until he finds a forever home much to the chagrin of Mr. Percy, he is not pleased and is moping around the house, won’t eat unless I hand feed him and is generally perturbed.

Christmas cards have been pouring in, for Percy, LOL! I have gotten 2 with over 30 cards for Percy from our friends on social media.

I found a great recipe for Chocolate thumbprint cookies, better than the recipe I have been using for the last few years. It’s from Martha Stewart and have to say it’s terrific. The cookies are soft and moist and I love adding the striped Hershey’s kiss in the center while the cookies are still warm.

chocolate thumbprint cookies

I’ve also made fruitcakes, chocolate chip cookies, rugelach and biscotti. This week I’m making Stollen, more cookies and more.

rugelach, chocolate, orange hazelnut

fruitcake

Chocolate Thumbprint Cookies

Recipe from Martha Stewart

Makes 90 small cookies

2 cups all purpose flour

1 cup plus 1 tbs dutch cocoa, unsweetened

2 tsp course salt

8 ounces (2 sticks) unsalted butter softened

1 1/3 cup sugar (plus more for rolling the cookies in)

2 large egg yolks

2 tbs heavy cream

2 tsp vanilla extract

Heat oven to 350 degree’s. Sift flour, cocoa powder and salt into a small bowl and set aside. Cream butter and sugar until fluffy. Reduce speed to medium and add egg yolks, cream and vanilla, beat until combined scraping sides when needed. Beat in flour mixture just until combined.

Scoop out approximately 2 tsp and roll into a ball, roll in sugar and place on parchment lined baking sheet. Use your thumb or the end of a wooden spoon to make an indent in each cookie. Bake for 5 minutes rotating the pan and then bake another 5 minutes (10 minutes total baking time).
Remove from oven and place a Hershey’s kiss in the center, let cool completely before packaging or storing.

Apple Cake With Brown Sugar Buttercream Frosting

Continuing my homage to the apple, the quintessential harbinger of Autumn I made an apple cake. I have been making this cake for many years and it never fails, I found it years ago while watching an episode of Martha Stewarts show on Food Network.  The cake is moist and rustic in texture, loaded with apples and warm autumn spices. Sometimes I use a cream cheese frosting but this time I made the frosting that is featured in the recipe on Martha Stewarts site. The frosting is gently sweet, buttery and has a lovely caramel flavor that comes from using brown sugar instead of granulated.

I really love this cake, it couldn’t be easier to make, no mixer required. The recipe calls for grated and diced apples but I like to use homemade applesauce, I make it in the oven, peel and quarter 4 apples, add a splash of apple cider, cover and bake for about 30 minutes until the apples are soft. Let them cool and mash with a fork. I prefer using applesauce rather than grating apples, the cake has some small pieces of apples and a balanced apple flavor. I think the buttercream is good but I prefer the cream cheese frosting,  it’s a bit sweeter but the tangy creaminess from the cream cheese goes so well with this cake. Just saying!!

I am bringing the cake to Fiesta Friday #196. This weeks co hosts are Antonia@Zoale.com and Jhuls@The Not So Creative Cook.

Cake

Recipe from Martha Stewart

2 cups flour

2 tsp baking soda

1/2 tsp baking powder

3/4 tsp salt

2 tsp cinnamon

1/2 tsp powdered ginger

1 stick (4 oz) unsalted butter melted

2 large eggs

2 cups packed light brown sugar

1 1/2 cup applesauce or 4 apples peeled- 2 grated and 2 diced)

Heat oven to 350 degree’s. Prepare 3 8 inch round baking pans by lining with parchment, butter or grease and dust with flour, set aside.

In medium bowl whisk together the flour, baking soda, baking powder, cinnamon, ginger and salt and set aside. In a large bowl whisk together the melted butter, brown sugar and eggs. Fold in the applesauce or apples. Add the flour mixture and mix with a spatula or wooden spoon just until combined. Divide equally into prepared baking pans and bake for 25-30 minutes until browned and toothpick comes out clean. Remove from oven and allow to cool in the pan for 10 minutes, run butter knife or offset spatula around the edges to loosen and turn out onto cooling racks. Let cool completely before frosting.

Brown Sugar Swiss Meringue Buttercream

Recipe from Martha Stewart

4 egg whites from large eggs

1 cup light brown sugar lightly packed

3 sticks or 12 oz of softened unsalted butter

Set pan with about 2 inches of water on low heat, place the egg whites and brown sugar in mixing bowl and set on top of the simmering water (bowl should not touch the water). Whisk until mixture is warm to the touch and sugar is completely melted. Place on stand mixer with whisk attachment and mix on medium speed until fluffy and completely cooled, approximately 15 minutes. Change to paddle attachment and add the soft butter 1 tbs at a time while the mixer is on med low speed. Once butter is incorporated continue to mix on medium speed for another 3-5 minutes. If it curdles it’s ok, keep mixing it will come together. Frost cake immediately.  I piled way too much frosting on top, don’t do like I do and make sure the frosting is evenly spread all over the cake. Thats what happens when you are in a hurry.

Apple Cider Doughnuts

Making the pumpkin spice doughnuts was fun and they turned out really well so I decided to try a recipe I found for apple cider doughnuts. One of the first stands visible at the farmers market, always front and center is also one of my favorites, apples, apple cider and doughnuts and it’s a favorite of mine and IMHO it epitomizes Fall. The recipe is from Bon Appetit and sounded really wonderful. The cake doughnuts contain homemade apple butter and apple cider syrup, at my last trip to the farmers market I bought a jar of apple butter which eliminated one step but I did make the cider syrup, it’s a bit of a slow process but fills your house with the most wonderful aroma of apples and cinnamon.  I love apples so much I decided to devote the next several blog posts to recipes using apples. This is the first in the apple installment and it’s a great way to kick off all things apples.

This is a really really good recipe, the doughnuts are the perfect texture and crumb, love how they get a bit craggy when frying, gives them character. The flavor is out of this world delicious. Highly recommend you give this a try if you want to make doughnuts. They are the perfect dunking donut if you know what I mean, it always makes me laugh thinking of the Seinfeld episode where they were all wondering if Joe DiMaggio dunks when they were in Dinky Donut, so funny.

I am bringing these bad boys to Fiesta Friday #195 this week, you must check out all the Halloween goodies, amazing. The co  hosts this week are  Monika @ Everyday Healthy Recipes and Sandhya @ Indfused

That was 3 cups of cider

Apple Cider Syrup

3 cups apple cider

2-3 cinnamon sticks

Boil on medium high heat in large wide pot (makes the process quicker). The cider will reduce to a thick syrup and the yield will be about 1/3 cup. It takes approximately 30 minutes. Make sure you watch it because it can burn and removing the burnt cider is a challenge, (burned my first batch).

Doughnuts

1/2 cup apple butter

1/3 cup apple cider syrup

1/2 cup buttermilk

2 tsp vanilla extract

1 tbs + 2 tsp baking powder

1 tsp kosher salt

1/4 tsp baking soda

1/4 tsp nutmeg

1 tbs + 1 tsp cinnamon divided

3 1/2 cup all purpose flour

6 tbs unsalted butter softened and at room temperature

1/4 cup packed light brown sugar

2 large eggs

1 1/4 cup granulated sugar (divided)

Vegetable oil for frying

Whisk together the apple butter, apple cider syrup, buttermilk, vanilla and set aside. Whisk flour, baking powder, baking soda, salt, nutmeg and 1 tsp cinnamon. Set aside. Using an electric mixer on medium high speed cream the butter, brown sugar, 1/4 cup granulated sugar until light and fluffy (takes about 4 minutes) Add the eggs one at a time beating between each addition. Reduce mixer to low and add the dry ingredients in 2 additions, alternating with the cider mixture. Make sure you start with the dry, add half the cider mixture, then the other half of dry ingredients and ending with cider mixture. The dough will be soft and sticky.

Line a baking sheet with parchment paper. Spread about 1/3 cup of flour on the sheet. Put the dough on the parchment and sprinkle with a little flour. With your hands gently pat the dough spreading it on the lined sheet pan, you want the dough to be about 1/2 inch thick. Cover with plastic wrap and refrigerate for 3 hours or longer.

When dough is sufficiently chilled, start heating your oil, pour about 3 inches of oil in a pot and heat to 350 degree’s using a deep fry thermometer. While oil is heating cut out your doughnuts using a 3 inch round biscuit cutter and to make the hole in the center a 1 or 1/2 inch. Place cut doughnuts on a floured piece of parchment and drop them carefully in the hot oil. Fry 2 or 3 at a time letting them get nicely browned on both sides. After the doughnuts are done fry the holes.

Mix 1 cup sugar and 1 tbs cinnamon in a bowl and roll the warm doughnuts in the sugar mixture and place on cooling rack.

love to dunk


All About Pumpkin, Soup And Doughnuts

Recently I ordered 2 cans of pumpkin from my online grocer, I simply added to my cart without looking at the size of the cans, thinking it is the usual small cans of pumpkin puree. What arrived were the big cans, a whole lotta pumpkin and once opened it has to be used. I don’t really like freezing it because it becomes watery. I made 3 mini loaves of pumpkin spice bread, some chickpea pumpkin soup and pumpkin spice donuts and there is still enough leftover for a few pumpkin spice latte’s.

The pumpkin loaves I can practically make with my eyes closed, I use my recipe for banana bread and adapt to pumpkin adding spices.  The soup was my own creation and turned out quite well and is super easy to make. Now Doughnuts are another thing entirely. I have only made doughnuts once I think,  they were less than stellar so I abandoned  making those delicious little fried cakes and opted to buy them (the best doughnuts EVER are in my neighborhood).  We had a brief (2 days) of cool weather, back to warmer temps for the rest of the week but the soup on a cool day was just perfect. I used what I had in the pantry and refrigerator, threw everything in my oval roaster and slow cooked for about 6 hours. I didn’t pre soak the chick peas, just threw them in with some vegetable broth, carrot, onion, celery and everything cooked up beautifully. At the end I pureed some of the chickpeas, added pumpkin, Sri Lankan curry powder and some creme fraiche. So easy really, and no recipe required. You can add whatever you like or have on hand. I think that next I will try making yeast doughnuts now that I have cake doughnuts down.

curried pumpkin chickpea soup

Curried Pumpkin Chickpea Soup

2 cups dried chick peas

1 onion quartered

2 stalks celery

1 large or 2 small carrot

8 cups vegetable broth (you can also use water or chicken broth)

1 cup pumpkin puree

1 tsp curry powder (I used Sri Lankan)

Optional 1/2 cup creme fraiche

salt and pepper to taste

Heat oven to 325 degree’s. Put everything in the pot, put it in the oven and let it cook slow and long. I cooked it for 6 hours. When done, scoop out about 2/3 of the chick peas and a little of the broth along with the celery and onion. Puree in the blender until smooth, add the pumpkin, curry powder and optional creme fraiche. Add back to the pot, cut the carrots into bite size pieces and cook on medium heat for about 15 minutes. Adjust seasoning and if you like at the end add some spinach. I had some that needed to be used and it was nice in the soup.

Pumpkin Spice Doughnuts

Makes 12 doughnuts and holes

Recipe from Good Housekeeping

2 tbs softened butter

1/2 cup sugar

2 tsp baking powder

1/2 tsp salt

1 tsp cinnamon

1/4 tsp baking soda

dash of ground nutmeg or about 1/8 tsp

1/2 cup pumpkin puree

1/3 cup buttermilk

1 egg

1 egg yolk

1/2 tsp vanilla

2 cups all purpose flour

vegetable oil for frying

Cream butter until fluffy, it’s only 2 tbs so it won’t be that fluffy. Add the sugar, baking powder, salt, cinnamon and nutmeg. Beat until combined scraping sides of the bowl occasionally. Beat in the pumpkin, buttermilk, egg and egg yolk and vanilla until combined. Using a wooden spoon stir in flour until well combined. Cover bowl and chill for at least 3 hours or over night.

Heat the oil to 365 degrees. On work surface dusted with flour roll out the dough to about 1/2 inch thick. Using doughnut cutter or biscuit cutter cut the doughnuts and place on parchment lined baking sheet. When oil is at the right temperature drop 2 or 3 doughnuts at a time and turn once browned making sure they are evenly brown and cooked through. It takes about 3 – 4 minutest per doughnut. When done place on rack lined with paper bag or paper towels. Prepare some sugar and cinnamon and roll each doughnut while still warm in the sugar mixture. Let cool and enjoy!


Basic Hummus And A Vegan Apple Tart

This recipe is from Ottolenghi’s cookbook “Jerusalem” it calls for dried chickpeas rather than canned. I always stayed away from recipes where you have to cook the beans/peas and rather opt for canned because it’s easy and I guess I am a bit lazy. Well, have to say there is a difference, a big difference in flavor and texture when you use freshly made chick peas. I love just about anything from any of the cookbooks by Ottolenghi or the team of Ottolenghi and Tamimi. The books are beautiful to look at, the ingredients they use are always fresh and the recipes are simple but creative and everything so far that I have made has been absolutely delicious. Like chocolate chip cookies there are thousands of recipes out there for hummus. It’s not rocket science and is made easily and quickly and has always been welcome as an appetizer or part of the main meal. It’s a wonderful recipe and if you are hesitant to use dried chickpeas, it takes a little more time and effort but the results are well worth the effort. The only change I made when making this recipe is that I use half the garlic indicated, I am not a big fan of raw garlic, the garlic is flavor is definitely there but is more subtle with 2 cloves, of course if your garlic cloves are very small use more.

I am bringing the hummus and tart to Fiesta Friday #191, this week, the co cohosts are Judi @ cookingwithauntjuju.com and Antonia@ Zoale.com thank you ladies for co hosting and as always a big thank you to Angie for putting this party together every week!

Basic Hummus

Serves 6 or more

1 1/4 cup dried chickpeas

1 tsp baking soda

6 1/2 cups water

1 cup plus 2 tbs light tahini

4 tbs lemon juice freshly squeezed

4 cloves garlic crushed (I used 2 cloves)

6 1/2 tbs ice cold water

The night before put the chickpeas in a large bowl and cover them with cold water at least twice their volume. Leave to soak overnight.

The next day, drain the chickpeas. Place a medium saucepan over high heat and add the chickpeas and baking soda, cook for about 3 minutes, stirring constantly. Add the water and bring to a boil. Cook, skimming off foam and any skins that float to the surface. The chickpeas will need to cook between 20-40 minutes, depending on the type and freshness, sometimes even longer. Once done, they should be very tender, breaking up easily when pressed between your thumb and finger, almost but not quite mushy.

Drain the chickpeas. You should have roughly 3 2/3 cups. Place the chickpeas in the food processor and process until you get a stiff paste. Then with the machine still running, add the tahini, lemon juice, garlic and 1 1/2 tsp salt. Finally, slowly drizzle in the ice water and allow it to process for 5 minutes until you get a very smooth and creamy paste.

Transfer to a serving bowl, cover with plastic wrap and let sit for 30 minutes before serving, you can also refrigerate until needed. Make sure to take it out of the refrigerator 30 minutes before serving. I drizzle the hummus with olive oil and sprinkle some sumac.

Delicious with fresh veggies and pita

I recently heard from friend I used to work with, it had been years since we have seen each other and I invited him over the other day to catch up, he is vegan and specifically requested pastry.  This tart is vegan,  has very little sugar, only about 2 tbs and is drizzled with apple cider cinnamon reduction. It couldn’t be simpler and it’s so beautiful. The pie crust is from the Crisco package and is one my Mother used for her pies, she didn’t even know her pie crust was vegan, I sliced the apples hasselback style, sprinkled with a little sugar, flour, cinnamon mixture, dotted a little earth balance and baked.

Simple, beautiful and delicious and it’s vegan

Flaky Pie Crust (Vegan)

Recipe on Crisco Shortening- makes single 9 inch pie crust

1 1/3 cup flour

1 tsp salt

1/2 cup vegetable shortening

6-8 tbs ice cold water

Whisk flour and salt together, add the shortening and with a pastry cutter combine until it resembles moist crumbs. Add water and stir with a fork. Gather together into a ball, wrap in plastic wrap and flatten into a disk and refrigerate for at least an hour. Roll the dough on floured work surface and line your tart pan. Refrigerate.

While dough is chilling, cut the apples in half, skin on, core and slice thinly keeping each half together, it’s easier to lift the sliced apples and place in pie shell. Heat oven to 400 degree’s. Mix 2 tbs sugar, 1 tbs flour, 1/4 tsp cinnamon in a small ramekin and set aside. Arrange the apples in the cold pie shell and sprinkle with the sugar, flour, cinnamon mixture. Dot with butter or vegan butter. Line a baking sheet with parchment and bake the tart until golden brown approximately 40-45 minutes.

Apple Cider Reduction

1 cup apple cider

1/2 tsp cinnamon

1 tbs sugar

Place everything in a non reactive heavy bottom saucepan and boil on medium high until it reduces to a syrup. Approximately 30-40 minutes.

Served with Vegan salted caramel ice cream.


Block Party, Judging At Community Garden, A Bowl Of Vegetables And A One Bowl Chocolate Cake

It has been an exhausting few weeks. It was crunch time as our annual block party was coming up quicker than I would have liked it to. Organizing is not my strong suite but as the block association president much of the planning and prep work falls on me and I have to step outside my comfort zone and try to be the party planner. There is always so much to do, not enough time to do it and invariably something goes wrong. I have had torrential rain and had to cancel because of it, this year it was sunny and hot (way too hot for me) almost 90 degree’s. Something I have planned on for a year was cancelled, the rock climbing wall that our brave policeman bring to events, the kids love it and it’s so much fun for all. Last year my reservation for the wall got lost when the Officer retired and we only got it for an hour, I reserved it this year, almost a year ahead and 2 days before the event the police contacted me with bad news, the rock wall had broken and needs to be repaired. The children were all disappointed but the block party went off almost without a hitch and everyone had a good time.

Vegetables from the community garden

I live across the street from a Community Garden and they asked me if I would be a judge for a food event at their annual Harvest Festival, I was more than happy to do so. We tasted fresh vegetables grown in the garden which were judged on beauty and taste. Other things we tried were homemade pickles and desserts made with apples from the tree in the garden. It was a lot of fun, everything was delicious and some of the other judges were a food stylist, food photographer and cookbook publisher.

The block party is something everyone looks forward to all year, our block along with people from the neighborhood come together to eat, drink, talk, we all love watching the children have fun in the bouncy castle and ride their bicycles and skateboards in the street without fear of traffic. I usually have a bake sale but have been so incredibly busy I only made cookies which sold out very quickly. We grilled hamburgers, hot dogs, veggie burgers, had pizza, drinks, music from a fantastic DJ and an amazing Ukelele group.

The day after I was completely exhausted and wanted a light simple meal. A bowl of roasted vegetables with cheesy cauliflower mash was exactly what I needed. I used an assortment of vegetables and mashed cauliflower with gruyere. Simple, healthful and delicious.  Had some green beans, zucchini, tomato and shallot drizzled with olive oil and roasted in the oven at 400 degree’s. Cauliflower mash is so easy, simply boil the cauliflower, let it dry in the oven on 200 for about 20 minutes then put in the food processor with some butter, sour cream and season with salt and pepper.  I added some grated gruyere and popped into the oven at 200 for a few minutes to heat and melt the cheese.

This super easy one bowl no measure chocolate cake is awesome. It’s a recipe on Food52. The fact that it’s quick and no measure immediately prompted me to give this recipe a try. The cake uses full fat plain Greek yogurt, I used Fage and you use the yogurt container as the means of measuring. Pretty cool right?

The cake will have cracks thats ok

Simple One Bowl Chocolate Cake

Recipe on food52

1  container (7 oz) plain Greek yogurt

1 container neutral flavored oil (I used canola)

2 large eggs

2 containers self rising flour

1 container unsweetened cocoa powder

1 container sugar

1 container warm water or coffee

Heat Oven to 350 degree’s. Prepare a 10 inch spring form pan by greasing or spraying the bottom, add a parchment round and then grease and flour the pan.

Place all of the ingredients in a bowl and mix on low until the flour is incorporated, then increase to medium high and beat for approximately 2 minutes. Scrape batter into prepared pan and bake for 35-40 minutes. Cake Tester should come out clean. Let cool in the pan, release the pan and remove the cake. Sprinkle with some powdered sugar and serve with whipped cream or ice cream.


London Fog Cake

I have been wanting to make a cake for a while now but lacked inspiration to try something a little different. There is a tendency to stick with the tried and true in both flavors and recipes, not that there is anything wrong with that but sometimes I feel the need to do something different. Since I got the tea from Adagio I have wanted to make another recipe using it that isn’t a cup of hot or iced tea. Yesterday an email appeared in my inbox from Pinterest and I saw this cake and immediately was struck by how utterly delicious it looked but then when I clicked on the link the frosting is flavors with Earl Grey Tea. The cake itself is pretty simple chocolate cake with a earl grey buttercream and then it’s drizzled with caramel. Sounds great right? I thought so too!! I decided to take it a step further and infuse the caramel with tea as well. The recipe is from The Cake Blog and it’s beautifully decorated and photographed. Decorating cakes is not my strong suite nor is photography but irregardless this cake sounds too good not to make. My recommendations are in bold print, I found the earl grey flavor overpowering and would recommend reducing the amount of tea used to infuse the butter. I love earl grey tea but feel that the buttercream needed to be a little more subtle in flavor.

This is my favorite chocolate cake, a recipe from Hershey’s which is on the can of unsweetened cocoa powder, the recipe has also been posted here on the blog many times click here to see it. I’ve made other cake recipes and nothing IMHO even compares. It’s simple, moist and delicious and never fails.

I am going to bring this cake with me to Fiesta Friday #188 and this weeks co hosts are Jhuls @ The Not So Creative Cook and Nimmi @ Adorable Life

Earl Grey Buttercream

Recipe from Theresa Huff for The Cake Blog

Frosts 2 layer 9 inch cake or 3 layer 8 inch cake

2 cups unsalted butter

1/4 cup loose earl grey tea (Recommend to reduce to 1-2 tbs)

1/2 cup plus 2 tbs egg whites ( 150 grams) the whites from 4-5 large eggs

1 1/4 cup granulated sugar

1 1/2 tsp vanilla bean paste or seeds from half a vanilla bean

Place one cup of the butter in a saucepan with the loose tea. Heat over medium heat until the butter melts, reduce heat to low and simmer for 5 minutes. Remove from the heat and let tea steep for another 5 minutes. Strain the butter into a bowl and refrigerate until the butter is the consistency of softened butter approximate 20-30 minutes or longer it took over an hour before my butter hardened.

Place egg whites and sugar into the bowl of a stand mixer and hand whisk until foamy and mixed. Place an inch or two of water in a saucepan on medium heat, place the bowl with the egg whites and sugar on top of it being careful not to let the bowl touch the water. Whisk frequently until the sugar melts it should register 155-160 on the candy thermometer or until it’s hot to the touch. Fit the bowl onto your stand mixer.

Fit the mixer with the whisk attachment and beat on high for 8-10 minutes until the mixture holds medium stiff peaks. When done the outside of the bowl should be room temperature and there should be no residual heat, you also should hold your hand over the bowl and you should not feel any heat at all.  Stop the mixer, remove the whisk attachment and replace with a paddle.

With the mixer on low speed add the vanilla, the tea infused butter and the other butter a few tablespoons at a time. Once the butter is incorporated turn the mixer to medium high and beat for another 3-5 minutes. The buttercream will be thick and silky.

Earl Grey caramel sauce

3/4 cup granulated sugar

2 tbs light corn syrup

2 tbs strong earl grey tea

1/2 cup heavy cream

2 tbs butter,diced

generous pinch sea salt

1 tsp vanilla extract

Place sugar, corn syrup and water in a deep heavy bottom saucepan, stir to combine. Heat over high heat swirling occasionally for 8-10 minutes. The sugar mixture will start to rapidly boil before slowing down and darkening in color. Remove the saucepan from the heat once it has reached the desired color, I like a deep amber. Note: my caramel got a bit over done, almost burnt. I cooked on high and all of a sudden it started rising almost to the top of the pot after I removed from the heat. I didn’t want to add the cream and butter until it settled but that was a mistake, I should have added it to cool it down and stop the cooking process. So my caramel is a bit bitter. My advise is to remove from the heat right when it turns a light amber and add the butter and cream. Because it was so bitter I threw away half and replaced that half with a chocolate ganache. The pot I used was too small and it almost boiled over hence the over cooking, the caramel continues to cook even after removed from the heat and what stops that is adding the butter and cream. Because my pot was not big enough I had to wait until the bubbles went down a bit. 

Slowly and carefully whisk in the cream being careful to stand back because it will sputter and foam so stand clear.

Add the butter and continue to stir until melted. Now add the salt and vanilla and stir to combine. Pour into a heat proof container and let cool, it will thicken as it cools.

Assembling the cake

Place one of the layers on your cake stand or serving plate. Spread some of the butter cream to cover the layer and continue until all layers are place. Frost top and sides of cake and refrigerate until cooled at least 20 minutes.

Pour the caramel sauce over the top of the cooled cake letting it drip down the sides.

I made this cake yesterday and wasn’t in love with the flavor, today it tastes better maybe the tea flavor has mellowed but I still recommend reducing the amount of tea used in the buttercream. I love the buttercream recipe it is silky and just the perfect consistency and will definitely be using it again.

A Tale Of Two Cobblers

Making cobbler with summers best produce is one of my favorites. Using fresh seasonal fruit and vegetables  makes this delicious dish even more amazing. I thought I would make both savory and sweet just for fun. The other day I went to the farmers market and stocked up on fresh vegetables and fruit without knowing what I would make with them, I was inspired by Mollie @frugalhausfrau, she and I were commenting about how much fun it would be to make cobblers, pandowdy’s, crisps etc… she has some awesome recipes make sure you check her blog out.

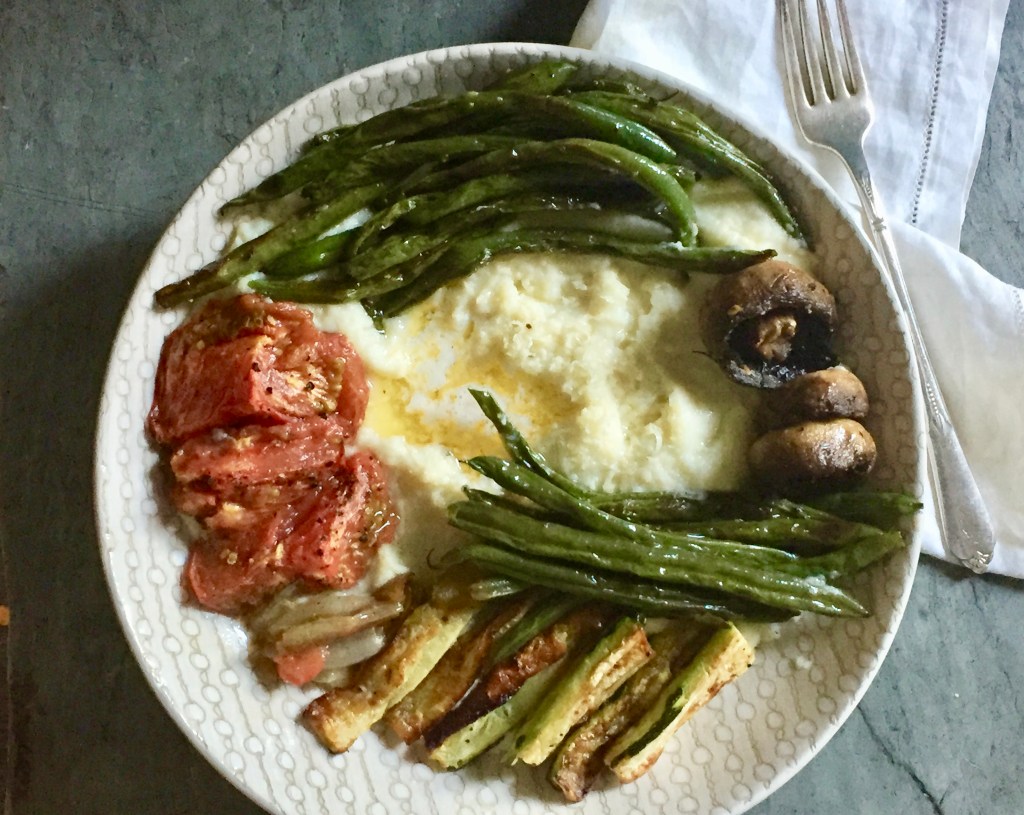
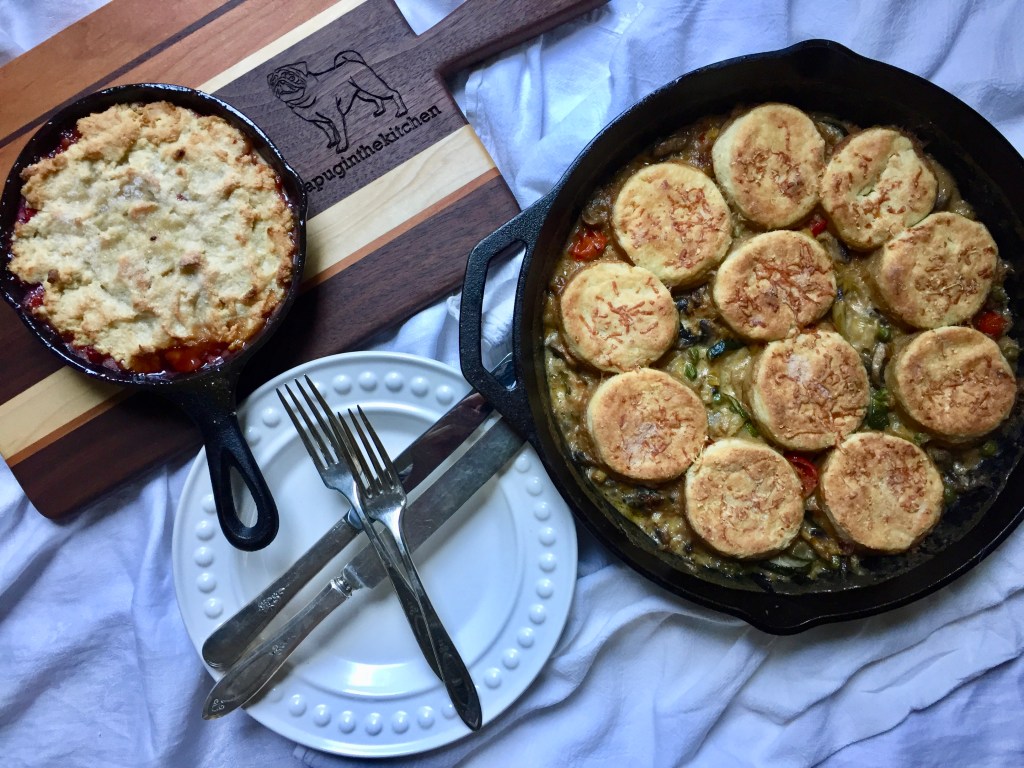
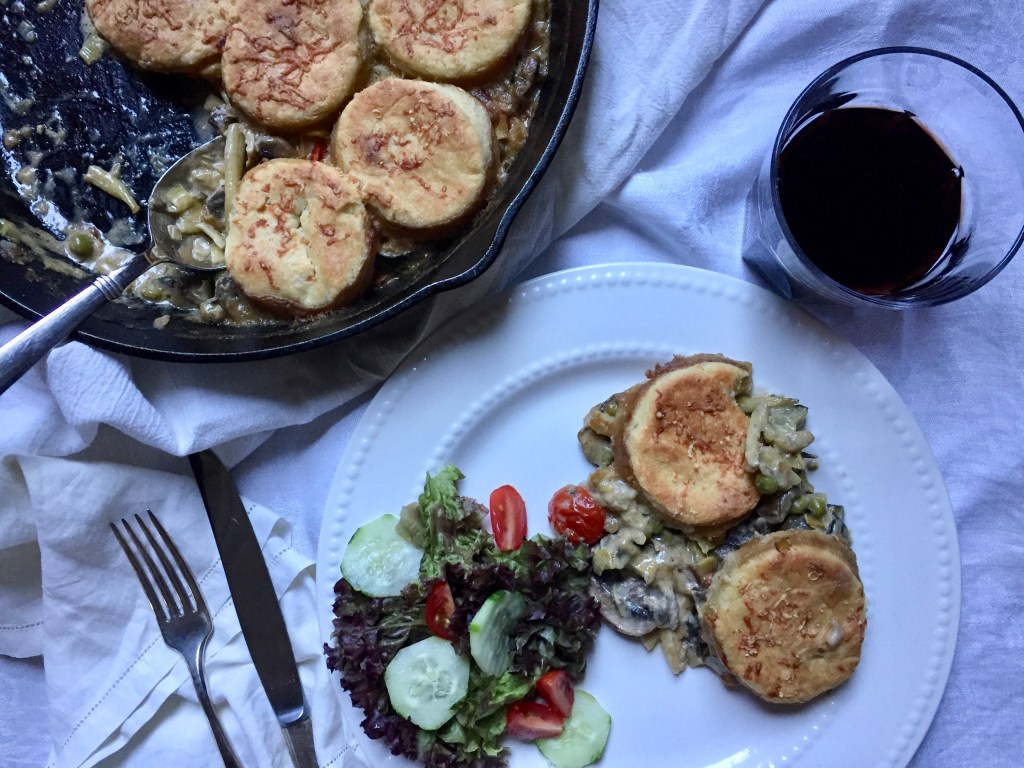
Both recipes are original or as original as any recipe can be. I posted the cobbler pastry on food52 years ago, it is adapted from Julia Childs Galette dough. The savory cobbler is Vegetarian, loaded with vegetables in a rich mushroom leek cream sauce. I used a biscuit cutter for the cobbler top rather than a rough look and to finish it, I grated some gruyere on top of each round. The beauty of the savory cobbler is that you can make the mushroom and leek base and add whatever kind of vegetables you like or have on hand. Note: For the savory cobbler I added some baking powder, I had thought about that before and my friend Emily who made this also suggested it. It’s not necessary for the sweet cobbler really as I treat it more like a pie crust but can be used for both.

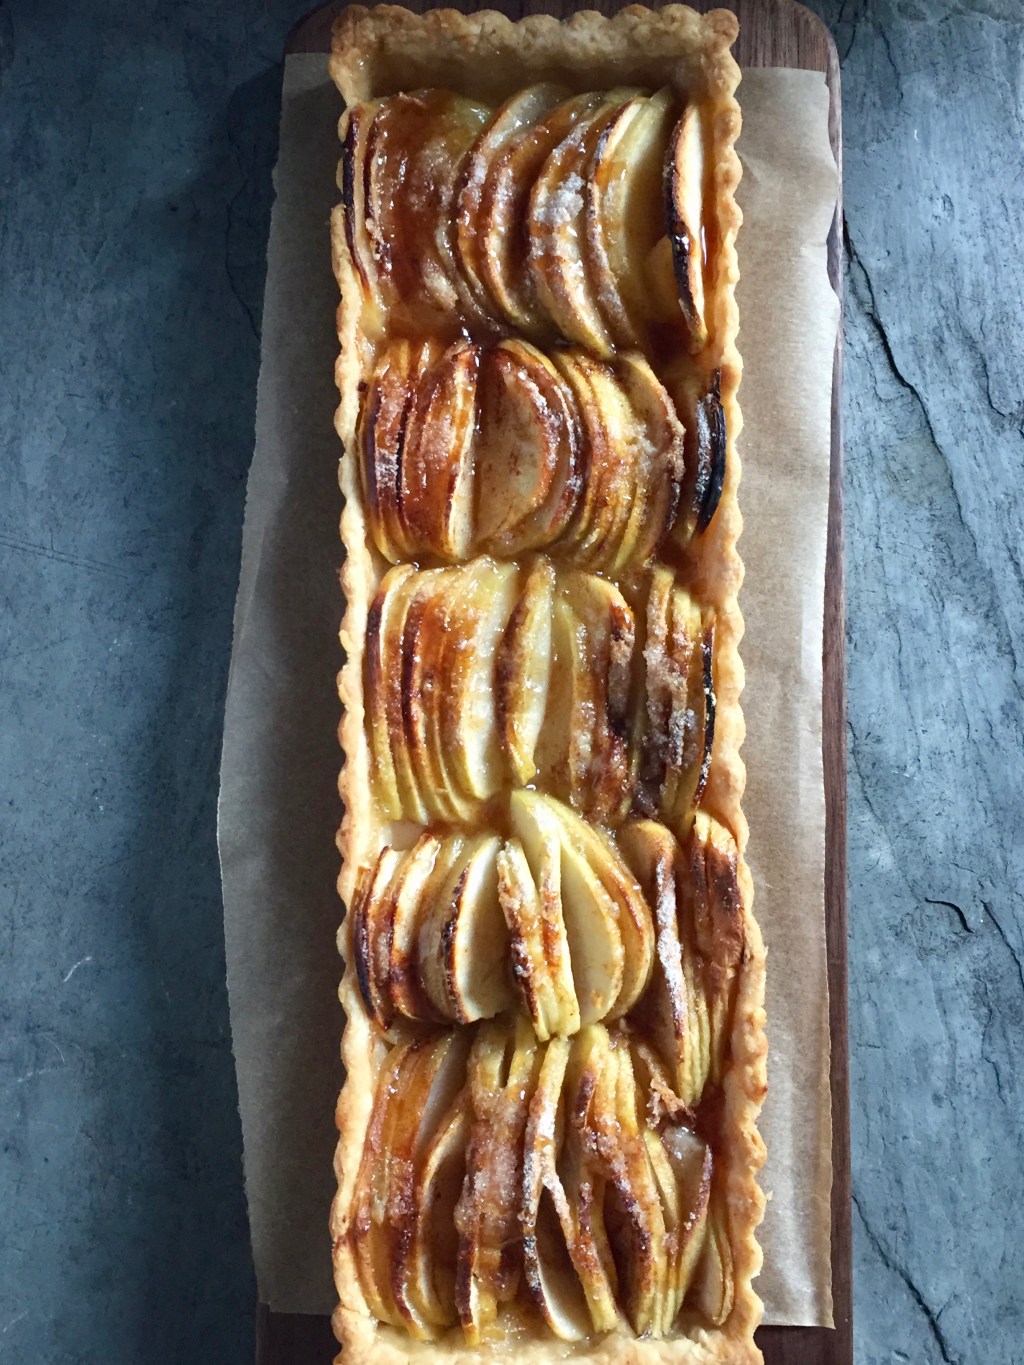
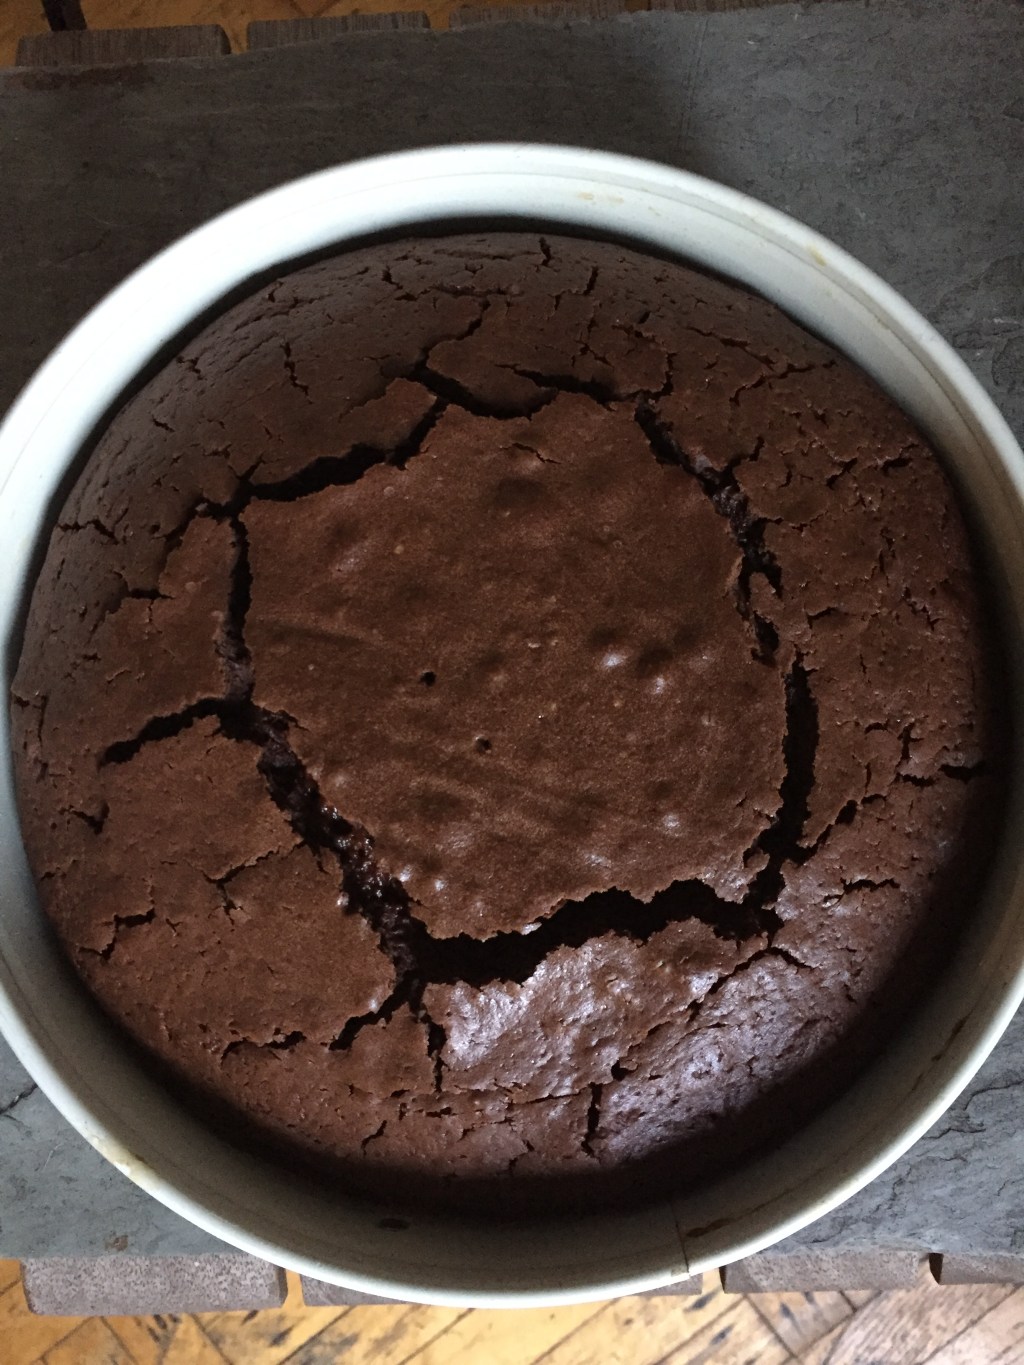
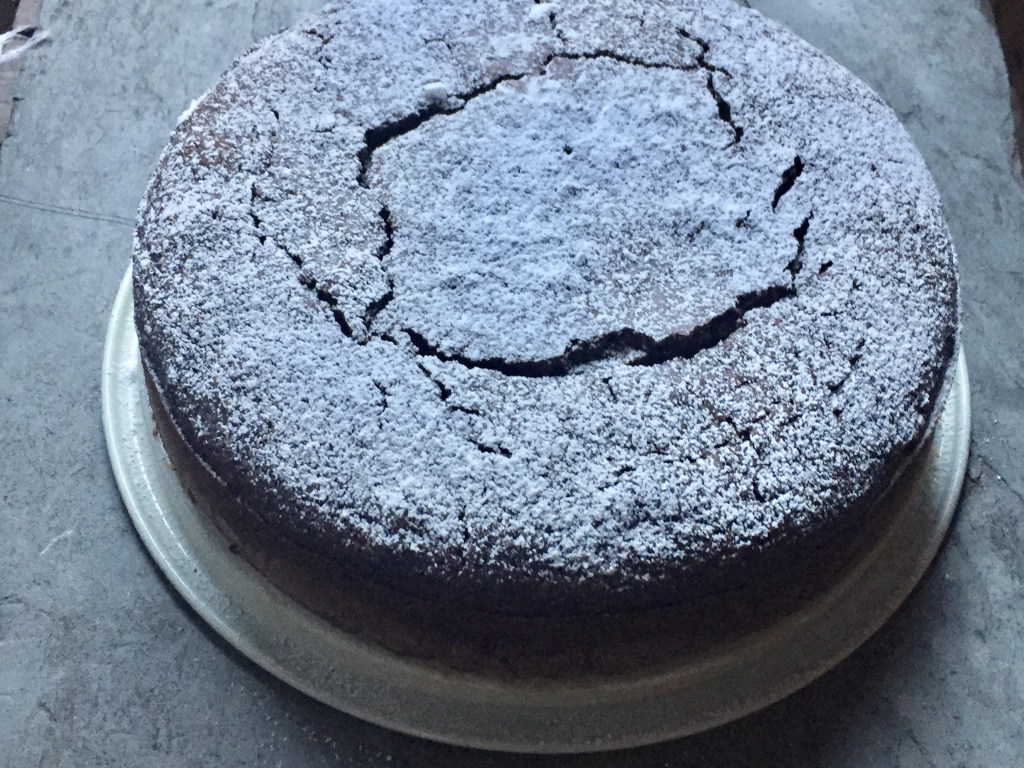
The dessert cobbler is made with fresh ripe nectarines which are sweetened only with some gooseberry jam that I made a few weeks ago, the cobbler top is roughly pressed on top of fruit and sprinkled with a little sugar before baking. There is really no recipe required for this you can ad lib adding the type of fruit you like and sugar or jam. I love super easy to prepare foods.

This week I am honored to co host Fiesta Friday # 185 with the totally awesome Monika @ Everyday Healthy Recipes and I am bringing both a dessert and main with me, both in the form of cobbler

Pastry for Cobbler

1 cup flour

1/4 cup cornmeal

2 tsp baking powder (recommended for savory cobbler)

1/2 tsp salt

2 tsp sugar or brown sugar (Use 1 tbs for the savory cobbler pastry)

3 tbs cold butter cut into pieces

1/4 cup sour cream

1/4 cup whole milk

Whisk together the dry ingredients, add the cold butter and break up with your hands or pastry cutter until it looks crumbly. Add the sour cream and milk and mix with a fork. It will become a cohesive but slightly wet/moist dough. Set aside or refrigerate until ready to use.

Savory filling

3 small leeks, using only the white parts, cleaned VERY well (I cut into rounds and put in cold water rinsing until there is no sand in the bottom of the bowl)

1 package of mushrooms (I used white button) cleaned and sliced

String beans ( I used yellow) stem end removed (I did’t measure add as much as you like)

1 medium size zucchini – cut into bite size pieces

2 small carrots quartered lengthwise

2 tbs flour

cherry tomatoes cut in half

3 sprigs thyme

white wine (about 1/2 cup)

1 cup heavy cream (You can also use light cream, milk, half and half or non dairy milk)

splash of Worcestershire sauce (omit if making vegetarian or vegan)

salt and pepper to taste

Heat oven to 375 degree’s. Line a sheet pan with parchment, place the zucchini, carrots and beans on the pan, drizzle with olive oil and sprinkle a little salt and pepper and roast until tender (approximately 20 minutes. While the vegetables are in the oven, put a little butter in a sauté pan and add the leeks, cook on medium high until softened, add the mushrooms and continue cooking until soft. Add the flour and continue to cook stirring so that the flour coats the leeks and mushrooms, add the wine, continue to cook, it will thicken considerably, stir in the cream and thyme,  cook until thickened, you can add a little water to thin it out if desired. Add the Worcestershire sauce and cherry tomatoes and continue to cook for about 10 minutes, remove the thyme sprigs. When vegetables in the oven are done add to the cream sauce and let cool a bit and spoon into baking dish, or a  10 inch cast iron skillet.
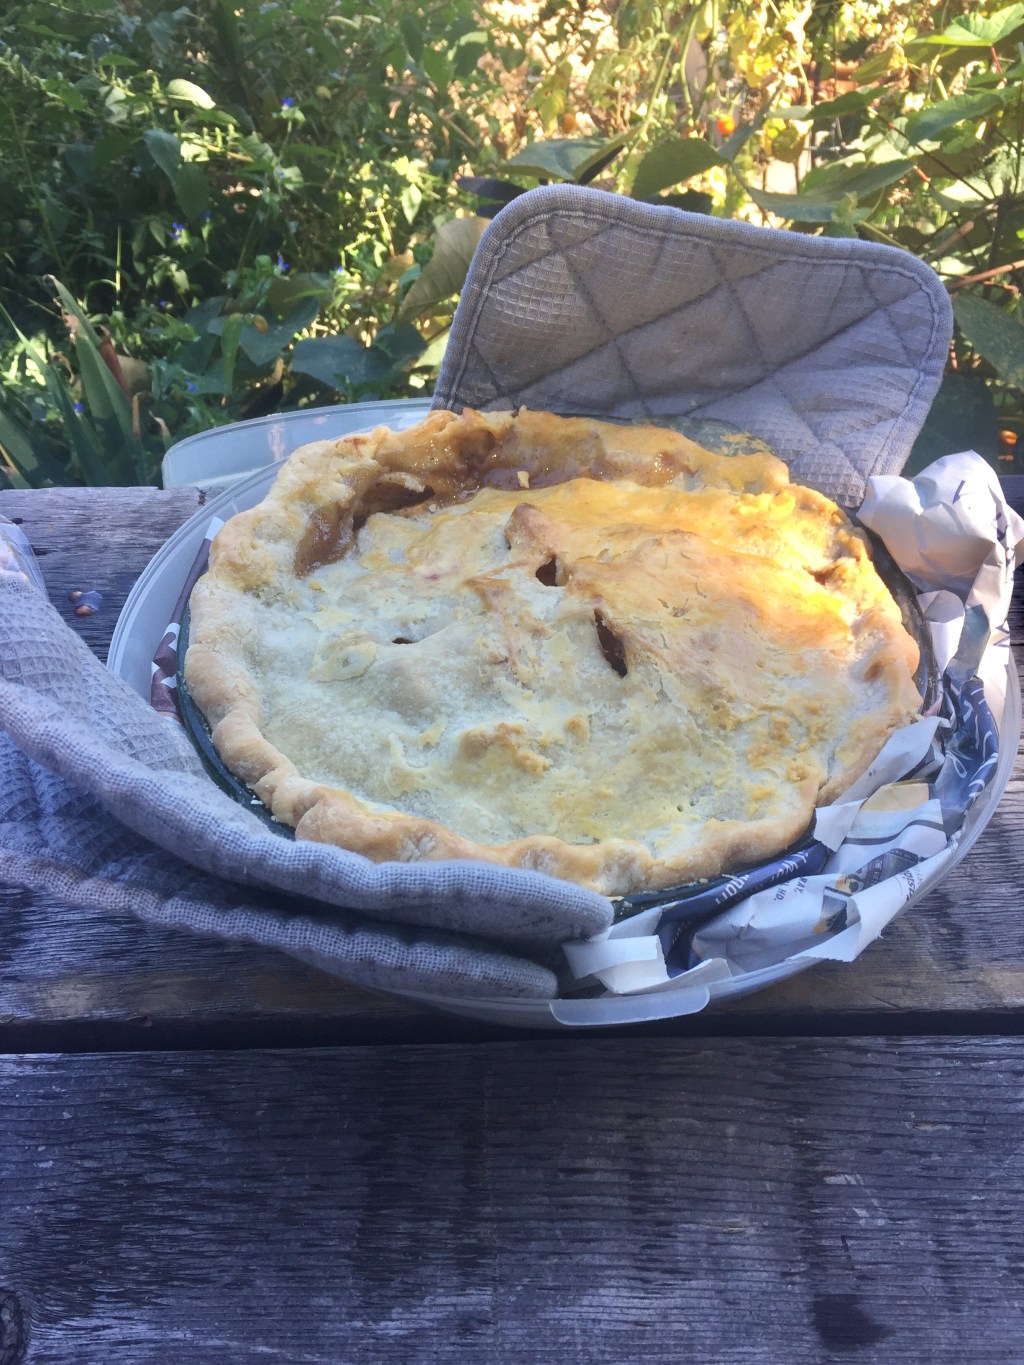
Making the cobbler

Increase oven temperature to 400 degree’s. Press the pastry into a circle approximately 1/2 inch thick. Using a glass or biscuit cutter cut rounds using all the dough. Place on top of the filling, grate a little gruyere or your favorite cheese on top of the rounds and bake until golden brown and bubbly about 35-45 minutes depending on your oven.

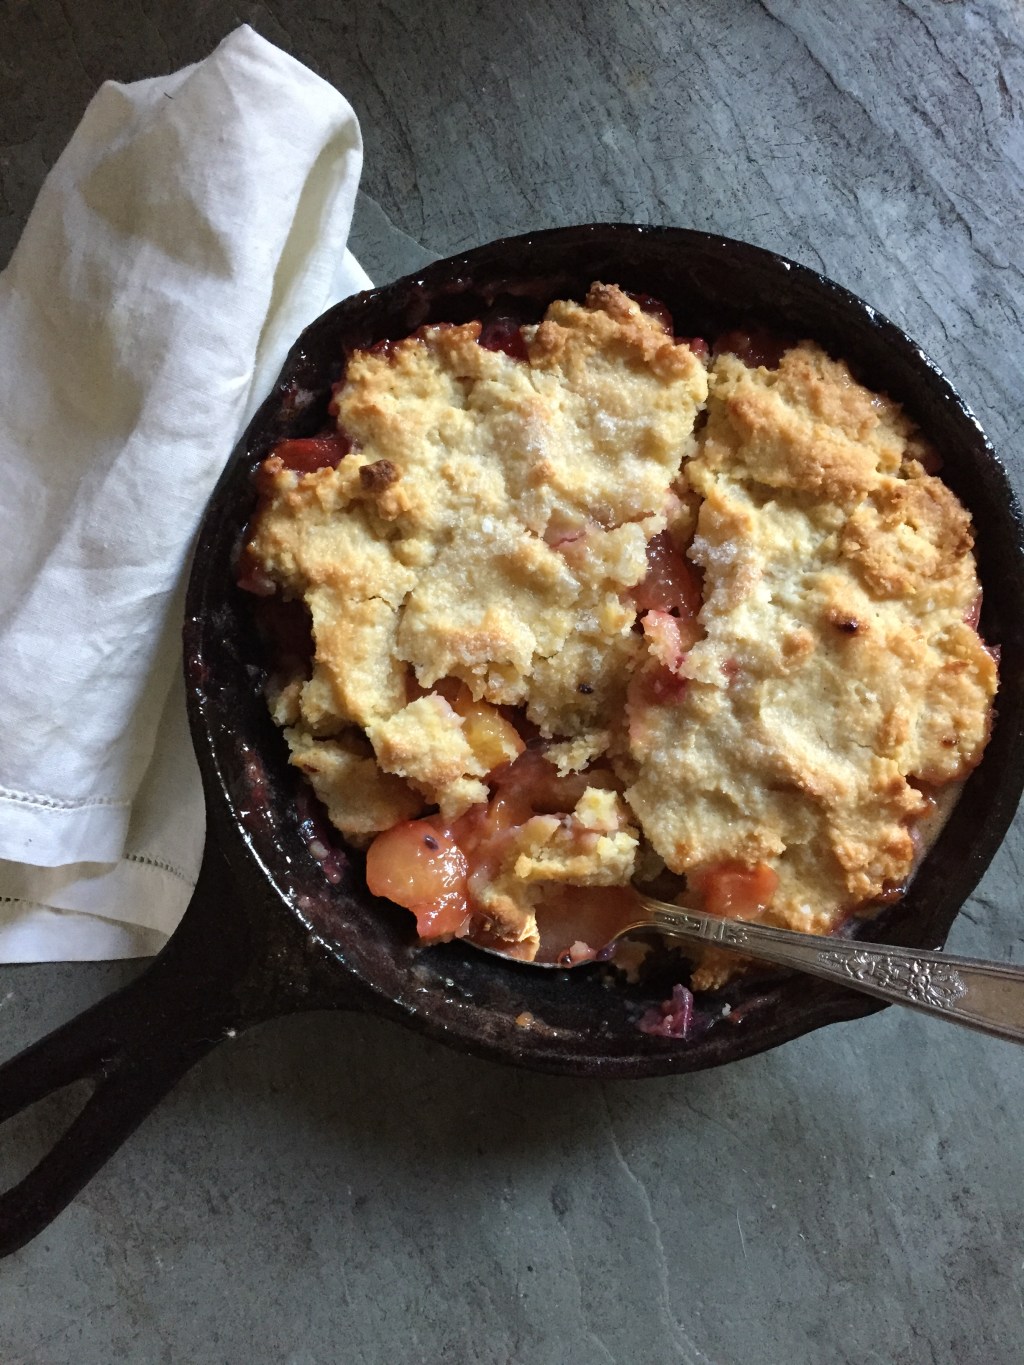
Nectarine Gooseberry Cobbler

1 small cobbler made in 6 inch cast iron skillet – serves 2

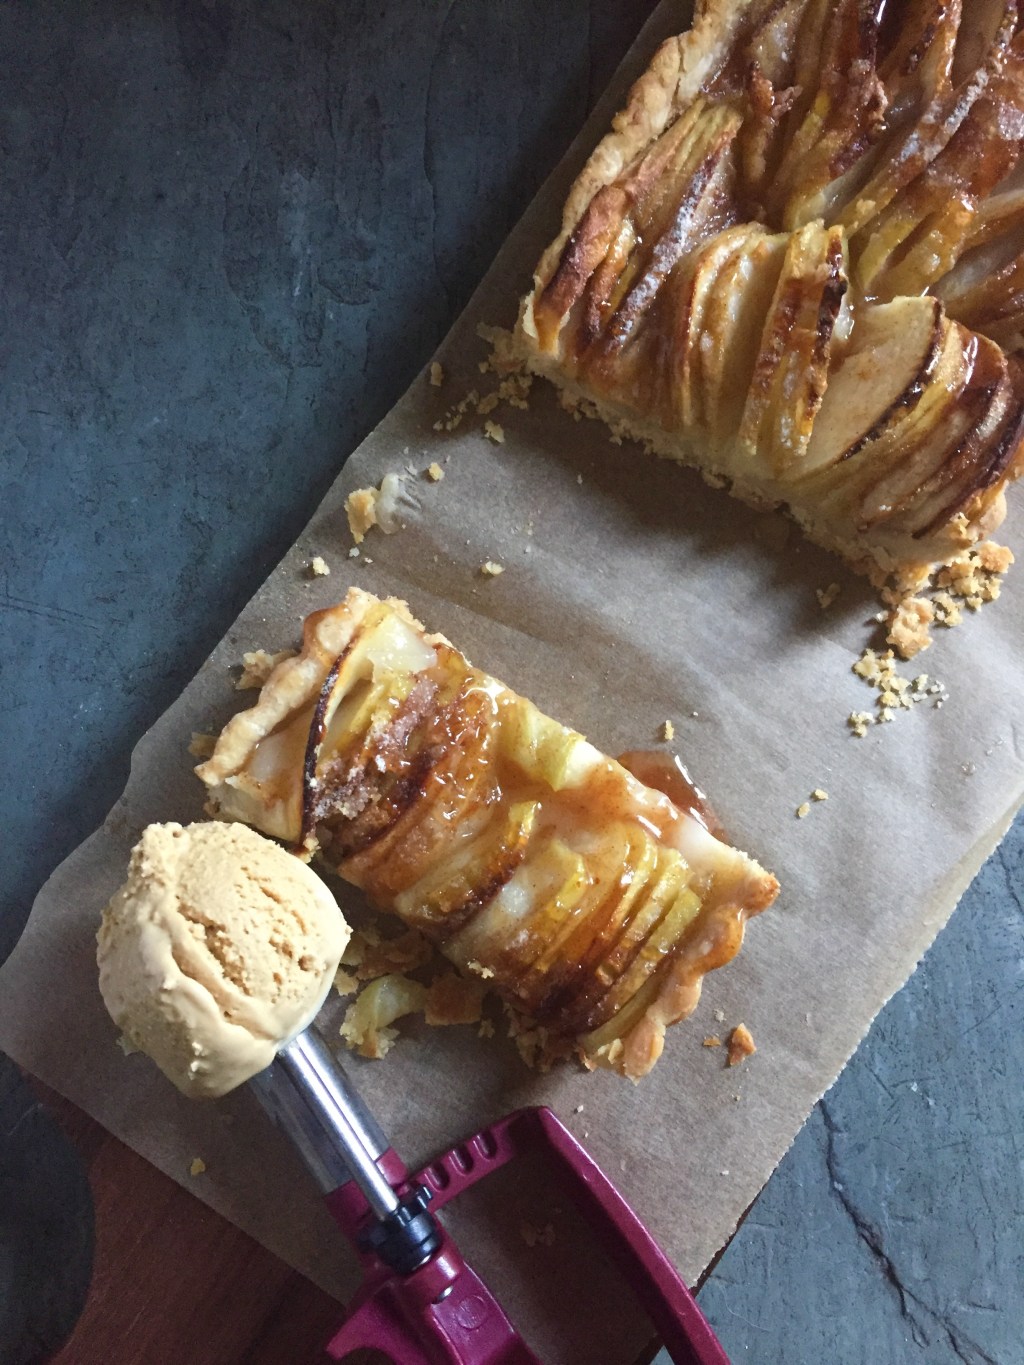
First let me say many will not have gooseberry jam, you can use anything you want or omit jam and use just fruit mixed with a little sugar.  I happened to have gooseberry jam in the fridge but any jam would be good, cherry I think would be delicious.

2-3 nectarines, cleaned and sliced

1/3 cup gooseberry or your favorite jam (if using just fruit add 2-3 tbs sugar)

Heat oven to 400 degrees. Place a sheet of foil or parchment on baking sheet. Mix the fruit and jam or sugar and put into the skillet,  press the cobbler crust on top, sprinkle with a little sugar and bake until browned and bubbly approximately 30 minutes. Serve with a scoop of vanilla ice cream, whipped cream, heavy cream poured on or a spoonful of lightly sweetened creme fraiche.