Skip to content

Mixed Beef And Pork Ragu With Rigatoni
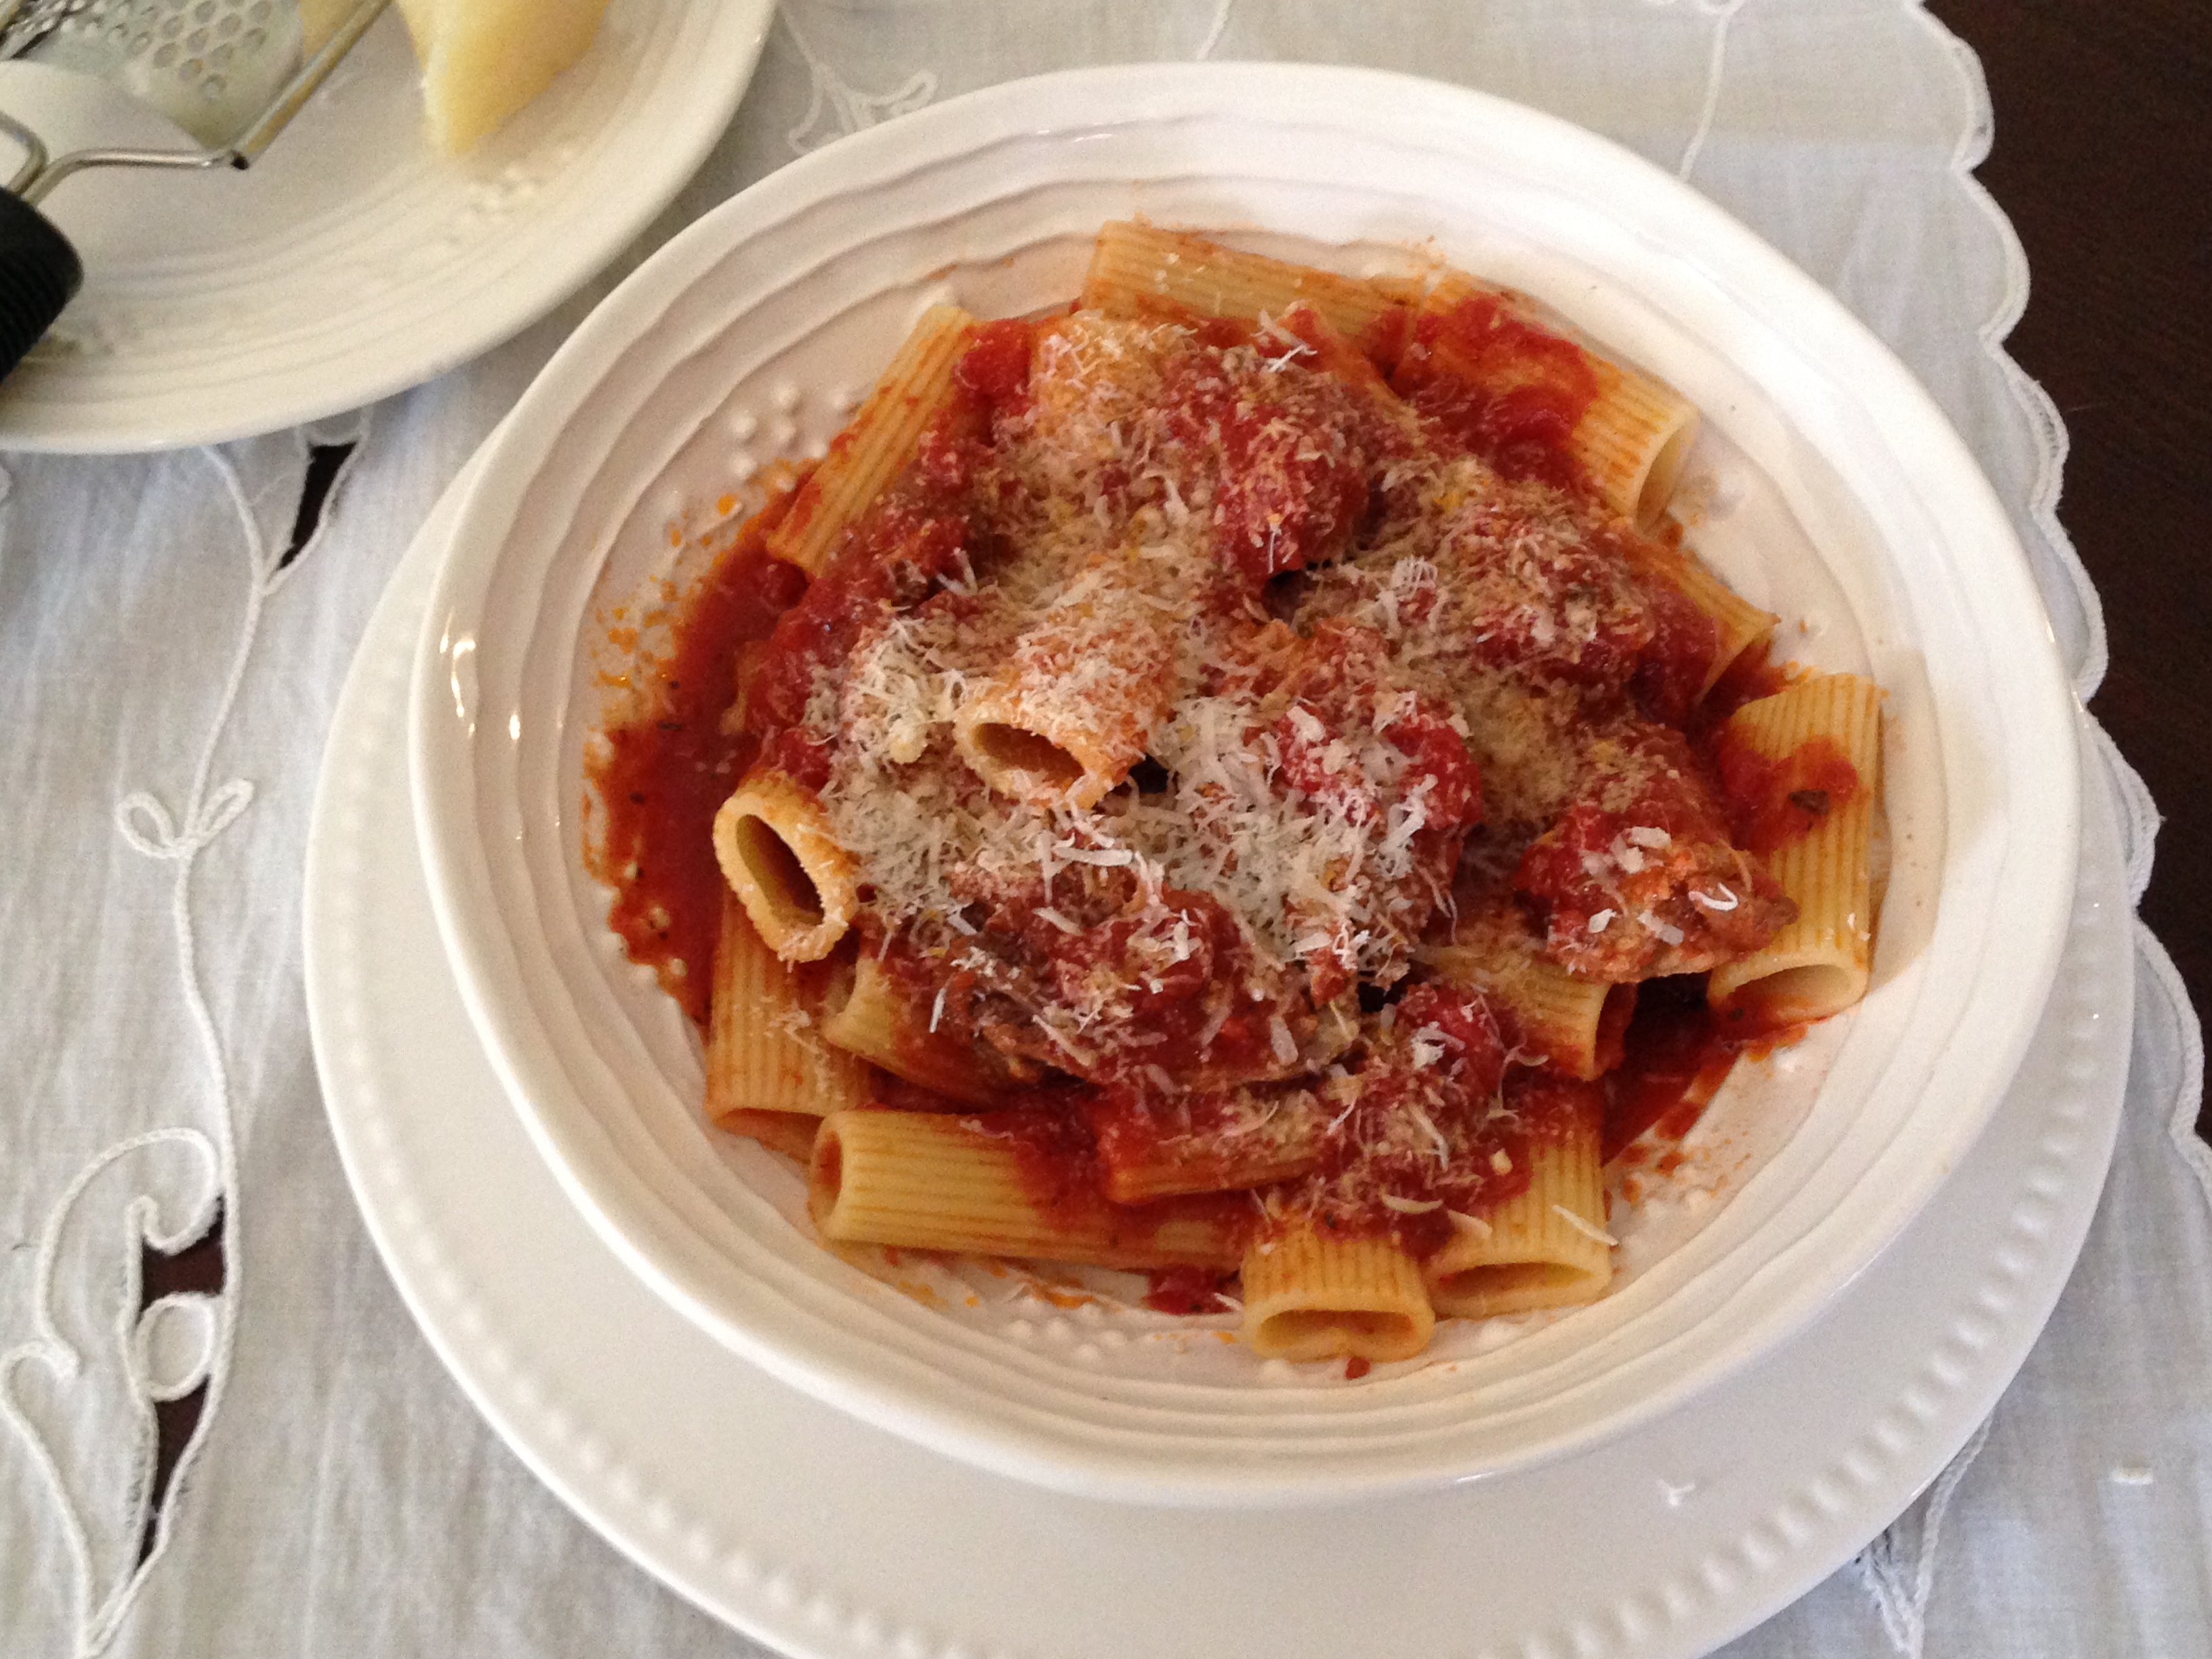
A bowl of pasta

A bowl of pasta

I saw a post the other day from The Seasoned Traveller for Pappardelle With Pork Rib Ragu and it immediately brought me back to my childhood, one of my favorite Italian dishes my Mom made was a mixed meat ragu, Mom used both beef and pork and it was delicious the meat was so tender it literally melts in your mouth and the sauce is rich and thick.  Laura (The Seasoned Traveller) made a mouthwateringly good ragu and served it with pappardelle, imagine that ribbon like pasta with the thick rich meaty sauce. Delicious right?  Laura inspired me to make a ragu, I used beef short ribs and pork country ribs. Now I don’t know if technically that is the correct name for those ribs but thats what I know them as. They are meaty with just the right ratio of fat to muscle. It’s one of my favorite cuts of pork. I first sauteed the ribs in a little olive oil, then added some garlic and basil, tomato and slow simmered for about 3 – 4 1/2 hours until the meat was falling off the bone. I decided to make Rigatoni to serve with this thick rich sauce, the pasta is not delicate and neither is the sauce, its a great match. I make this the day before I serve it, the meat is quite fatty so I refrigerate overnight, scrape off most of the fat, reheat and adjust seasoning before serving. Added bonus there is something about an Italian sauce that always tastes better the next day, it’s that much more delicious.
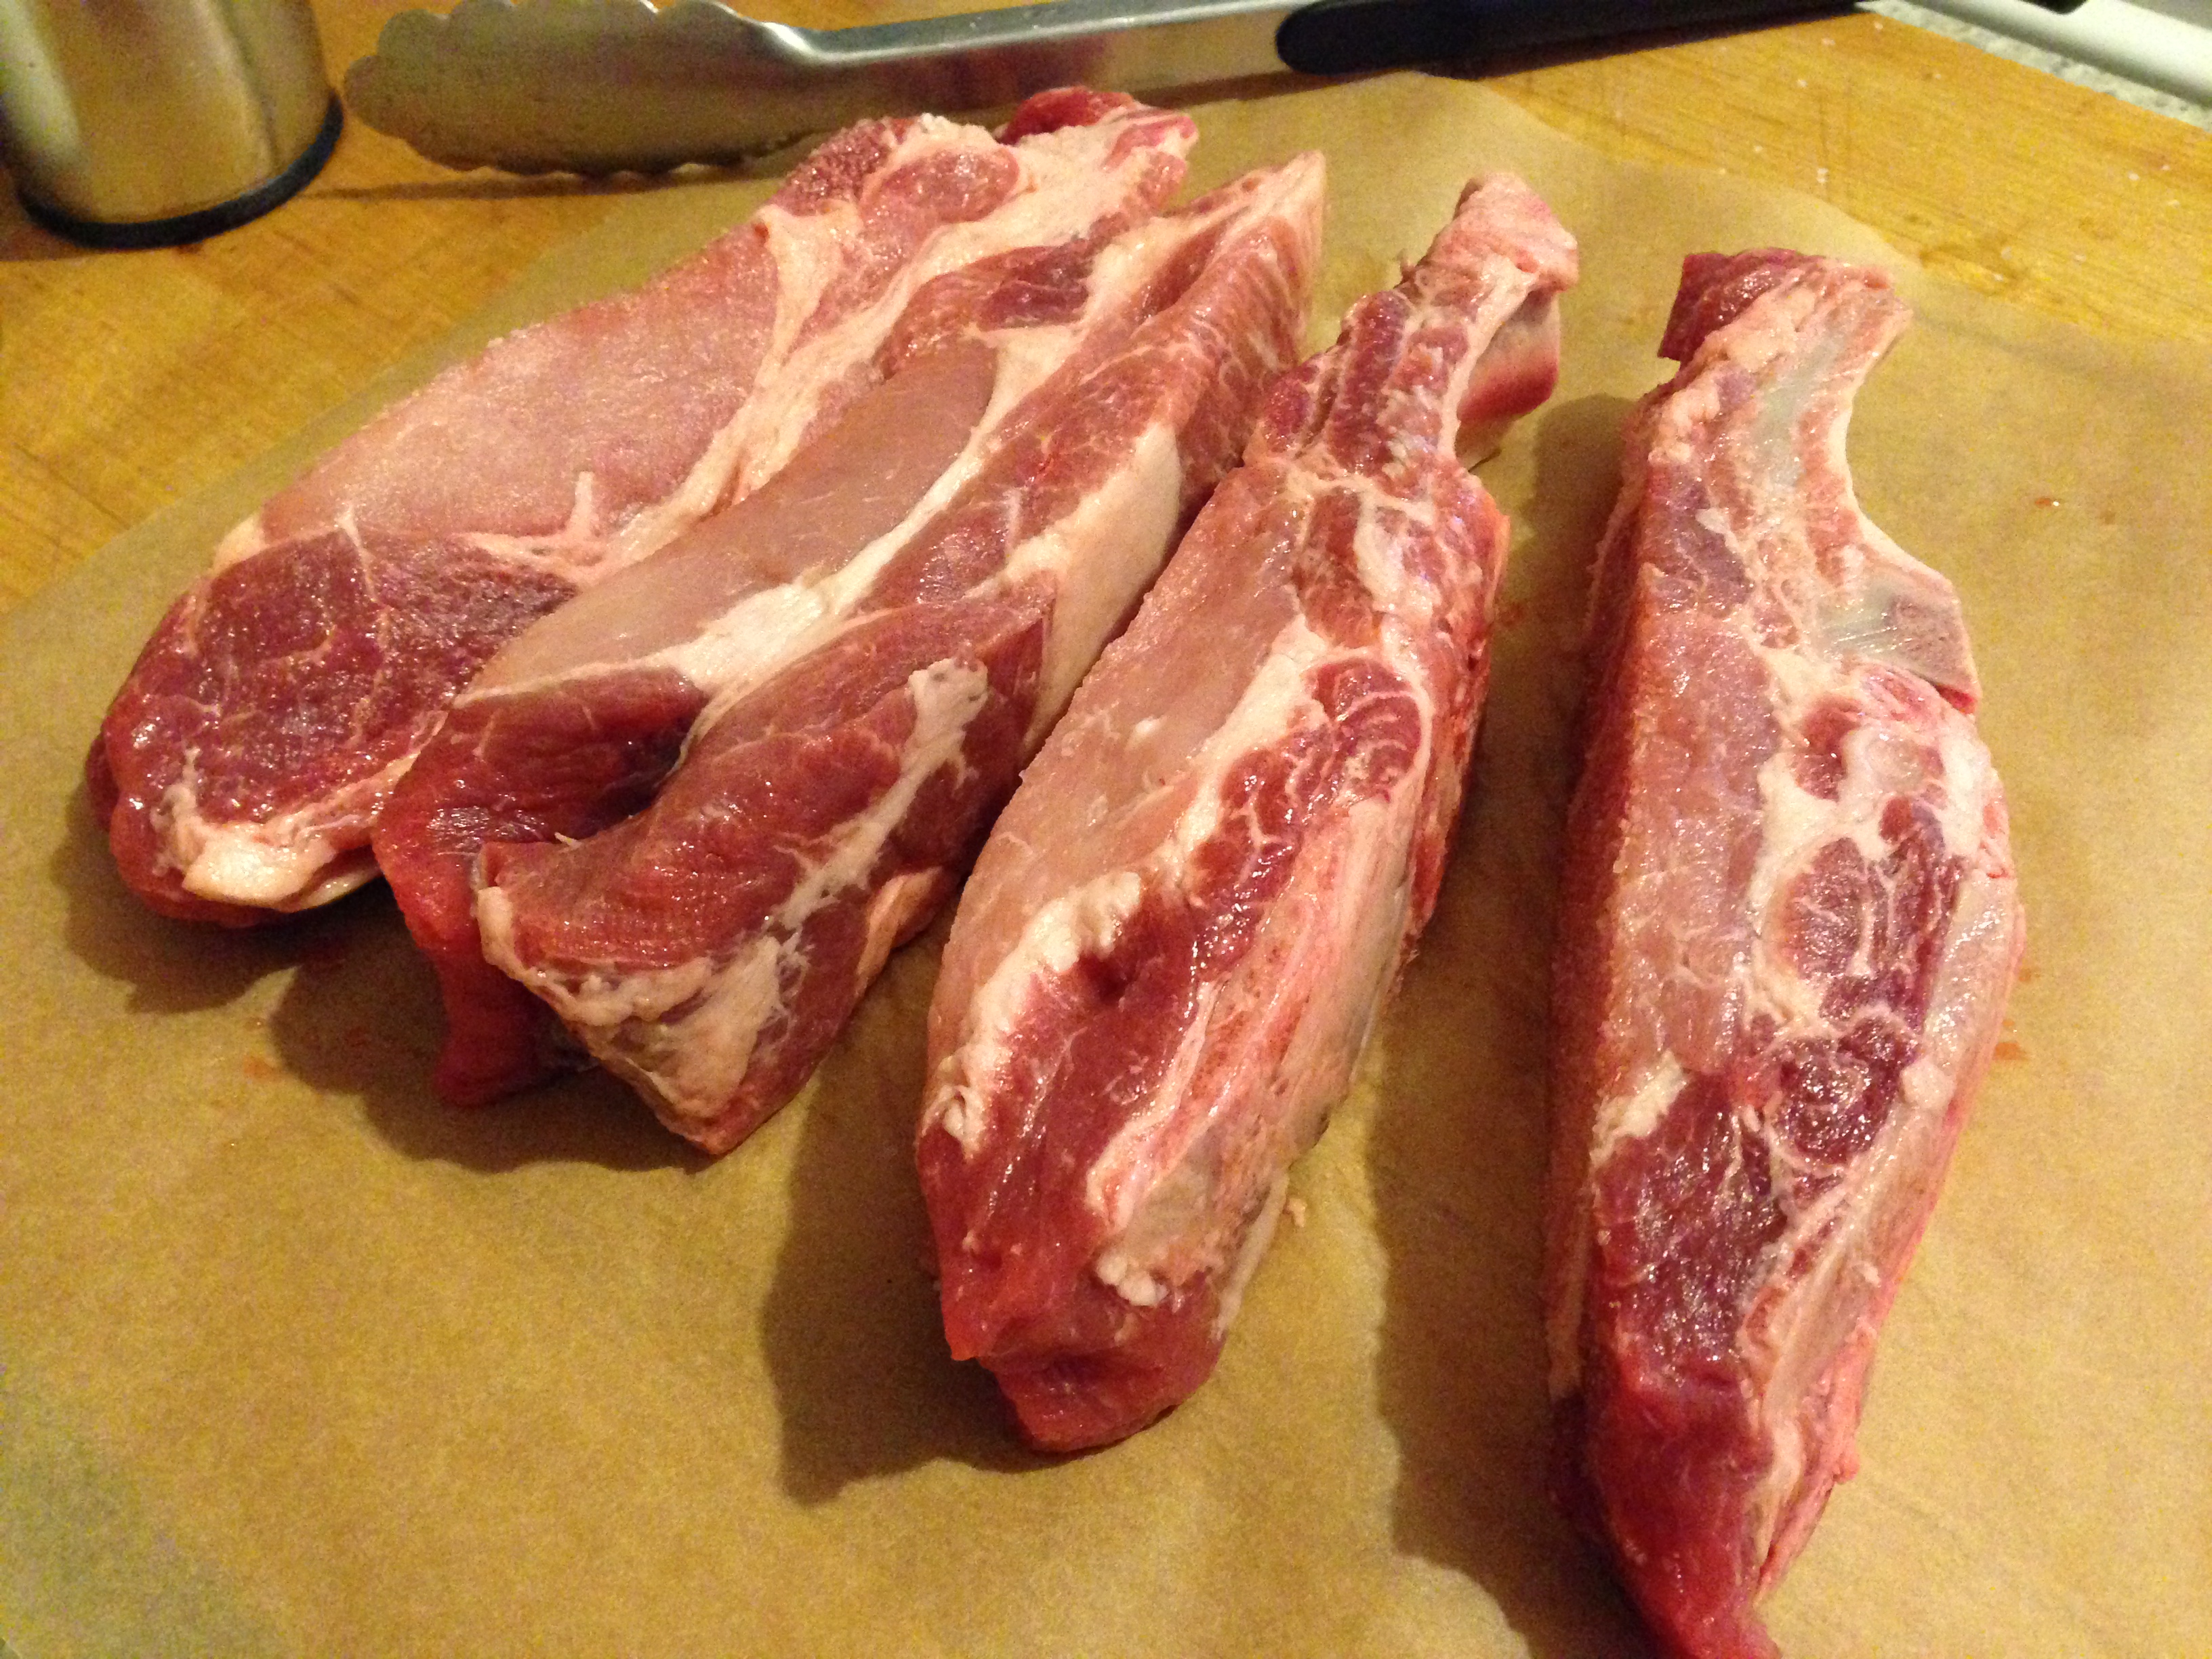
Country Pork Ribs

Country Pork Ribs


Mixed Meat Ragu

4 meaty pork country ribs

4-6 beef short ribs

olive oil for pan

fresh or dried basil (8 leaves fresh and approximately 2-3 tsp dried basil) I never measure so its approximate do according to taste

2 cans (28 oz each) good whole tomatoes I like San Marzano – pureed in blender, run through food mill or broken up with your hands

1 can (28 oz) crushed tomatoes

1 shallot minced

3 cloves garlic peeled and smashed

peperoncino or crushed red pepper a generous pinch

Salt and pepper to taste

Heat the olive oil in dutch oven, add the short ribs and sear, remove and sear the pork ribs, remove to plate. Add the shallot and saute until it softens, then add the garlic and lightly brown, if using dried basil add to the oil with the garlic also add the crushed red pepper when it is almost done. Add the crushed tomatoes and you can either put the whole tomatoes in the blender or food processor to puree or break with your hands or use a food mill. Add the whole tomato puree to the pot, season with salt and pepper, add the fresh basil. Now add the meat, bring to a boil then reduce to medium and simmer for 3-4 1/2  hours or until meat is fall off the bone tender.

To serve I remove the bones and leave the meat in nice size chunks, I don’t like to shred it. I add some of the sauce to a saute pan. add the al dente pasta and let it cook a minute or two in the sauce. Divide into bowls, add meat and a little more sauce and finish with a nice grating of cheese either parmigiano reggiano or pecorino romano or both.
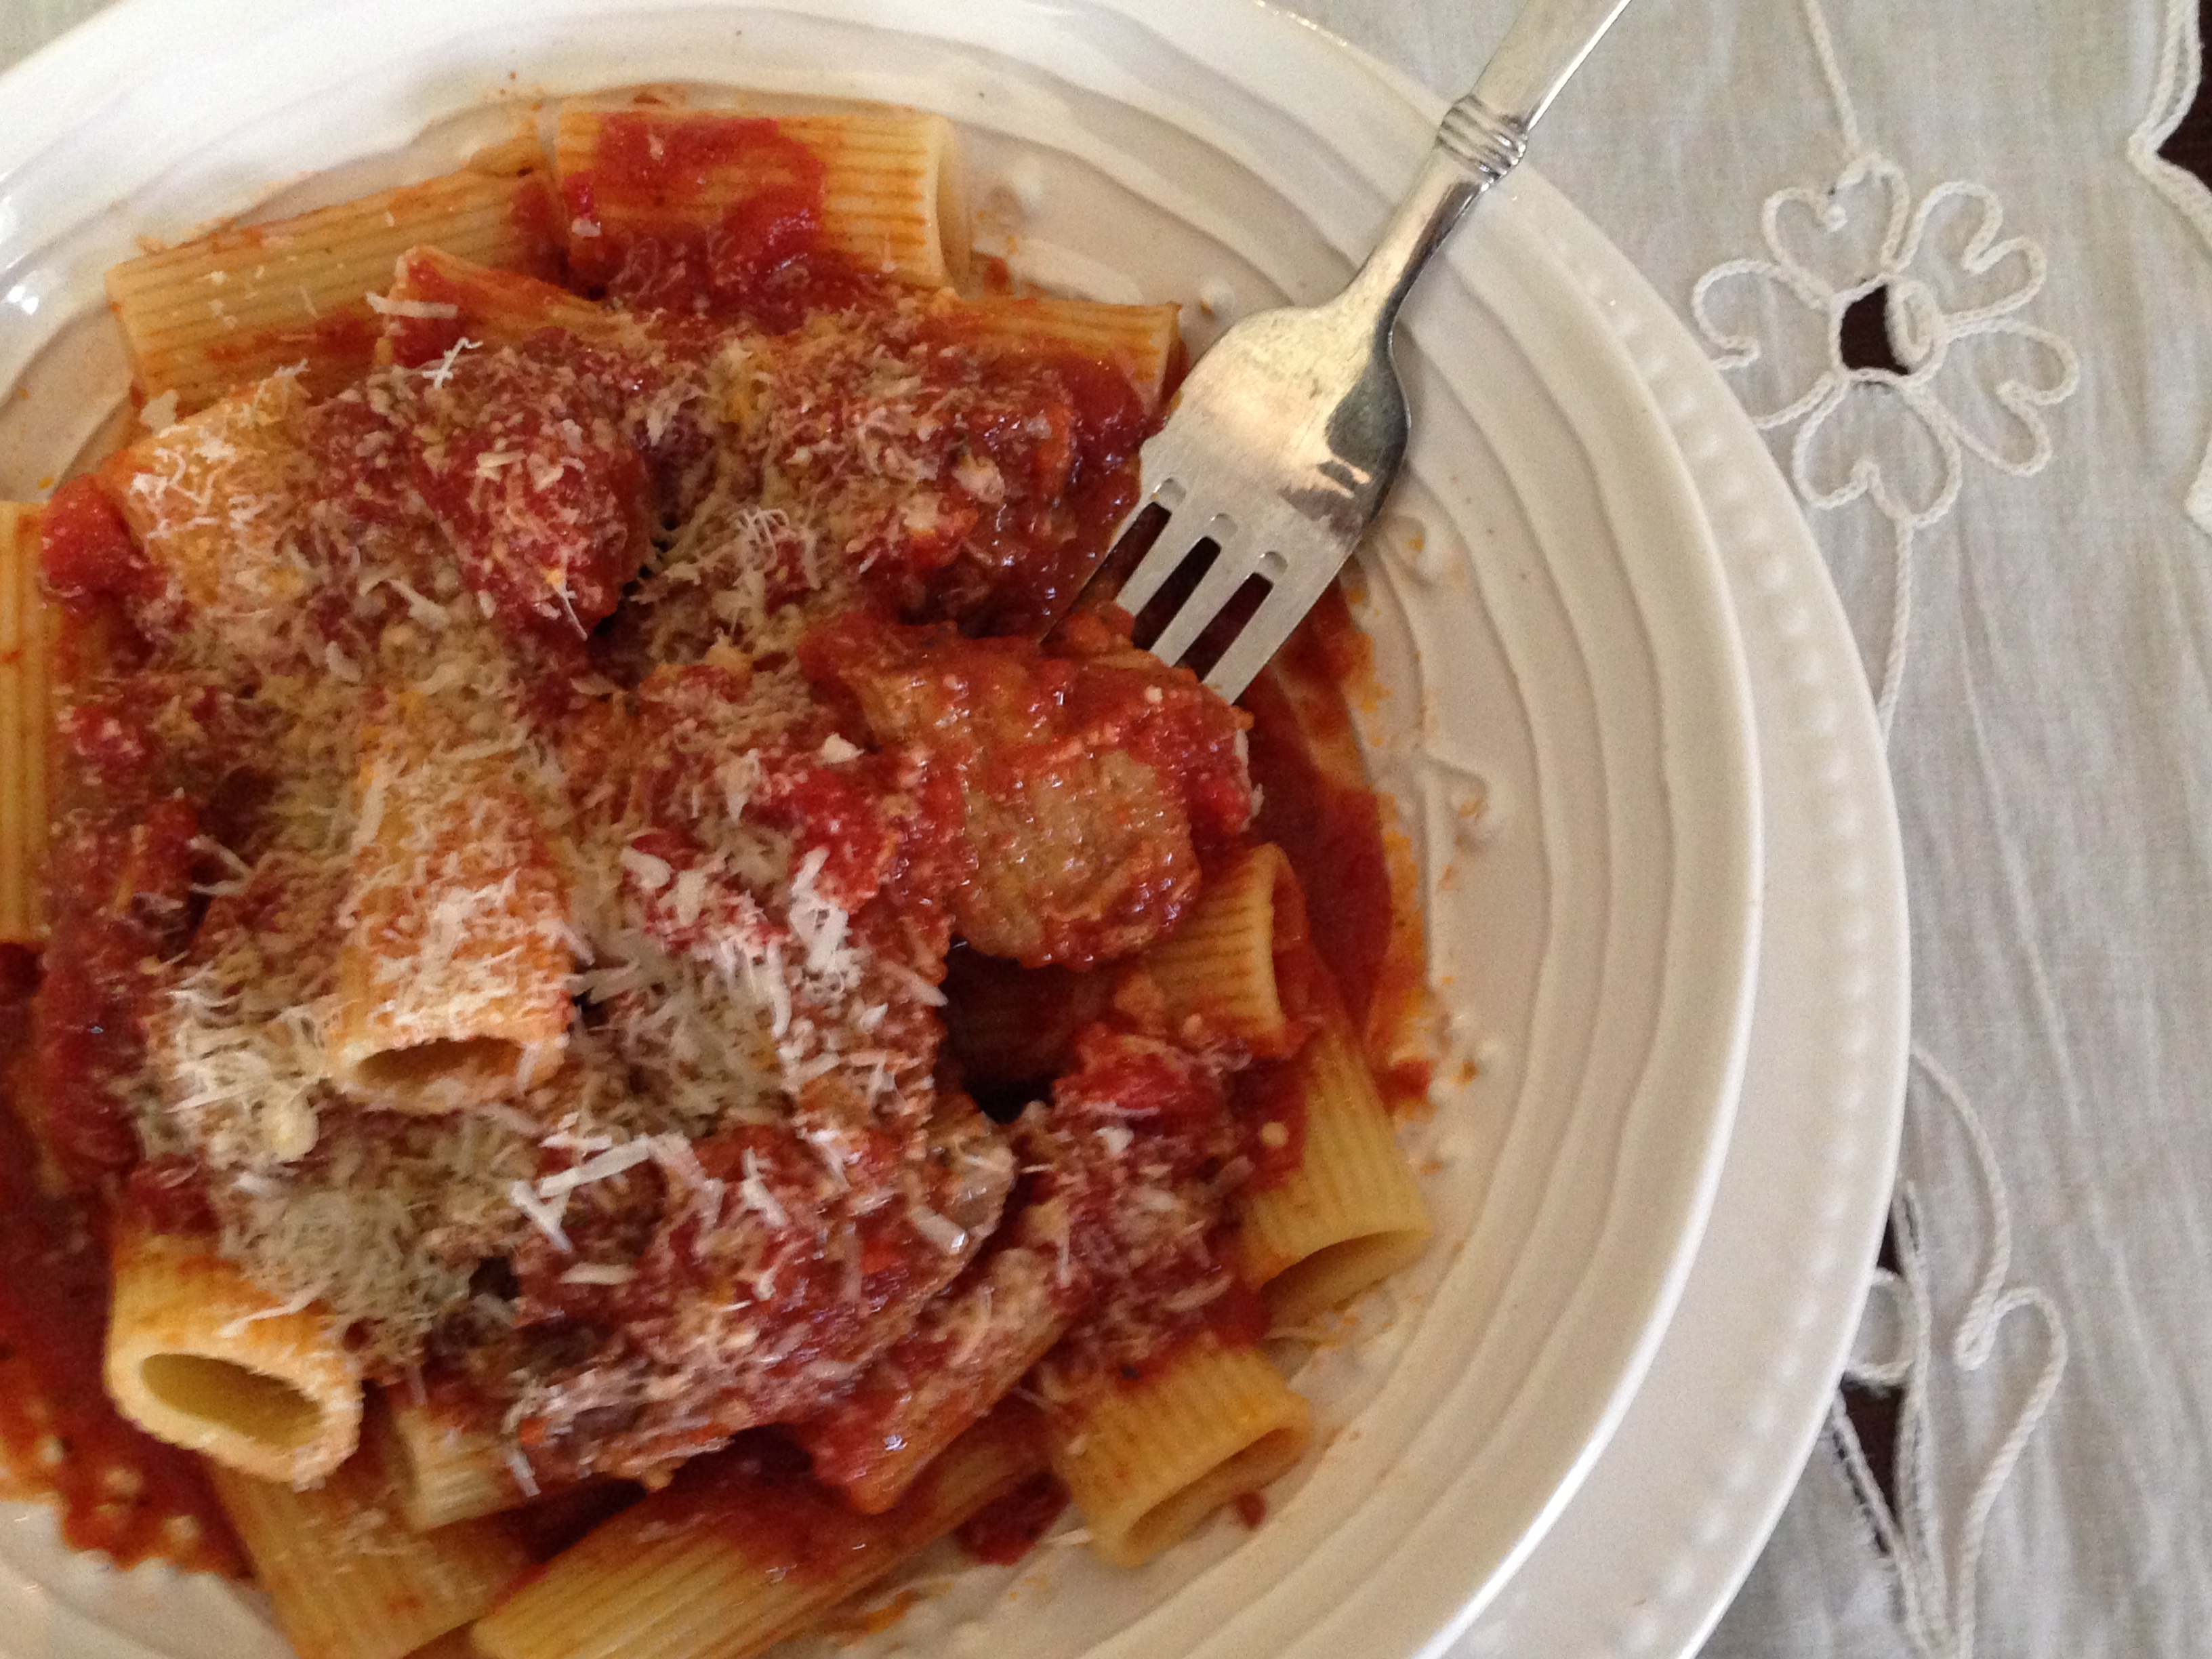
Meaty and Delicious

Meaty and Delicious


Tiger Cake – Alice Medrich

I saw this cake yesterday on Food52, first of all I am a sucker for a marble cake always have been and then when I saw that it is made with olive oil I knew I had to make it. A cake made with oil would be incredibly moist and have a very tender crumb, both are requisites for a really good cake, IMHO. I also love recipes by Alice Medrich, she knows a thing or two about baking. With a little spare time today I undertook this cake, now I have made marble cakes before and you usually drag a butter knife around the batter to give the marble effect, well you don’t do that with this cake. You pour your batters separately, layering them and just bake it like that. I was a little skeptical. I had to force myself not to get the knife and start swirling,

Ready to bake

Ready to bake

Tiger Cake – Alice Medrich

Makes 1 cake in a 10-to-12 cup tube pan
1/2 cup (25 grams) natural cocoa powder (non-alkalized, non-Dutch processed)
1/2 cup (100 grams) sugar
1/3 cup water
3 cups (385 grams) all-purpose unbleached flour
2 teaspoons baking powder
2 cups (400 grams) sugar
1 cup extra virgin olive oil
1 teaspoon pure vanilla extract
1/4 teaspoon salt
1/2 teaspoon finely ground white pepper
5 cold eggs
1 cup cold milk
Position a rack in the lower third of the oven and preheat the oven to 350 degrees F. Butter or spray a 10-to-12 cup tube pan with oil spray and dust it with flour.
In a medium large bowl, whisk the cocoa, sugar, and water until well blended.
In another medium large bowl, whisk the flour and baking powder thoroughly and sift onto a piece of wax paper. Set aside.
In a the bowl of a stand mixer fitted with the whisk attachment, beat the sugar, oil, vanilla, salt, and pepper until well blended. Add the eggs one at a time, beating well after each addition. Continue to beat until the mixture is thick and pale, 3 to 5 minutes. Stop the mixer and add one-third of the flour mixture. Beat on low speed just until blended. Stop the mixer and add half of the milk. Beat just until it is blended. Repeat with another third of the flour, the remaining milk, and then the remaining flour.
Add three cups of the batter to the cocoa mixture and stir until blended. Pour one-third of the plain batter into the prepared pan and top with one third of the chocolate batter. Repeat with the remaining batters. Don’t worry about marbling the batters—that happens during the baking.
Bake 1 hour to 1 hour and 10 minutes, until a toothpick inserted into the middle of the cake comes out clean. Set the pan on a rack to cool. Slide a skewer around the tube and a thin metal spatula (or knife) around the sides of the pan. Lift the tube and slide the spatula under the cake to detach it from the pan bottom. Transfer the cake to a serving platter. The cake keeps for several days, at room temperature, under a dome or wrapped in plastic.

Just out of the oven

Just out of the oven

Came out of the pan like a dream

Came out of the pan like a dream

As you can see from the photo’s below, it swirled nicely on it’s own. I like the cake. It has good crumb, baked nicely.  I think it would be great with a chocolate glaze drizzled on top or with some ice cream.
The next time I will add more salt, like at least 1/2 tsp, and maybe some orange zest. Note: I forgot to add the white pepper.

So pretty

So pretty

Tiger Cake

Tiger Cake


Mary’s Secret Ingredients and Feed The Children

Mary's Secret Ingredients

Mary’s Secret Ingredients

Many of you may already know the wonderful Mary Frances and her blog, Love, the Secret Ingredient and if you are not familiar you should definitely check it out. Mary’s blog is loaded with great recipes, tips on cooking and entertaining and one thing I am excited about is her newest venture. It’s a box of ingredients that she will send to you, Mary’s secret ingredients. I don’t know about you but I love a surprise. I think this is a lovely idea and even better a portion of your purchase goes to the charitable organization Feed The Children.

We bloggers stick together and support each other so I wanted to let all of you know about Mary Frances, her exciting idea, wonderful blog and charitable work. It’s a win win as far as I am concerned. I can’t wait to get my box and see what she has put together for me. I hope you all will visit Mary’s blog, follow so you won’t miss any of her outstanding recipes and if you can check out her Secret Ingredient Box! I plan to post what I make with the contents of my Spring box. Very excited.

Chocolate Chip Cookies

Chocolate Chip

Chocolate Chip

I wanted to make some cookies to give to some workmen who will be doing some work in my apt tomorrow, they are so nice and don’t price gouge, besides paying them I wanted them to have a treat. I thought I would give the cookie recipe in my old Betty Crocker cook book a go. It’s so simple and I must say the cookies are really good. I used dark and milk chocolate chunks and dark brown sugar, the recipe didn’t specify. They came together quickly and baked up soft on the inside a little crisp on the outside and really good!

I’ve owned this cookbook for years and rarely use it, but I think I am going to start experimenting with some of the recipes. I really liked this one.

Betty Crockers Chocolate Chip Cookies

Made 27 cookies for me (recipe said it makes 4 dozen)

1 cup (2 sticks) room temperature unsalted butter

3/4 cup granulated sugar

3/4 cup dark brown sugar

1 egg room temperature

2 1/4 cups all purpose flour

1 tsp baking soda

1 tsp salt

1 tsp vanilla extract

Chocolate chips (I use dark and milk chocolate and never measure)

Nuts are optional but I like hazelnuts or pecans in mine

Pre heat oven to 375 degrees. Line baking sheet with parchment or silpat. Cream butter and sugar using paddle attachment until creamy and smooth, add the egg and vanilla and continue beating until incorporated. Sift the flour, baking soda and salt and add to the creamed mixture and mx just until its combined. Don’t over mix. You can make your cookies right away if you like but I like to refrigerate over night and bring to room temperature before baking. I like to use a 1 1/2 tbs scoop and place a heaping mound on the baking sheet, baking a dozen cookies at a time. You can sprinkle a few flakes of sea salt on top of the cookies before they bake if you like, it’s delicious!

Bake for 10-12 minutes rotating pan halfway through baking. Remove to cooling rack and enjoy!

Yum!

Yum!


Spring Is Here….. In Theory And A Spring Recipe

Spring Turnips

Spring Turnips

At 12:57 PM today it’s officially spring. It is a glorious day in NYC with temps in the 50’s and after a tenacious winter those warmish temps feel really nice. It will be short lived but thats ok I see the light at the end of the tunnel. The first little nubs of green are peeking through the earth and I know that very soon there will be buds everywhere.

I can’t wait for the spring vegetables to hit the market, right now it’s still winter produce. I wanted to make something that just screamed spring but, to be perfectly honest, was completely uninspired by anything I saw at the market.

I decided to reprise a recipe that I made a couple of years ago, it’s a great spring soup, it’s simple and delicious and it will be the first thing I make when the spring produce hits the farmers market. I posted this on Food 52 about 2 years ago and was a communiuty pick, the editors also made the soup and  it was photographed by Mr Ransom the very talented food52 photographer. I also posted this here in May of 2012

Creamy turnip soup

Creamy turnip soup

Creamy Spring Turnip Soup With Wilted Radish Greens And Bacon

Serves 4-6 depending on serving size

3 cups spring turnips cut in quarters

3 young leeks cleaned very well and sliced

4 cups broth (I used chicken but vegetable broth would also be good or even water)

1/4 cup heavy cream

salt and pepper to taste

Clean and slice your leeks, I like to clean, trim and chop into rounds and add to a large amount of clean water. The grit goes to the bottom, then I scoop them out and rinse again. Let them air dry while you prep the turnips. Peel, rinse and chop the turnips into quarters.

Heat only enough olive oil to coat the bottom of a heavy large saucepan, add the dried leeks and cook only until softened. Add the turnips and cook for a short time you don’t want them to brown only to start to soften, I cooked on medium/high heat, Add the stock, bring to a boil then reduce heat to medium and cook for approximately 30 minutes or until the turnips are very soft.

You may not need all of the liquid depending on how thick you like your soup, so drain the turnips and leeks and process in blender until very smooth, Pour into a bowl and add back the stock until it reaches the consistency you like. Now add the heavy cream. Adjust seasoning. Stir and set aside while you make the topping. If you are serving the soup warm pour back in the saucepan and keep on very low flame.

Greens and Bacon

4-6 slices bacon (I like maple cured)

the leaves from a head of radishes

Remove the greens from the radishes and clean very well to remove any grit, Lay on paper towel to dry.

Fry the bacon until crisp, remove from pan and lay on paper towel, add the dried radish greens and saute only until wilted, Remove to paper towel. Ladle soup into bowls lay some of the wilted greens and crumble some of the bacon on top.

Photograph by James Ransom for Food52

Photograph by James Ransom for Food52

Happy St. Patricks Day

Irish Countryside

Irish Countryside

Ireland

Ireland

Irish Coffee,Brown Bread with Butter and Caramelized Pear Jam

Irish Coffee,Brown Bread with Butter and Caramelized Pear Jam

Corned beef, Colcannon, irish soda bread

Corned beef, Colcannon, irish soda bread

I want to take this opportunity to wish everyone a Happy St. Patricks Day. I did not and am not making anything special  but I did not want to let this day pass without well wishes. Here are some images from last year. Hope you all have a wonderful day, with great food and drink! La Fhelle Padraig Sona Daoibh!

Genoise With Strawberries And Whipped Cream Frosting

The cake

The cake

The Genoise I made the other day was for a special event, it was made for a very special girl who turned 9 years old today. She wanted colored icing and strawberries. I wanted to try and make the frosting pink without the use of food color. I thought the genoise lent itself to a whipped cream frosting rather than a buttercream because of the addition of fresh strawberries. I have posted here on the blog the recipe I use for a stable whipped cream frosting, it’s a recipe by James McNair from his book Cakes.

It’s an excellent recipe, and makes a very stable frosting that will not turn watery or dissolve. Here is the basic recipe:

Whipped Cream Frosting:

From James Mcnair’s Cakes

  • 1/4 cup powdered sugar
  • 2 1/2 teaspoons cornstarch
  • 2 cups Heavy whipping cream Divided
  • 1 teaspoon Pure vanilla extract
  1. Place metal bowl and wire whisk beater or beaters in freezer to chill.
  2. In a small saucepan combine the powdered sugar and cornstarch whisk until mixed. Slowly whisk in 1/2 cup heavy cream whisk until smooth. Place on medium heat and stir constantly to prevent scorching at the bottom stir constantly until mixture thickens and almost comes to a boil. Remove from heat, transfer to a bowl and set aside stirring occasionally until it reaches room temperature.
  3. In the chilled bowl combine the remaining 1 1/2 cups of heavy cream and the vanilla beat with the chilled whisk of your stand mixer or your hand held mixer until the cream begins to hold shape. While still beating add the powdered sugar mixture a little at a time. Beat just until the mixture forms stiff peaks when the beater is raised and is spreadable, be careful not to over beat. Use immediately.

I took the basic recipe ad changed it a bit since I wanted my frosting to be pink. First I made a strawberry syrup by simply boiling strawberries with a little sugar, strain, smash and bottle. Super easy. I did this the day before and refrigerated the syrup. It’s a beautiful red.

strawberry syrup

strawberry syrup

Here is the recipe for the pink whipped cream frosting using James McNair’s whipped cream frosting as a base:

1/2 cup strawberry syrup

2 1/2 tsp corn starch

1/4 cup confectioners sugar

1 1/2 cups heavy cream

1 tsp vanilla

In small saucepan add the strawberry syrup, cornstarch and confectioners sugar. Cook on medium heat until it thickens, immediately remove from the burner and spoon into a bowl . Let come to room temperature stirring occasionally.

To chilled mixing bowl add the heavy cream and vanilla,  with a chilled beater or whisk attachment start whipping the cream, when it begins to hold it’s shape add the cooled strawberry pudding, whip until it becomes a spreading consistency. Spread on your cake and refrigerate. This was enough to generously frost a 3 layer 8 inch cake.

Blueberry Muffins

Blueberry Muffins

Blueberry Muffins

Really, there are countless recipes out there in cyberspace, print and in our recipe files. I feel like there is always room for one more in my repertoire when it stands out. I like my muffins cakey rather than well, like a quick bread I have run across several in my culinary travels that have fit the bill. I saw these on pinterest (I think) and they sounded really good. Cake flour so they are light, vegetable oil so they are super moist and yogurt, not just for flavor but additional moistness and of course lots of blueberries. The muffins are from Alton Brown of Food Network. I have mad respect for Mr. Brown, his scientific and entertaining approach to cooking is wonderful.

I like these muffins a lot, it was my first time using this recipe and I will definitely use it again. I followed the directions for the most part exactly as written except for 2 things. I didn’t have fresh blueberries, I used frozen and they worked out just fine and I sprinkled a little organic sugar on the top of the muffins before baking. The muffin tops are crisp and a little crunchy and every bite gives you blueberry. One other last tip, if using frozen blueberries, toss them in 1 tbs flour, don’t reserve one tbs of the dry ingredients as indicated in the recipe.

Blueberry Muffins – Alton Brown

Makes 12 muffins

12 1/2 ounces cake flour
1 teaspoon baking soda
2 teaspoons baking powder
Heavy pinch salt
1 cup sugar
1/2 cup vegetable oil
1 egg
1 cup yogurt
1 1/2 cups fresh blueberries
Vegetable spray, for the muffin tins
Directions

Preheat oven to 380 degrees F.

In a large bowl sift together the flour, baking soda, baking powder, and salt and set aside.

In another large bowl, whisk together the sugar, oil, egg and yogurt. Add the dry ingredients reserving 1 tablespoon of the dry ingredients and toss with the blueberries. Stir mixture for a count of 10. Add 1 cup blueberries to mixture and stir 3 more times. Reserve the 1/2 cup of blueberries.

Using a #20 ice cream scoop, add the mixture to greased muffin pans. Sprinkle the remaining 1/2 cup of berries on top of muffins and press down lightly. Place into the oven and increase the temperature to 400 degrees. Bake for 20 to 25 minutes, rotating pan halfway through. Remove from oven and turn out, upside down on tea towel to cool completely. Serve immediately or store in airtight container for 2 to 3 days.

Moist and loaded with blueberries

Moist and loaded with blueberries

The Basics- Creme Patissiere, Genoise And A Boston Cream Pie

Perfect egg whites Perfect egg whites

Pastry Cream and Genoise, the building blocks for many different cakes or desserts. These recipes are again from Julia Child and are in her book Julia’s Kitchen Wisdom. Pastry Cream when used as a filling in a cake, pie or tart needs to be just the right consistency, not too thin or it will be runny and not so thick that it is reminiscent of glue. I found this recipe to be pretty perfect. The recipe gives you the option of using flour or corn starch as the thickening agent. Use whatever you are comfortable with.

A perfect Genoise is not as difficult as you may think. Once you master the technique it is a beautiful thing. I have had my share of fails and I always know why it failed, it was technique. I found that when making Genoise I cannot be interrupted, each step must flow, believe me this is not easy with the elderly pugs so I carefully plan for when I will make this cake.

Creme Patissiere Creme Patissiere

Creme Patissiere

Makes approximately 2 cups pastry cream

Whisk 6  room temperature egg yolks in a stainless steel saucepan or mixing bowl, gradually adding 1 cup sugar and a pinch of salt. Continue until eggs are thick and pale yellow and form a ribbon. Sift on and whisk in 1/2 cup flour or cornstarch (I like to use cornstarch). Whisk in 2 cups hot milk or half and half by dribbles at first. Whisking slowly, bring to a boil, then wisk vigorously for a few seconds to smooth any lumps. Simmer, slowly stirring with a wooden spoon or whisk for 2 minutes (when it becomes thick) to cook the flour or corn starch (At this point whisk or stir constantly, it will thicken quickly and could easily scorch). If you are using a thermometer the custard should read 165, it will be very thick.  Remove from heat and blend in 1 tbs pure vanilla extract and 2 tbs unsalted butter and rum or kirsch. Strain through a fine meshed sieve into a bowl. Let cool, stirring occasionally to prevent lumps. Press a sheet of plastic wrap onto the surface to prevent a skin from forming. Cover and refrigerate for up to 2-3 days. Can also be frozen.

Note: The pastry cream is very thick, I usually whip it with my mixer before using it, add 2-4 tbs of heavy cream and whip or whisk until it’s fluffy. 

9 inch genoise 9 inch genoise

Genoise

For about 6 cups of batter, to make 1 round 9 x1 1/2 inch cake, or 1  round 8×2″ cake or enough for 16 cup cakes or a 12×16 inch sponge sheet.

1/2 cup plus 1/3 cup plain unbleached cake flour sifted

1 tbs plus 1/2 cup sugar

1/4 tsp salt

1/4 cup clarified butter (I don’t always use clarified butter and it turns out just fine)

4 large eggs (soak the eggs in warm water for 5 minutes before whipping them, this will help to aerate the eggs and they will whip higher- saw this tip on a video Gourmet Magazine did)

1 tsp pure vanilla extract

Pre heat oven to 350 degrees. Slide rack onto the lower middle level and prepare your pan. (I like to use a parchment round) butter and flour your pan well.

Sift the flour with the 1 tbs of sugar and salt and set aside, reserve your clarified butter. Beat the eggs with the remaining  1/2 cup sugar and vanilla in your mixer until it has formed the ribbon.  At once rapidly sift on and fold in a quarter of the flour, then fold in half of what remains, then fold in the remaining flour. In other words you will fold in the dry ingredients in 3 installments.  Fold a large plop of this batter into the clarified butter, then fold into the remaining batter. Turn batter into prepared pan filling to no more than 1/4 inch from the rim of the pan. Bang lightly on work surface to deflate bubbles and bake 30-35 minutes until light and golden brown and showing a faint line of shrinkage from the sides of the pan, let cool 20 minutes before unmolding onto a rack. Let cool completely before filling or icing.

Note:If you use an 8 inch round, the cake it is much higher than the 9 inch.

Making clarified butter:

The simple system: melt the butter and pour the clear yellow liquid off the milky residue. The professional long keeping method: Bring butter to a slow boil in a roomy saucepan and boil until its crackling and bubbling almost cease. Pour the clear yellow butter through a tea strainer into a jar where it will keep for months in the refrigerator or freezer.

Boston Cream Pie Boston Cream Pie

Boston Cream Pie

A little history from Wikipedia:

A Boston cream pie is a cake that is filled with a custard or cream filling and frosted with chocolate. Although it is called a Boston cream pie, it is in fact a cake and not a pie. Created by Armenian-French chef M. Sanzian at Boston’s Parker House Hotel in 1856, this pudding and cake combination comprises two layers of sponge cake filled with vanilla flavored custard or crème pâtissière. The cake is topped with a chocolate glaze (such as ganache) and sometimes powdered sugar and a cherry.

The Boston cream pie is the official dessert of Massachusetts, declared as such in 1996.

This is my all time favorite cake, it has been since I was a child. It was my choice for a Birthday cake. There is something about the yellow cake, creamy vanilla pudding and chocolate ganache that are just so delicious.

The Glaze or Ganache

4 oz chocolate (all dark or half dark half milk) chopped into small pieces

1/4 cup + 2 tbs heavy cream

1 tbs Kahlua or corn syrup (Optional)

Place chocolate in bowl, heat cream to scalding, pour over chocolate and let sit for 5 minutes, add the optional Kahlua or corn syrup, stir until smooth and shiny.

Assembling

Cut your cake layer in half, brush each half (cut half) with simple syrup (you can flavor with a liquor if you like) spread a thick layer of pastry cream on the bottom half, place top half on, press down gently, smooth pastry cream with flexible offset spatula, pour ganache or glaze on cake. Serve at room temperature.

Beautiful Beautiful

IMG_5578

Happy Valentines Valentines Day – Coquille St. Jacques Part 3, The Entree and Wine

Coquille St Jacques

Coquille St Jacques

I don’t know what made me think of this dish, it was one of my favorites years ago. It’s been a very long time since I have had it and have never made it myself.   After searching the internet to find recipes, I decided to make this one from Epicurious, actually I combined several different techniques when I made it. This dish is really very simple to make and is an elegant and delicious meal. It  is a scallop gratin,  and was very popular in the 1950’s but had fallen from popularity and has been replaced by lighter fare. It is often served in the shell of the scallop but if you don’t happen to have the shells a gratin dish works just as well. I serve with a crisp salad of belgian endive, microgreens, mandarin orange segements and toasted pecans.The wine I chose is a  2011 Pouilly Fuisse, fresh and assertive and bold enough to pair nicely with a rich cream sauce.  It’s a lovely dinner for two and no one has to know how simple it is to make.

The Salad:

Belgian Endive

Mandarin Orange segments

pecans toasted and chopped

Micro greens

Vinaigrette

Good Olive Oil

Champagne Vinegar

Squeeze of fresh Orange Juice

Drizzle of honey

Herbes de provence

dijon mustard

sea salt and pepper

Coquille St. Jacque -Loosely Adapted From Epicurious 

Serves 2

1 cup white wine

1 large shallot chopped

Bouquet Garni (I used parsley, thyme, bay leaf, tarragon)

Pinch of herbes de provence (Optional)

1 lb fresh dry scallops

8 oz mushrooms

4 tbs butter divided

2 tbs flour

1/2 cup heavy cream

salt and pepper to taste

bread crumbs

grated gruyere cheese

1. Saute the shallot in 2 tbs butter, when translucent add the mushroom and continue to saute until soft. Pour in the wine and add the bouquet garni, optional herbes de provence and simmer on medium heat until liquid is reduced by about half.

2. Add the scallops and simmer for 2-4 minutes, careful not to over cook, remove with slotted spoon and set aside. Remove the bouquet garni.

3. Add the remaining 2 tbs of butter to the liquid and whisk in the flour, cook until thichened, pour in the cream and continue cooking until it’s thickened to the consistency of heavy cream . Remove from heat and add the scallops.

4. Fill 6 scallop shells or shallow 6-inch ramekins almost to the top with the scallop mixture. Dust the top lightly with bread crumbs and sprinkle with the grated cheese. (If you’re not ready to serve the scallops, cover them with plastic wrap and refrigerate.

5. Preheat the broiler. Broil the gratin until the mixture bubbles and the cheese melts and turns golden brown.

Belgian Endive, orange, pecan, micro greens

Belgian Endive, orange, pecan, micro greens

Pouilly Fuisse

Pouilly Fuisse