Skip to content

Posts from the ‘Desserts’ Category

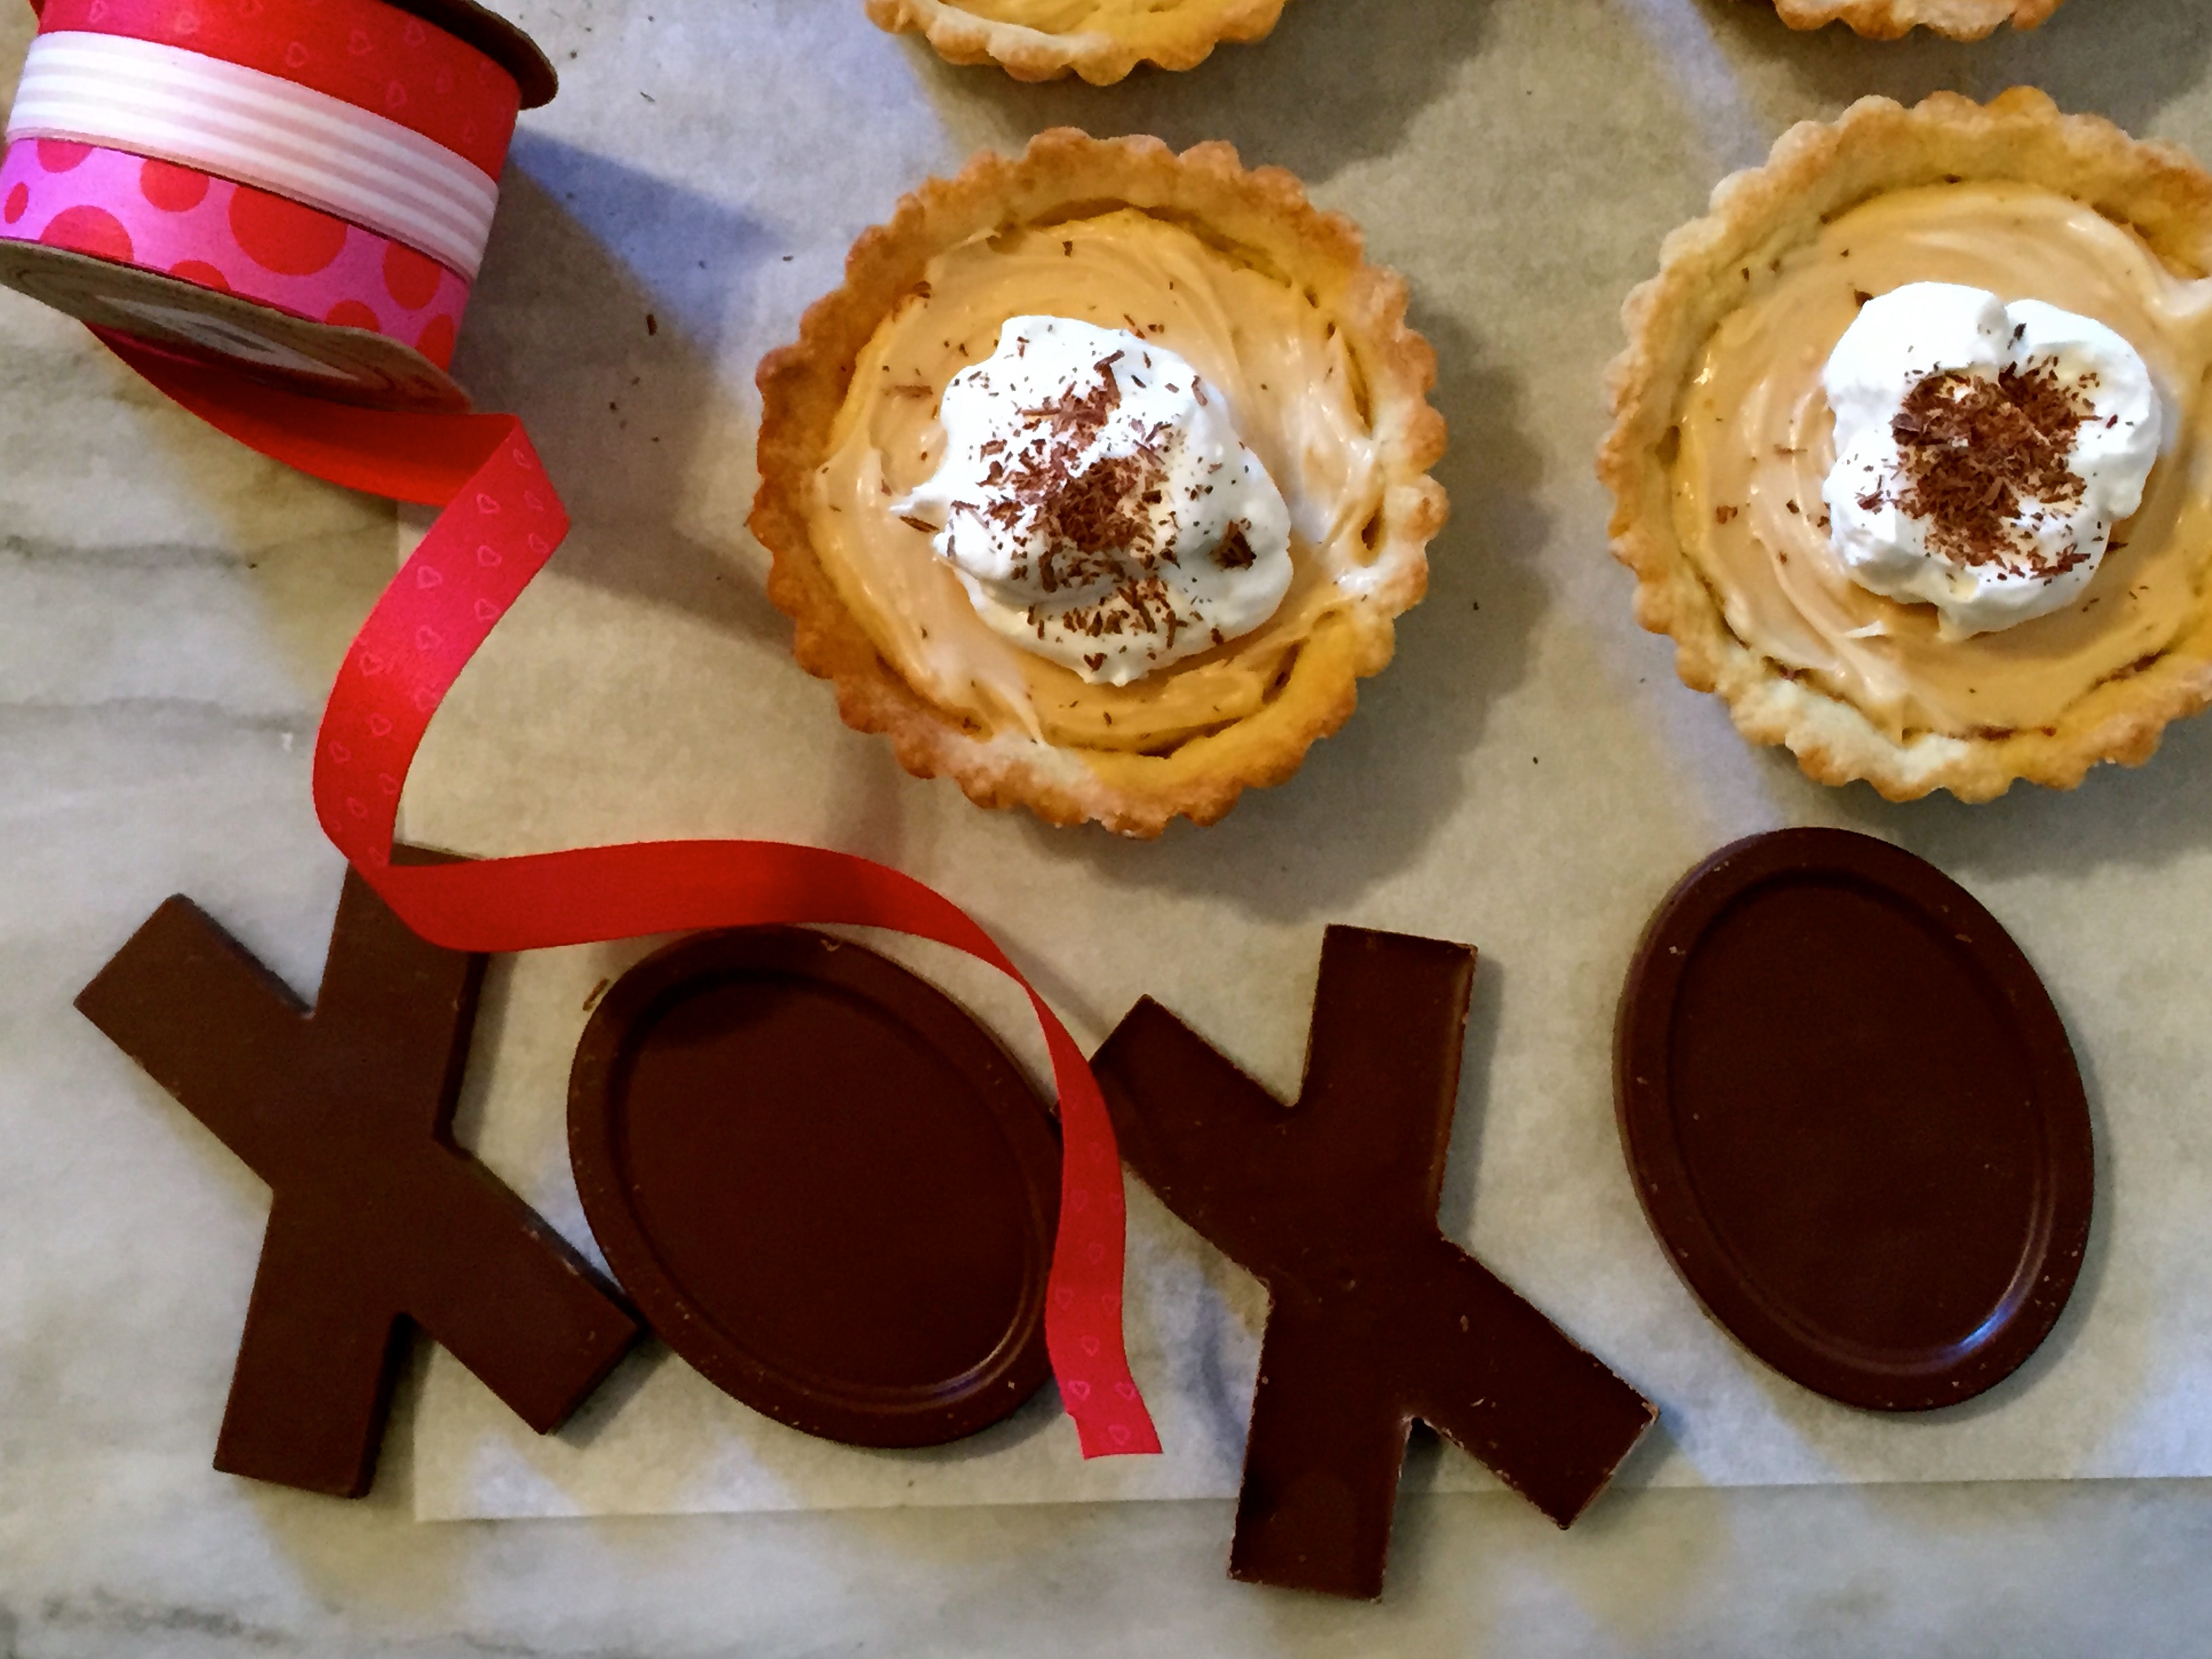
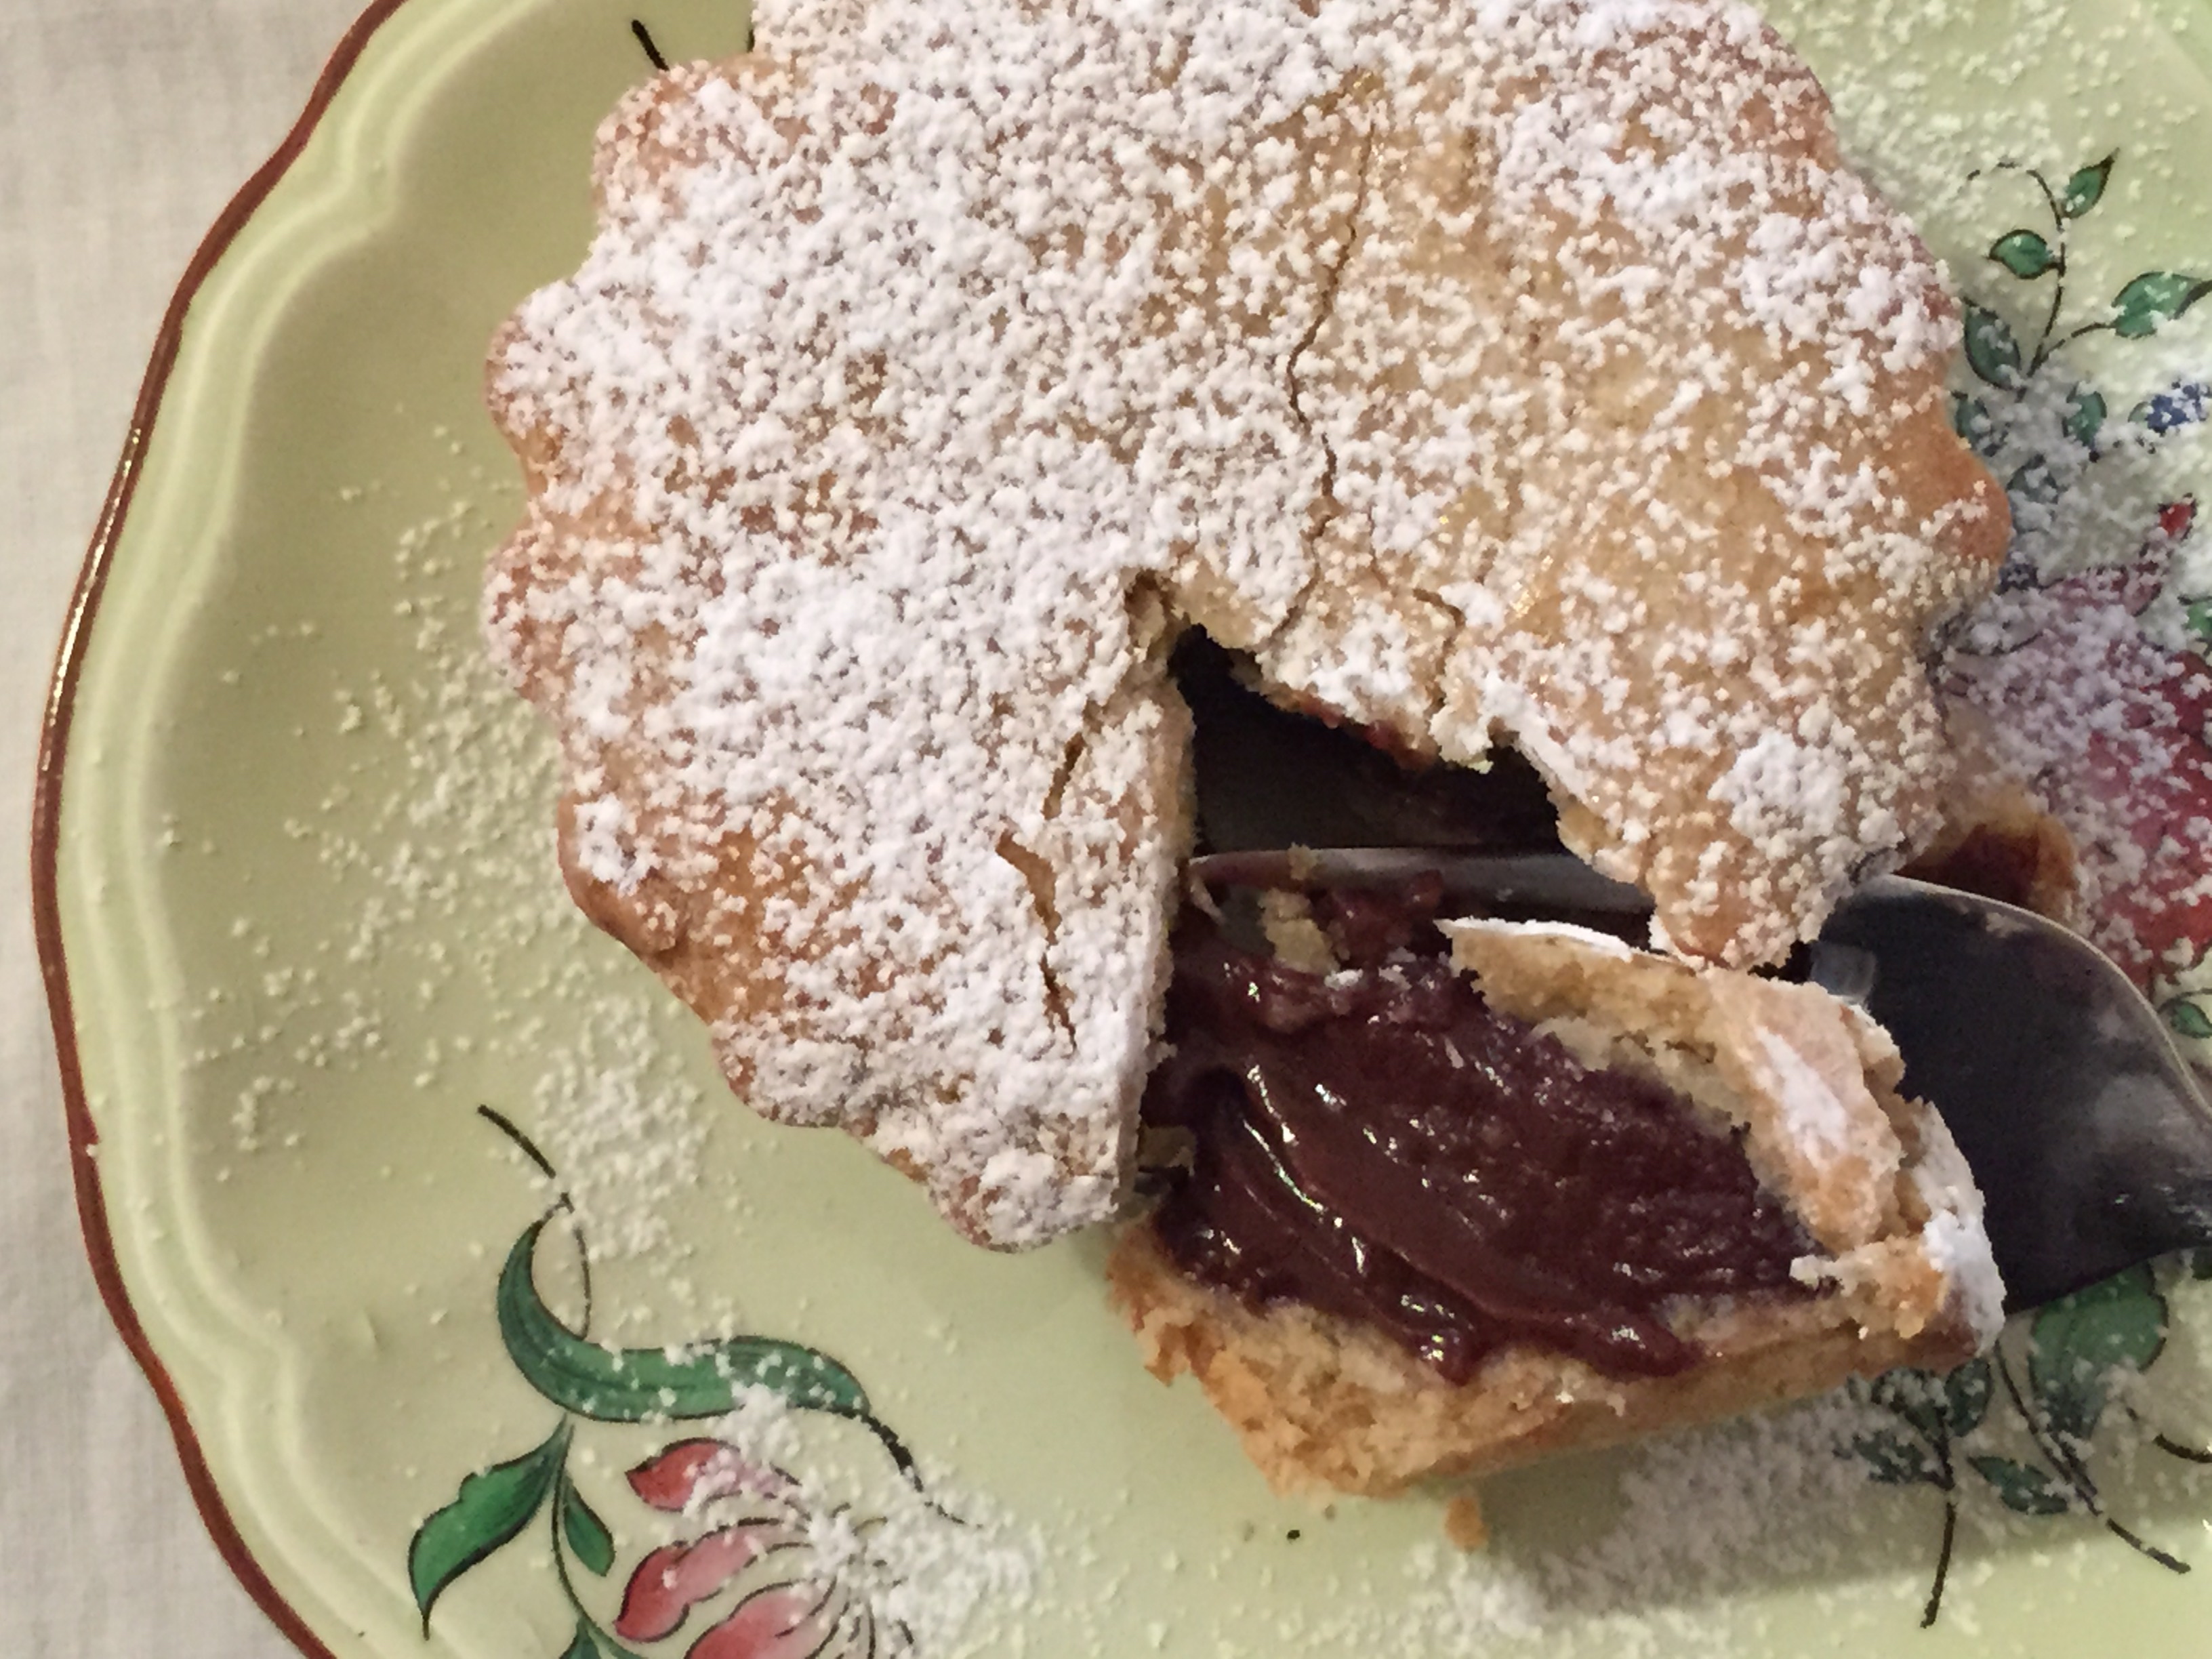
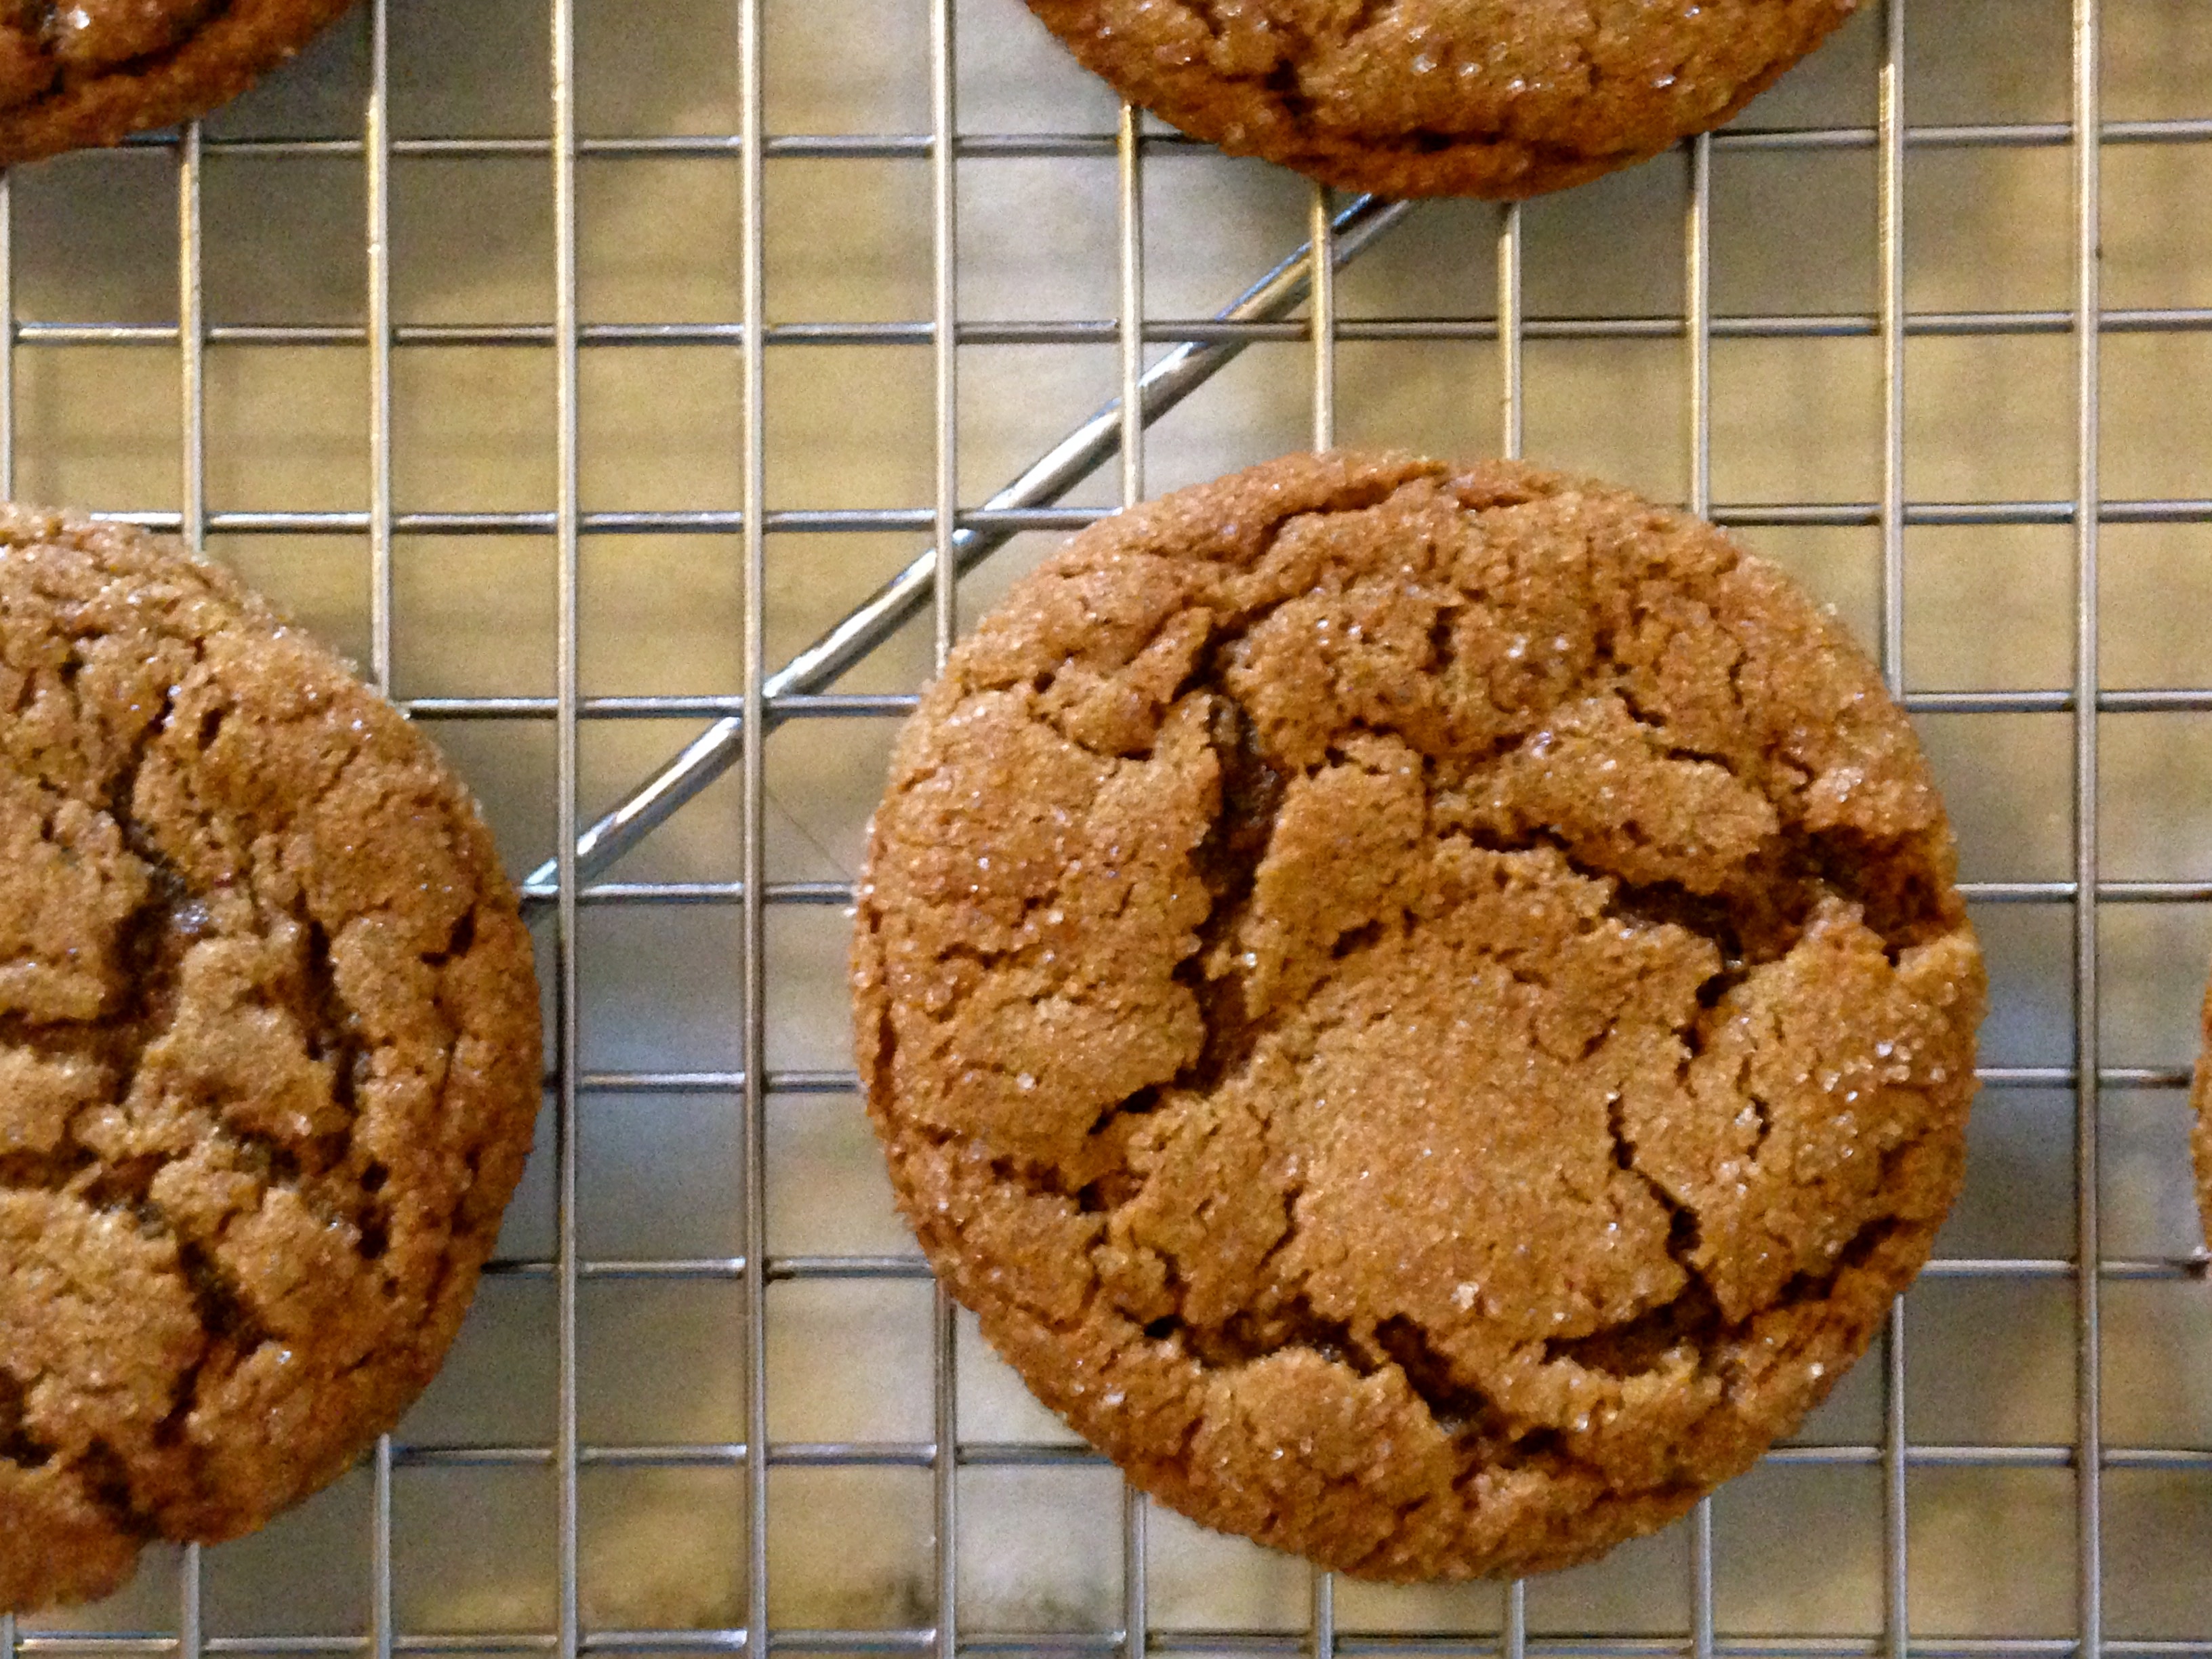
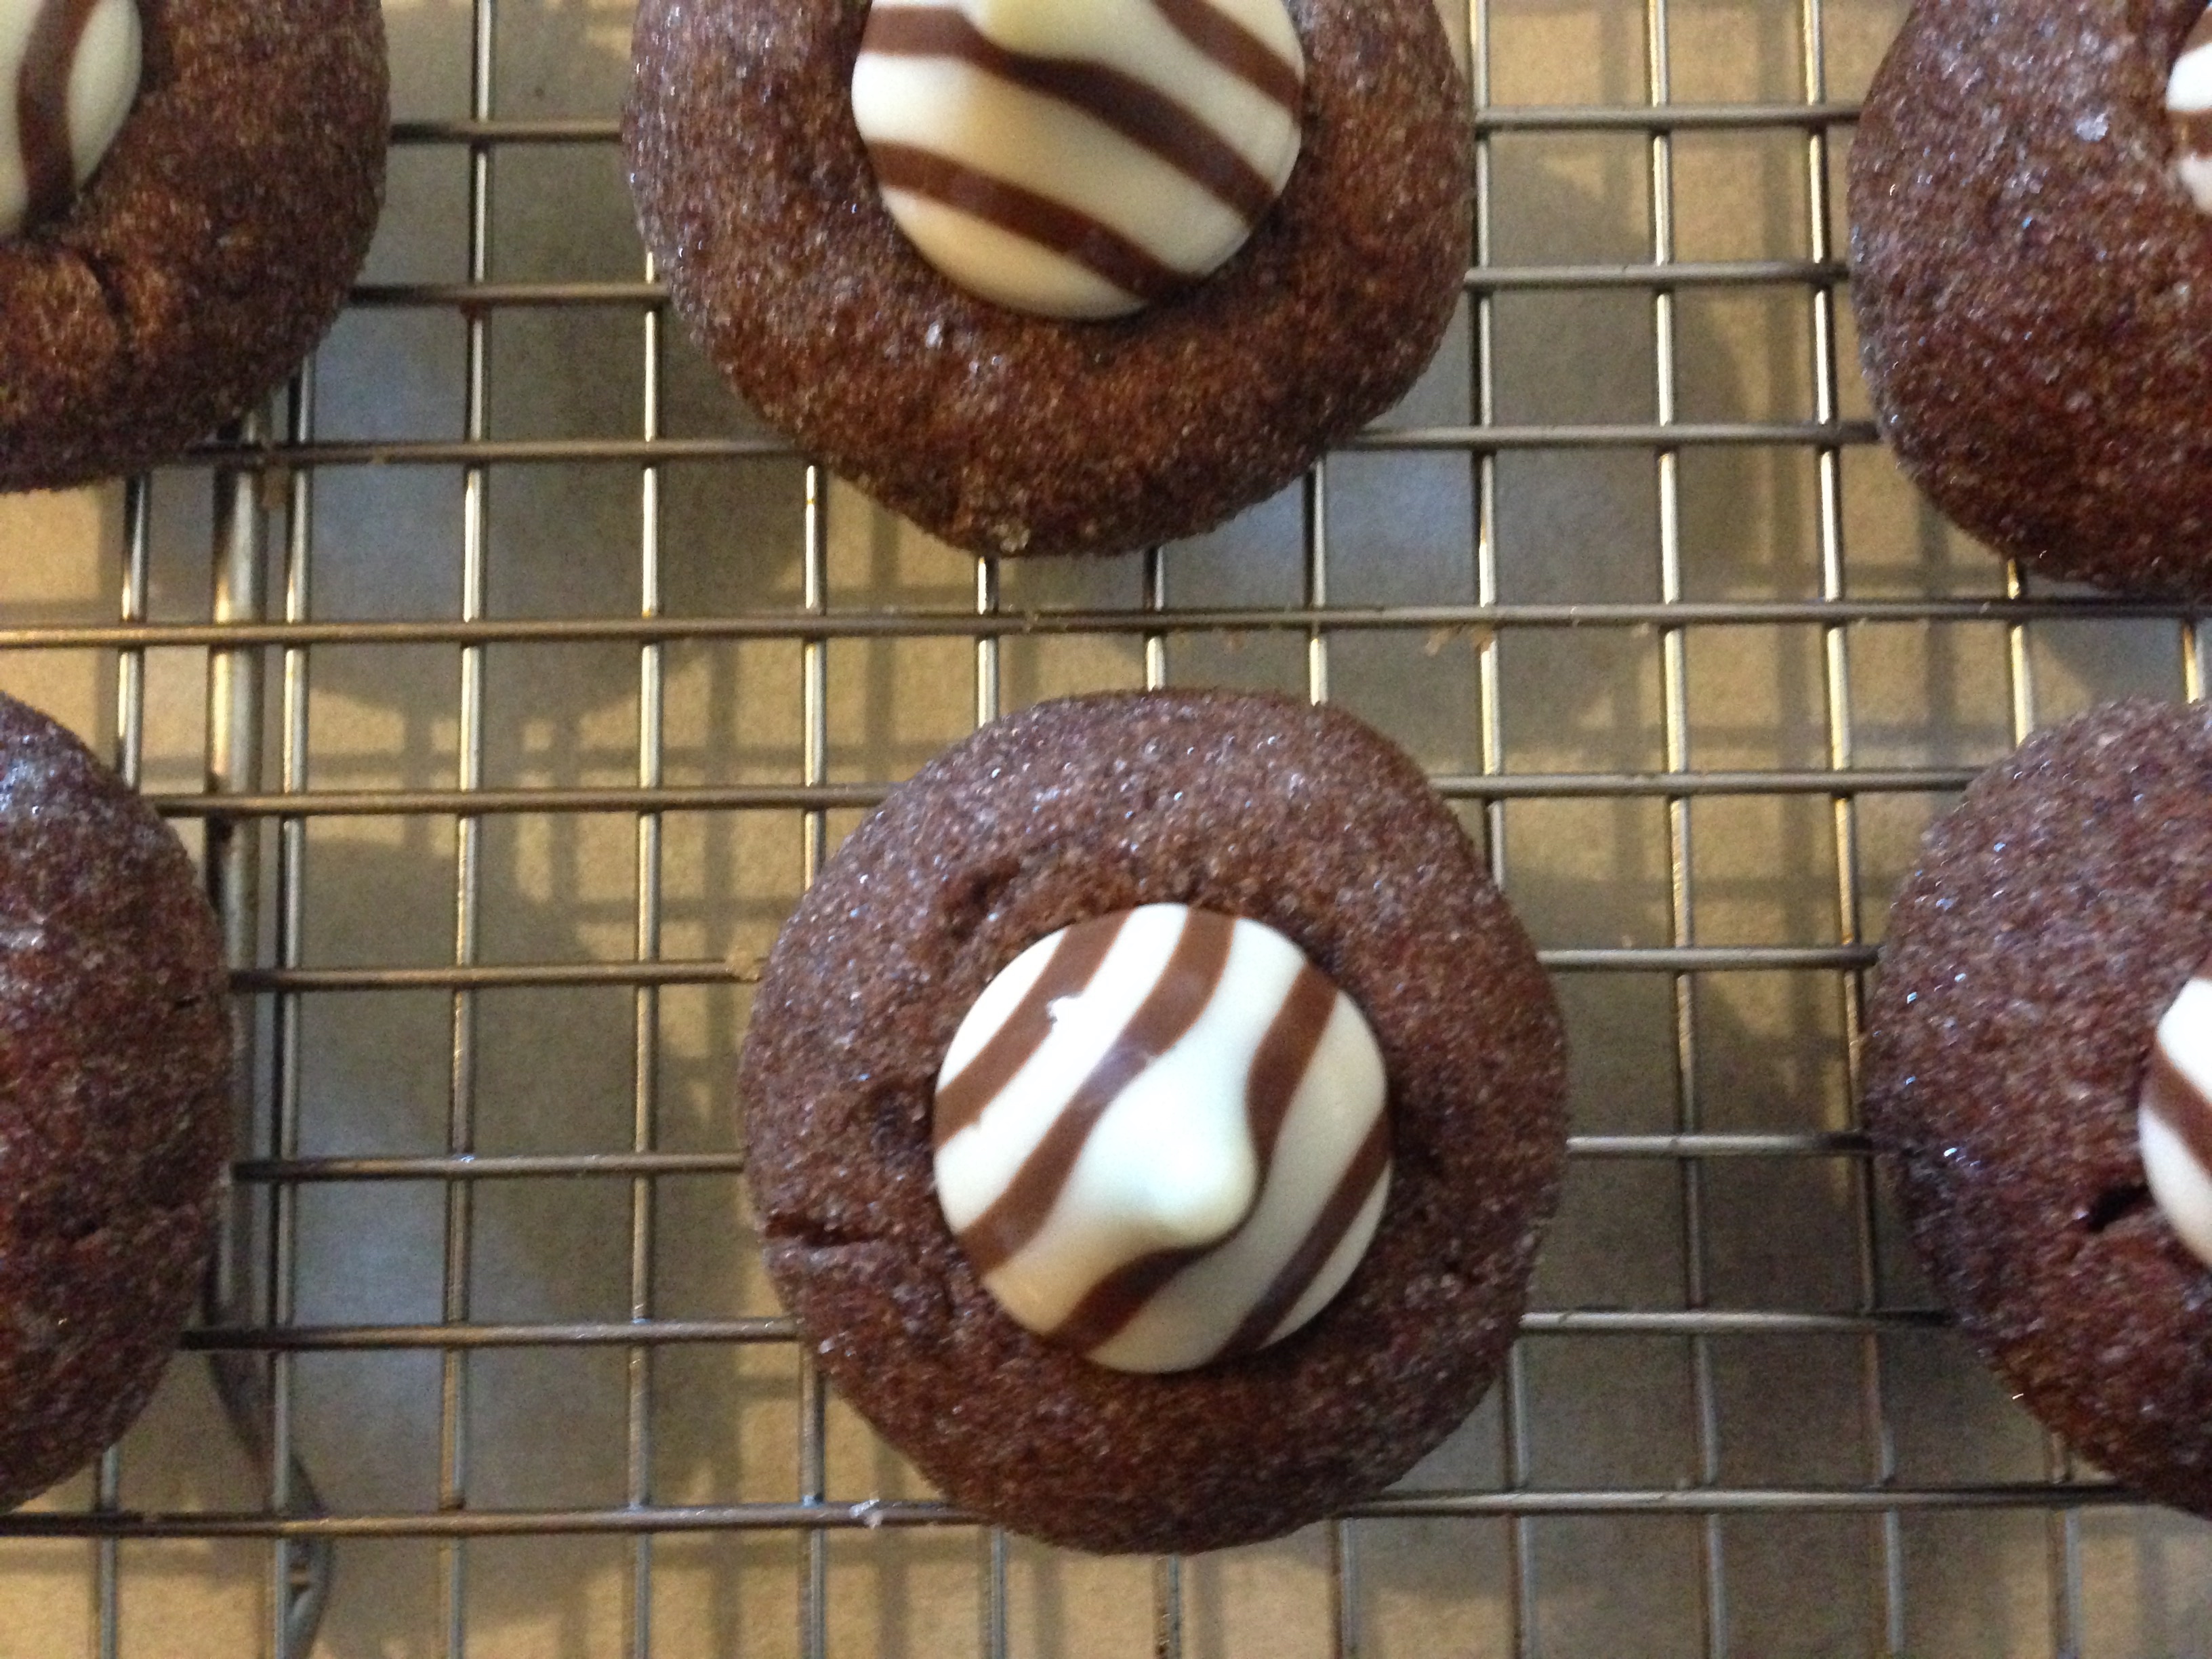
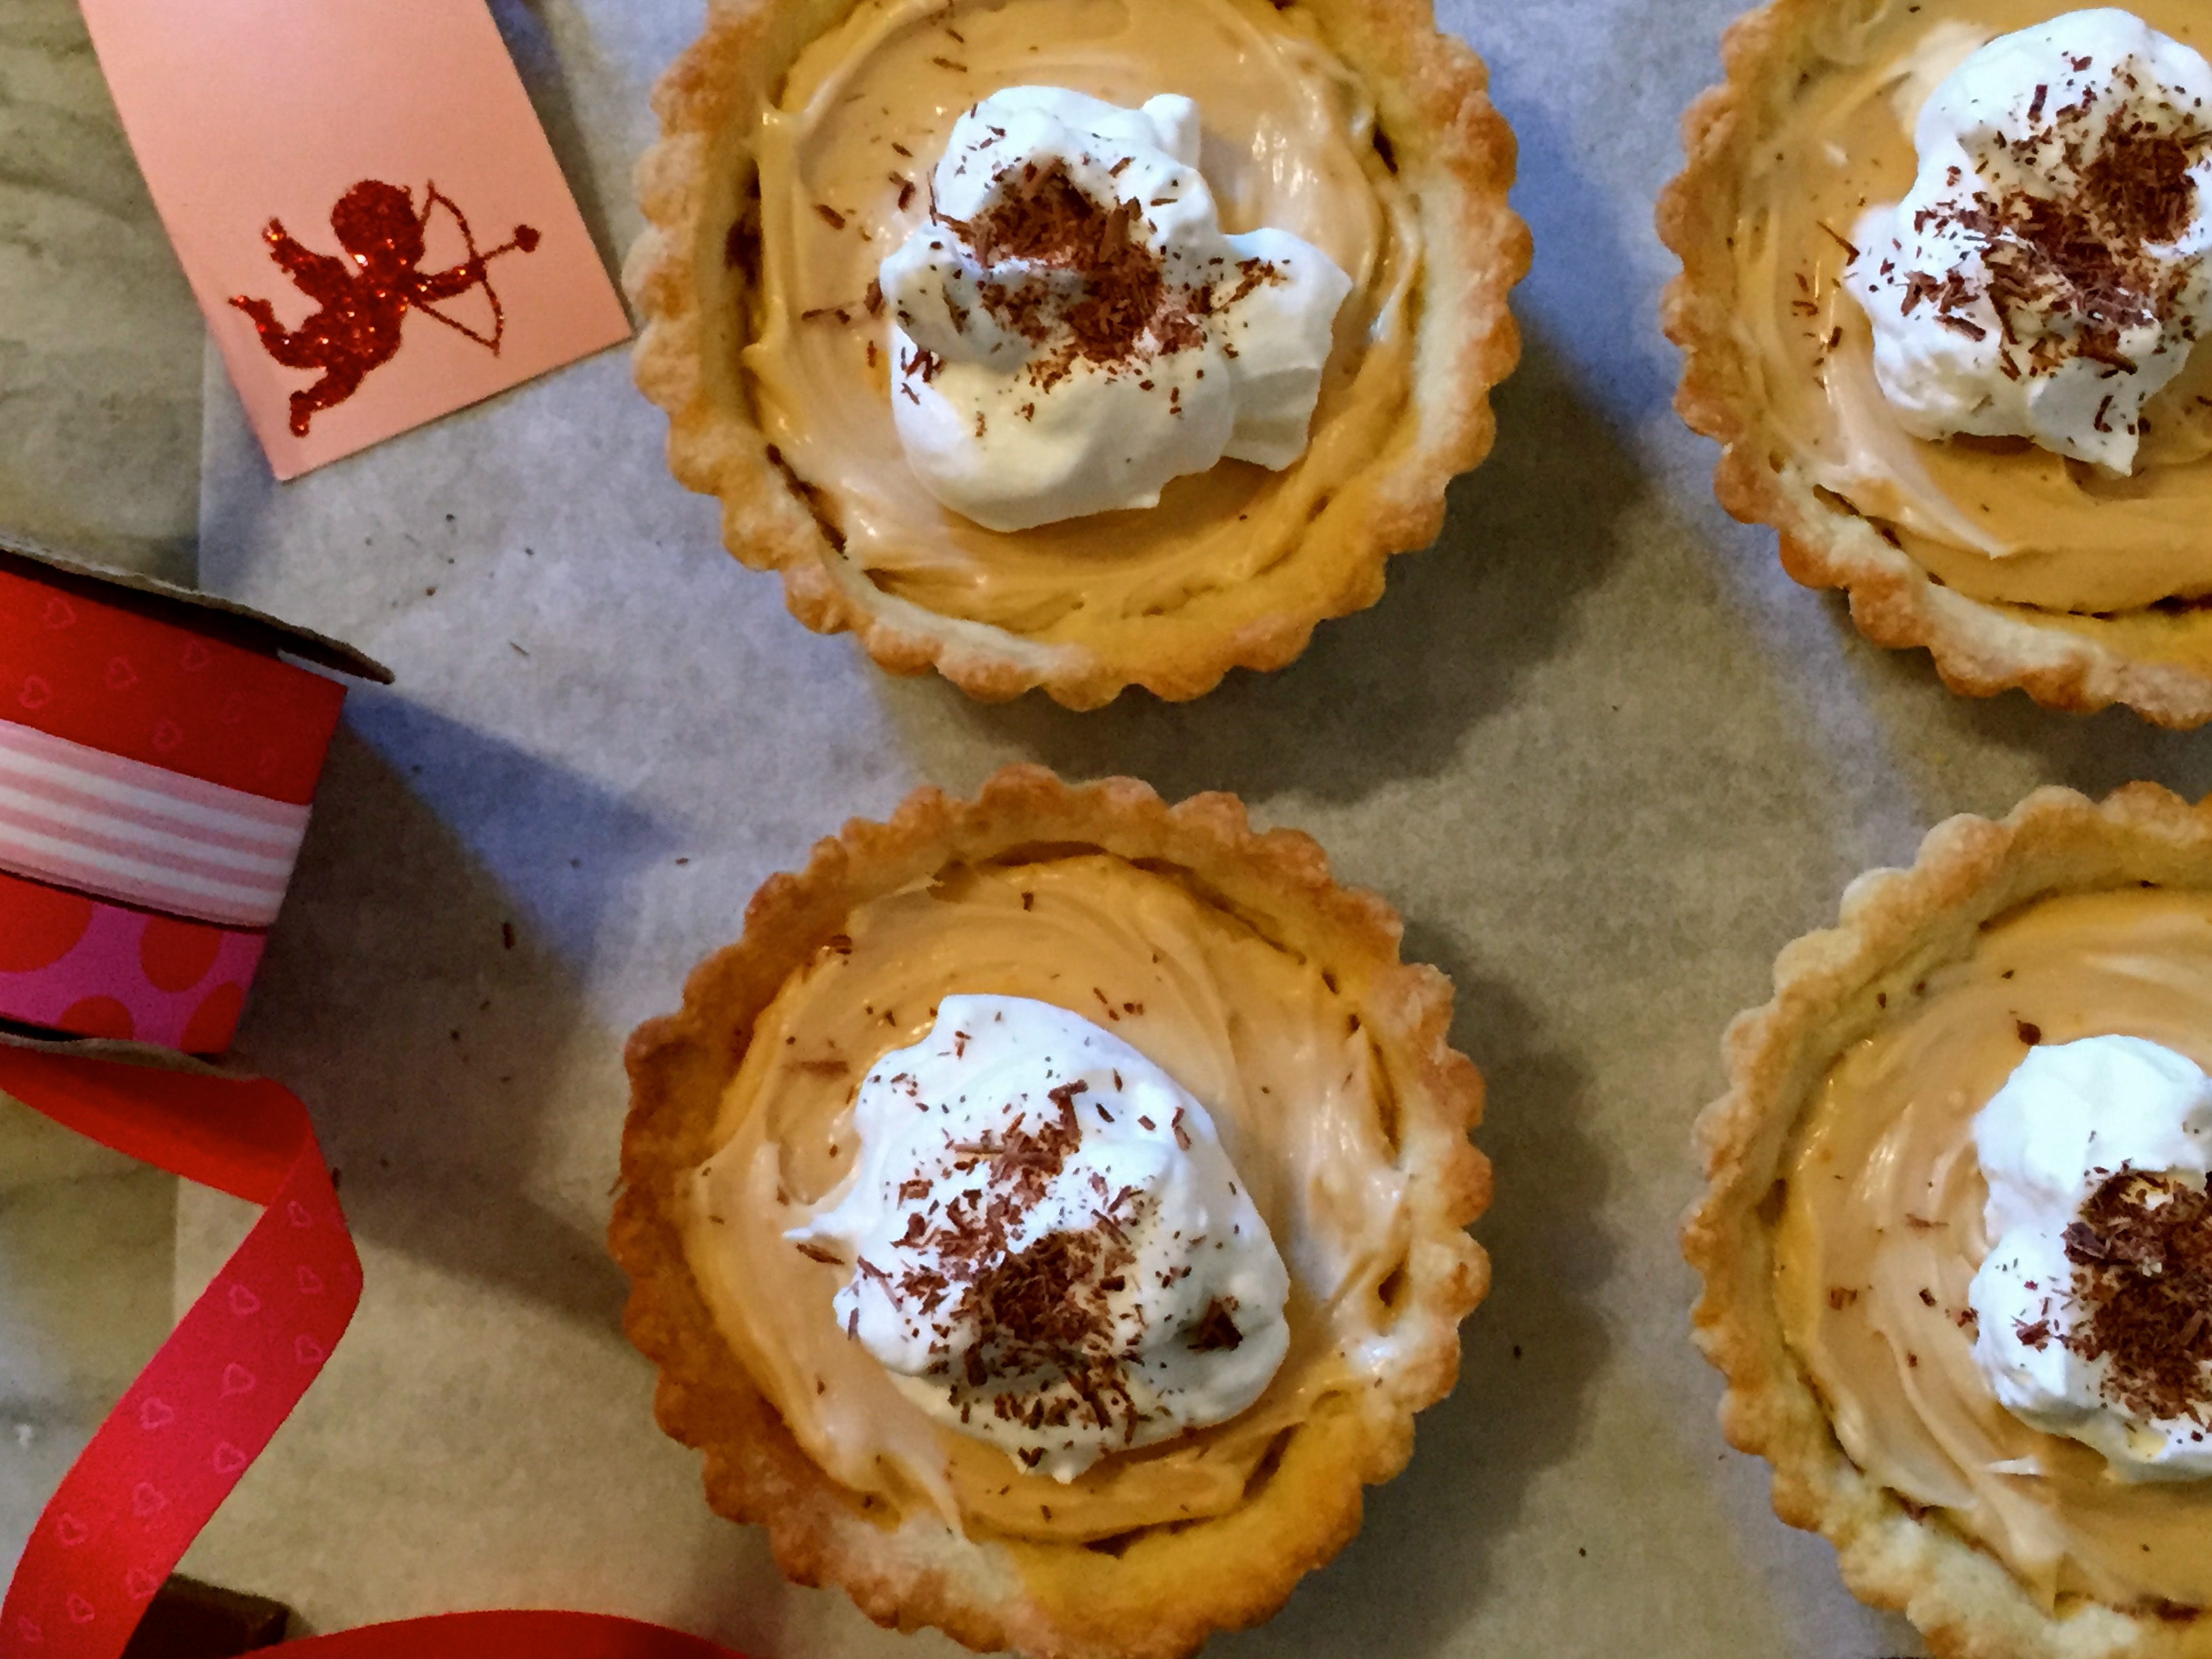
Happy Valentines Day, Tartlets With Blood Orange Curd, Whipped Cream And Nutella

tarts

tarts

This combines two wonderful celebrations, Valentines Day and Fiesta Friday. This post has morphed several times with some failed attempts at a cake (cake pan problems) and I have now settled on tartlets with a layer of nutella and filled with blood orange curd. They are delicious and I hope you enjoy!

This Friday, the day before Valentines Day is very special because we are celebrating two occasions, Valentines Day and Fiesta Friday #55, how great is that?  Thank you Angie@The Novice Gardener for hosting you rock,  the co hosts this week are Sue@birgerbird and me, moi, yep I’m a co host this week no link necessary because if you are reading this you are already here!! Very excited to host with my buddy Sue.

I needed to use the blood oranges so I squeezed the juice ahead of making the curd and froze in ice cube trays, I also threw in 2 mandarins. the color is incredible!!!


Look at the color of the blood orange juice

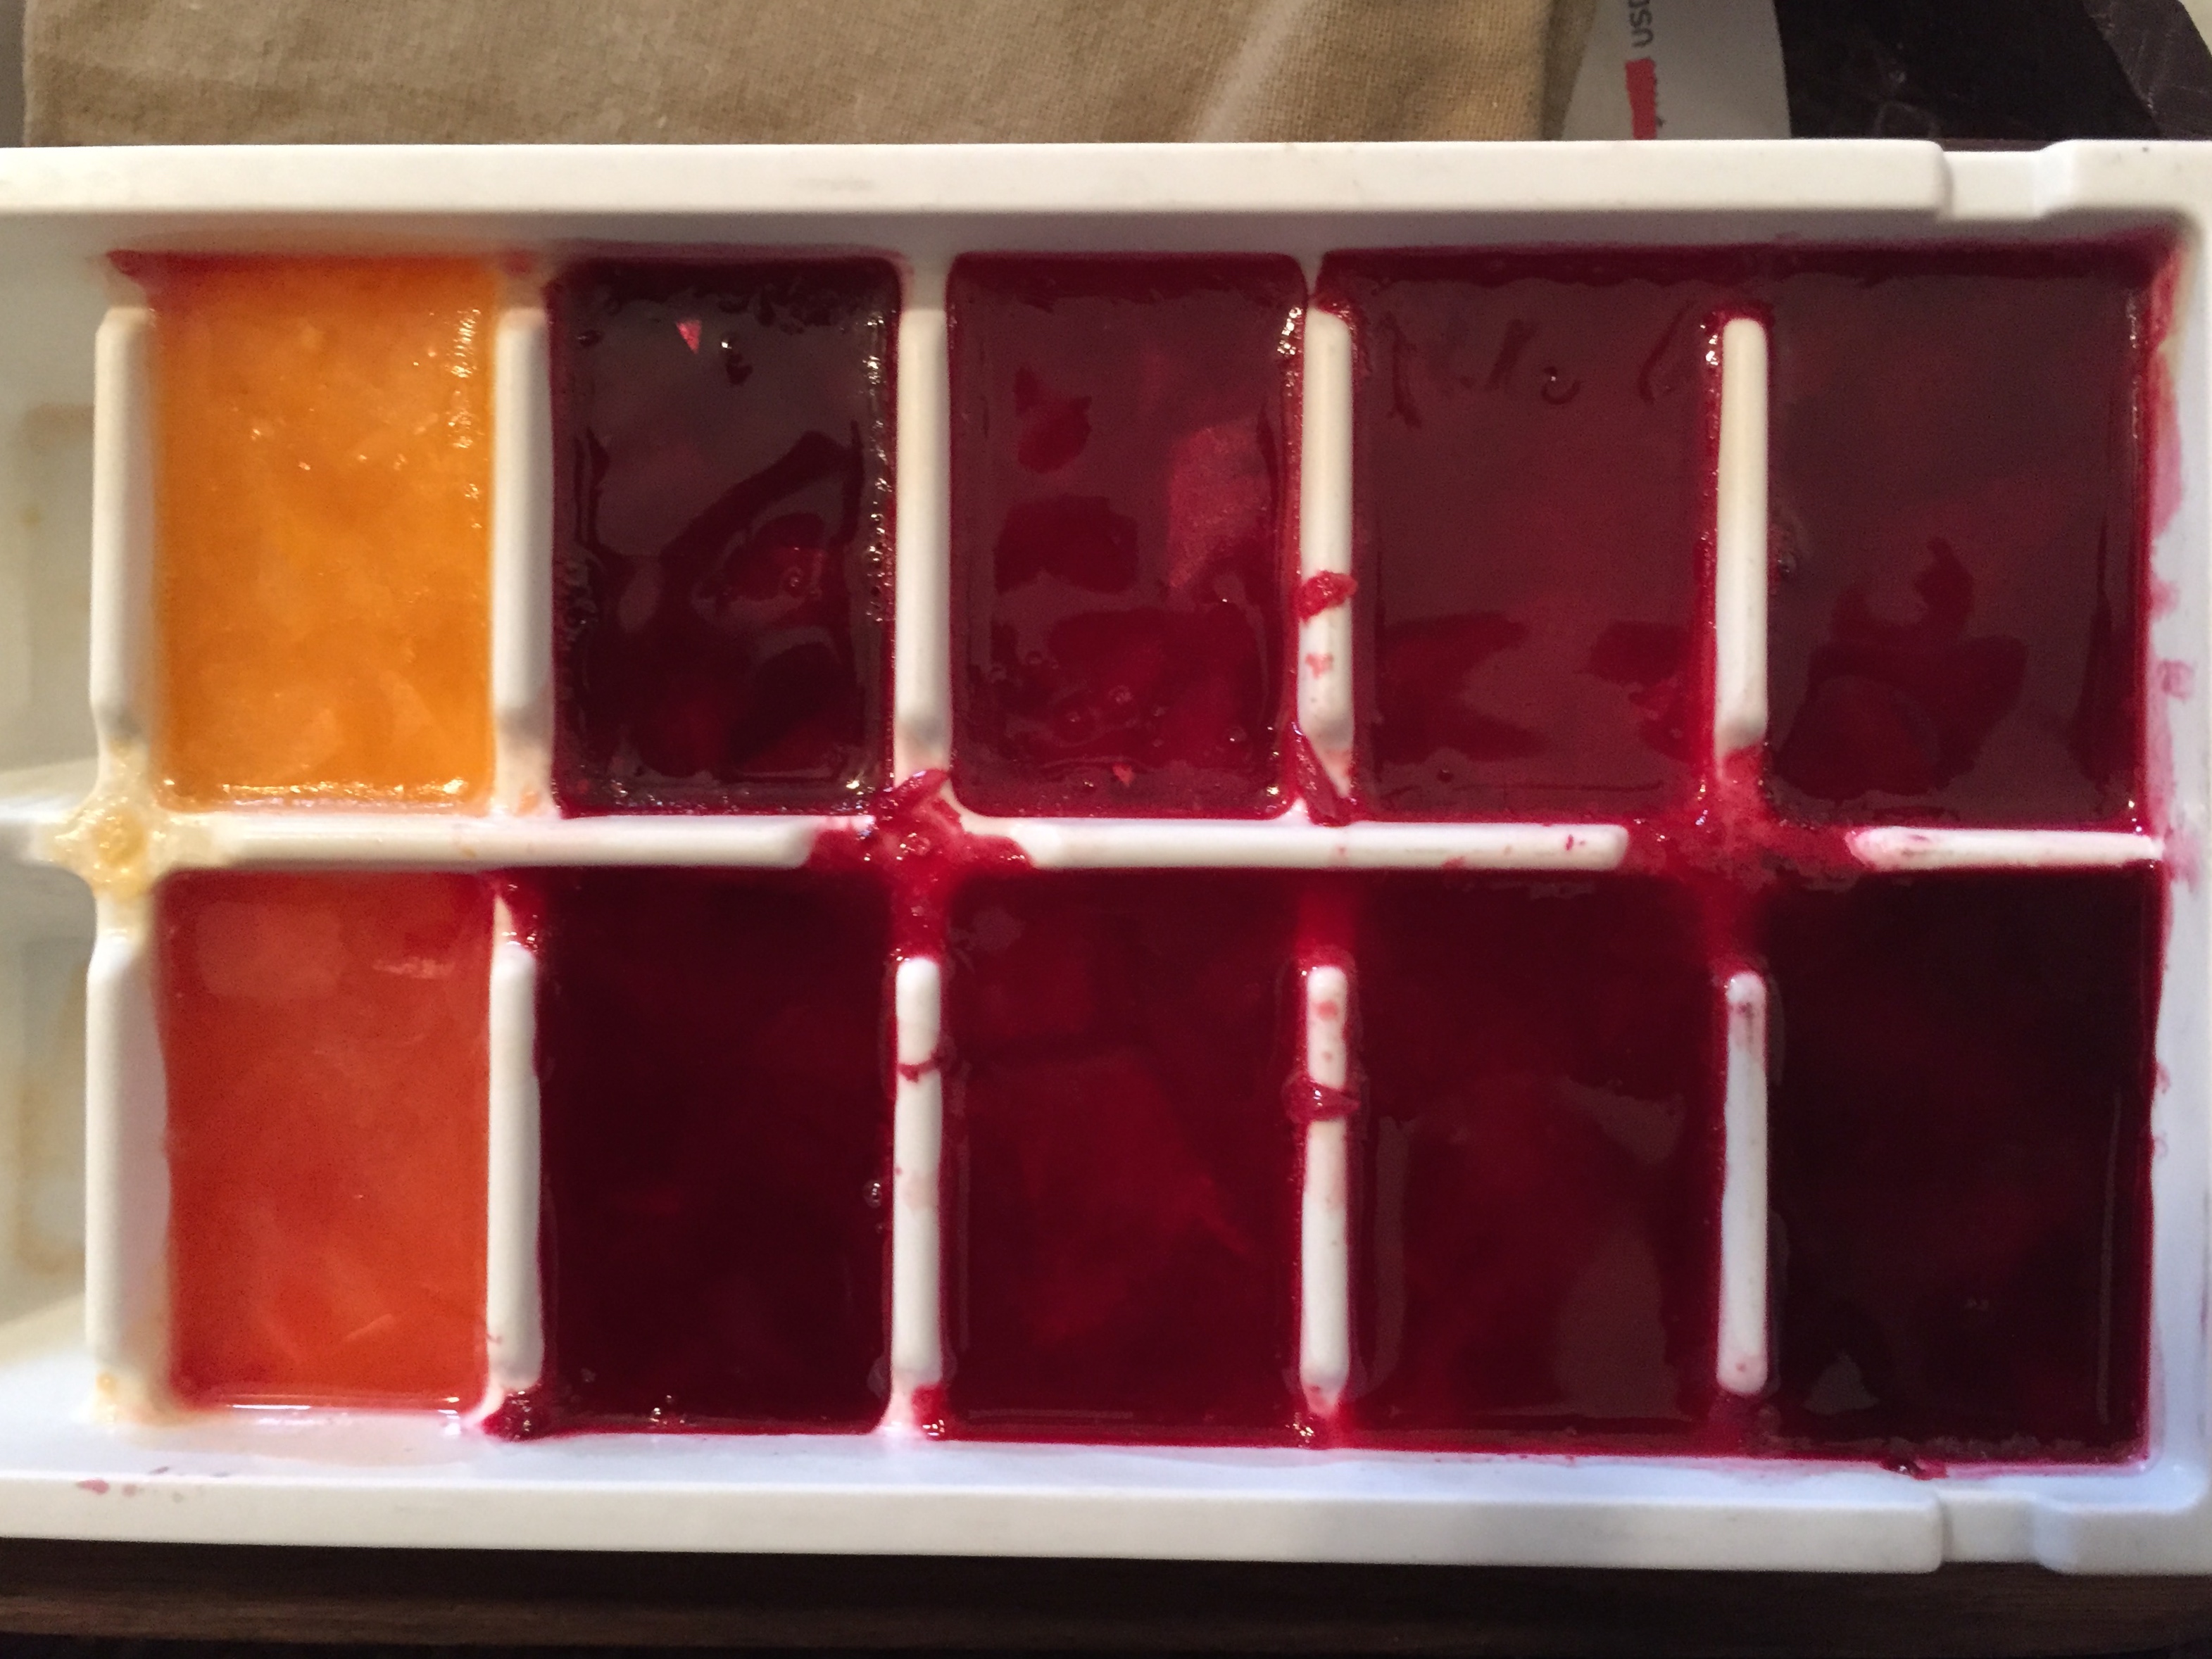
Look at the color of the blood orange juice can you figure out which is the mandarin

Blood Orange Curd

adapted from lemon cream recipe from Tartine Bakery Cookbook

Makes about 2 1/2 cups (625 ml) (It made exactly 16 oz for me)

1/2 cup + 2 tbsp (5 oz/155 ml) Juice from Blood Oranges

3 large eggs

1 large egg yolk

1 tsp orange zest

3/4 cup (6 oz/170 g) sugar

Pinch of salt

1 cup (8 oz/225 g) unsalted butter

zest of one whole orange (medium size)

Pour water to a depth of about 2 inches into a saucepan, place over medium heat, and bring to a simmer.

Combine the orange juice, whole eggs, yolk, sugar, zest and salt in a stainless steel bowl that will rest securely in the rim of a saucepan over, not touching, the water. (Never let the egg yolks and sugar sit together for more than a moment without stirring; the sugar will cook the yolks and turn them granular.) Place the bowl over the saucepan and continue to whisk until the mixture becomes very thick and registers 180° F on a thermometer. This will take 10 to 12 minutes. If you don’t have or trust your thermometer, don’t worry. It should thicken to the point that your whisk leaves a trail through the curd. NOTE: I don’t use a thermometer, the mixture will thicken and coat the back of the spoon, draw a line on the back of the spoon with your finger, the line will stay intact. It took about 11 minutes for mine to thicken properly.

Remove the bowl from over the water and let cool to 140° F, stirring from time to time to release the heat. Again I didn’t use a thermometer, I poured into the blender, and by the time I cut the butter into tbs size pieces it was just the right temperature.

When the cream is ready, leave it in the bowl if using an immersion blender, or pour it into a countertop blender. With the blender running, add the butter 1 tablespoon at a time, blending after each addition until incorporated before adding the next piece add the additional orange zest and pulse once or twice.. The cream will be quite thick.

Blood Orange Curd

Blood Orange Curd

You can use the cream immediately, or pour it into a storage container with a tight-fitting lid and refrigerate for up to 5 days. To use after refrigeration, if necessary, gently heat in a stainless steel bowl set over simmering water until it has softened, whisking constantly. Note: Your beautiful vibrant, brightly colored blood orange juice will turn a sort of beige color after mixing with the eggs and butter, you can if you wish add a tiny drop of food color to turn it pink, more fitting for valentines day or go au naturale and as you can see I went natural.
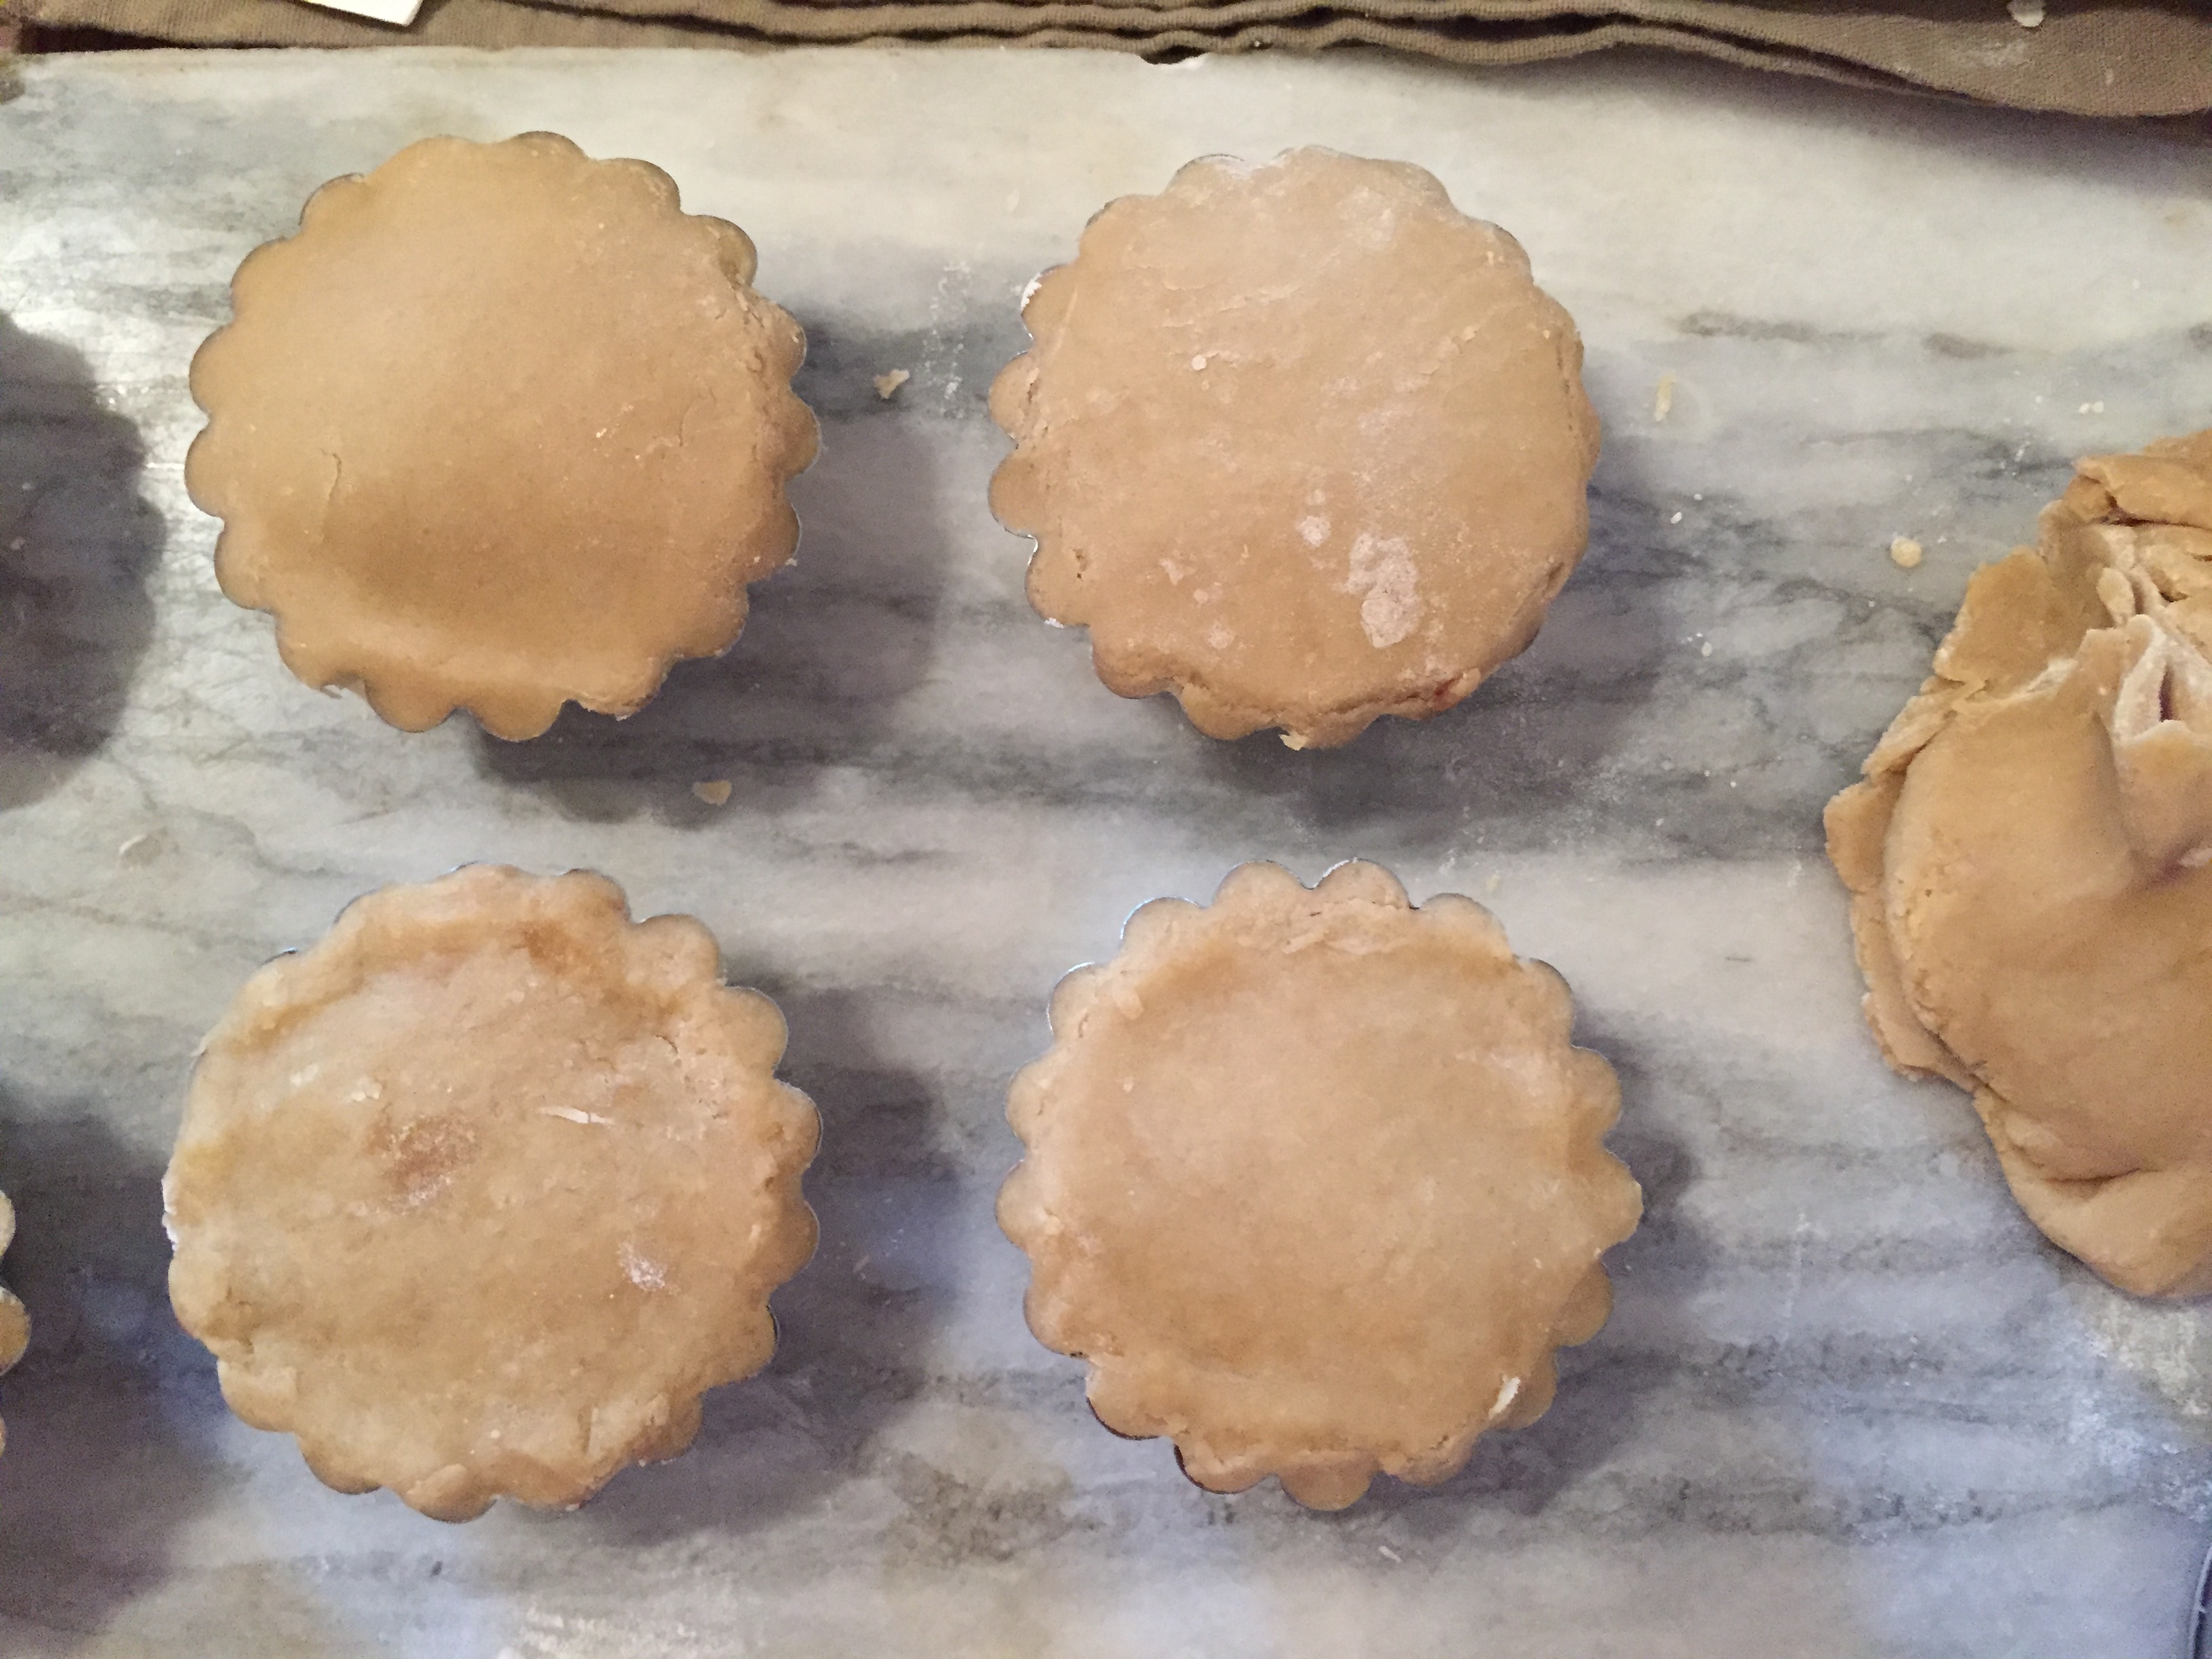
Pate Sucree

From Martha Stewarts Pie’s and Tarts

2 1/2 cups all purpose flour

1/4 cup sugar

1/4 tsp salt

1 cup (2 sticks or 8 oz) unsalted butter cold cut into small pieces

2 large egg yolks

2-4 tbs heavy cream or ice water

Pulse flour, sugar and salt in food processor until well combined. Add butter and pulse until mixture resembles course meal. Add the egg yolks and drizzle the cream or ice water and pulse until it forms a cohesive dough. If mixture is too dry add cream or water a tsp at a time until it is cohesive. Remove from processor, wrap in plastic wrap and refrigerate for at least an hour.

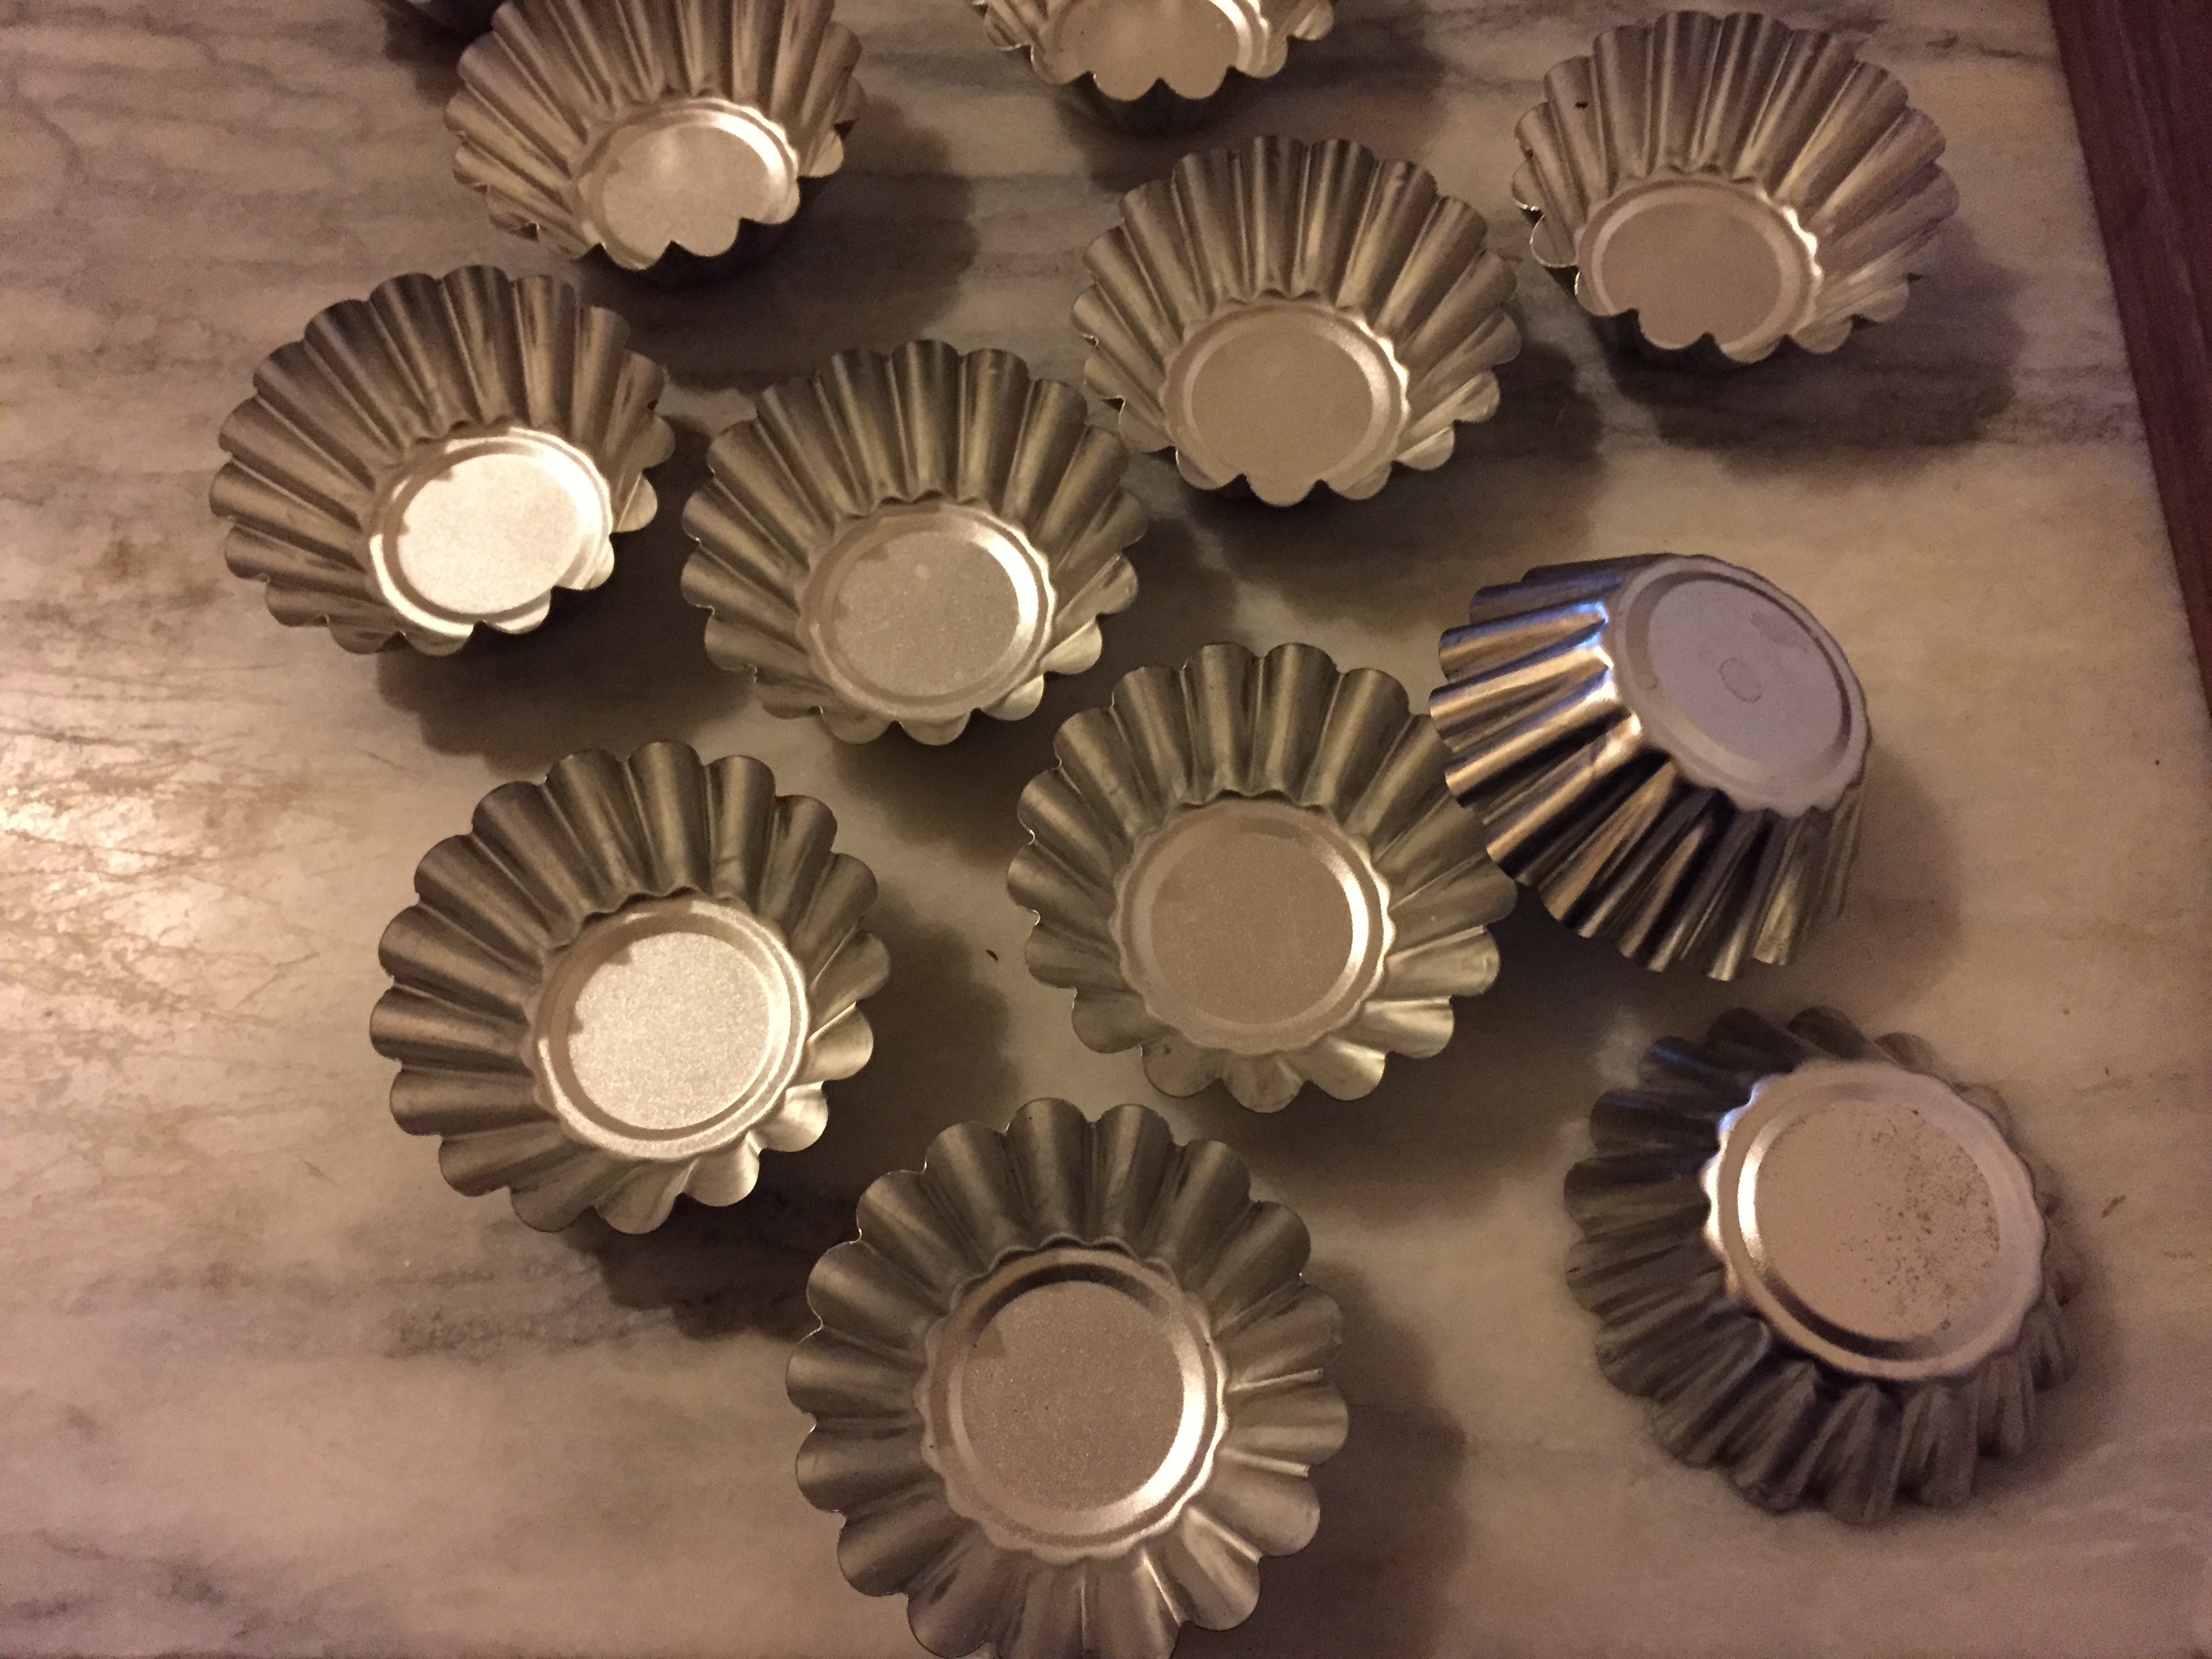
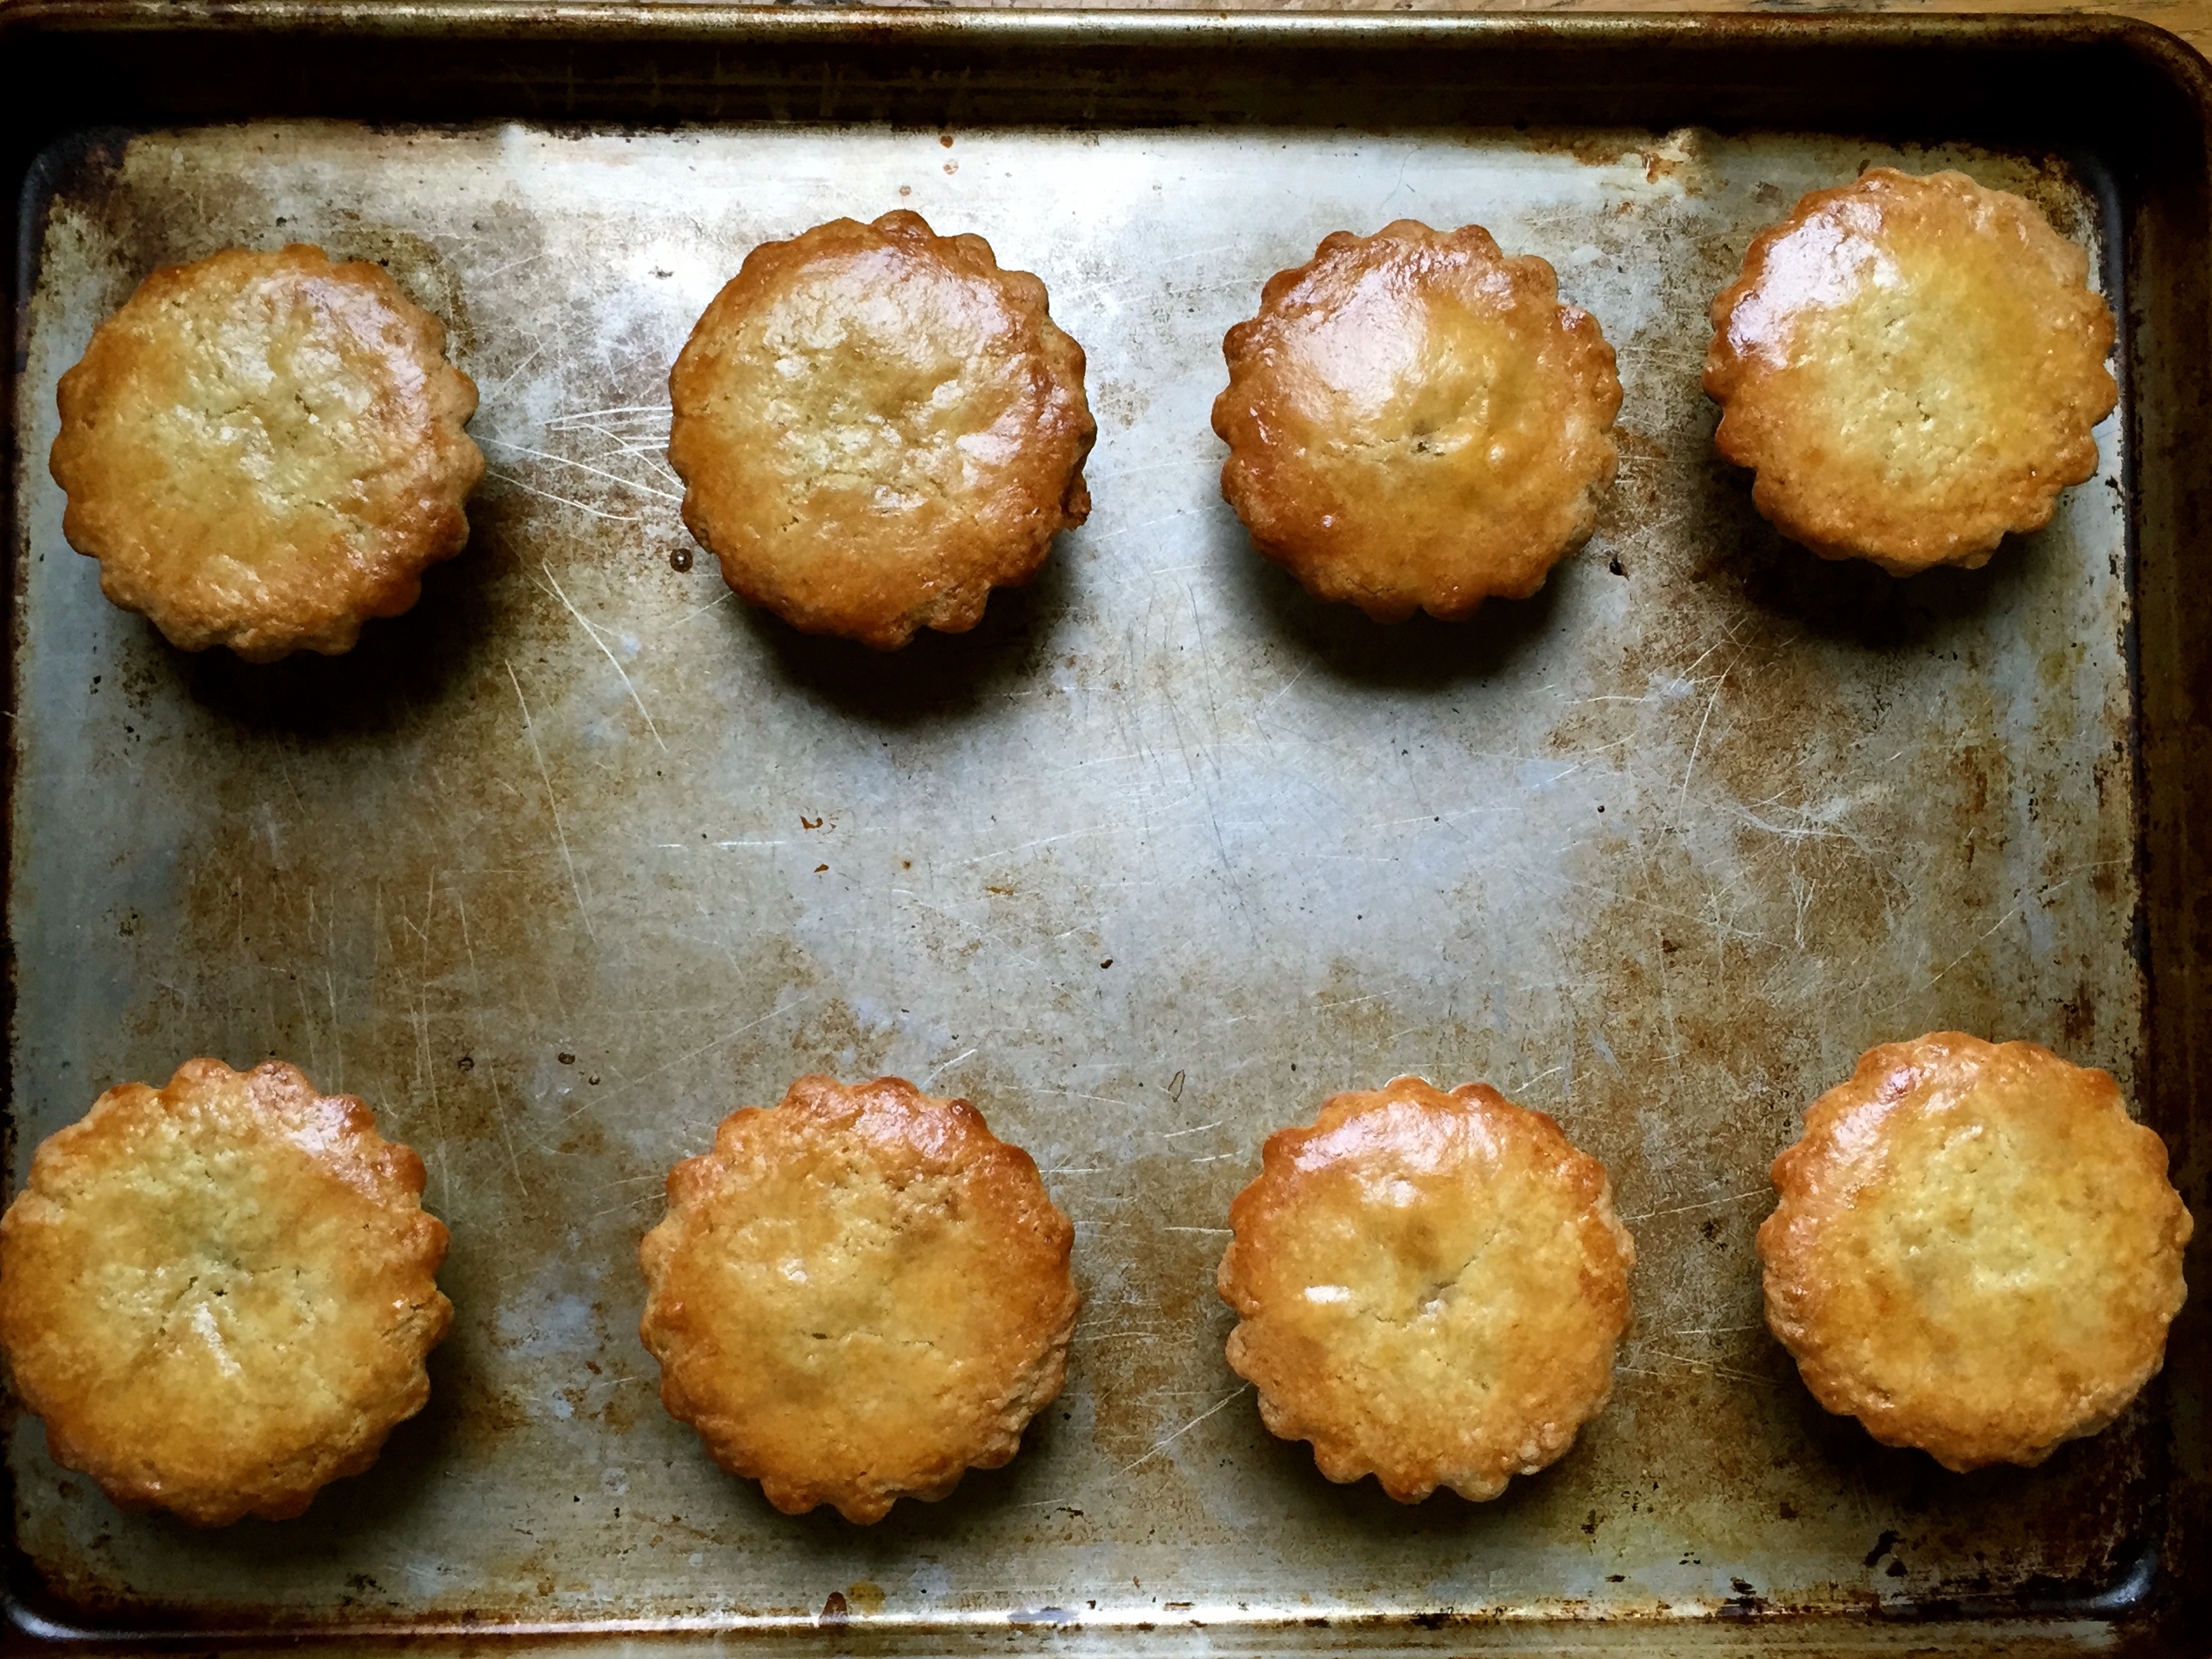
To blind bake the tartlets:

Pre heat oven to 375 degree’s. Roll out or press dough into tartlet pans and refrigerate or put in freezer for 15-30 minutes before baking. Place sheet of parchment in each and fill with pie weights or place another tartlet pan on top and place them on a baking sheet. Bake for 8-10 minutes you will notice the edges lightly brown. Remove parchment and weights or pan and place back in the oven another 4-6 minutes or until golden brown. Remove to a wire rack to cool completely before filling.
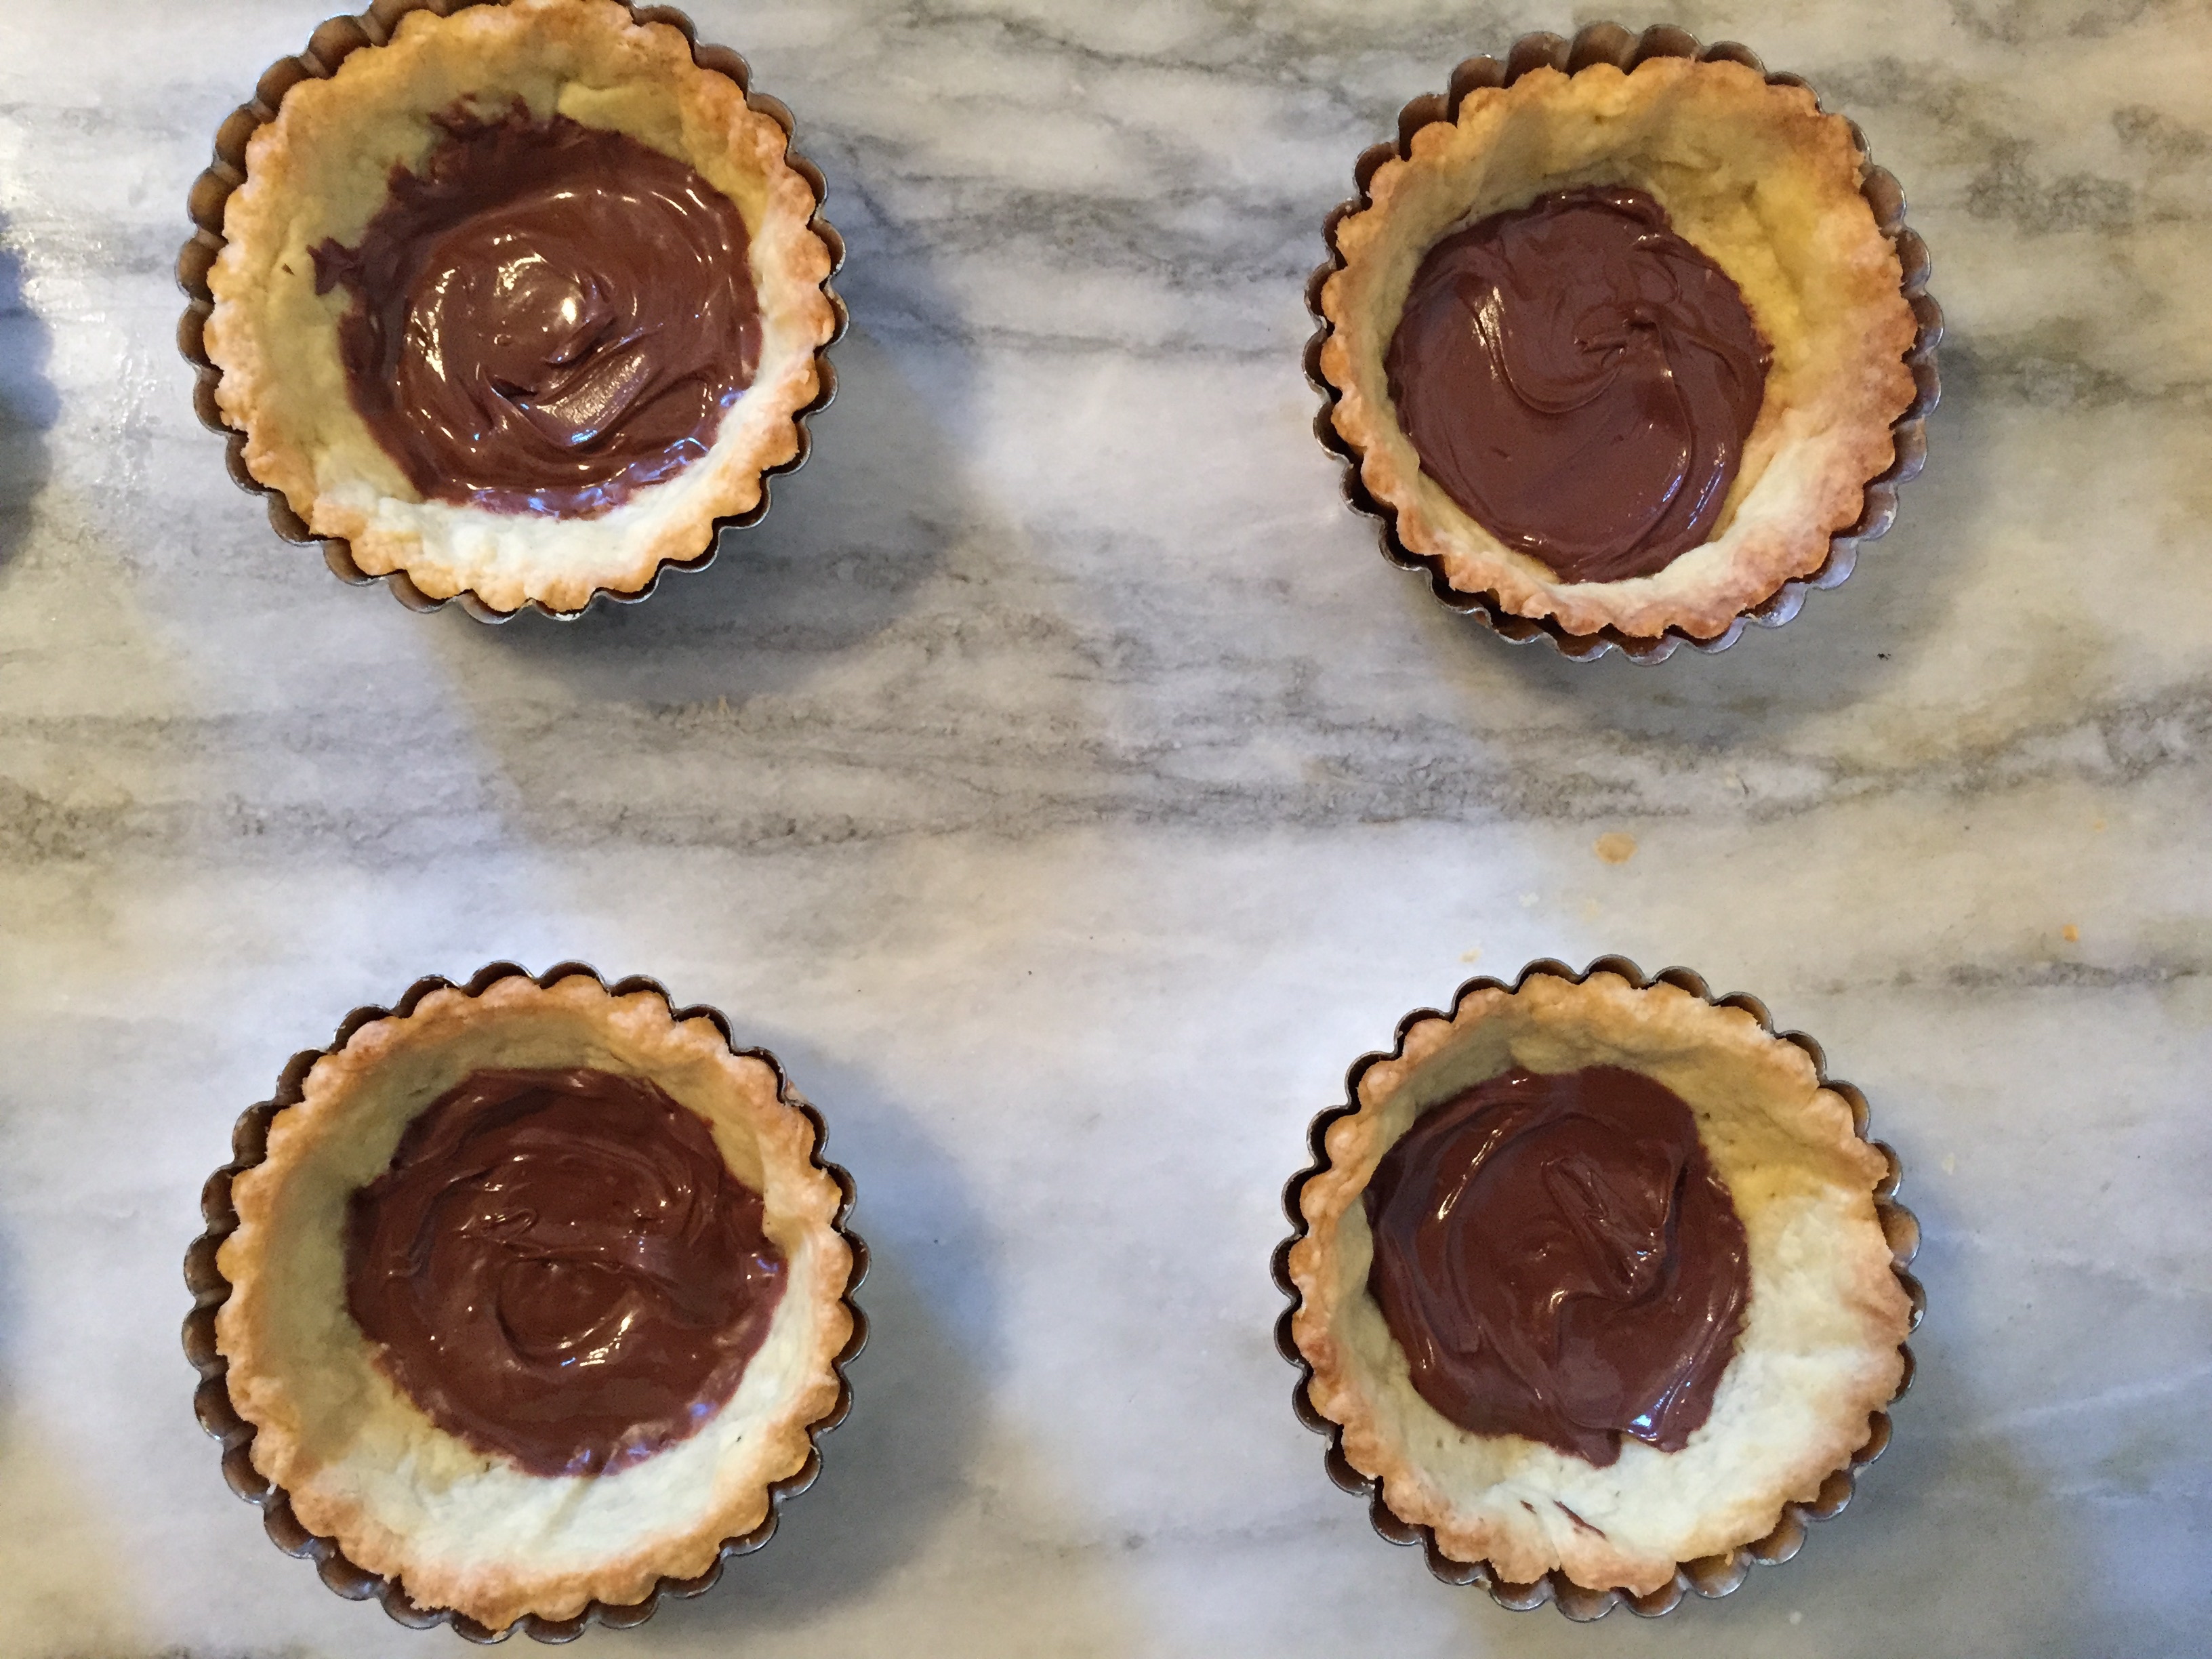
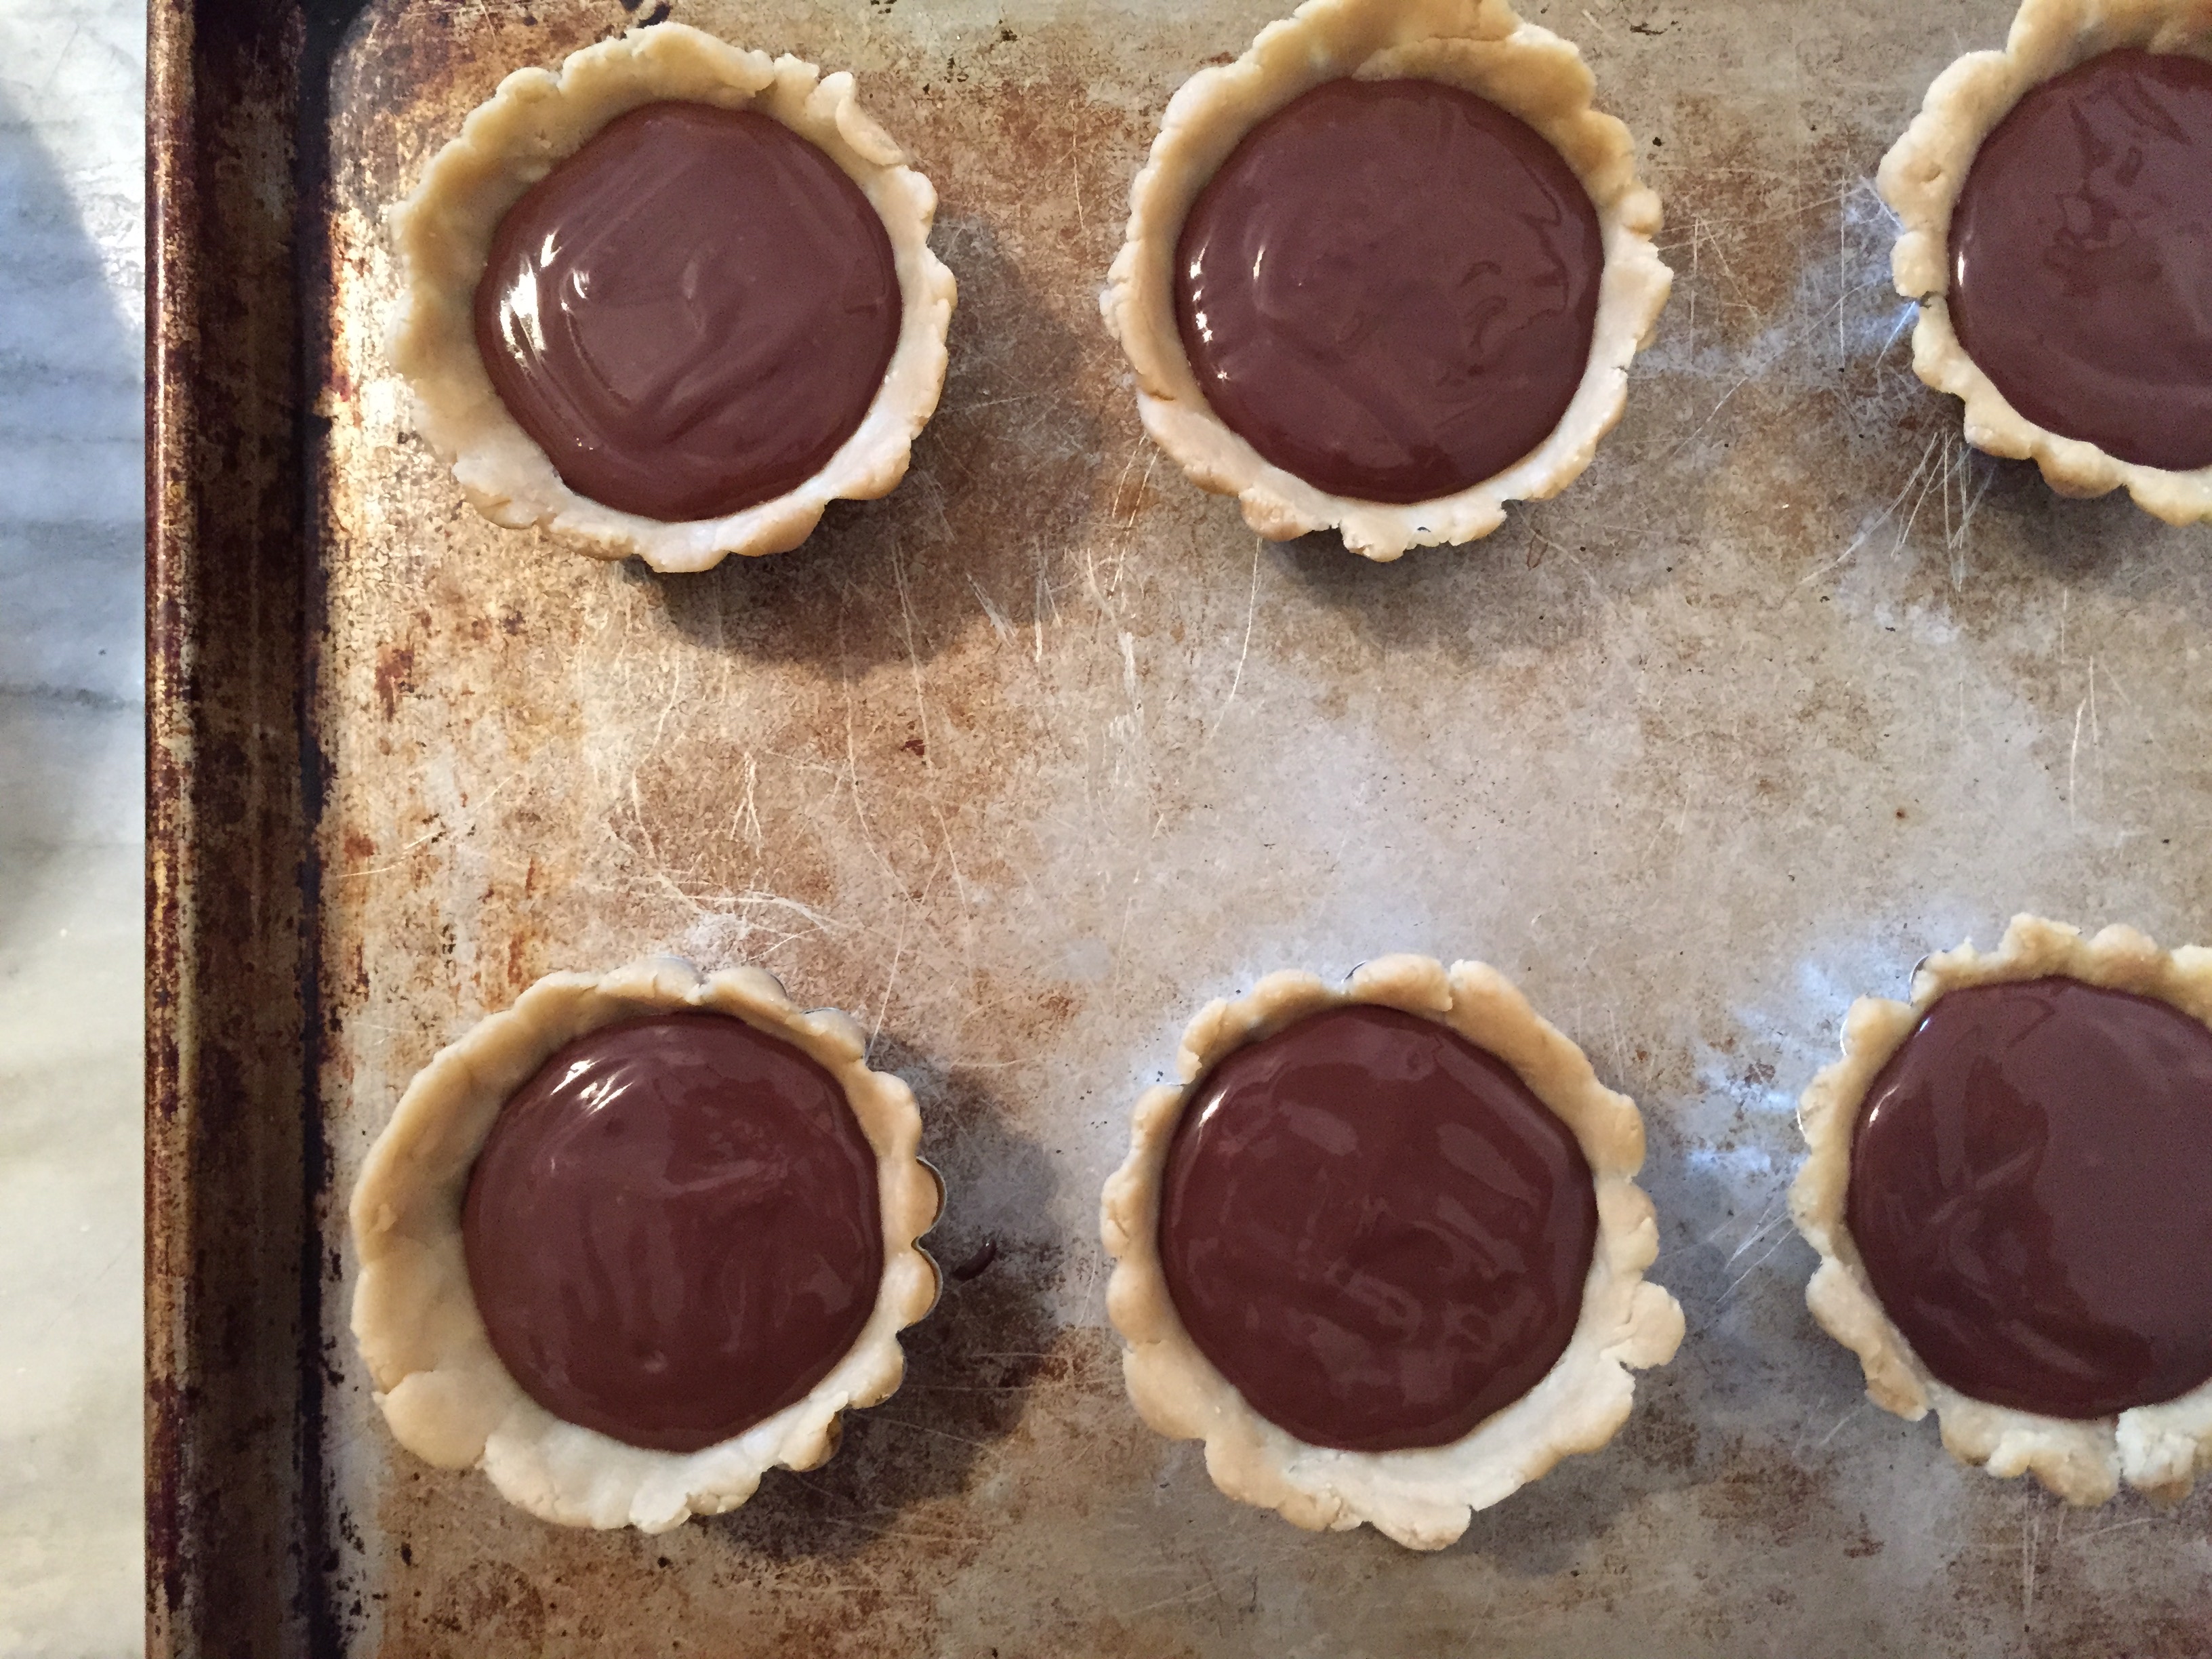
nutella

nutella

To make your tarts

Spoon some nutella in the tart shell ( I like to do it when the shell is still a little warm so the nutella is easier to spread) place in the refrigerator for about 15 or 20 minutes so the nutella hardens a bit, be generous, don’t skimp on the nutella. Spoon in the curd, top with some whipped cream and chocolate shavings and serve.

Happy Valentines Day to all!!

fiesta-friday-badge-button-i-was-featured1


IMG_5020

Blondies For Fiesta Friday #54 And A Winner For Uncle Steve’s Giveaway!!!


Moist and delicious

Moist and delicious

Who doesn’t love a blondie? I certainly do, and when I saw this recipe for Blondies on Mama’s Gotta Bake, I knew I needed/wanted to make it. If you have never visited Sheryl’s site you are in for a treat when you do. I love her recipes and photography, she doesn’t just bake her savory recipes are amazing too. I had yet to find a recipe for Blondies that I was totally in love with, they were good, some were not, I have had more than my fair share of flops. I am so happy to report that this recipe is a keeper. It’s simple to make and results are fantastic. The recipe/instructions are spot on. Sheryl used chocolate chips, pecans and cranberries. I didn’t have cranberries so I didn’t use any fruit, but I did use both dark and milk chocolate, brown butter and pecans.

IMG_4771

After 2 weeks of partying I’m surprised Angie @The Novice Gardener isn’t worn out,  and this week to help keep the party going she has two fabulous co hosts to help her Josette @ The Brook Cook and Sonal @Simply Vegetarian 777, this is going to be one heck of a party.  So for Fiesta Friday#54 I am bringing Mama’s Gotta Bake’s delicious blondies, I hope you all enjoy!!!

IMG_4796

fiesta-friday-badge-button-i-was-featured1

Now for the giveaway, the lucky winner of a trio of delicious sauces from Uncle Steve’s NY is……..

Liz from the wonderful blog Liz the Chef!!! Congratulations Liz, send me your address by email and I will forward to Uncle Steve’s NY!!

Uncle Steve's Sauce

Uncle Steve’s Sauce

Mange Molto!!

Pasticiotti For Fiesta Friday #53

Party time

Party time

This is week 2 of the Epic Fiesta Friday First Year Anniversary Party and we are bringing the main course and dessert.   I wanted to bring a very special dessert to the party, so I made Pasticiotti with chocolate filling.  I love these pastries, they are very special to me because it is a recipe that has been passed from generation to generation in my family.  It’s a great party dessert because it’s small, you don’t need a plate and fork, a napkin will suffice and they are pretty neat to eat.  Angie@The Novice Gardener has been working hard on this mega party and thank goodness she has two co hosts to help, so a big thank you to Nancy @Feasting With Friends and Selma @Selma’s Table for always being there to help and doing such a great job of hosting.

Pasticiotti is an Italian pastry, it’s a pastry crust baked in a pustie tin filled with either chocolate or vanilla filling, similar to a pudding. I grew up eating these and always looked forward to my Father bringing home a big box from the local bakery. For years I have gone to Court Street bakery in Brooklyn when I want an Italian pastry, they have been around for over half a century and the pastries are delicious and as close to my childhood memories as I have found. I wanted to try and make my own so I asked my Mother if she had a recipe, she did, it is a very old recipe from my Aunt Dee, Mom said that the recipe was handed down from my Great Grandmother. It was in Italian and measurements were not exact and I am sure it was not originally written using cups, teaspoons and tablespoons. My Aunt who was a great cook took this recipe and made it her own. I was a bit nervous making it, having never tried my hand at anything like this before, it was surprisingly easy and turned out absolutely delicious. The first time I made these I used tartlet pans and they turned out fine. Since then I have purchased pustie tins and they come out even better,  I think its because of the shape of the tin, the pudding is heavy and the crust delicate and the tins are smaller at the bottom becoming larger at the top similar to a brioche mold.There is a distinct flavor in many Italian Pastries and I found out it is from an extract called Fiori Di Sicilia, it is unique in that it is both citrusy and floral.  You can find it at Bakers Catalog (King Arthur Flour)  but you can also add a little orange zest instead and it works just fine. If you do plan to make these invest in pustie tins, they are inexpensive and worth having even if you only make these every now and then, I found mine here. One more very exciting bit of news, this recipe will be featured in The Global Family Reunion cookbook that will be unveiled at the Global Family Reunion event which is being held at the World Fair Grounds in New York in the early summer. The proceeds from the sale of the cookbook will benefit research to help find a cure and treatment for Alzheimers.

Pustie Tins

Pustie Tins

Pasticiotti with Chocolate Filling

Makes:  approximately 18

The pastry crust:
4 cups Flour

1 teaspoon baking powder

2 cups light brown Brown Sugar (Not packed)

pinch of salt

1 cup (8 oz)  cold leaf lard or vegetable shortening (I used lard because thats what the original recipe used)

2 large eggs

1 teaspoon vanilla extract

1/4 cup cold whole milk

Beat one egg with a teaspoon of sugar to brush on the pastry before baking

In mixing bowl add the flour, brown sugar,baking powder, and salt, whisk to combine making sure any clumps of brown sugar are incorporated.
In measuring cup add the milk and egg, beat egg and milk together then add the vanilla and stir to incorporate
Measure  or weigh (I like to weigh) your lard and add to dry ingredients, use a pastry cutter to cut the lard into the flour mixture it should resemble crumbs. Add the milk, egg and vanilla and with a fork combine. Working quickly gather the dough into a cohesive disk, wrap in plastic wrap and refrigerate for at least an hour even overnight.

Ready for the tops

Ready for the tops

Chocolate Filling:

1 cup flour

2 cups sugar

2/3 cups unsweetened cocoa

pinch of salt

4 cup warm milk or water (the original recipe used water)

2 egg yolks

1 teaspoon vanilla extract

1/4 teaspoon fiori di sicilia or if you don’t have add 1/2 tsp orange zest (optional)

In medium saucepan add flour,chocolate, sugar, a pinch of salt and whisk to combine. While whisking add the warm milk and keep whisking until its combined and there are no lumps. Turn flame to medium and whisking constantly cook until mixture thickens, add about 1 cup of hot mixture to beaten egg yolks and add back to saucepan. Continue cooking on medium heat, stirring or whisking constantly until it becomes very thick. Once the filling is very thick remove from heat stir in the vanilla and optional fiori di sicilia or orange zest, pour into a bowl. Lay some plastic wrap directly on top of the filling and let it come to room temperature on the counter top, then refrigerate until cold. Note: I like to make the dough and filling the day before and leave in the refrigerator overnight.

Ready to bake

Ready to bake

Making the Pasticiotti

Heat oven to 350 degree’s. Flour work surface,Cut dough in half one half will be bottom crust the other top crust, place half of dough back in refrigerator while working. Have your pustie tins or fluted tartlet pans ready.Either roll or press the dough into the pans it should be approximately 1/4 in thick and should have a small overhang, if dough starts to warm put back in refrigerator. When you have put the dough in the tins, place in refrigerator while you roll out the dough for the tops, roll dough about 1/4 in thick and cut into rounds a little larger than the top of the tin. Take tins from refrigerator fill with the chocolate filling just slightly  below the top of the tin. Place the top on, press making sure the bottom crust and top crust are joined and trim off any excess. Brush with egg wash and place in freezer for a few minutes just to get the pastry cold. Remove from freezer place tins on baking sheet and bake for 30-35 minutes or until golden brown. Remove from oven place on cooling rack and let sit at room temperature for 45 min to an hour or until COMPLETELY COOLED. Gently remove from the tins and refrigerate covered with plastic wrap or in an air tight container 4-6 hours or overnight.

Just out of the oven

Just out of the oven

pasticiotti

pasticiotti

Yum!

Yum!

fiesta-friday-badge-button-i-was-featured1

Rugelach- Fig/Cognac Jam, Pistachio,Orange For Fiesta Friday #48

Rugelach

Rugelach

I am making another batch of my rugelach, the very one I put in my gift boxes, I always make a double batch of the dough because invariably I need to make more to give away after Christmas. This new batch is the same but I decided to add some chopped pistachio and a hint of candied orange peel (chopped really fine). Since I am baking for friends and you all are my friends right,  I made enough to bring with me to the party hosted by the lonesome and totally awesome Angie@The Novice Gardener, I only say lonesome because this week she gave everyone the week off, no co hosts. Don’t worry Angie you won’t  be lonesome for long, soon your house will be filled with eager party goers.

orange and pistachios added

orange and pistachios added

Makes 4 dozen

The Dough and filling:

8 ounces cream cheese at room temperature

2 sticks unsalted butter at room temperature

1/4 cup granulated sugar + more for sprinkling on cookies

1/4 teaspoon kosher salt

1 teaspoon vanilla extract

2 cups all purpose flour

3/4 cup pistachio’s- chopped

2 tbs finely chopped candied orange peel

1/4 tsp cardamom

1/4 tsp powdered ginger

1/2 cup fig jam

egg wash

sugar for sprinkling

1/4 cup light brown sugar packed

looks like dukkah

looks like dukkah

In stand mixer fitted with paddle attachment cream the cream cheese and butter until light. Add the sugar, salt and vanilla. With mixer on low add the flour and mix just to combine. Dump dough onto work surface form into a ball cut into four quarters and wrap each in plastic wrap, refrigerate for one hour
Place pistachio (if they are not toasted already) on parchment lined sheet pan and toast in a 350 degree oven for 15 minutes (just until you can smell the nuts). Once the nuts have cooled enough to handle, and add the brown sugar cardamom and ginger, orange and chopped pistachio. Set aside.

Remove one of the dough quarters from the refrigerator, roll into a circle on floured work surface. Note: The dough should be cold when rolling, do not let the dough sit out and come to room temperature, it will get too sticky and you want to avoid using a lot of flour if at all possible.  I use the lid of my dutch oven to cut an even circle. Spread jam on the dough round, sprinkle nut/sugar mixture on top of the jam and press down gently with your hand. Cut into quarters and cut each quarter into 3 pieces. Roll from widest end to smallest.

ready to roll

ready to roll

Place each rugelach on parchment lined baking sheet, brush with egg wash and sprinkle some sugar on each. Put in freezer for 15 minutes before baking. While they are in freezer pre heat your oven to 350 degrees.

Bake for 15-20 minutes until golden brown. Remove to cooling rack.

fresh from the oven

fresh from the oven

flaky and delicious

flaky and delicious

fiesta-friday-badge-button-i-was-featured1


Cardamom, Orange And Chocolate Ribbon Cookies – Cookies For Christmas

Ribbon Cookies

Ribbon Cookies

This is the last cookie I will be making to include in my gift boxes.  It’s such a beautiful cookie, festive and delicious. The recipe came from my Mom, it’s probably from the 60’s, the original recipe did not contain cardamom or orange, that was my idea. Both are very subtle and go well together, the sum of all the parts makes a wonderful cookie. You can add whatever flavoring you like, you are not bound by cardamom and orange.  I think orange, hazelnut and chocolate would be great. Almond extract to the vanilla portion would be lovely also. The great thing about these cookies is that you can change the flavor profile to suit your taste. I hope you enjoy!


Makes Approximately 36 cookies
1/2 cup unsalted butter at room temperature
1/2 cup good quality shortening at room temperature (I like Spectrum)
1 cup sugar
1/2 teaspoon baking soda
1/4 teaspoon salt
1 large egg at room temperature
2 tablespoons whole milk or half and half
1 teaspoon vanilla extract
3 cups all-purpose flour
Zest of one orange
1/3 cup (1 1/2 ounces) semi-sweet chocolate melted (Use the microwave method — it’s great.)
1/4 teaspoon cardamom
1/2 cup toasted walnuts chopped finely
In mixing bowl beat butter and shortening with an electric mixer or stand mixer with paddle attachment for approximately 30 seconds. Add sugar, baking soda, and salt and beat until combined. Beat in the egg, milk, and vanilla. Add flour and mix to combine with spoon. Melt the chocolate in the microwave at 30-second intervals stirring in between. It took me 60 seconds.
Divide dough in half. Knead the melted chocolate and walnuts into half of the dough and then the cardamom and orange zest into the other half. Line a 9- by 5- by 3-inch loaf pan with plastic wrap. Divide chocolate dough in half and press into the bottom of the loaf pan, now divide the vanilla dough in half and press on top of chocolate layer, now another chocolate layer, and finish with the vanilla layer. Cover with the plastic wrap and refrigerate for at least 30 minutes, I freeze or refrigerate overnight. Preheat oven to 375° F.

Three equal pieces

Three equal pieces

Going into the oven

Going into the oven find the cookie that isn’t facing the right way!! LOL

Remove from refrigerator, invert onto cutting board, and remove plastic wrap. Divide into 3 equal pieces (each is 3 inches) and cut each third into 12 equal pieces that are about 1/4 inch thick. Place on baking sheet with either parchment or silpat and bake for 10 to 12 minutes turning baking sheet around halfway through baking (5 minutes). BE CAREFUL NOT TO OVERBAKE! Remove from oven when edges start to turn a light brown. If you leave them in longer than the prescribed baking time they become overdone and are really crunchy. I took out my batch of cookies at 11 minutes. They were just right.

Ready for the gift box

Ready for the gift box


Rugelach With Fig/Cognac Jam And Spiced Walnuts- Christmas Cookies

Ready to make the rugelach

Ready to make the rugelach

I love making rugelach, and the possibilities are virtually endless when it comes to the filling for these lovely little buttery flaky beauties. Some of you may remember my Chocolate Hazelnut Rugelach that won a Whole Foods Contest a few years ago, it’s a lovely combination of orange marmalade, chocolate and hazelnut. There is the traditional with apricot jam, cinnamon and walnuts, love that too! I thought of doing something a little different this year, my good friend Bevi of Brussels Sprouts,Pears and Pistachio fame and an amazing cook on Food52 sent a jar of her homemade fig and cognac jam. I have been waiting for just the right use (other than eating out of the jar with a spoon) and thought rugelach would be the perfect use for this amazing jam. The walnuts are toasted and then you add some cardamom and ginger when you mix in the brown sugar. Spread the dough with the jam, sprinkle the walnuts and roll them up. It’s an amazing combination of flavors, a little on the exotic side but very subtle. I include rugelach in every gift box and hope the recipients enjoy these.

Slice and roll

Slice and roll

Makes 4 dozen

The Dough and filling:

8 ounces cream cheese at room temperature

2 sticks unsalted butter at room temperature

1/4 cup granulated sugar + more for sprinkling on cookies

1/4 teaspoon kosher salt

1 teaspoon vanilla extract

2 cups all purpose flour

1 1/2 cup  walnuts

1/4 tsp cardamom

1/4 tsp powdered ginger

1/2 cup fig jam

egg wash

sugar for sprinkling

1/4 cup light brown sugar packed
In stand mixer fitted with paddle attachment cream the cream cheese and butter until light. Add the sugar, salt and vanilla. With mixer on low add the flour and mix just to combine. Dump dough onto work surface form into a ball cut into four quarters and wrap each in plastic wrap, refrigerate for one hour
Place walnuts on parchment lined sheet pan and toast in a 350 degree oven for 15 minutes (just until you can smell the nuts). Once the nuts have cooled enough to handle, chop and add the brown sugar cardamom and ginger. Set aside.

Remove one of the dough quarters from the refrigerator, roll into a circle on floured work surface. I use the lid of my dutch oven to cut an even circle. Spread jam on the dough round, sprinkle nut/sugar mixture on top of the jam and press down gently with your hand. Cut into quarters and cut each quarter into 3 pieces. Roll from widest end to smallest.

Ready for the freezer

Ready for the freezer

Place each rugelach on parchment lined baking sheet, brush with egg wash and sprinkle some sugar on each. Put in freezer for 15 minutes before baking. While they are in freezer pre heat your oven to 350 degrees.

Bake for 15-20 minutes until golden brown. Remove to cooling rack.

Out of the oven

Out of the oven

IMG_3331

Chocolate Chip Granola Cookies- Cookies For Christmas

Chocolate Chip Granola Cookies

Chocolate Chip Granola Cookies

These cookies were just posted on Butter Basil And Breadcrumbs, my good friend Prudy’s totally delicious blog, they were a guest post from yours truly, I liked them  so much I decided to put them in my gift baskets this year. They are crunchy, chewy, chocolatey downright delicious. I always put a chocolate chip cookie in my gift boxes because they are really a classic and adding the granola takes them to a new level. I used my homemade granola, it contains lots of nuts, coconut, maple syrup, coconut oil all good stuff and I make it super crispy. Forgive me for being redundant but had to include this cookie in my holiday repertoire. Note: I changed the recipe a bit after posting on Prudy’s site. reduced the butter by 1 tbs and increased the flour, I think it really depends on the granola that you use my latest batch must have had more coconut oil and the cookies spread a bit too much. You judge make a test cookie which is how I saw it spread. After adding the additional 2 tbs of flour they came out perfectly. 
Ingredients
  • 1 cup  (2 sticks) butter, room temperature (I use salted)
  • 2 cups packed light brown sugar
  • 1 egg at room temperature
  • 1 tsp vanilla
  • 2 cups + 2 tbs flour
  • 1 tsp baking soda
  • ½ tsp salt
  • 1½ (heaping)cups granola (recipe here) Use your favorite or try mine. Your choice
  • 3 oz milk chocolate cut into pieces
  • 3 oz dark chocolate cut into pieces
Instructions
  1. Cream butter and brown sugar until creamy, add egg and vanilla and beat until fully incorporated and the mixture is fluffy.
  2. With mixer on low add the sifted flour, baking soda and salt, beat just until combined, add the granola and chocolate and again mix just until it is combined.
  3. I like to wrap the dough in plastic wrap or parchment put in a zip lock bag and refrigerate for at least an hour but its even better overnight.
  4. Remember: If you refrigerate overnight let sit at room temperature before baking(a half hour on the counter will do it). You can also freeze cookie dough, wrap well and place in zip lock freezer bags and store until ready to use. Let thaw in refrigerator about 2 days before you will be making the cookies.
  5. Pre heat oven to 350 degrees.
  6. Place scoops of the dough (I used a 1½ tbs ice cream scoop) on silpat or parchment lined baking sheet.
  7. Bake for 10-12 minutes or until lightly browned. Remove from oven and let cool on rack.
  8. Note: the granola I used had pecans in it. If your granola doesn’t contain nuts you can add to the cookie dough unless you have a nut allergy.

IMG_2495

Ginger Spiced Molasses Cookies- More Christmas Cookies

Ginger spiced Molasses Cookies

Ginger spiced Molasses Cookies

Many of you I am sure have seen these before, the recipe may actually have appeared here more than once but these cookies are so good it’s worth sharing again and again. Spicy, chewy, moist and delicious I totally love this cookie and include it in every gift box that I make. This is a recipe from Food52, and these cookies are amazing. Don’t really need to say anymore, I have already said it and I don’t want to bore you. Try them, they are terrific!!

 Ginger Spiced Molasses Cookies

Makes 24 cookies

2 1/4 cups all purpose flour

2 teaspoon baking soda

1 teaspoon ground cinnamon

1/2 teaspoon ground ginger

1/2 teaspoon allspice

1/2 teaspoon salt

1/4 teaspoon ground cloves (Optional I don’t use cloves)

3/4 cups unsalted butter, room temperature

3/4 cups packed dark brown sugar

1 large egg

1/2 cup unsulfured molasses

1/3 cup finely diced candied ginger (optional)

granulated sugar for rolling

Combine flour, baking soda, cinnamon, ground ginger, allspice, salt and cloves (if using) in a bowl and mix well. (Note:) if not using cloves increase another of the spices I increase cinnamon and ginger.
Beat butter and sugar together in bowl of electric mixer until light and fluffy, 3 minutes.
Add egg and molasses. Mix to combine well. Stir in dry ingredients. Stir in candied ginger if using. Refrigerate batter 1 hour.
Preheat oven to 375 F. Roll dough into 1 1/2″ balls. Roll balls in granulated sugar. Arrange on baking sheets lined with parchment paper and gently flatten, just barely I use 2 fingers and lightly push on the dough. Bake in oven until set and crinkled on top, about 12 minutes. Remove and cool.

IMG_2602

The Cookies Of Christmas-Chocolate Kiss Thumbprints


Thumbprints

Thumbprints

Over the next few days I plan on posting recipes for cookies, specifically cookies that I will be including in my gift boxes this year. I have basically the same repertoire every year although sometimes I will skip some and add another just to change it up a bit.

I accidentally bought a bag of these lovely striped Hershey’s kisses, I thought they were the plain chocolate but when I opened one I was surprised to see this creamy white striped kiss. It is quite delicious and so pretty I was inspired to make these chocolate thumbprint cookies and top with a kiss, it will be added to my cookie gift boxes. I have no idea where I got these recipe, I have it written down and stored in a huge pile of recipes that I don’t know what to do with, I mean a huge binder of clippings and recipes I printed from the internet, hand written family recipes, some are decades old. My mantra is that one day I will scan and organize but years later it’s still sitting in my bookshelf with my cookbooks, unorganized. I tend to rotate certain recipes and I think it’s been a few years since I’ve made these, I love thumbprints, you can be creative with what to put in the indent, one year I put a maraschino cherry and drizzled with ganache, another year apricot jam (delicious with chocolate). They are such cute little bites and very easy to make.

Chocolate Thumbprints

Makes 36-48 cookies

2 cups all purpose flour

2/3 cup unsweetened cocoa powder

1 cup butter room temperature (soft)

1 cup sugar

1/4 tsp salt

1 egg

1 1/2 tsp vanilla extract

1/4-1/2 cup sugar in bowl to roll cookies in.

In a medium bowl, whisk together flour, cocoa powder, and salt. In a large bowl, using an electric mixer, beat 1 cup each butter and sugar on medium-high until light and fluffy, 3 minutes. Add egg and vanilla; beat to combine. With mixer on low, gradually add flour mixture and beat to combine. Refrigerate the dough for an hour before baking. It did not say this in the recipe but I find it works best when the dough has been chilled.

Pre heat oven to 350 degree’s. Use a small scoop (so they are uniform in size) and roll in your hands into a ball, place dough in the bowl of sugar and make sure its completely covered, place on parchment or silpat lined baking sheet. Using your thumb make an indent on top of each ball. You can fit 1 dozen on a baking sheet, cookies should be at least an inch apart. Bake for 8-10 minutes no longer please, it really depends on your oven, when you remove them they will be soft,my first batch I kept in almost 10 minutes the second batch 8 minutes, I like them better when left in for 8 minutes. Remove from oven, let sit for 5 minutes on baking sheet and then place a kiss in the center of each cookies. Place on cooling rack. The kiss will soften but should retain it’s shape.

Cute

Cute

Orange Angel Food Cupcakes With Chocolate Orange Buttercream For Fiesta Friday #45

Angel Food Cupcake With Chocolate Orange buttercream

Angel Food Cupcake With Chocolate Orange buttercream

Tis the season for Holiday parties, potlucks and scratching my head wondering what to bring. This Sunday is my Block Association pot luck Holiday party and my neighbors  usually request dessert. This year I decided to make angel food cupcakes, light as a feather and flavored with orange, so seasonal right? The frosting is a chocolate orange buttercream and for just a little more orange I spread just a touch of orange marmalade on top of the cupcake before icing.  Because I have two parties I made a double batch and am bringing them to Fiesta Friday #45. Hard to believe this party has been happening 45 weeks, and it’s still going strong thanks to the amazing Angie@the novice gardener and as always there are amazing co hosts helping out and this week we have two fantastic co hosts Michelle@giraffes can bake andMB @Bourbon & Brown Sugar. Thank you for hosting and co hosting and I hope you like these cupcakes.

Cupcakes:

Makes 12 cupcakes

1 1/4 cup egg whites at room temperature

1 tsp cream of tartar

1 tsp orange zest

3/4 cup granulated sugar

1 cup cake flour

1/2 cup confectioners sugar

1/2 tsp salt

Preheat the oven to 325°. Set 12 jumbo foil muffin cups on a rimmed baking sheet. In a small bowl, combine the cake flour with the confectioners’ sugar. In a large bowl, combine the egg whites with the salt, orange zest and cream of tartar and beat until soft peaks form. Gradually beat in the granulated sugar, 1 tablespoon at a time, until the whites are firm and glossy. Sift the flour mixture over the egg whites in 2 additions, folding gently until incorporated.
Spoon the batter into the muffin cups filling to the top. Bake for 15 minutes (checking on them starting at 13 minutes), shifting the pan from front to back, until the cupcakes are springy and golden. Transfer the cupcakes to a rack to cool. It’s important to use the foil lined they are more substantial and will hold up when the cupcakes start expanding. This recipe is from Grace Parisi and she says’ to set them on a baking sheet rather than in muffin tins.
The Buttercream:

6 ounces bittersweet chocolate (70%) broken into small pieces

1 tsp orange zest

4 egg whites from large eggs

1/2 cup +2 tbs granulated sugar

8 ounces unsalted butter cut into pieces at room temperature

Place chocolate and orange zest in microwave safe bowl, microwave for 30 seconds, stir and microwave another 30 seconds, it may need another 30 seconds to melt. Stir until all the chocolate is melted set aside to cool.

Combine sugar and egg whites in the bowl of an electric mixer. Place the bowl over a pan of simmering water; whisk until the mixture feels hot to touch and the sugar is completely dissolved, about 3-5 minutes. Transfer the bowl to the mixer stand. Using the whisk attachment, beat the mixture on medium-high until cooled, about 15 minutes.

Add the butter a piece at a time beating continuously until its all added, now add the cooled chocolate and beat until combined. Use immediately.

Spread a thin layer of the marmalade on top of the cupcake, pipe some of the chocolate buttercream in the middle. Enjoy!

fiesta-friday-badge-button-i-was-featured1